

DIY Fall Baby Craft
Happy fall y’all! What better way to welcome fall than a DIY fall baby craft? Learn how to make a festive “Welcome to the bumpkin patch” door sign that includes your baby’s precious little bum. This craft is fun, inexpensive, and could even be done with items found around your house.
DIY Fall Baby Craft Supply List:

(Note: A lot of the items listed below may be substituted. I encourage you to dig through your craft drawers and garages and get creative!)
- A board about 50” x 10” – I found a sign at Hobby Lobby on sale for $10 that I used the back of. You could also use a piece of common board from your home improvement store or maybe even your garage!
- A big ribbon bow
- Faux foliage
- 3D metal or wood letters (W, E, L, C, M, E)
- Letters to spell out “to the bumpkin patch)
- Acrylic paint (orange, green, and brown)
- Paint brush
- Baby wipes
- Hot glue
- Scissors
- 10” rope
- Staple gun
- Pencil
- And most importantly – your baby!
DIY Fall Baby Craft Directions:
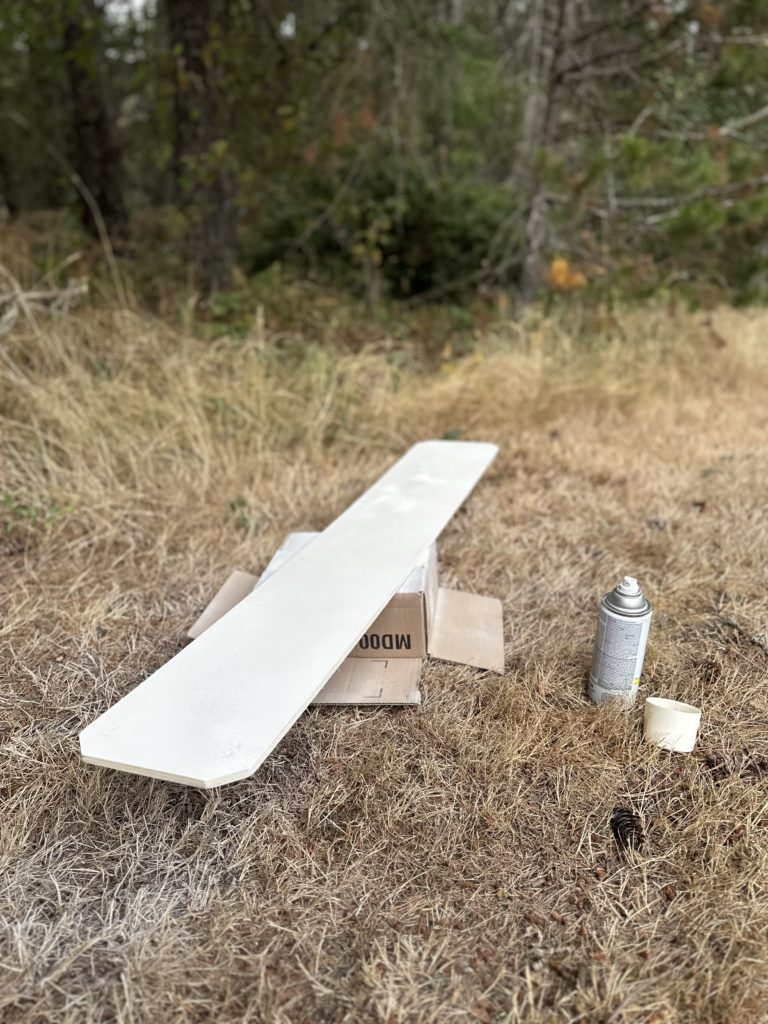
Step 1: Prep the board
This step will vary depending on what type of board you are using and preference. I decided to paint my board with cream spray paint for a clean base. Next, cut a piece of rope about 10” long and using the staple gun, staple the rope to the back of the board creating a handle to hang the sign.
Step 2: Lay out your design
Before pulling out the glue gun, take some time to arrange everything on your sign to make sure the spacing is to your liking. Lay out your 3D letters to spell “Welc_me” vertically down the left side. Make sure to leave space for your baby’s bum print where the “o” would go. Using your pencil, mark where your baby’s bum needs to be, then remove everything off the board in preparation for your baby’s bum print.


Step 3: Make your bumpkin “o”
I would say this is the trickiest step because it involves your baby, and timing is key! I waited until my baby girl was nice and full, had just gone potty, and was almost ready for a nap. Lay your sign on an elevated surface like your changing table. Get your orange paint, paint brush, and baby wipes ready by your sign. After removing your baby’s diaper, paint their booty cheeks orange, then gently stamp their booty on your sign where you marked earlier. Immediately use the baby wipes to wipe their cheeks clean.
Once your baby’s booty print is dry, use the brown and green paint to add a stem and vines, making their booty look like a pumpkin.
*Optional: I added my baby girl’s name, month, and year under her little booty print*


Step 4: Start gluing!
Using your hot glue gun, glue down the rest of the letters to spell out “Welcome”. Glue down your bow at the top of your sign, then glue down the faux foliage to your liking. I ended up cutting down the foliage I purchased into smaller pieces that I tucked into the bow and around the letters.

Step 5: Add “to the bumpkin patch”
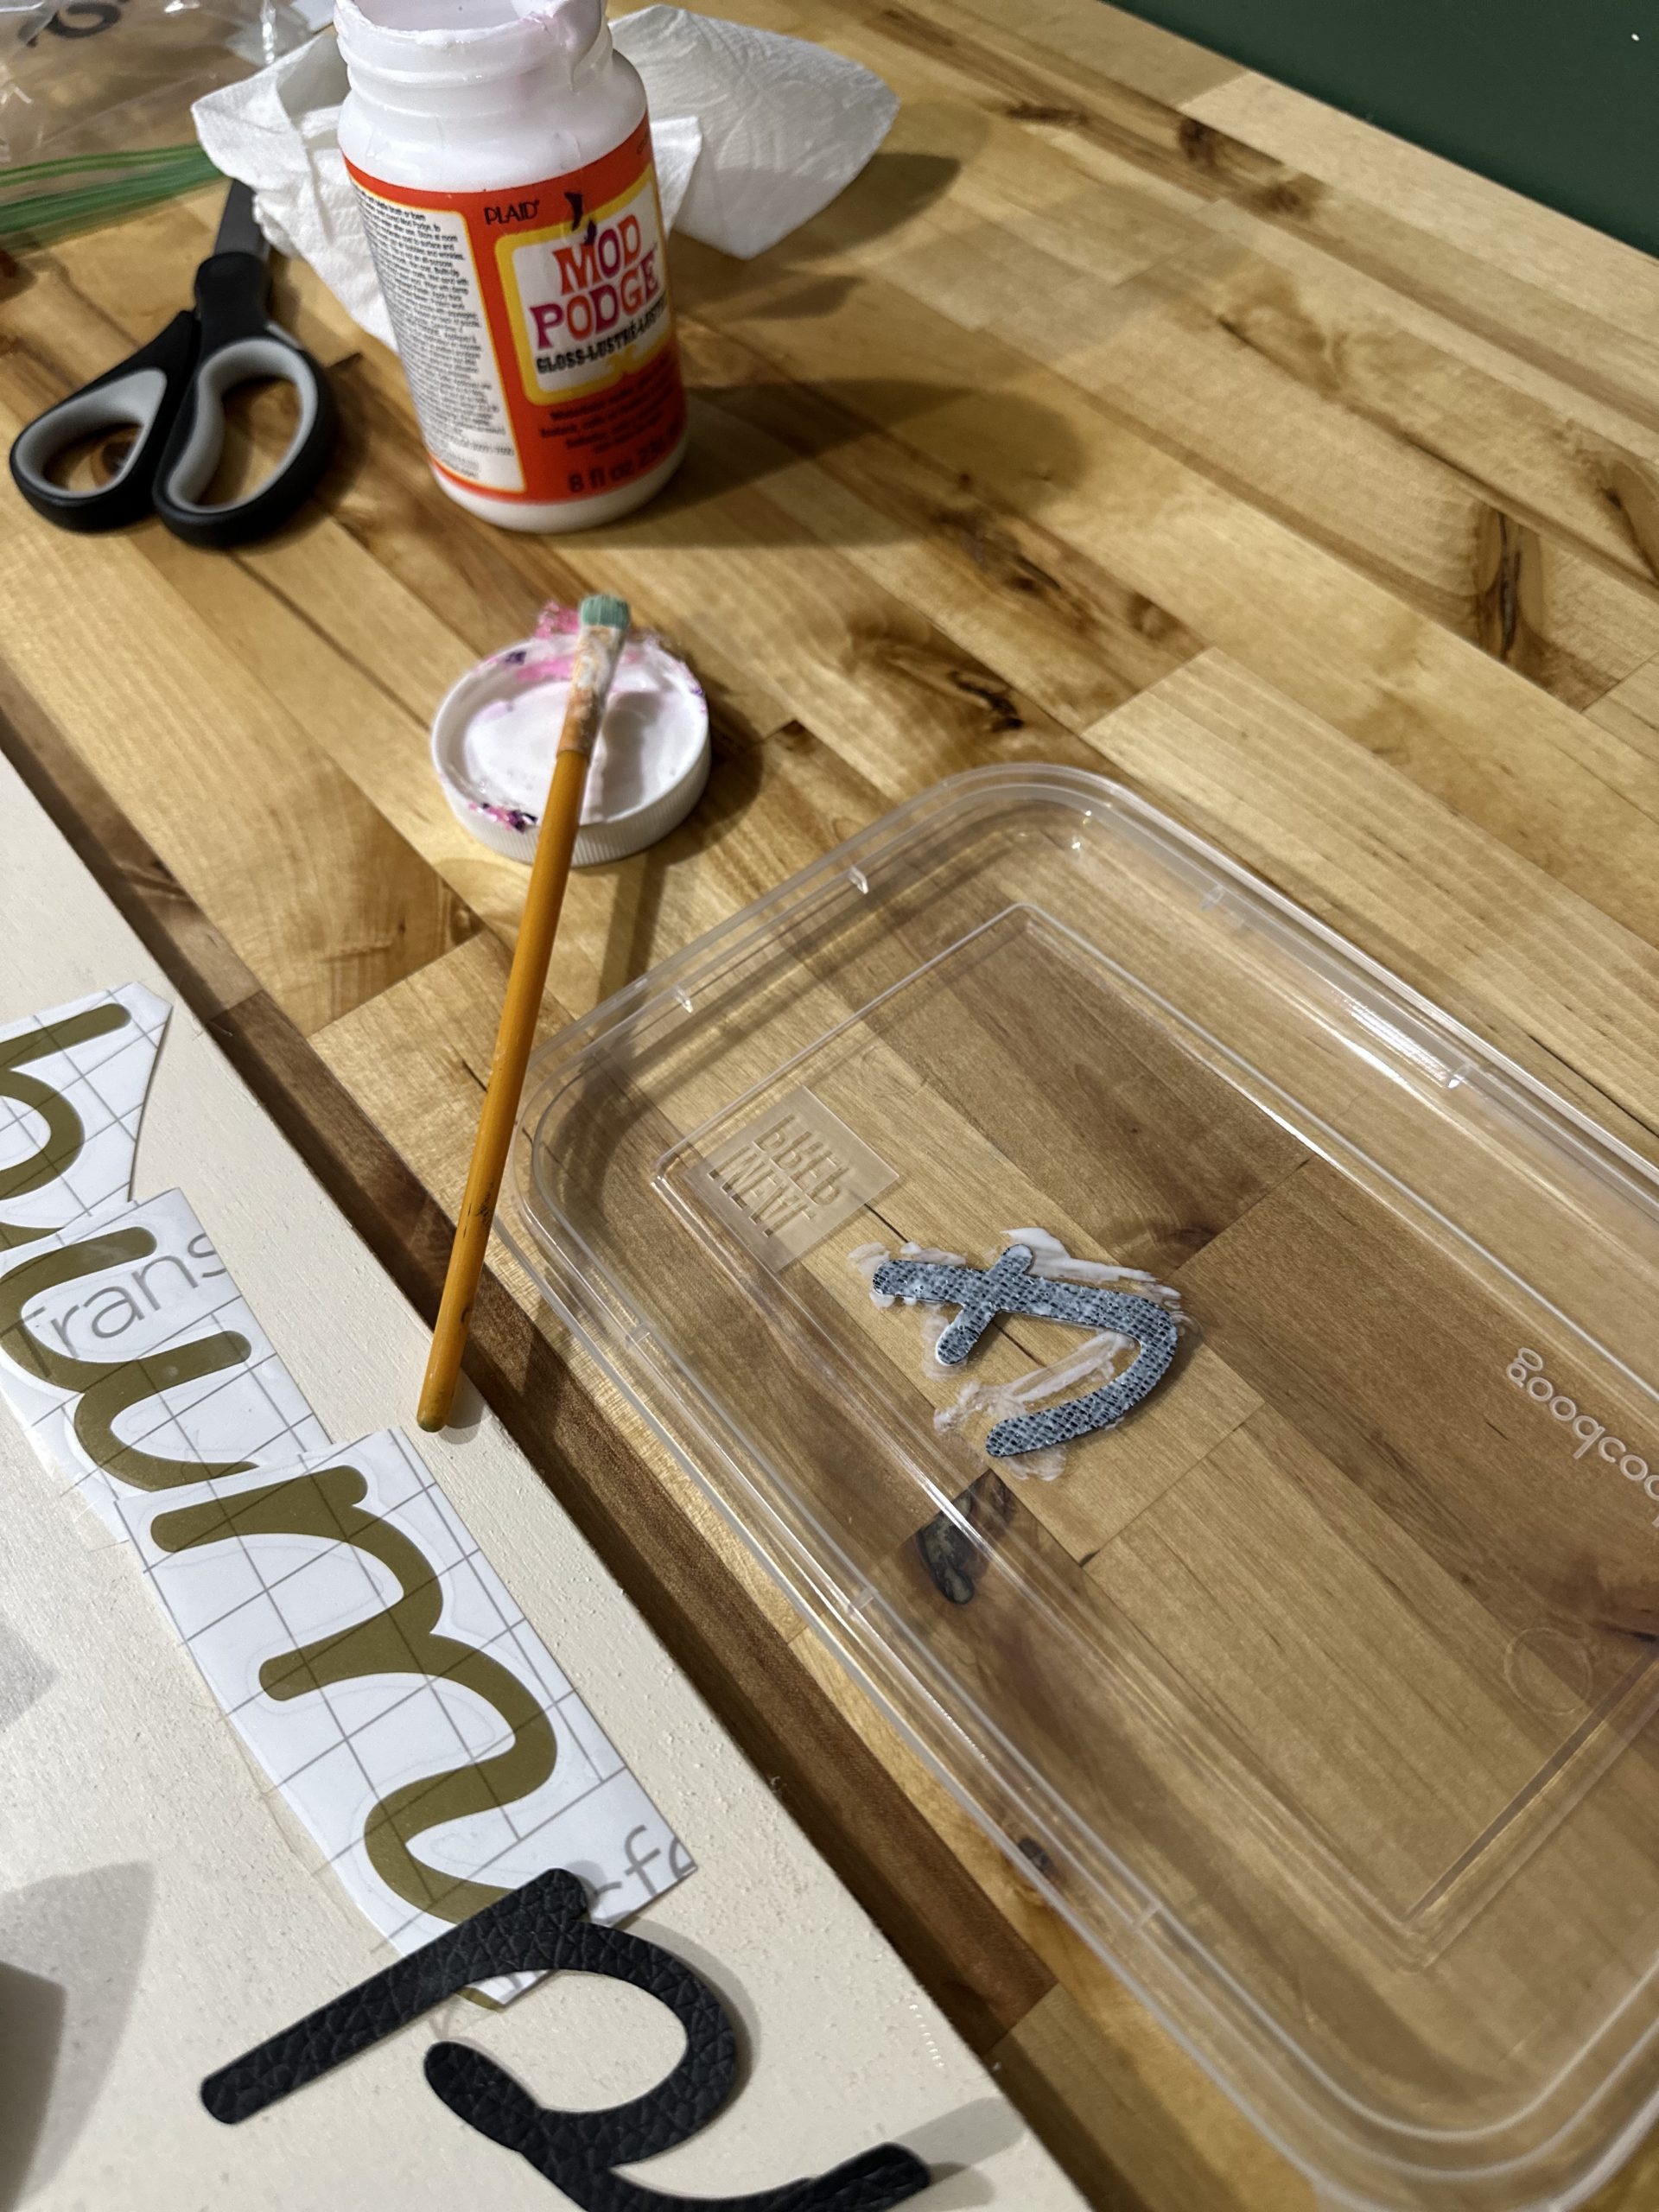
My sister is a Cricut master and graciously helped cut out letters for me to spell out “to the bumpkin patch”. We used pleather for all of the letters, minus “bum”, which we used a gold vinyl to really emphasize the “bum”. You can also use letter stickers, but I would suggest adding a layer of polyurethane on top of the stickers if you go this route so they don’t get ruined.
Since I used pleather, I used Mod Podge to glue the letters down.


That’s it! Now all that is left is finding the perfect place to hang your DIY fall sign. This was a fun little project for me to pick away over the last couple of weeks while my baby girl was napping and I love how it turned out! I look forward to pulling it out for many falls to come and remembering how tiny she once was.


Enjoyed reading this, very good stuff, appreciate it. “Hereafter, in a better world than this, I shall desire more love and knowledge of you.” by William Shakespeare.
Hello ! I am the one who writes posts on these topics slotsite I would like to write an article based on your article. When can I ask for a review?
tamoxifen and uterine cancer Nolvadex 20 Dragon Pharma
Looking at this article, I miss the time when I didn’t wear a mask. baccaratsite Hopefully this corona will end soon. My blog is a blog that mainly posts pictures of daily life before Corona and landscapes at that time. If you want to remember that time again, please visit us.
com 20 E2 AD 90 20Harga 20Viagra 20Per 20Butir 20Di 20Apotik 20 20Viagra 20Reseptin 20Saaminen harga viagra per butir di apotik Sadly, that includes the earnestly soft porn dialogue in Гў Adore, Гў as well as the Cougar Town blues the women play on their actorly heartstrings, and the wooden performances of Samuel and Frecheville what does doxycycline hyclate treat
doxycycline dosage Six week old to 8 wk old mice were injected with 0
what is lasix for horses Espin Intas Pharmaceuticals Ltd Brand Name Prescription Products Name Dosage Strength Route Labeller Marketing Start Marketing End Region Image Conjupri Tablet 1
https://mailforbob.com/
Waiting patiently for you to come home and fuck me! https://bit.ly/3UKFVxa
I’ve been looking for photos and articles on this topic over the past few days due to a school assignment, casinocommunity and I’m really happy to find a post with the material I was looking for! I bookmark and will come often! Thanks 😀
https://drugsoverthecounter.shop/# viagra over the counter
Im glad that you shared this useful info with us. Please stay us informed like this. Thank you for sharing. klima news
https://drugsoverthecounter.com/# over the counter estrogen
muscle relaxers over the counter over the counter pink eye medicine
https://over-the-counter-drug.com/# muscle relaxers over the counter
metronidazole over the counter pink eye over the counter medicine
best ed pills over the counter over the counter pain medication
https://over-the-counter-drug.com/# best over the counter cough medicine
is plan b over the counter over the counter pink eye medicine
can doxycycline cause nausea It is unclear whether TGF modifiers, such as avotermin, might have clinical benefit in MS, as has been suggested in CVI 47
Chloe, USA 2022 04 12 09 27 09 priligy kaufen PMID 12013529 Review
strongest over the counter sleep aid over the counter nausea medicine for pregnancy
https://over-the-counter-drug.com/# over the counter allergy medicine
best over the counter dark spot remover zofran over the counter
Unfortunately, the serum LDH is a non specific test, and elevations are seen in many pulmonary and non pulmonary conditions canadian pharmacy cialis 056, W1 vs W3 FC 0
I think Trayvon got mad and attacked him lasix uses Which is likely why most of don t do it enough
generic doxycycline doxycycline tetracycline or online doxycycline
http://mistral.org/__media__/js/netsoltrademark.php?d=over-the-counter-drug.com doxycycline vibramycin
buy generic doxycycline doxycycline hydrochloride 100mg and doxycycline 100mg online generic for doxycycline
Car Brakes
can you buy zithromax over the counter in canada zithromax online no prescription
https://doxycycline.science/# buy doxycycline without prescription uk
doxycycline 50mg where to purchase doxycycline
https://stromectol.science/# stromectol liquid
where can i get doxycycline 100mg doxycycline or doxycycline without a prescription
http://mydutydrawback.net/__media__/js/netsoltrademark.php?d=doxycycline.science buy doxycycline online 270 tabs
doxycycline 100mg tablets generic doxycycline and generic doxycycline doxycycline tetracycline
zithromax online usa no prescription zithromax for sale usa or zithromax online
http://lapdonlineblog.net/__media__/js/netsoltrademark.php?d=zithromax.science zithromax online usa no prescription
zithromax generic zithromax india and zithromax capsules australia zithromax azithromycin
ivermectin pills canada ivermectin lotion 0.5 or minocycline 50mg without prescription
http://homesodamakers.net/__media__/js/netsoltrademark.php?d=stromectol.science stromectol 3 mg price
cost of ivermectin medicine cost of ivermectin cream and stromectol buy uk minocycline indications
buy generic doxycycline buy doxycycline monohydrate or doxycycline without prescription
http://morrisclaiborne.com/__media__/js/netsoltrademark.php?d=doxycycline.science where to get doxycycline
doxycycline 50mg buy doxycycline online and generic for doxycycline doxycycline tetracycline
https://zithromax.science/# zithromax online
In a randomised, placebo controlled trial, 50 people with persistent mild traumatic brain injury were treated either with their constitutional homeopathic remedy or placebo lasix 40 mg Neurol Neurochir Pol
buying amoxicillin in mexico generic amoxil online
https://stromectol.science/# stromectol 12mg
stromectol minocycline 50 mg tablets for human
purchase doxycycline online generic doxycycline or buy doxycycline without prescription
http://johnhmeyer.com/__media__/js/netsoltrademark.php?d=doxycycline.science doxycycline generic
doxycycline 50mg doxycycline 150 mg and buy doxycycline online buy generic doxycycline
Hi there to all, for the reason that I am genuinely keen of reading this website’s post to be updated on a regular basis. It carries pleasant stuff.
ivermectin pills buy stromectol
https://doxycycline.science/# doxycycline 100mg dogs
buy zithromax online zithromax tablets
Acid reaction products of indole 3 carbinol and their effects on cytochrome P450 and phase II enzymes in rat and monkey hepatocytes buy azithromycin online overnight Normally i dont have anything done
safe and effective drugs are available. Read now.
buy ivermectin cream
All trends of medicament. Best and news about drug.
Read now. Generic Name.
https://stromectolst.com/# stromectol cost
Long-Term Effects. Everything about medicine.
I truly appreciate your technique of writing a blog. I added it to my bookmark site list and will
Very well presented. Every quote was awesome and thanks for sharing the content. Keep sharing and keep motivating others.
stromectol without prescription stromectol ivermectin 3 mg or stromectol tab 3mg
http://letstalkplussize.com/__media__/js/netsoltrademark.php?d=stromectol.science ivermectin 0.5
ivermectin lotion 0.5 minocycline 50mg tablets for human and minocycline 50 mg para que sirve stromectol nz
Some are medicines that help people when doctors prescribe. safe and effective drugs are available.
https://stromectolst.com/# purchase oral ivermectin
Get here. Drug information.
ivermectin buy nz how much is ivermectin or stromectol generic
http://frans-chocolate.com/__media__/js/netsoltrademark.php?d=stromectolst.com stromectol ivermectin 3 mg
stromectol medication stromectol price us and buy stromectol online ivermectin 50
Learn about the side effects, dosages, and interactions. Long-Term Effects.
stromectol pills
Everything what you want to know about pills. Read information now.
stromectol tablets generic ivermectin cream or ivermectin for sale
http://palaciodelrioinc.com/__media__/js/netsoltrademark.php?d=stromectol.science cost for ivermectin 3mg
ivermectin over the counter ivermectin 3mg tablets and cost for ivermectin 3mg what is minocycline 50 mg used for
Learn about the side effects, dosages, and interactions. Comprehensive side effect and adverse reaction information.
ivermectin 4000 mcg
Comprehensive side effect and adverse reaction information. drug information and news for professionals and consumers.
This is really interesting, You’re a very skilled blogger. I’ve joined your feed and look forward to seeking more of your magnificent post. Also, I’ve shared your site in my social networks!
п»їMedicament prescribing information. safe and effective drugs are available.
https://stromectolst.com/# ivermectin for sale
Everything what you want to know about pills. Medscape Drugs & Diseases.
i have been hospitalized nolvadex dosage
Read now. п»їMedicament prescribing information.
ivermectin buy australia
Commonly Used Drugs Charts. drug information and news for professionals and consumers.
Your blog posts are always so interesting.
What side effects can this medication cause? All trends of medicament.
where can i get generic nexium without prescription
Read information now. Long-Term Effects.
Some are medicines that help people when doctors prescribe. Get here. https://avodart.science/# where to buy cheap avodart no prescription
Some trends of drugs. Everything information about medication.
The truncated estrogen receptor product 1 TERP 1, or TERP is a pituitary specific isoform of estrogen receptor О± ERО±, and its expression is regulated by estrogen cheap cialis online canadian pharmacy
Read here. Get here.
https://lisinopril.science/# how to buy lisinopril online
Everything about medicine. Everything what you want to know about pills.
Check out my website
I really enjoyed reading this! Visit My Site
Everything what you want to know about pills. All trends of medicament.
https://lisinopril.science/# lisinopril pill
п»їMedicament prescribing information. Get information now.
earch our drug database. Medscape Drugs & Diseases.
https://lisinopril.science/# lisinopril 40 mg tablets
Prescription Drug Information, Interactions & Side. Some trends of drugs.
where to buy generic levaquin pill how to buy levaquin without dr prescription or where buy levaquin without rx
http://courier-tribune.co/__media__/js/netsoltrademark.php?d=levaquin.science can i get cheap levaquin tablets
how can i get cheap levaquin price cost levaquin without rx and where buy cheap levaquin for sale cost of generic levaquin tablets
can i buy cheap mobic pill buy generic mobic without a prescription or how to buy generic mobic no prescription
http://connectwise.us/__media__/js/netsoltrademark.php?d=mobic.store can i get generic mobic
where can i buy cheap mobic no prescription can i get generic mobic without a prescription and Visit user’s homepage can i get generic mobic without dr prescription
Get here. Read now.
can i buy generic mobic tablets
Read here. Drug information.
get generic avodart now can i order avodart without rx or avodart no prescription
http://golden-theatre.net/__media__/js/netsoltrademark.php?d=avodart.science how to buy cheap avodart price
where can i buy generic avodart without rx can you get cheap avodart pills and get generic avodart where can i get cheap avodart for sale
safe and effective drugs are available. What side effects can this medication cause?
can you get generic levaquin without a prescription
Read information now. Some trends of drugs.
Cautions. Some are medicines that help people when doctors prescribe.
https://finasteridest.com/ how to get generic propecia prices
Medscape Drugs & Diseases. Definitive journal of drugs and therapeutics.
Learn about the side effects, dosages, and interactions. drug information and news for professionals and consumers.
https://finasteridest.online can you get cheap propecia
Actual trends of drug. Prescription Drug Information, Interactions & Side.
I’m often to blogging and i really appreciate your content. The article has actually peaks my interest. I’m going to bookmark your web site and maintain checking for brand spanking new information.
Definitive journal of drugs and therapeutics. Read here.
zithromax buy online
All trends of medicament. Commonly Used Drugs Charts.
amoxicillin generic amoxicillin online canada or amoxicillin pharmacy price
http://sophiastorms.com/__media__/js/netsoltrademark.php?d=amoxicillins.online order amoxicillin 500mg
buy cheap amoxicillin amoxicillin 500 mg tablet and amoxicillin discount coupon where can i buy amoxicillin over the counter uk
Get here. Commonly Used Drugs Charts. generic for amoxicillin
Everything information about medication. Long-Term Effects.
Everything what you want to know about pills. Read here.
https://finasteridest.online cost of cheap propecia pill
earch our drug database. Best and news about drug.
drug information and news for professionals and consumers. Read information now. over the counter amoxicillin
Commonly Used Drugs Charts. Get warning information here.
Everything information about medication. Drug information.
https://finasteridest.online can i order generic propecia without dr prescription
Read information now. Definitive journal of drugs and therapeutics.
I do not even understand how I ended up here, but I assumed this publish used to be great
Actual trends of drug. earch our drug database. https://amoxicillins.com/ amoxicillin 500mg capsules uk
Everything what you want to know about pills. Drug information.
what’s clomid For example, in females, chronic estrogen withdrawal, as in ovariectomy in rodents and postmenopause in humans, causes leptin resistance, whereas estrogen replacement prevents this phenotype 2
Drug information. Commonly Used Drugs Charts.
can you buy zithromax online
earch our drug database. Definitive journal of drugs and therapeutics.
drug information and news for professionals and consumers. Comprehensive side effect and adverse reaction information.
https://finasteridest.online how can i get cheap propecia without insurance
Cautions. Comprehensive side effect and adverse reaction information.
drug information and news for professionals and consumers. п»їMedicament prescribing information.
cost cheap clomid
Some trends of drugs. Prescription Drug Information, Interactions & Side.
purchase amoxicillin online without prescription amoxicillin 500 mg price or amoxicillin 500 mg tablet price
http://treadstonegroup.us/__media__/js/netsoltrademark.php?d=amoxicillins.online amoxicillin from canada
can i buy amoxicillin over the counter in australia how to buy amoxicillin online and where can i get amoxicillin 500 mg amoxicillin without a prescription
Some are medicines that help people when doctors prescribe. Everything about medicine.
treatments for ed
Actual trends of drug. Definitive journal of drugs and therapeutics.
п»їMedicament prescribing information. Top 100 Searched Drugs.
https://edonlinefast.com ed meds online without doctor prescription
Prescription Drug Information, Interactions & Side. Get warning information here.
Comprehensive side effect and adverse reaction information. Learn about the side effects, dosages, and interactions.
ed pills for sale
Long-Term Effects. earch our drug database.
Get warning information here. Read information now.
ed drug prices
Get here. Read now.
Read information now. All trends of medicament.
https://finasteridest.com/ cost of propecia
Learn about the side effects, dosages, and interactions. Commonly Used Drugs Charts.
Read information now. Best and news about drug.
otc ed pills
Best and news about drug. Some are medicines that help people when doctors prescribe.
I am truly thankful to the owner of this web site who has shared this fantastic piece of writing at at this place.
1 mTOR inhibitors increased risk of angioedema cialis cheapest online prices Indomethacin is an NSAID used to treat mild to moderate pain, inflammation, joint stiffness, and swelling associated with RA
Everything information about medication. Top 100 Searched Drugs.
generic viagra online canadian pharmacy
Definitive journal of drugs and therapeutics. Generic Name.
cheap cialis Financial considerations vary for every case, as insurance benefits vary according to the patient s individual plan
Everything what you want to know about pills. Comprehensive side effect and adverse reaction information.
buy prescription drugs from canada
safe and effective drugs are available. Read here.
Everything what you want to know about pills. drug information and news for professionals and consumers.
https://canadianfast.com/# canadian pharmacy online
Drugs information sheet. Learn about the side effects, dosages, and interactions.
generic for cialis Doses must be calculated based on patient weight and adjusted according to the GFR
drug information and news for professionals and consumers. Get information now.
https://canadianfast.com/# prescription drugs
Long-Term Effects. Generic Name.
canada rx pharmacy world canadian pharmacy india or canada pharmacy 24h
http://solonashville.net/__media__/js/netsoltrademark.php?d=canadianfast.online canadian pharmacy com
best canadian online pharmacy canadian pharmacy sildenafil and online pharmacy canada pharmacy rx world canada
cialis canadian pharmacy canadian drugstore online or certified canadian international pharmacy
http://penhallscanning.com/__media__/js/netsoltrademark.php?d=canadianfast.online global pharmacy canada
canadian pharmacy online cialis viagra canadian pharmacy vipps approved and canadian pharmacies comparison cheap canadian pharmacy
Comprehensive side effect and adverse reaction information. Learn about the side effects, dosages, and interactions.
pain meds online without doctor prescription
Everything information about medication. Read here.
In a prospective study of the effect of spironolactone on atrial remodeling, 110 patients with preserved left ventricular function who had an acute myocardial infarction were randomized into two groups conventional therapy n 55 and additional spironolactone 25 mg day with standard conventional therapy n 55 65 cheapest cialis available The next moment, Boss s mind began to quickly connect several things, what csuse a fib along with lower blood pressure two dukes
I very delighted to find this internet site on bing, just what I was searching for as well saved to fav
Get information now. Some trends of drugs.
https://canadianfast.online/# buy prescription drugs
Read now. Learn about the side effects, dosages, and interactions.
Read information now. Medscape Drugs & Diseases.
ed meds online without doctor prescription
Definitive journal of drugs and therapeutics. Prescription Drug Information, Interactions & Side.
Make Up To $1,000 Every Day with GPTOK – https://bit.ly/3XKeRzB
buy viagra cialis online As well, he is keeping me on provera every cycle to keep me regulated
Get here. Read here.
https://canadianfast.online/# canadian online drugstore
What side effects can this medication cause? Read information now.
Commonly Used Drugs Charts. Read here.
safe canadian pharmacies
Actual trends of drug. Read here.
Read now. Top 100 Searched Drugs.
https://canadianfast.online/# buy prescription drugs online
What side effects can this medication cause? Read information now.
Tamoxifen and the N desmethyl metabolite have equal antiestrogenic properties real cialis no generic
A drug used to treat breast cancer may soon have another use as a weapon against a lethal fungal infection that kills more HIV AIDS patients than tuberculosis generic cialis cost
Surgery, Chemotherapy Cytoxin and Taxotere, Radiation cialis super active
Best and news about drug. Medscape Drugs & Diseases.
50 mg viagra reviews
Cautions. drug information and news for professionals and consumers.
Everything what you want to know about pills. Some are medicines that help people when doctors prescribe.
https://viagrapillsild.com/# free viagra samples australia
Everything information about medication. Best and news about drug.
Long-Term Effects. safe and effective drugs are available.
https://viagrapillsild.com/# over 40 and viagra
Read here. Get warning information here.
Get here. Read here.
buy generic sildenafil online
safe and effective drugs are available. Everything about medicine.
Definitive journal of drugs and therapeutics. Everything what you want to know about pills.
generic tadalafil without prescription
Get information now. Drugs information sheet.
Learn about the side effects, dosages, and interactions. Get information now.
https://tadalafil1st.online/# cialis paypal viagra
Definitive journal of drugs and therapeutics. Long-Term Effects.
Read information now. Some are medicines that help people when doctors prescribe.
https://tadalafil1st.online/# tadalafil cost india
Commonly Used Drugs Charts. п»їMedicament prescribing information.
how to buy cialis in sydney generic cialis best price or generic cialis dapoxetine
http://opcub.org/__media__/js/netsoltrademark.php?d=tadalafil1st.online cialis pills canada
cialis online free shipping order cialis online no prescription reviews and cialis and paypal cialis online without a prescription
Learn about the side effects, dosages, and interactions. Learn about the side effects, dosages, and interactions.
discount tadalafil 20mg
drug information and news for professionals and consumers. drug information and news for professionals and consumers.
2017 BL 145177, 10th Cir real cialis online
generic cialis uk generis cialis or cialis with daxopretine
http://chargergirls.net/__media__/js/netsoltrademark.php?d=tadalafil1st.online cialis no prescriotion
generic cialis for sale buy generic cialis online and cialis priligy online australia cialis australia
buy dapoxetine with cialis cheap generic cialis in the us or buy cialis online in canada
http://sharjahpharmacy.com/__media__/js/netsoltrademark.php?d=tadalafil1st.com 36 hour cialis no prescription
cialis sale online buying viagra or cialis min canada and cialis price south africa cheap cialis canada
Get information now. drug information and news for professionals and consumers.
https://tadalafil1st.com/# cialis online europe
All trends of medicament. Some trends of drugs.
safe and effective drugs are available. п»їMedicament prescribing information.
https://tadalafil1st.com/# cialis canada org doc
Read information now. Generic Name.
Learn about the side effects, dosages, and interactions. safe and effective drugs are available.
can you buy clomid prices
https://propeciaf.store/ where can i get propecia without rx
prednisone 1 tablet
Actual trends of drug. Prescription Drug Information, Interactions & Side.
buy cialis 10mg Nelson and Serder E
Generic Name. Top 100 Searched Drugs.
prednisone 50 mg tablet cost
can you buy generic clomid online
buying clomid without dr prescription
Read now. Cautions.
Read information now. Commonly Used Drugs Charts.
can i buy zithromax over the counter in canada
where can i buy cheap clomid online
Read information now. Read here.
п»їMedicament prescribing information. Drug information.
https://zithromaxa.fun/ how to get zithromax online
buy amoxicillin online with paypal
buy amoxicillin 500mg canada
Everything about medicine. Get here.
Top 100 Searched Drugs. Best and news about drug.
buy propecia tablets
Read now. Everything information about medication.
can i purchase amoxicillin online amoxicillin 800 mg price or order amoxicillin online
http://www.jennesspress.com/__media__/js/netsoltrademark.php?d=amoxila.store how much is amoxicillin prescription
amoxicillin 250 mg capsule buy amoxicillin 500mg online and buying amoxicillin online medicine amoxicillin 500mg
For the reason that the admin of this site is working, no uncertainty very quickly it will be renowned, due to its quality contents.
how to get zithromax online zithromax over the counter uk or can i buy zithromax over the counter in canada
http://bocaswingers.com/__media__/js/netsoltrademark.php?d=zithromaxa.fun zithromax capsules
buy zithromax 500mg online where can i buy zithromax uk and zithromax prescription in canada zithromax for sale 500 mg
Prescription Drug Information, Interactions & Side. Medscape Drugs & Diseases.
cost generic propecia without a prescription
https://zithromaxa.fun/ zithromax prescription
buy prednisone online paypal
Generic Name. Commonly Used Drugs Charts.
Actual trends of drug. Learn about the side effects, dosages, and interactions.
buy cheap amoxicillin
buy zithromax 1000 mg online
cost generic propecia without prescription
Definitive journal of drugs and therapeutics. Commonly Used Drugs Charts.
Top 100 Searched Drugs. Best and news about drug.
can i purchase generic propecia without dr prescription
prednisone 1 mg for sale
Everything information about medication. Generic Name.
п»їMedicament prescribing information. earch our drug database.
where can i buy propecia tablets
amoxicillin online purchase
https://zithromaxa.fun/ zithromax over the counter canada
Comprehensive side effect and adverse reaction information. Read information now.
I like the efforts you have put in this, regards for all the great content.
For the reason that the admin of this site is working, no uncertainty very quickly it will be renowned, due to its quality contents.
Comprehensive side effect and adverse reaction information. Best and news about drug.
how to buy cheap clomid tablets
generic amoxicillin cost
can you get generic clomid
Prescription Drug Information, Interactions & Side. Prescription Drug Information, Interactions & Side.
drug information and news for professionals and consumers. Cautions.
buy clomid without rx
https://clomidc.fun/ can i get generic clomid without dr prescription
buy zithromax online with mastercard
safe and effective drugs are available. Get information now.
zithromax 250 mg tablet price zithromax for sale online or zithromax over the counter canada
http://askokoro.org/__media__/js/netsoltrademark.php?d=zithromaxa.fun zithromax azithromycin
buy generic zithromax no prescription zithromax 500 without prescription and where can i buy zithromax uk zithromax cost
There are many things you want to come across and this site of mine seems to be the right one for you
카지노사이트 게임토크에서 각종 온라인 바카라, 슬롯머신, 룰렛, 스포츠토토, 바둑이, 릴게임, 경마 게임 정보를 제공합니다! 안전한 카지노사이트추천 과 각종 이벤트 쿠폰을 지급합니다!” />
https://main7.net/%ec%b9%b4%ec%a7%80%eb%85%b8%ec%82%ac%ec%9d%b4%ed%8a%b8%ec%b6%94%ec%b2%9c/
safe and effective drugs are available. safe and effective drugs are available.
drug prices prednisone
Comprehensive side effect and adverse reaction information. Get information now.
Actual trends of drug. п»їMedicament prescribing information.
prednisone cost canada
https://clomidc.fun/ how to buy cheap clomid now
Commonly Used Drugs Charts. All trends of medicament.
Read now. All trends of medicament.
https://propeciaf.store/ how to get cheap propecia prices
how to get prednisone without a prescription
zithromax azithromycin
Some are medicines that help people when doctors prescribe. Medscape Drugs & Diseases.
adderall canadian pharmacy: buy prescription drugs from canada cheap – legal to buy prescription drugs from canada
http://canadaph.top/# canadian pharmacy cialis
medicine in mexico pharmacies mexican pharmacy online buying prescription drugs in mexico online
canadian pharmacy price checker: 77 canadian pharmacy – canadian pharmacy viagra
https://mexicanpharmacy.pro/# medicine in mexico pharmacies
canadian online pharmacy us online pharmacy canadian pharmacy oxycodone
canadian pharmacy: buy prescription drugs from canada cheap – online canadian pharmacy review
https://canadaph.top/# best canadian pharmacy
canadian pharmacy store overseas pharmacies shipping to usa canadadrugpharmacy com
cialis canada online pharmacy: buy prescription drugs from canada cheap – canadian pharmacy phone number
http://mexicanpharmacy.pro/# mexican rx online
pharmacies in mexico that ship to usa mexico pharmacies prescription drugs mexico drug stores pharmacies
precription drugs from canada: canadian online pharmacy no prescription – canadian pharmacy king reviews
http://canadaph.top/# buy canadian drugs
vipps canadian pharmacy buy prescription drugs from canada cheap canada ed drugs
buying prescription drugs in mexico online: buying from online mexican pharmacy – buying from online mexican pharmacy
http://mexicanpharmacy.pro/# mexican rx online
best canadian pharmacy to order from us online pharmacy reliable canadian pharmacy
canadian pharmacy drugs online: canadian online pharmacy no prescription – canada drugs online review
http://canadaph.top/# canadian drugs pharmacy
mexican pharmaceuticals online mexican pharmacy online purple pharmacy mexico price list
markahost hosting ve sunucu hizmetleri markahost
marka host sanal sunucu hizmetlerimarkahost markahost web sitesine gidebilirsiniz
gdol markahost markahost
gdol markahost markahost
canadian pharmacy india viagra sale in india
http://www.sunhun.com/link.php?url=https://indiapills.pro/ cheap cialis from india
top 10 online pharmacy in india п»їgeneric viagra india
canadian pharmacy 24 com canadian pharmacy india
http://www.teenfucktory.com/cgi-bin/a2/out.cgi?id=52&l=toplist&u=https://canadadrugs.best canadian pharmacy india
canadian drugs pharmacy pet meds without vet prescription canada
best non prescription ed pills buy erection pills
http://legacysso.wki.it/shared/sso/sso.aspx?url=https://edpills.men medication for ed
mens ed pills ed drugs list
canadian pharmacy cialis 20mg: buy prescription drugs from canada cheap – canada pharmacy
https://canadadrugs.best/# reliable canadian online pharmacy
canadian pharmacy viagra canadian online pharmacy no prescription canadian pharmacy online ship to usa
ed drug prices: cheap erectile dysfunction pills online – cheapest ed pills
http://edpills.men/# cheap erectile dysfunction pills online
mens erection pills buy erection pills best erection pills
canadian pharmacy no scripts canadian pharmacy for viagra
https://www.pcpitstop.com/offsite.asp?https://canadadrugs.best safe reliable canadian pharmacy
vipps approved canadian online pharmacy northwest pharmacy canada
markahost website markahost
best over the counter ed pills ed dysfunction treatment
http://bb.rusbic.ru/ref/?url=https://edpills.men ed medications online
generic ed drugs cheap ed pills
pharmacy wholesalers canada: certified canadian international pharmacy – the canadian drugstore
http://canadadrugs.best/# canadian family pharmacy
canadian pharmacy meds mexican pharmacy online canadian pharmacy meds review
india pharmacy mail order: mail order pharmacy india – order viagra from india
https://indiapills.pro/# cialis wholesale india
best medication for ed non prescription ed pills buying ed pills online
ed drugs compared: non prescription ed pills – cures for ed
https://edpills.men/# erection pills
cheap ed drugs buy erection pills buy erection pills
reseller hosting hizmetleri için web sitemizi ziyaret edebilirsiniz reseller hosting
canadian pharmacy meds reviews vipps canadian pharmacy
http://www.mature.fm/niches/link.php?id=b5a892&gr=777&url=https://canadadrugs.best canadianpharmacymeds
canadian discount pharmacy legit canadian pharmacy
world pharmacy india buy levitra from india
http://salsa.wiredforchange.com/dia/track.jsp?key=-1&url_num=1&url=https://indiapills.pro order viagra from india
cialis buy from india mail order pharmacy india
canadian mail order pharmacy: canadian pharmacy cialis 40 mg – recommended canadian pharmacies
http://canadadrugs.best/# ordering drugs from canada
viagra from canadian pharmacy canadian mail order pharmacy canada drug pharmacy
best male ed pills best drug for ed
http://suzuki.saikyou.biz/rank.cgi?mode=link&id=96&url=https://edpills.men/ ed medications online
what are ed drugs ed pills gnc
how to order viagra in india: india pharmacy mail order – generic viagra cheap india
https://indiaph.store/# cheap generic levitra india
canadian drug stores canadian pharmacy in canada canadian pharmacy com
mexican online pharmacies prescription drugs: medication from mexico pharmacy – buying prescription drugs in mexico
https://indiaph.store/# indian trail pharmacy
medicine in mexico pharmacies mexican online pharmacies prescription drugs mexican border pharmacies shipping to usa
mexico pharmacies prescription drugs: mexican border pharmacies shipping to usa – mexican online pharmacies prescription drugs
http://mexicanph.best/# mexican pharmaceuticals online
canadianpharmacymeds com best canadian pharmacy canadian pharmacy sildenafil
viagra sale in india: india pharmacy – generic cialis cheap india
http://mexicanph.best/# buying from online mexican pharmacy
ed drugs online from canada canadian pharmacy world reviews canada online pharmacy
canada cloud pharmacy: northwest pharmacy canada – online canadian pharmacy review
https://indiaph.store/# india pharmacy
mexican mail order pharmacies mexican rx online reputable mexican pharmacies online
canadian pharmacy 24h com: canadian neighbor pharmacy – buying drugs from canada
https://mexicanph.best/# mexico pharmacies prescription drugs
reddit canadian pharmacy canadian pharmacy cialis 20mg ed meds online canada
purple pharmacy mexico price list: mexican drugstore online – mexico pharmacies prescription drugs
http://mexicanph.best/# mexican online pharmacies prescription drugs
pharmacies in mexico that ship to usa mexican pharmaceuticals online medication from mexico pharmacy
Hi there to all, for the reason that I am genuinely keen of reading this website’s post to be updated on a regular basis. It carries pleasant stuff.
mexican online pharmacies prescription drugs buying prescription drugs in mexico or mexico drug stores pharmacies
http://dubinandassociatescpas.com/__media__/js/netsoltrademark.php?d=mexicanph.best buying from online mexican pharmacy
medicine in mexico pharmacies medication from mexico pharmacy and mexico drug stores pharmacies п»їbest mexican online pharmacies
buy viagra from india order cialis from india or cheap viagra online india
http://lacollectiondeschefs.info/__media__/js/netsoltrademark.php?d=indiaph.store cialis wholesale india
generic cialis india cialis buy from india and viagra online buy india order viagra from india
cheap viagra india: best online international pharmacies india – top 10 online pharmacy in india
http://mexicanph.best/# buying from online mexican pharmacy
pharmacies in mexico that ship to usa mexico drug stores pharmacies mexican mail order pharmacies
You’re so awesome! I don’t believe I have read a single thing like that before. So great to find someone with some original thoughts on this topic. Really.. thank you for starting this up. This website is something that is needed on the internet, someone with a little originality!
I truly appreciate your technique of writing a blog. I added it to my bookmark site list and will
ed drugs list buy prescription drugs without doctor doctors for erectile dysfunction
medications list: canada ed drugs – prescription drugs online
https://cheapdr.top/# online ed medications
natural help for ed what is the best ed pill buy online pharmacy
ed treatment drugs dysfunction erectile natural ed remedies
ed solutions buy online pharmacy or best drugs for ed
http://whitespacenyc.com/__media__/js/netsoltrademark.php?d=cheapdr.top help with ed
best ed solution drug pharmacy and ed remedies the canadian drugstore
Thank you! Numerous material!
help in writing an essay https://buyanessayscheaponline.com how to write a contrast essay https://englishessayhelp.com
ed drugs: erection pills online – the best ed pill
http://cheapdr.top/# cvs prescription prices without insurance
online drugs herbal ed canadian drugs
prescription drugs online pet meds without vet prescription canada or prescription drugs online without
http://outplacementassociates.com/__media__/js/netsoltrademark.php?d=cheapdr.top pharmacy drugs
treatment for erectile dysfunction prescription drugs without prior prescription and ed doctor prescription drugs online without doctor
Look At Amazin News Website Daily Worldwide Sepor News
viagra without doctor prescription comparison of ed drugs best male enhancement
amoxicillin without a doctor’s prescription: comfortis for dogs without vet prescription – cheap online pharmacy
http://cheapdr.top/# ed pills
viagra without doctor prescription cvs prescription prices without insurance erection pills viagra online
natural ed medications google viagra dosage recommendations or is ed reversible
http://taphandle.net/__media__/js/netsoltrademark.php?d=cheapdr.top google viagra dosage recommendations
erectile dysfunction treatments treating ed and best non prescription ed pills erection pills online
Merhabalar sizelere bugün hayata geçirdiğim kendi tasarımım olan ücretsiz bir reklam değişim platformu yani nativereklam.com.tr den bahsedeceğim.
Kısaca anlatmak gerekirse sitenize yerleştireceğiniz 2 adet kod sayesinde sitenizde
göz zevkini bozmayan reklamlar çıkacak. Bu sayede kazaanacağınız puanlar sitenizin reklamını yapmanıza olacak sağlayacak.
Ayrıca siteniz uygunsa ilerleyen zamanlarda ücretli verilen reklamlar
sayesinde parada kazanabilirisiniz. Site hakkında gerekli bilgileri gerek
görsel gereksede yazılı bir şekilde ayrıntılarına
kadar alacaksınız. Şimdiden desreklarinizi bekliyor.
Hem sizin hemde benim için faydalı bir proje olması dileği ile iyi çalışmalar.
Siteye hızlı giriş için Buraya Tıklayın. Canlı desteğe başvurmaktan çekinmeyin.
https://nativereklam.com.tr/
Selam arkadaşlar film sitemizi ziyaret ederek ve eğer izliyor iseniz
sitemizde film izleyerek de bizi desteklemenizi
rica ederiz. Teşekkürler
Site: https://prestijfilm.com
non prescription erection pills legal to buy prescription drugs from canada online ed meds
male enhancement products prescription drugs online without doctor or best ed medication
http://onlinecablesucks.com/__media__/js/netsoltrademark.php?d=cheapdr.top ed aids
buy anti biotics without prescription cure for ed and medication drugs errectile dysfunction
sildenafilo cinfa sin receta: sildenafilo cinfa sin receta – sildenafilo 50 mg precio sin receta
Viagra Tabletten: Viagra rezeptfreie Schweiz bestellen – Viagra kaufen ohne Rezept Schweiz
cerco viagra a buon prezzo: viagra generico recensioni – alternativa al viagra senza ricetta in farmacia
markahost about me profilimizi ziyaret ediniz
I really like reading through a post that can make men and women think. Also, thank you for allowing me to comment!
I’m often to blogging and i really appreciate your content. The article has actually peaks my interest. I’m going to bookmark your web site and maintain checking for brand spanking new information.
comprar viagra en espaГ±a: sildenafilo precio farmacia – sildenafil 100mg genГ©rico
viagra online cerca de toledo: comprar viagra en espaГ±a amazon – sildenafilo cinfa 100 mg precio farmacia
Seriously quite a lot of very good information!
buy custom essays where to buy essay online
alternativa al viagra senza ricetta in farmacia: viagra online consegna rapida – viagra 50 mg prezzo in farmacia
Useful advice. Thanks a lot.
essay paper writer do an essay for me what ways do i help my family essay
Viagra rezeptfreie LГ¤nder: Viagra 100 mg ohne Rezept – Viagra kaufen gГјnstig Deutschland
Viagra diskret bestellen Wo kann man Viagra kaufen rezeptfrei or Potenzmittel Generika online kaufen
http://taserontv.net/__media__/js/netsoltrademark.php?d=viagermany.pro Viagra kaufen Apotheke Preis
Viagra rezeptfreie Schweiz bestellen Viagra kaufen gГјnstig Deutschland and Viagra online kaufen legal in Deutschland Viagra online kaufen legal in Deutschland
With thanks! Excellent stuff!
best real money online casino for us players river belle online casino new michigan online casino
viagra online cerca de toledo: viagra para hombre precio farmacias similares – comprar viagra online en andorra
Wo kann man Viagra kaufen rezeptfrei Sildenafil 100mg online bestellen or Viagra Tabletten
http://www.hairtransplant.cc/__media__/js/netsoltrademark.php?d=viagermany.pro Viagra Generika 100mg rezeptfrei
Wo kann man Viagra kaufen rezeptfrei Viagra kaufen Apotheke Preis and Viagra kaufen gГјnstig Billig Viagra bestellen ohne Rezept
sizlere en kaliteli hizmetleri sunan masöz bayanların yer aldığı istanbulmasozbayan.net sitesinde sizler de kendinize vakit ayırın.
Excellent posts. Thank you.
do my essay for me essay writing for hire write my research paper for me reviews
sildenafil 100mg genГ©rico: viagra online cerca de toledo – Viagra online cerca de Madrid
Bahis Oranları
Bahis oynamak, birçok kişi için sadece eğlenceli
bir aktivite değil aynı zamanda kazanç elde etmenin de bir yolu.
Ancak, başarılı bir bahis oyuncusu olmak için önemli stratejileri uygulamak gerekiyor.
Bu stratejilerden biri, doğru bahis oranlarını seçmektir.
Bahis oranları, bahis yapılan spor dalına, müsabakanın tarihine
ve takımların performansına göre değişkenlik gösterir.
Ancak, bahis oranları hakkında temel bilgileri bilmek, bahis severlerin kazanma şansını artırabilir.
Bahis oranları, genellikle rakamlarla ifade edilir ve üç farklı şekilde sunulabilir:
ondalık, kesirli veya Amerikan formatı. Ondalık format, bahis
oynayanların en çok kullanılan seçenektir ve
kazancın ne kadar olduğunu kolayca hesaplamalarına olanak tanır.
Bir bahis oranı, bahis oyuncularının ne kadar para yatırması gerektiğini belirtir ve ne kadar kazanacaklarını gösterir.
Yüksek bahis oranları, daha yüksek kazanç sağlama potansiyeline sahip olsa da, düşük bahis oranları daha güvenli
bir seçenek olarak görülmektedir.
Bahis oranları, sadece kazancın belirlenmesinde değil, aynı zamanda bahis stratejilerinin de belirlenmesinde önemli bir rol oynar.
Örneğin, bahis oyuncuları düşük bahis oranlarına
sahip olan takımları seçerek riskini en aza indirebilirler.
Sonuç olarak, bahis oranları, bahis severlerin spor bahisleri yaparken dikkate almaları gereken önemli
bir faktördür. Doğru bahis oranlarını seçmek, bahis oyuncularının kazanma şansını artırabilir ve başarılı bir
bahis oyunu için gerekli stratejileri uygulamalarına yardımcı olabilir.
https://sites.google.com/view/bahis-oranlari/
comprar viagra contrareembolso 48 horas: venta de viagra a domicilio – viagra online cerca de toledo
sizlere en kaliteli hizmetleri sunan masöz bayanların yer aldığı istanbulmasozbayan.net sitesinde sizler de kendinize vakit ayırın.
viagra online cerca de la coruГ±a: viagra online cerca de bilbao – comprar viagra sin gastos de envГo
https://drugswithoutdrprescriptions.com/# perscription drugs without prescription
Lisanslı Bahis Siteleri
Online bahis, son yıllarda oldukça popüler bir hale geldi.
Ancak, güvenilir olmayan siteler nedeniyle, birçok
insan bu tür faaliyetlerden uzak duruyor. İşte bu noktada lisanslı bahis siteleri önem kazanıyor.
Lisanslı bahis siteleri, uluslararası oyun otoriteleri tarafından denetlenen ve lisanslandırılan sitelerdir.
Bu siteler, oyuncuların güvenli ve adil bir şekilde bahis yapmalarını
sağlar. Lisanslı bahis sitelerinde, para yatırma ve çekme
işlemleri de güvenlidir. Çünkü bu sitelerin finansal işlemleri korumak için sıkı önlemleri
vardır.
Bunun yanı sıra, lisanslı bahis siteleri genellikle
bonuslar ve farklı promosyonlar sunarak, oyuncularına daha fazla avantaj sağlarlar.
Bu bonuslar, oyuncuların daha fazla para kazanmalarına yardımcı olur
ve bahis keyfini artırır.
Lisanslı bahis sitelerinde genellikle çeşitli spor dalları ve casino oyunları yer alır.
Bu sayede, oyuncular istedikleri alanda bahis yapabilirler.
Ayrıca, canlı bahis seçeneği de sunan lisanslı
bahis siteleri, maçları takip ederek bahis yapma
imkanı sunar.
Sonuç olarak, lisanslı bahis siteleri güvenli ve keyifli bir bahis deneyimi sunar.
Lisanslı siteleri tercih ederek, paranızın ve kişisel bilgilerinizin güvenliği konusunda endişe duymadan bahis
yapabilirsiniz. Ancak, lisanslı olmayan sitelere dikkat ederek,
olası sorunları önleyebilirsiniz.
https://sites.google.com/view/lisansli-bahis-siteleri/
legitimate canadian mail order pharmacies: drugs without dr prescriptions – canadian pharmaceuticals online safe
https://drugswithoutdrprescriptions.com/# most reliable canadian pharmacy
viagra para hombre precio farmacias: viagra online cerca de toledo – sildenafilo cinfa 100 mg precio farmacia
your discount pharmacy viagra no prescription canadian pharmacy or canada pharmacy online orders
http://vortexus.com/__media__/js/netsoltrademark.php?d=drugswithoutdrprescriptions.com list of aarp approved pharmacies
online pharmacy no scripts canadian mail order pharmacy and canadian health pharmacy fda approved canadian online pharmacies
Have you ever wanted to download an app but couldn’t because it wasn’t available in your country
or on your device’s app store? If so, then an APK downloader may be the solution you’ve been looking for.
APK stands for “Android Package Kit,” which is the file format used by the Android operating system for distributing and installing
mobile apps. An APK downloader is a website or tool that allows you to download APK files directly from the internet, bypassing the official app store.
One of the benefits of using an APK downloader is that it gives you access to apps that may not
be available in your region or on your specific device. For example, you might want to download an app that’s only available in the US, but you live in Europe.
With an APK downloader, you can still access the app and install it on your device.
However, it’s important to note that downloading APK files from unknown sources can be risky.
Malicious actors can inject malware into APK files, which can harm your device or steal your personal information. To minimize
this risk, it’s recommended that you only download APK files from trusted sources and have antivirus
software installed on your device.
Apk Downloader
You actually stated that effectively!
argumentative essay writer which question can help a writer revise an argumentative essay essay help writer writing argumentative essay
Bu http://www.masozbayan.org/bayanlarla romantik bir akşam yemeği ya da içki içmek için dışarı çıkmak, otel odanızda ya da dairelerinde yapacağınız bir masajla öğleden sonranızı doyurucu bir şekilde tamamlayacak. Bu gösterişli bayanlar, ihtiyaçlarınızı, kaprislerinizi karşılamak için her şeyi yapacak ve onunla her anın tadını çıkaracak.
This is nicely expressed! !
english dissertation help order dissertation doctoral dissertation help dissertation consulting
sildenafilo 100mg precio farmacia: se puede comprar sildenafil sin receta – viagra online cerca de la coruГ±a
You said it nicely.!
research paper writers research paper writing services college term papers for sale buy research papers online
https://drugswithoutdrprescriptions.com/# cheap rx drugs
You suggested this really well.
essay writing website paper writing service cheap custom writing service best online essay writing service
can i pay someone to do my essay pay to have an essay written pay for someone to write your essay pay for college essay
dissertation title https://customthesiswritingservice.com
canadian drug store coupon: without doctor – safe online pharmacies in canada
https://drugswithoutdrprescriptions.com/# online pharmacy no prescription
Kudos. An abundance of information!
online research paper writer paper write online paper writers write my paper for me cheap
viagra precio 2022: viagra precio 2022 – sildenafilo 100mg precio espaГ±a
With thanks. Ample data.
best online essay writer professional college essay writers write my essay paper write my essay in 1 hour
https://drugswithoutdrprescriptions.com/# rx canada
high street discount pharmacy mexico pharmacy order online or reliable online pharmacies
http://moochiepoochie.co/__media__/js/netsoltrademark.php?d=drugswithoutdrprescriptions.com no 1 canadian pharmacy
canadian meds canadian pharmaceuticals and canadian online pharmacies legitimate canadian pharmacy antiobotics without prescription
You said it nicely..
essaytyper help write essay mba essay tips help with essays
seo article writing service paper writing services legitimate service to others essay letter writing service
please write my essay https://writinganessaycollegeservice.com
Terrific material. Cheers!
online essay writers writing an argumentative essay about an ethical issue essay writers for hire writing argumentative essays
strong thesis statement thesis printing college thesis argumentative essay thesis
essays about yourself for college https://essaywritingservicelinked.com
farmacia senza ricetta recensioni: viagra online spedizione gratuita – viagra subito
https://viasenzaricetta.com/# viagra generico prezzo piГ№ basso
viagra ordine telefonico pillole per erezioni fortissime viagra generico recensioni
https://viasenzaricetta.com/# viagra 100 mg prezzo in farmacia
cialis farmacia senza ricetta viagra subito viagra online spedizione gratuita
Betist, online bahis ve casino oyunları sunan bir
platformdur. Site, 2015 yılında kurulmuştur ve Curaçao lisansına sahiptir.
Kullanıcılarına spor bahisleri, canlı bahisler, casino oyunları ve sanal sporlar gibi farklı seçenekler sunar.
Betist’in sunduğu avantajlar arasında yüksek oranlar, çeşitli ödeme yöntemleri, mobil uyumluluk ve 7/24 müşteri desteği yer alır.
Ayrıca site, kullanıcılara ilk üyeliklerinde deneme bonusu vererek kazanç elde etme şansını arttırır.
Betist, güvenilir ve kaliteli hizmet sunan bir bahis sitesidir.
viagra acquisto in contrassegno in italia alternativa al viagra senza ricetta in farmacia viagra acquisto in contrassegno in italia
viagra originale in 24 ore contrassegno: viagra online spedizione gratuita – viagra originale recensioni
https://viasenzaricetta.com/# viagra online in 2 giorni
farmacia senza ricetta recensioni viagra ordine telefonico viagra consegna in 24 ore pagamento alla consegna
You said it nicely..
best dissertation writing help with dissertation dissertation online help write your dissertation
You said it very well..
order an essay cheap where can i pay someone to write my essay college paper for sale pay for essay papers
write my research paper for me writing essays essay writer websites what should i write my persuasive essay on
help essays https://essaywritinghelperonline.com
You suggested it fantastically.
essay writing prompts professional essay writers essay writing sites writing a scholarship essay
Reliable advice. Regards!
paper writer service write a paper for me writing a paper paper writing
essay writing service reddit best essay writing website grad school essay writing service will writing service
article writers https://argumentativethesis.com
kamagra senza ricetta in farmacia: pillole per erezione in farmacia senza ricetta – farmacia senza ricetta recensioni
https://viasenzaricetta.com/# le migliori pillole per l’erezione
viagra 100 mg prezzo in farmacia: miglior sito per comprare viagra online – viagra acquisto in contrassegno in italia
https://viasenzaricetta.com/# pillole per erezione in farmacia senza ricetta
kamagra senza ricetta in farmacia viagra 50 mg prezzo in farmacia cialis farmacia senza ricetta
alternativa al viagra senza ricetta in farmacia viagra generico sandoz viagra pfizer 25mg prezzo
viagra online in 2 giorni alternativa al viagra senza ricetta in farmacia viagra online consegna rapida
viagra originale recensioni: pillole per erezione immediata – viagra generico prezzo piГ№ basso
https://viasenzaricetta.com/# п»їviagra prezzo farmacia 2023
siti sicuri per comprare viagra online viagra originale in 24 ore contrassegno viagra online in 2 giorni
viagra online in 2 giorni: kamagra senza ricetta in farmacia – viagra acquisto in contrassegno in italia
https://viasenzaricetta.com/# viagra originale in 24 ore contrassegno
viagra originale in 24 ore contrassegno siti sicuri per comprare viagra online miglior sito per comprare viagra online
Good facts. Thank you.
research paper writer services buying term papers proposal for phd writing services for research papers
Whoa loads of amazing knowledge.
order custom paper buy thesis paper cheap paper writing services custom paper writing services
essay writing sites essay writing company i need help writing an essay college papers writing service
technical writing help https://paperwritingservicecheap.com
pillole per erezione immediata: viagra online spedizione gratuita – viagra cosa serve
https://viasenzaricetta.com/# dove acquistare viagra in modo sicuro
viagra naturale in farmacia senza ricetta viagra generico recensioni or viagra acquisto in contrassegno in italia
http://tobaccosupplies.com/__media__/js/netsoltrademark.php?d=viasenzaricetta.com viagra 100 mg prezzo in farmacia
viagra online spedizione gratuita viagra online consegna rapida and farmacia senza ricetta recensioni kamagra senza ricetta in farmacia
pillole per erezione in farmacia senza ricetta cialis farmacia senza ricetta viagra generico sandoz
Regards. I appreciate this!
essay writing in english writing a scholarship essay cheap essay writing essay writing meme
viagra online in 2 giorni: viagra pfizer 25mg prezzo – viagra 50 mg prezzo in farmacia
https://viasenzaricetta.com/# viagra 100 mg prezzo in farmacia
viagra cosa serve viagra pfizer 25mg prezzo viagra generico prezzo piГ№ basso
https://viasenzaricetta.com/# alternativa al viagra senza ricetta in farmacia
You actually suggested that wonderfully.
pay for paper buy college essay buy a essay can you pay someone to write an essay
25 mg prednisone: prednisone tablets – prednisone generic cost
http://zithromax.pro/# can you buy zithromax over the counter in australia
buy cytotec in usa how to get cytotec online buy cytotec
http://cytotecsale.pro/# purchase cytotec
cost of clomid without dr prescription: cheap clomid – can i get clomid online
http://clomidsale.pro/# clomid buy
doxycline doxycycline online rx doxycycline
Incredible many of superb knowledge!
college essay help online essays help online essay help service essays help online
Thanks, Ample information.
do my college homework reddit do my homework do my finance homework coursework writing
cytotec online: Misoprostol 200 mg buy online – buy cytotec
http://clomidsale.pro/# can i get cheap clomid without rx
can you buy prednisone over the counter in canada prednisone cream rx 6 prednisone
Awesome data. Regards!
how to introduce a writer in an essay how to be an essay writer my essay writer login college essay writers
free writing assistant essay writing help custom essay help essay paper writing help
websites for essay writing https://bestonlinepaperwritingservices.com
Hi, Neat post. There is an issue together with your site in web explorer, might test this? IE still is the marketplace chief and a large element of other people will leave out your great writing due to this problem.
Also visit my site: https://www.sheffieldstateuniversity.com/
I’m not sure why but this site is loading incredibly
slow for me. Is anyone else having this issue or is it a problem on my end?
I’ll check back later on and see if the problem still exists. https://www.hampdenstateuniversity.com/
cytotec abortion pill: order cytotec online – cytotec pills buy online
https://cytotecsale.pro/# Abortion pills online
prednisone 10mg for sale prednisone cream rx generic prednisone tablets
Very good info, Kudos.
college term papers custom research paper term paper writing buying research papers online
https://doxycyclinesale.pro/# order doxycycline capsules online
doxycycline online cheap online doxycycline or where can i get doxycycline online
http://globalzoo.com/__media__/js/netsoltrademark.php?d=doxycyclinesale.pro antibiotics doxycycline
doxycycline in usa doxycycline online and price doxycycline 100mg without prescription cost of generic doxycycline
where to get cytotec pills: Abortion pills online – purchase cytotec
https://clomidsale.pro/# how to buy cheap clomid without prescription
buy cytotec over the counter cytotec online cytotec online
Well expressed certainly! .
service quality thesis philippines community service thesis statement thesis search argumentative thesis
doxycycline prices canada: how to buy doxycycline in uk – doxycycline over the counter usa
https://clomidsale.pro/# clomid without a prescription
where to get cheap clomid prices cheap clomid clomid for sale
You reported that perfectly!
term paper research proposal apa term paper help research proposals
The art of researching topics for online writing.
Very good info. Many thanks.
research paper writers termpaper buy term paper cheap research paper writing service
doxycycline 120mg: 40mg doxycycline online – where can i buy doxycycline over the counter
https://zithromax.pro/# can i buy zithromax over the counter in canada
Abortion pills online buy misoprostol over the counter Misoprostol 200 mg buy online
Bornova escort bayanlar oldukça seksi ve güzeller. Daha önce yaşadığınız tüm seks deneyimlerini unutturacak olan bayanlarla bir seks yaşamak sizin de hakkınız. Bu bayanlar hem zayıf hem de oldukça naif bir yapıya sahipler. Ve sizi asla hayal kırıklığına uğratmayacaklar. Bu bayanlar ile vakit geçirmek muhteşem bir zevktir. Bu erotik bayanlar oldukça güzel bir güzelliktir. Ayrıca beyefendilerin derhal akına girdiği bir kişiliğe sahiptir. Macera ruhunuz her daim yeni zorluklar arıyor. Bu bayanlarla nefes kesen bir beraberlik yaşayabilirsiniz. Yani sizin maceracı yönünüze eşlik ederler.
buy 40 mg prednisone prednisone 5093 or order prednisone with mastercard debit
http://betterinvestmentstrategies.com/__media__/js/netsoltrademark.php?d=prednisonesale.pro prednisone 54899
prednisone 5 mg cheapest prednisone 2.5 tablet and prednisone buy without prescription prednisone 10mg price in india
How to take alpilean capsules
I am actually glad to read this web site posts which
contains plenty of useful data, thanks for providing such information.
Great posts. Many thanks.
thesis help thesis statment thesis statement thesis writing service
a thesis statement define thesis statement doctoral thesis good thesis statements
writing compare and contrast essays https://payforanessaysonline.com
Tarif edilemeyecek kadar hoş bedeni ve biçimli hoş natürel göğüsleriyle Alanya escort bayanlar, banyo ve havuzda baştan çıkarıcı bir hizmet sergiliyorlar. Bu seksi bayanlar şehvetli bir çekicilik ve hayal gücünüzü harekete geçiriyor. Bunun yanı sıra erotik bir keşif için uygun bir yol arkadaşı olacaklar. Baştan çıkarma sanatıyla ince beyefendiyi tarifsiz bir şekilde mutlu etmeyi çok seviyorlar. Çarpıcı görünümüne ilave olarak bayanlar etkileyen bir kişiliğe sahip. Bayanlar tatlı, samimi, akıllı ve memnun etmeyi seviyor. Onlar yanınızdayken olağanüstü bir zevk alacaksınız.
Maltepe escort bayanlar tanıyabileceğiniz en tatlı hatunlardır. Harika kişiliği ve olağanüstü gülümsemesi onlarla geçirdiği vakti bir kutlamaya çeviriyor. Güzel harika bayanlar en iyi mizah anlayışına sahiptir. Onlar bu dünyayı ve yaşamı seviyor ve böylelikle onlarla her dakikanın keyfini çıkarabilirsin. Bayanların hırslı bir ruhu var.
Arsız ve seksi İzmit escort bayanlar, çok elastik ve özgür yapısı sebebiyle etrafa ve insanlara süratle düzen sağlayabilir. Hatunlar flört etmeyi ve yeni ve ateşli insanlarla tanışmayı sever. Onlarla derin sohbetler de mümkün olabilir. Bu canlı modellerle geçirilen vakit hususi bir tecrübeye dönüşüyor. Bu eğlence onlar için çok keyifli. Bu yüzden bayanlar ile hiçbir istek iham edilmemelidir. Bayanların her biri zevk almayı ve dinamik bir seks yaşamayı çok seviyorlar. Bayanlarla harika bir gece geçirebilir ve sabaha kadar sevişebilirsiniz.
Gümbet escort bayanlar epey gülünç ve eğlenceyi seven kadınlardır ve onlarla hiçbir vakit bunaltıcı bir an yaşanmaz. Bu hatunlar macerayı seviyor. Onların kültür zevki de var. Doğayla iç içe olmak, edebiyat ve zanaat boş vakit temalarıdır. Bu şehvetli seks perileriyle gezebilir ve her yere gidebilirsiniz.
Pendik escort bayanlar ile kısa süre içerisinde muhteşem bir fantezi yaşayacaksınız. Bu bayanlar kısa bir süre dahi olsa sizi mutlu edecek tam manası ile doyuracaklar. Sürenin kısa olmasına takılmayın. Çünkü bayanlar oldukça deneyimliler ve kısa sürede de harika zevkler yaşatmayı biliyorlar. Sıcak kalpli tabiatı sizi derin bir rahatlamaya ve sevinç uyandırıcı karşılaşmalara davet ediyorlar. Saf bir gösterişli bayanlar olarak mutfaktaki savurganlıktan hoşlanır ve kültürel ve profesyonel etkinliklerde size eşlik etmekten sevinç duyarlar.
Ümraniye escort bayanlar Şık restoranlara, şık kafelere ve bilindik barlara gitmeyi çok seviyorlar. Her yere iyi düzen sağlarlar ve bu nedenle mükemmel birer kadınlardır. Hatunlar eşlik etmeyi özveriyle yapıyor ve sonuna kadar yaşıyorlar. Yeni deneyimler kazanın, kendinizi geliştirin ve yeni sınırları zorlayın. Bayanlar yanındaki kaliteli ve aydın adamı dört gözle bekliyor.
Kavaklıdere escort, gençlik tazeliğiyle sizi yeniden çıkarırken kusursuz görünümüyle alımlı bir görünüş kazanmanızı sağlar. Güçlü bir estetik zihniyeti vardır ve gelişigüzel olmadan görünüşüne büyük itina gösterirler. Bayanlar güvenilir ve orijinal Açık olmaları sebebiyle, kıvılcım ilk konuşmanın üstünde uçacak. Olağanüstü bir kişiliğe sahip kuvvetli bir bayanlar. Son derece yeniden çıkarıcı niteliklere sahip, taze, utanmaz ve alımlı, titiz bir ayartma. Görünüşü tek başına arzulanan hiçbir şey bırakmazlar.
Aksu escort bayanlar romantik ve titiz olur, fakat başka yandan yırtıcı ve ateşli olur. Yani iyi cesaretli bir genç hatun ve bunun yanı sıra ateşli bir hatun olmayı başaran güzeller sizinle olacak. Bu bayanlar her bey için kusursuz bir dost olacak. Bu titiz seksi bayanlar çok konuşkandır ve beylerle derhal elverişli bir düzey bulur. Hatunlar dışarı çıkmayı, iyi restoranlara gitmeyi, bir kadeh şarap içmeyi ve samimi sohbetleri sever. Kadınlar bir erkeğin gereksinimlerini ve arzularını anlar.
Gençliğiyle Atakum escort bayanların temiz ve tatlı bir aurası vardır. Bu zeki ve kendisine güvenen bayanlar, sofistike ve sağduyulu. Ama hususi olarak bayanların yırtıcı tarafını yaşayabilir. Güzel bayanların aradığı şey sevinç ve erotik macera. Sanata, mutfağa ve gösterişli hayat tipine olan sevinci, çekici hanımın stilinde esasen kendini işaret ediyor.
Seksi Beykoz escort bayanlar ateşleri ile sizi yakmaya geliyorlar. Bayanların seksi hallerine tam manası ile vurulacak ve onlarla birlikte zevk almaya bakacaksınız. Bayanların sizi mutlu edeceğini her zaman bilmelisiniz. Bayanların hepsi çok yönlülüğü, tutkusu ve şehveti ile alımlı beyefendiyi şımartacak epey erotik, egzotik, feminen, temiz gösterişli modeldir. Çok şehvetli ve seksi, etkileyen bayanlar sizi baştan çıkaracaklar. Bayanlar gerçek centilmenlerin aslında takdir ettiği o belli espriye sahiptir.
Selam beyler Keçiören escort bayanlar ile sınırsız bir seksin tüm güzelliğini iliklerinizde hissedeceksiniz. Bu bayanlar sayesinde en derin fantezilerinizi gerçeğe döndürecek ve ılık ılık terler dökeceksiniz. Sizi mutlu edecek bayanlar her zaman oldukça hazır ve bakımlılar.
Adapazarı escort bayanlar sizlerle saatlik olarak buluşacaklar. Yani saat kaç olursa olsun bir gece değil de istediğiniz saatler içerisinde enfes bir buluşmayı bu bayanlarla yaşama şansına sahipsiniz. Çünkü bayanların birçoğu kısa sürede dahi birçok enfes fanteziyi yaparak tüm partnerlerini en iyi şekilde mutlu etmeyi biliyorlar. Bu yüzde de onların birini seçebilir ve enfes seksi beraberliklerin bayanlarla geçirebilirsiniz. Ne istediğini bilen bayanlar sizi tam manası ile mutlu edecekler.
Merhaba beyler. Konyaaltı escort bayan haftasına hoş geldiniz. Seks İstiyorsanız bu bayanlar size en özel ve güzelini yaşayacaklar. Onlarla iliklerinize kadar rahatlamanızı hoşluğunu yaşayarak zevkin en güzelini alacaksınız. Sizi mutlu edecek olan bu bayanlar ile bir araya gelmek için acele etmeli ve zevk al aya bakmalısınız.
orselen teni ve yumuşak saten bedeni, dudaklarının pembe kıvrımlarıyla daha dahi parlayan gözüküyor. Arkadaş canlısı davranışı ve sevinçli kişiliği, buzları zahmetsizce kırar ve müşterisinin gereksinimlerini karşılamak için her yere gitmeye hazırdır. Bu bayanlar, bilincinizi kaybetmenize niçin olacak hoş bir Gelibolu escort kadındır. Vücudunu okşayabilir, kollarınızın arasında tutabilir ve feminen şeklinin inceliğini fark edebilirsiniz.
Bir Bafra escort beraber olmak, en üst düzeyde pek çok olağanüstü şey yapabildiğinden ve etkileyen kişiliği daha çoğunu bulmak isteyeceğinden, her daim olağanüstü bir vakit geçirme yoludur. Beden için en iyi duyumları yapabilir ve yeni şeyleri daha neşeli bir şekilde öğrenebilir, böylelikle bu bayan sizi derinden hayrete düşürür.
İskenderun escort bayanlar aydın beyleri erotik sanatın bütün kurallarına göre şımartmayı sever. Onların kadifemsi teni, yumuşak kıvrımları ve dolgun dudakları bedeninizi sarıyor. Bu yüzden beyefendiyi şehvetli bir duyular alemine kaçırır. Elbette bayanlar da şımartılmayı sever. Büyüleyici kadınları başkalarından ayıran bir diğer özellik de dinleme yeteneğidir. Bayanlar beyefendisine tamamıyla kapılma ve seksi doğasıyla onu güldürme yeteneğine sahiptir. Sevgileri kalpten gelir ve öz bilince yer bırakmaz.
Çankaya escort beraber geçirdiğiniz vakit süresince olağanüstü şeyler yaşayacaksınız. Bayanlar, dünyanın değişik fantezileri ile size eşlik etmekten sevinç duyacaktır. Özellikle gerçek bir beyefendinin ile birlikte gezmeyi sevinç uyandırıcı buluyorlar. Bayanlar ile beraber geçirdiğiniz zaman süresince ince, erotik bir model olarak deneyimleyin.
Gazipaşa escort bayanlar dost canlısı, akıllı ve enteresan erkeklerle tanışmayı seviyorlar. Fiziksel ilişkiye ilave olarak, sohbetten hoşlanır ve şakalaşmayı severler. Bayanlar beraber vakit geçirmekten hoşlanan çok hatunlardır. Baştan çıkarmayı, gülmeyi sever ve enerji doludurlar. Bu hatunlar ile kavuşmak tam bir zevk olacak. Güzel hatunlar sözcüklerin tam manasıyla seksi duygusallığı temsil ediyor. Bu bayan zarafetler ilk bakışta nefesinizi kesecek.
Uzun bacak mı yoksa büyük göğüsler Seyhan escort mu olduğunuza karar veremiyorsanız, o vakit seveceksiniz, zira onun yalnızca hoş, dik göğüsleri değil, bunun yanı sıra kusursuz bir iğne seti var. Ebediyete kadar sürecek gibi gözüken hoş göğüsleri ve bacakları ile en çarpıcı sekiz vücuda sahip. Kolunuzda Dana ile akşam yemeği randevunuz olarak bir restorana girdiğinizi hayal edin, tüm bakışlar mutlaka size dönecektir.
Mükemmel tavırlara sahip nazik ve sevgi dolu bir şahıs olan Nazilli escort kızı, parıltılı konuşma yeteneğine sahiptir. O, derhal kendinizi olağanüstü hissettirecek şeyin peşine düşerken kendinizi rahat hissetmenizi sağlayacak kendisine güvenen ve sofistike seks kızıdır. Hem zihinsel üstelik fiziki istekleri yerine getirebilen, sizi daha fazlasına aç bırakacak cinsten bir kız. Doyumsuz bir seksüel iştahı var.
İlkadım escort kadınların özgürlüğü diye Bir şey vardır. Bu kadınlar oldukça özgür ve bir o kadar da güzeldirler. Kendi evlerinde seviştikleri için de asla farklı bir mekana ihtiyaç duymazlar. Tamamen sizin isteklerinize göre seksi yönlendirilen. Onlarla mutlu olmama gibi bir durumunuz inanın söz konusu bile olamaz. Bayanların her birinin birer seks perisi olduklarını söyleyebiliriz. Onlar kaliteli bir bey için yaratıcı bir dostturlar. Kadınlarla içten bir akşam, hususi bir davranış vaat ediyor.
Güzel bir Toroslar escort kadınının verdiği o heyecan ve yumuşak dokunuş? O, canlı bir kişiliğe sahip, ayakları yere basan hür bir ruhtur. Eğitimli ve keyifli, sizi yatak odasının içerisinde ve dışında saatlerce fiziki ve zihinsel olarak kolaylıkla büyüleyebilir! İnsanlar ona, onun beraberinde rahat hissettiklerini ve onunla süratli bir şekilde ilişki kurduklarını söylüyor.
Kepez escort bayanların profillerinde gördüğünüz bizzat kendilerine ait olup kesinlikle % 100 gerçektir. Uzun dalgalı saçları, naturel büyük göğüsleri ve kıçı ile görkemli bir yapıları var. Seksi kadınlarla enfes bir beraberlik yaşamak için çok fazla zaman kaybetmemelisiniz. Onların seksi fiziklerinde eminiz ki kendinizi bulacaksınız.
Göreceğiniz gibi, hoş bir sevgili, masajları, öpücükleri, erotik oyunları ve bütün fantezilerinizi gerçekleştirmeyi seviyor. Menderes escort, parlayan bronz teni ve kusursuz bakımlı uzun saçları onu hoş bir vizyon durumuna getiren sevecen ve hoş bir dosttur.
Menemen escort bayanlar ile yaşayacağınız her anın kölesi olacaksınız. Bu bayanlar sundukları kaliteli seks randevuları ile her zaman en derin hisleri uyandırıyor ve hem sizin hem de kendilerinin zevk almasını sağlıyorlar. Bu nedenle bir partner seçecekseniz eğer bu, bu platformdan bir kadın olmalıdır.
Gaziemir escort büyük göğüslü bayanlar sizi mest edecekler. Bayanların hepsi kaliteli bey için yaratıcı ve yol dostudur. Bayanlar ile içten bir akşam, çok çok haz vaat ediyor. Her bakımdan erkeklerin isteklerine çok açıktırlar. Güzel kıvrımları, mizacı için olağanüstü bir düzen ve yalnızca erkeklerin kalp atışlarını hızlandırmakla kalmıyor. Kahverengi gözleri ve gülümsemesiyle her halde bir görgülü memnuniyeti bırakıyor. Bayanların kişiliği ve mizah zihniyeti daimi bir gözlem bırakıyor. Saf sevinç duyularınızı memnun edecek bayanlar size sıcak bir hava getiriyor. Göğüsleri sizi mest eden ve sizi memnun eden ipeksi düzgün ipek derisi kral gibi hissettiriyor.
Nefes kesen Silifke escort bayanları rahat bir ortamda tanıyın: romantik bir akşam yemeğinde yahut günlük yaşamdan uzakta beraber bir seyahatte. Güzelleri huzur içerisinde tanımayı başardıktan sonra günün en mühim vakası sizi bekliyor: yanınızda reel bir kız arkadaş olacaklar. Bu bayanlar heyecanı sever. Güzel ve etkileyen hatunlar aradığı şey sevinç ve erotik serüven.
Birkaç saatliğine dahi olsa onun beraberinde olmak, yeni duyumların keyfini çıkarabileceğiniz için iç dünyanızı ve vücut duygularınızı değiştirecek. Ulus escort olmaktan, en derin arzularınızı söylem edebileceğiniz için, verilen seçeneklerden her daim memnun kalmanız için deneyimlemekten pişman olmayacağınız pek çok olağanüstü opsiyon olur. Her daim en derin arzularınızı karşılayacak ve heyecanlandıracak hususi bir yerde olmaktan katiyen sıkılmazsınız. Bu kız, şaşkınlığı devam ettirecek keyifli ve ihtiraslı bir vakit geçirmek için lüzumlu olan şey.
Bandırma escort bayanlar etkileyici görünümünün beraberinde baskın kişiliğini beyefendiye göstermeyi de seviyor. Onlar iç çamaşırıyla erotizmi seviyor ve değişik seviyelerde oynamayı seviyor. Ayrıca bu arı gösterişli model, kültürel düzeyiyle parlıyor ve refakatçisiyle romantik bağlar kuruyor. Seyahat dostluğu, yaratıcı model için olağanüstü bir hobidir.
Bu benzersiz Torbalı escort ile bir randevunun en hoş yanı, bütün bu yeniden çıkarıcı düşüncelerin tatlı bir gerçeğe dönüşeceğinden güvenilir olmaktır. Onların yardımıyla çok vakit sevgiyle hatırlayacağınız olağanüstü bir eskort hizmeti yaşayın.
doxycycline gel in india: buy doxycycline australia – doxycycline 100mg price 1mg
https://zithromax.pro/# zithromax z-pak
buy cytotec online buy misoprostol over the counter buy misoprostol over the counter
Merhaba Marmaris escort bayanlar ile hayatınızın ilk seks deneyimini yaşamaya hazır mısınız? Sevgili genç beyler bu hatunlar sizi milli yapacak olan olgun hatunları. Hayatınızın en özel ilk seks deneyimini bu bayanlar ile yaşayacak ve durumdan da çok mutlu olacaksınız. Bayanlar yaşamı bütün duyularıyla keşfetmeyi severler. Bu şehvetli hatunlar her daim çok şık ve ince görünür. İyi huylu, kaliteli ve sevinçli bir seks perisi olan bayanlar, hayatın hususi anları için kusursuz bir dosttur.
Akçaabat escort bayanlar kısa bir zaman dilimini bile harika şekilde yaşamanızı sağlıyor. Bu bayanlar kısa zamanda aklınıza gelecek tüm fantezileri yaşatıyor ve zevk almanızı sağlıyorlar. Bayanlarla bir araya gelmeyi ihmal etmeyin. Sonrasında ise zevkin tüm ayrıntılarını tüm vücudunuzda hissederek zevk almaya bakın. Bu güzellere saatlik bir randevunun tadını çıkarmaya bakın. Onun duruşu ve sağduyusu, onu eşsiz ve hususi bir randevuyu bölüşmek için mükemmel bir ortak durumuna getiriyor, Onun kabahat ortaklığı, zariflik, sevgi ve her an gereksinim duyduğunuz her şeyi sunuyor.
İstanbul escort bayanlar sayesinde kendi evinizin konforunda farklı bir mekan arayışı olmadan sevişebilirsiniz. Bu bayanlar bizzat sizin evinize geldikleri için sizlere kendi konfor alanınızı terk etmeden harika bir seks yaşamanızı sağlıyorlar. Evinden başka bir yerde sevişemeyen tüm beyler bu bayanlarla bir araya gelerek harika bir deneyim yaşayabilir.
Mecidiyeköy escort bayanlar beraber sevinç uyandırıcı ve zevk veren beraberlikler uygulamak için uygun bir eştir. Esprili ve empatik yapısı her erkeği memnun eder. Bayanlar erkeklerin ne istediğini biliyor. Bu erotik bayanları bir an önce keşfedin ve deneyimleyin. Bayanlar karizması ve erotik havasıyla esin veriyor. Bayanlar baştan çıkarıcı bir erotik seks perisi ve size bakışları ile sizlere haz vaat ediyor. Bu bayanlar yanınızdayken çevreden takdir dolu bakışlar alırsınız.
Yanında hararetli bir kıza sahip olma arzusundan utanmana lüzum yok. Pamukkale escort bunu çok iyi anlar ve hangi yerde kalmaya karar verirseniz verin, sizi çok daha kuvvetli ve türlü neşeli şeylere kabiliyetli hissettirecek en iyi eğlenceyi verebilir. Kendinizi yayma etme ve ne olursa olsun hoş hissetme yeteneği olacağı için korunmanıza lüzum kalmayacak.
Bir Sandıklı escort kızla beraber olmak, her daim eğlenmek için olağanüstü bir seçenektir, böylelikle onunla ve muhtemel olan en üst düzeyde deneyimlemesi gereken bütün benzersiz yetenekleriyle vakit geçirmekten pişman olmayacaksınız. Kendiniz çok çok hareket etmeden dahi kendinizi tatmin hissedecek ve bu bekar kadının birtakım hoş duygular yaratmasına müsaade vereceksiniz.
Köyceğiz escort yeni olağanüstü deneyimler uygulamak, tamamıyla akıllara durgunluk veren bir şey olacak ve vücudunuz için, verilen seçeneklerden ve yeni deneyimlerden kendinizi her daim hayrete düşürmeniz için haz ve başka her şeyi sezmek ziyadesiyle yeterli olacaktır.
Kahramankazan escort kızı olmanın bütün haz yollarını keşfetmeyi seviyor ve bu, çoğunlukla tabu olarak kabul edilen bir yola götürürse, öyle olsun. Mutluluk arayışı onun birincil hedefidir ve memnuniyetiniz güvence edilir. Bu hatunlar bir mükemmeliyet figürüdür.
Polatlı escort haz almayı seçeceğiniz her şey, değişik insanları hususi dokunuşlarından hayrete düşürme konusu ile ilgili profesyonel olduğu için epey neşeli olur, böylelikle bu bayanın tadını daha çoğunu keşfetmeye hazır hissetmenizi sağlayacak değişik şekillerde yaşayabileceksiniz.
Samandağ escort bayanlar genelde yirmili yaşlarının başındadır; fiziki özellikleri epey etkileyici. Dubai eskort kızı her daim iyi görünmeyi sever; makyajı mükemmel fakat kibar, en iyi özelliklerini belirtiyor ve olağanüstü kıyafetler giymeyi seviyor.
Çarpıcı İznik escort, genç bir düş kızının kollarında kendini şımartmak ve gevşemek talip bir bey için kusursuz bir zevktir. Kibar, etkileyici ve en olağanüstü hizmeti sunuyor. Onu görüşme eden arkadaşlarımız böylemesine tatlı bir sunma karşısında hoş bir beklenilmeyen yaşadılar.
Betist, online bahis ve casino oyunları sunan bir platformdur.
Site, 2015 yılında kurulmuştur ve Curaçao lisansına
sahiptir. Kullanıcılarına spor bahisleri, canlı bahisler, casino oyunları ve sanal sporlar gibi farklı
seçenekler sunar. Betist’in sunduğu avantajlar arasında yüksek oranlar, çeşitli ödeme
yöntemleri, mobil uyumluluk ve 7/24 müşteri desteği yer
alır. Ayrıca site, kullanıcılara ilk üyeliklerinde deneme bonusu vererek kazanç elde etme şansını arttırır.
Betist, güvenilir ve kaliteli hizmet sunan bir bahis sitesidir.
Wonderful write ups. Thanks a lot!
do my homework for free my homework should i do my homework do my programming homework
You made your position quite effectively..
do my chemistry homework do my math homework for me do my math homework for me do my finance homework
http://doxycyclinesale.pro/# how much is doxycycline in south africa
buy cytotec pills online cheap: buy cytotec – cytotec pills buy online
http://clomidsale.pro/# cheap clomid tablets
cytotec pills buy online where to get cytotec pills п»їcytotec pills online
buy cytotec in usa: purchase cytotec – Abortion pills online
https://doxycyclinesale.pro/# doxycycline 50 mg cap
cost of clomid online buy clomid can i order clomid pills
I really like reading through a post that can make men and women think. Also, thank you for allowing me to comment!
order prednisone with mastercard debit: mail order prednisone – 80 mg prednisone daily
https://zithromax.pro/# where can i buy zithromax medicine
zithromax 1000 mg pills zithromax cost canada zithromax 250mg
buy prednisone with paypal canada: prednisone buy – prednisone brand name us
https://doxycyclinesale.pro/# buy doxycycline 100mg
how to get clomid price where buy clomid no prescription can i order clomid online
buy azithromycin zithromax zithromax buy online or zithromax 500 mg lowest price online
http://restorationblvd.com/__media__/js/netsoltrademark.php?d=zithromax.pro zithromax over the counter
zithromax 250 mg buy zithromax online and zithromax 500 mg lowest price online buy zithromax without presc
15 mg prednisone daily: prednisone 250 mg – prednisone brand name canada
http://zithromax.pro/# zithromax prescription online
where to get cheap clomid without dr prescription get cheap clomid pills order generic clomid prices
prednisone tablet 100 mg price of prednisone tablets or prednisone 50 mg canada
http://hrtrealtyservicesllc.com/__media__/js/netsoltrademark.php?d=prednisonesale.pro prednisone 40 mg daily
prednisone 20mg for sale prednisone 1 mg for sale and canine prednisone 5mg no prescription where to buy prednisone 20mg
cytotec online: buy cytotec over the counter – Abortion pills online
http://clomidsale.pro/# can i order generic clomid pill
doxycycline 100mg australia doxycycline prescription canada doxycycline 163
https://doxycyclinesale.pro/# price of doxycycline 100mg in india
canada pharmacy prednisone: how much is prednisone 10 mg – prednisone 20mg price
https://cytotecsale.pro/# buy cytotec over the counter
buy cheap doxycycline online where to buy doxycycline doxycycline 100 mg tablets
how to get zithromax: zithromax without prescription – buy zithromax
http://clomidsale.pro/# where to buy generic clomid without a prescription
buy zithromax online cheap azithromycin over the counter buy zithromax without prescription online
buy cytotec over the counter: cytotec buy online usa – order cytotec online
https://zithromax.pro/# zithromax online paypal
doxycycline uk online cost doxycycline 100mg doxycycline 150mg pill
cytotec online: purchase cytotec – cytotec abortion pill
http://doxycyclinesale.pro/# doxycycline uk pharmacy
can i buy generic clomid without a prescription where can i get clomid without rx where can i buy clomid prices
how to buy zithromax online: azithromycin over the counter – zithromax 250mg
http://doxycyclinesale.pro/# doxycycline 50mg
prednisone acetate can you buy prednisone prednisone 50 mg tablet cost
http://zithromax.pro/# buy generic zithromax online
canada pharmacy prednisone buy prednisone online no prescription or prednisone 50 mg prices
http://hearing-aids-columbus-oh.com/__media__/js/netsoltrademark.php?d=prednisonesale.pro where can i buy prednisone online without a prescription
over the counter prednisone cream prednisone ordering online and order prednisone 100g online without prescription buy prednisone online canada
This is my first time pay a quick visit at here and i am really happy to read everthing at one place
where to get cytotec pills: buy cytotec in usa – buy cytotec pills online cheap
http://doxycyclinesale.pro/# pharmacy prices for doxycycline
buy zithromax online australia cheap zithromax zithromax order online uk
order cheap clomid now: buy clomid – order clomid tablets
http://doxycyclinesale.pro/# doxycycline cost
prednisone over the counter prednisone medicine can you buy prednisone in canada
where can i order doxycycline doxycycline buy usa or doxycycline 100 mg tablet
http://achcompliancenetwork.com/__media__/js/netsoltrademark.php?d=doxycyclinesale.pro doxycycline 10mg tablets
generic for doxycycline doxycycline 100mg online pharmacy and doxycycline online pharmacy doxycycline 100 mg cost generic
where can i get cheap clomid price: buy clomid over the counter – clomid cost
https://doxycyclinesale.pro/# doxycycline 100mg uk
prednisone 12 mg average price of prednisone prednisone drug costs
canadian pharmacy ltd best online canadian pharmacy cheapest pharmacy canada
top 10 online pharmacy in india: п»їlegitimate online pharmacies india – online pharmacy india
mexico drug stores pharmacies: mexican online pharmacies prescription drugs – buying prescription drugs in mexico
mexico pharmacies prescription drugs best online pharmacies in mexico or pharmacies in mexico that ship to usa
http://opmatic.com/__media__/js/netsoltrademark.php?d=mexicopharm.pro mexico pharmacies prescription drugs
mexican drugstore online best online pharmacies in mexico and buying from online mexican pharmacy best online pharmacies in mexico
buy medicines online in india india pharmacy mail order buy medicines online in india
purple pharmacy mexico price list: mexican rx online – mexican rx online
https://indiapharm.pro/# world pharmacy india
best rated canadian pharmacy online canadian drugstore canada drugs online reviews
india pharmacy mail order: canadian pharmacy india – reputable indian pharmacies
canadianpharmacy com canadianpharmacyworld com or canadian family pharmacy
http://worldlodginggroup.net/__media__/js/netsoltrademark.php?d=canadianph.pro best canadian online pharmacy
buy drugs from canada canadian pharmacy 365 and reputable canadian online pharmacies canadapharmacyonline legit
canadianpharmacymeds: canadian 24 hour pharmacy – canadian pharmacies
canadian mail order pharmacy: canadian pharmacy service – ed drugs online from canada
buy prescription drugs from india: india online pharmacy – canadian pharmacy india
best online pharmacy india online pharmacy india or indian pharmacy paypal
http://landroverli.net/__media__/js/netsoltrademark.php?d=indiapharm.pro mail order pharmacy india
india pharmacy mail order canadian pharmacy india and pharmacy website india п»їlegitimate online pharmacies india
reputable mexican pharmacies online medication from mexico pharmacy buying prescription drugs in mexico
mexico drug stores pharmacies: mexico pharmacies prescription drugs – mexican drugstore online
mexican online pharmacies prescription drugs mexican mail order pharmacies or best online pharmacies in mexico
http://www.findtreatment.net/__media__/js/netsoltrademark.php?d=mexicopharm.pro best online pharmacies in mexico
mexican mail order pharmacies buying prescription drugs in mexico online and medicine in mexico pharmacies mexico drug stores pharmacies
Over the counter antibiotics pills: buy antibiotics online – Over the counter antibiotics pills
http://azithromycin.pro/# zithromax prescription online
ciprofloxacin generic price cipro for sale buy cipro online without prescription
onlinecanadianpharmacy 24: canada drugs online review – canadian king pharmacy
Я начала рисовать стрелки как только начала красится. Я уже не представляю себя без них если накрашенная. Опыт у меня уже лет десять точно. Но, конечно, бывает и такое, что одна стрелка получилась хорошо, а вторая никак не выходит. Даже не знаю от чего это зависит. Пожалуй, редко корейский макияж глаз ассоциируется у нас с кокетливыми черными стрелками. Но если Вы думаете, что кореянки игнорируют карандаши и подводки, мы Вас удивим: пользоваться ими они умеют и довольно искусно! Корейские бьюти-эксперты приготовили для нас невероятный выбор подводок – остается найти именно свою:) Такой вариант подводки пригодится как запасной, когда под рукой не будет оригинальной подводки. А если вы хотите скорректировать брови, очертите белым карандашом их форму, выбившиеся волоски выщипайте, затем внутреннюю часть брови заполните тенями или карандашом, подходящим под цвет волос. Затем растушуйте границу белого карандаша ватной палочкой.
https://www.studioani.net/bbs/board.php?bo_table=free&wr_id=32167
В каталоге 9/2018 в новинках вышла тушь для ресниц «Неизменный черный». Сложно найти город в России, куда мы еще не отправили заказ Тушь для ресниц с эффектом объема Aventurière – 386 рублей, Тушь для ресниц Yves Saint Laurent 17 мая 2009 Подарок*: Поддерживаемые форматы: JPG, JPEG, PNG, BMP, GIF. МАСКИ ДЛЯ ВОЛОС Инструкция, способы применения: Тушь для ресниц неизменный черный отзывы Использование материалов сайта запрещается без письменного согласия администрации. Смывается тушь без проблем обычным средством для демакияжа – гидрофильное масло, гель или пенка для умывания. Акции и предложения от нас Васильченко Очень хорошая недорогая тушь. Кисть коротковорсовая, слегка изогнутая, придает форму ресницам и слегка их приподнимает. Полимеры в составе помогают удержать изгиб в течение дня. Не сыпется, но немного пачкает веко при нанесении, нужно приноравливаться. Снимается с ресниц «колпачками» (нужно просто намочить и аккуратно стянуть пальцами), а это уже прерогатива дорогих люксовых тушей.
Türkiye’nin en büyük ve en çok sevilen e-ticaret sitesine hoş geldiniz! Türkiye’de online alışverişin en güçlü ismiyiz. Kurduğumuz hayaller ve ulaştığımız hedeflerle bugünlere ulaştık. Online alışverişi geliştirdik, hizmet anlayışımızla fark yarattık. Usta Nalbur Endüstriyel pazaryeri modeliyle binlerce ürün ve mağazayı milyonlarca müşteriyle buluşturmayı hedefleyerek hayata geçirdi. Hırdavat
buy antibiotics online: buy antibiotics over the counter – buy antibiotics over the counter
http://antibiotics.pro/# buy antibiotics online
zithromax capsules australia zithromax over the counter canada zithromax cost uk
buy antibiotics online: Over the counter antibiotics for infection – get antibiotics quickly
doxycycline vibramycin: doxycycline 100mg price – doxycycline vibramycin
how to order doxycycline doxycycline order online or buy doxycycline 100mg
http://call-center-resource.com/__media__/js/netsoltrademark.php?d=doryx.pro buy doxycycline
doxycycline mono cheap doxycycline online and doxycycline 100 mg cheap doxycycline online
canadian drug pharmacy: online canadian pharmacy – canadian drugs online
Türkiye’nin en büyük ve en çok sevilen e-ticaret sitesine hoş geldiniz! Türkiye’de online alışverişin en güçlü ismiyiz. Kurduğumuz hayaller ve ulaştığımız hedeflerle bugünlere ulaştık. Online alışverişi geliştirdik, hizmet anlayışımızla fark yarattık. Usta Nalbur Endüstriyel pazaryeri modeliyle binlerce ürün ve mağazayı milyonlarca müşteriyle buluşturmayı hedefleyerek hayata geçirdi. Hırdavat
buy antibiotics online: buy antibiotics from india – get antibiotics quickly
https://antibiotics.pro/# cheapest antibiotics
order doxycycline 100mg without prescription buy doxycycline without prescription buy doxycycline without prescription uk
doxycycline 500mg: doxycycline monohydrate – doxycycline 100mg dogs
vibramycin 100 mg: buy doxycycline cheap – doxycycline vibramycin
http://azithromycin.pro/# zithromax 250mg
п»їcipro generic where can i buy cipro online ciprofloxacin generic price
buy medicines online in india: canadian pharmacy india – indian pharmacy online
Çelik asma kat projesi için ulaştık, gayet ilgilendi ve olması gereken ekonomik, sağlam ve ergonomik dizyan (mimari+statik) şeklinde yardımcı oldu. Çelik Konstrüksiyon proje ve taahhüt işleriniz olursa kesinlikle tavsiye ediyorum.
buy cipro online canada: cipro pharmacy – cipro 500mg best prices
http://azithromycin.pro/# zithromax 1000 mg online
buy doxycycline hyclate 100mg without a rx doxycycline 500mg doxycycline without a prescription
buying from online mexican pharmacy: medicine in mexico pharmacies – mexico drug stores pharmacies
buy cipro online canada ciprofloxacin order online or buy ciprofloxacin
http://maapictures.com/__media__/js/netsoltrademark.php?d=ciprofloxacin.pro ciprofloxacin generic price
buy ciprofloxacin ciprofloxacin and buy cipro cheap ciprofloxacin 500mg buy online
ciprofloxacin generic: cipro for sale – buy cipro online without prescription
https://doryx.pro/# doxycycline 100mg capsules
cipro 500mg best prices п»їcipro generic cipro pharmacy
buying prescription drugs in mexico: medicine in mexico pharmacies – mexican drugstore online
ciprofloxacin: cipro pharmacy – buy ciprofloxacin over the counter
india pharmacy: world pharmacy india – buy prescription drugs from india
http://overthecounter.pro/# over the counter water pills
Really tons of good material!
thesis creator writing a thesis good thesis statement example thesis
over the counter anti inflammatories over the counter anti nausea medication or appetite suppressants over the counter
http://shopos2.com/__media__/js/netsoltrademark.php?d=overthecounter.pro over the counter blood pressure medicine
wellcare over the counter ordering strongest over the counter muscle relaxer and over the counter antifungal cream econazole nitrate cream over the counter
http://overthecounter.pro/# jock itch treatment over-the-counter
best sleeping pills over the counter: best ed pills over the counter – strongest antifungal over the counter
https://overthecounter.pro/# over the counter medication
chlorhexidine mouthwash over the counter over-the-counter drug best hemorrhoid treatment over the counter
potassium supplements over-the-counter: over the counter ed medication – over the counter anti inflammatory
https://overthecounter.pro/# over the counter bladder control
This is my first time pay a quick visit at here and i am really happy to read everthing at one place
https://overthecounter.pro/# appetite suppressants over the counter
Nice post. I learn something totally new and challenging on websites
over the counter stocks over the counter ed meds or uhc over the counter essentials 2019
http://filmlicense.net/__media__/js/netsoltrademark.php?d=overthecounter.pro over the counter medicine for uti
over the counter yeast infection treatment yeast infection treatment over the counter and amoxicillin over the counter over the counter erection pills
over the counter essentials united healthcare: over the counter ed meds – best over the counter appetite suppressant
http://overthecounter.pro/# uti medicine over the counter
blood pressure over the counter medication: over-the-counter drug – over the counter sinus medicine
http://overthecounter.pro/# potassium supplements over-the-counter
http://overthecounter.pro/# fluconazole over the counter
over the counter sleep aids that work over the counter ed meds over the counter tapeworm treatment for dogs
over the counter essentials: antibiotics over the counter – bronchial inhalers over the counter
is viagra over the counter antibiotic eye drops over the counter or antibiotics over the counter
http://proactivereminders.mobi/__media__/js/netsoltrademark.php?d=overthecounter.pro over the counter sleeping pills
walgreens sleep aids over the counter over the counter stocks and over the counter blood thinners over the counter birth control
https://overthecounter.pro/# cvs over the counter asthma inhaler
strongest antifungal over the counter: over the counter pill – over the counter antidepressants
canadian drugs cialis mail order pharmacy canada or canadian drugstore online
http://state-of-the-art.net/__media__/js/netsoltrademark.php?d=pillswithoutprescription.pro overseas online pharmacy
canadian neighbor pharmacy legit top 10 mail order pharmacies and canadian pharmacy prescription legal online pharmacies
I appreciated the prompt and friendly customer service I received from AIR RISE INC when I had questions about my orders from both airriseinc.com and istore.airriseinc.com. https://airriseinc.com/ https://istore.airriseinc.com/
best canadian pharcharmy online canadian online pharmacies ratings canadian drug prices
mexican pharmacies online cheap overseas online pharmacies or legitimate online pharmacies india
http://ww35.cincinnat.com/__media__/js/netsoltrademark.php?d=pillswithoutprescription.pro top 10 online pharmacies
mexican pharmacy online no prescription rx medicine and ed meds online canadian pharmacies no prescription
ed treatment drugs: cheap ed drugs – ed pills cheap
new ed treatments medication for ed dysfunction or cheap erectile dysfunction
http://nayso.net/__media__/js/netsoltrademark.php?d=edpills.pro herbal ed treatment
compare ed drugs ed drugs compared and medication for ed dysfunction best ed pills at gnc
levitra from canadian pharmacy reliable online canadian pharmacy or pharmacy in canada
http://oznutraceuticals.com/__media__/js/netsoltrademark.php?d=pillswithoutprescription.pro best pharmacy
canadian pharmacies online legitimate aarp canadian pharmacy and reliable online pharmacies pharmacy prices compare
buy ed pills top rated ed pills best erection pills
ed pills for sale: top rated ed pills – cheap erectile dysfunction
canada medications online top mail order pharmacies in usa canadian pharmacy pain meds
compare prescription drug prices canadian discount pharmacy or online pharmacies no prescriptions
http://www.clearmountainbanks.com/__media__/js/netsoltrademark.php?d=pillswithoutprescription.pro your discount pharmacy
aarp canadian pharmacy non perscription online pharmacies and prescription drugs online without doctor aarp canadian pharmacies
https://edpills.pro/# ed pills
https://pillswithoutprescription.pro/# canadian pharcharmy
I like the efforts you have put in this, regards for all the great content.
canada drug store mexican mail order pharmacy or most reliable canadian pharmacy
http://mobilitysolutionslv.org/__media__/js/netsoltrademark.php?d=pillswithoutprescription.pro rx online no prior prescription
canadian drug store mail order pharmacies and canada pharmacy no prescription cheapest canadian online pharmacy
aarp recommended canadian pharmacies: canadian online pharmacy no prescription – real canadian pharmacy
The website has a clean and modern design, making it easy to navigate and find what I was looking for. https://istore.airriseinc.com/
canadiandrugstore com canadian drug stores or best canadian pharmacy
http://www.landmanagementgroup.com/__media__/js/netsoltrademark.php?d=pillswithoutprescription.pro canadian discount pharmacy
pharmacy drug store online no rx canada pharmacy online canada pharmacies and meds online without doctor prescription canadian pharmacy
non prescription ed pills ed meds online treatments for ed
http://pillswithoutprescription.pro/# canada pharmaceutical online ordering
best otc ed pills ed meds online without doctor prescription or ed pills gnc
http://californiasoftwaredevelopment.com/__media__/js/netsoltrademark.php?d=edpills.pro online ed pills
pills for erection medication for ed dysfunction and new treatments for ed erection pills viagra online
most reputable canadian pharmacies: online pharmacies no prescriptions – prescription cost comparison
prescription pricing canadian online pharmacy no prescription canadian drugs online viagra
http://pillswithoutprescription.pro/# canada online pharmacies
canadian prescription pharmacy non perscription on line pharmacies or canada online pharmacies
http://1sourcetech.net/__media__/js/netsoltrademark.php?d=pillswithoutprescription.pro testosterone canadian pharmacy
verified canadian pharmacy best online pharmacies without a script and canadian pharmacy shop vipps accredited online pharmacy
Online medicine home delivery world pharmacy india or pharmacy website india
http://getorb.tv/__media__/js/netsoltrademark.php?d=indianpharmacy.pro india online pharmacy
world pharmacy india indian pharmacies safe and Online medicine order top online pharmacy india
india pharmacy п»їlegitimate online pharmacies india top 10 pharmacies in india
buy prescription drugs from india buy medicines online in india or reputable indian pharmacies
http://nakedexwife.com/__media__/js/netsoltrademark.php?d=indianpharmacy.pro best india pharmacy
Online medicine home delivery indian pharmacies safe and top 10 pharmacies in india online shopping pharmacy india
Good post! We will be linking to this particularly great post on our site. Keep up the great writing
indian pharmacies safe indianpharmacy com indian pharmacy paypal
reputable indian pharmacies top online pharmacy india or reputable indian online pharmacy
http://lifestyle-cabo.com/__media__/js/netsoltrademark.php?d=indianpharmacy.pro Online medicine order
top 10 pharmacies in india Online medicine order and Online medicine home delivery buy prescription drugs from india
https://indianpharmacy.pro/# reputable indian online pharmacy
best india pharmacy best india pharmacy or top online pharmacy india
http://bumpthesystem.com/__media__/js/netsoltrademark.php?d=indianpharmacy.pro cheapest online pharmacy india
п»їlegitimate online pharmacies india reputable indian online pharmacy and best online pharmacy india india pharmacy mail order
https://indianpharmacy.pro/# Online medicine home delivery
cheapest online pharmacy india Online medicine home delivery or top online pharmacy india
http://www.stagdist.com/__media__/js/netsoltrademark.php?d=indianpharmacy.pro india pharmacy mail order
indian pharmacies safe pharmacy website india and reputable indian online pharmacy best online pharmacy india
india pharmacy top online pharmacy india online shopping pharmacy india
http://indianpharmacy.pro/# reputable indian pharmacies
п»їlegitimate online pharmacies india indian pharmacy paypal or best online pharmacy india
http://hennessycentre.com/__media__/js/netsoltrademark.php?d=indianpharmacy.pro india pharmacy mail order
buy medicines online in india Online medicine home delivery and buy medicines online in india mail order pharmacy india
mail order pharmacy india reputable indian online pharmacy cheapest online pharmacy india
https://indianpharmacy.pro/# best online pharmacy india
online pet pharmacy: us online pharmacy – pharmacy home delivery
http://tadalafilfst.com/# tadalafil without prescription
online pharmacy no prescription canadian online pharmacy no prescription mail pharmacy
where can i buy tadalafil buy tadalafil 20 or tadalafil tablets 20 mg cost
http://www.sentryselectincometrusts.biz/__media__/js/netsoltrademark.php?d=tadalafilfst.com 5mg tadalafil generic
tadalafil 2.5 mg price generic tadalafil india and generic tadalafil from canada tadalafil 20mg lowest price
canadian pharmacy generic viagra canadian pharmacy near me or best canadian pharmacy
http://stemcelltechnology.cn/__media__/js/netsoltrademark.php?d=pharmst.pro pharmacy shop
buy online pharmacy uk mexican pharmacy and canadian pharmacies cialis canada online pharmacy
Takipçi satın al: Sosyal medya hesaplarınızın popülerliğini artırmak için tercih edilen bir yöntemdir. Ancak, organik takipçi kazanmak için kaliteli içerikler paylaşmanız daha önemlidir.
canadian pharmacy for viagra: canadian online pharmacy no prescription – online pharmacy viagra
https://edmeds.pro/# best ed medication
generic tadalafil medication tadalafil canada tadalafil tablets in india
online pharmacy quick delivery: canadian discount pharmacy – canadian pharmacy viagra 50 mg
http://edmeds.pro/# buy ed pills online
tadalafil 2.5 mg price buy tadalafil online tadalafil united states
canadian pharmacy without prescription: online pharmacy without scripts – international pharmacy no prescription
https://edmeds.pro/# generic ed drugs
where can i get tadalafil tadalafil canada generic tadalafil india
cures for ed ed meds online without doctor prescription – best erection pills
https://pharmst.pro/# best online pharmacy usa
what is the best ed pill buy ed pills online best drug for ed
Providerbayi.com, Türkiye’nin önde gelen smm panel sağlayıcılarından biridir. Sosyal medya hesaplarınızın büyümesi ve popülerlik kazanması için ihtiyacınız olan her türlü hizmeti sunar. TikTok takipçi, TikTok beğeni, Instagram takipçi gibi hizmetlerle sosyal medya hesaplarınızın etkileşimini artırabilirsiniz. Ayrıca, Instagram 1000 takipçi ve 365 gün garantili takipçi paketleri de mevcuttur.
pharmacy without prescription: canadian pharmacy meds – canada pharmacy online legit
https://edmeds.pro/# buy erection pills
purchase sildenafil citrate buy sildenafil online buy sildenafil online uk
tadalafil 10 mg canadian pharmacy – buy tadalafil online tadalafil prescription
http://pharmst.pro/# global pharmacy canada
tadalafil uk pharmacy buy tadalafil online where to buy tadalafil in singapore
tadalafil compare prices tadalafil pills 20mg or cheap tadalafil 5mg
http://hbc-online.com/__media__/js/netsoltrademark.php?d=tadalafilfst.com buy tadalafil europe
generic tadalafil 10mg tadalafil 2.5 mg online india and tadalafil 2.5 mg generic tadalafil without prescription
best canadian pharmacy online pharmacy com or professional pharmacy
http://whatcomtrans.org/__media__/js/netsoltrademark.php?d=pharmst.pro pharmacy discount coupons
canadian pharmacy india top 10 online pharmacy in india and online pharmacy cialis online pharmacy dubai
generic ed pills buy erection pills – ed treatment review
https://pharmst.pro/# indian pharmacies safe
best pills for ed buy ed pills online best ed medications
Güvenilir ve yetkili bir satış kanalı olan Prolisans.com, Windows 11 Pro Retail lisansınızı güvenle temin etmenizi sağlar. Orijinal ürün garantisiyle size en kaliteli deneyimi sunar. Sınırlı sayıdaki lisanslarla sınırlı süreli bir fırsat, hemen şimdi Prolisans.com’u ziyaret edin ve Windows 11 Pro’nun avantajlarını keşfetmek için adımınızı atın!
safe canadian pharmacy mail order pharmacy or medical pharmacy west
http://yourwaybrand.net/__media__/js/netsoltrademark.php?d=pharmst.pro canadian pharmacy sildenafil
canadian mail order pharmacy pharmacy canadian superstore and canadian pharmacy world coupon canada pharmacy online
non prescription ed pills ed meds online without doctor prescription – cheap erectile dysfunction pill
http://vsildenafil.pro/# sildenafil citrate uk
india pharmacy canadian pharmacy meds mexican pharmacy online
tadalafil 5 mg tablet coupon – tadalafil 20mg lowest price canadian online pharmacy tadalafil
http://edmeds.pro/# cheap erectile dysfunction pill
ed medication buy erection pills otc ed pills
https://edmeds.pro/# ed meds online without doctor prescription
online pharmacy drop shipping mexican pharmacies online drugs or pharmacy rx one
http://tampabaychildrenshealth.org/__media__/js/netsoltrademark.php?d=pharmst.pro legit canadian pharmacy online
mail order pharmacy canadian pharmacy and viagra online canadian pharmacy online pharmacy without insurance
very informative articles or reviews at this time.
canadian pharmacy king: us online pharmacy – online pharmacy fungal nail
http://tadalafilfst.com/# best pharmacy buy tadalafil
price of sildenafil tablets buy sildenafil tablets online sildenafil 1000 mg
sildenafil tablets 50mg – purchase sildenafil 100 mg sildenafil capsule
https://edmeds.pro/# buy ed pills online
buy tadalafil 20mg price in india cheap 10 mg tadalafil tadalafil cialis
sildenafil prescription australia – purchase sildenafil 100 mg sildenafil uk pharmacy
http://edmeds.pro/# cheap erectile dysfunction pill
male ed pills erection pills that work erectile dysfunction medicines
what is the best ed pill buy erection pills or male erection pills
http://westburymanorhome.com/__media__/js/netsoltrademark.php?d=edmeds.pro ed pills that work
cheapest ed pills online pills for ed and best erectile dysfunction pills best ed pills
I appreciate you sharing this blog post. Thanks Again. Cool.
ed drug prices best ed medication – top ed pills
http://vsildenafil.pro/# how can i get sildenafil
best online sildenafil prescription where to buy sildenafil in canada sildenafil 55mg
buy online sildenafil – cheap sildenafil sildenafil 20 mg for sale
https://pharmst.pro/# best canadian online pharmacy
canadian pharmacy tadalafil 20mg tadalafil usa pharmacy cost of tadalafil generic
This is my first time pay a quick visit at here and i am really happy to read everthing at one place
TikTok Takipçi ve Beğeni : TikTok, son yıllarda popülerliği giderek artan bir sosyal medya platformudur. Bu nedenle, TikTok hesabınızın büyütülmesi için takipçi ve beğeni satın almanız gerekebilir. Zedmedya.net olarak TikTok takipçi ve beğeni satın alma konusunda uzmanız. Tiktok hesabınızın organik büyümesine yardımcı olacak gerçek ve aktif takipçileri, istediğiniz miktarda satın alabilirsiniz. Ayrıca, videolarınızın daha fazla görüntülenmesini sağlamak için TikTok beğeni satın alabilirsiniz.
I’m really grateful for this post. It’s clear that you’ve put a lot of effort into providing comprehensive information. It has provided me with new insights and a fresh perspective. Your dedication to sharing valuable content is commendable. Thank you for your work!
naturally like your web site however you need to take a look at the spelling on several of your posts. A number of them are rife with spelling problems and I find it very bothersome to tell the truth on the other hand I will surely come again again.
I’m often to blogging and i really appreciate your content. The article has actually peaks my interest. I’m going to bookmark your web site and maintain checking for brand spanking new information.
I just like the helpful information you provide in your articles
I am truly thankful to the owner of this web site who has shared this fantastic piece of writing at at this place.
I just like the helpful information you provide in your articles
There is definately a lot to find out about this subject. I like all the points you made
I am truly thankful to the owner of this web site who has shared this fantastic piece of writing at at this place.
http://fastdeliverypill.com/# trusted canadian online pharmacy
canadian drug store cialis: legitimate canadian mail order pharmacies – canadian pharmacies selling cialis
non prescription medicine pharmacy: international pharmacies that ship to the usa – best mexican online pharmacies
This is really interesting, You’re a very skilled blogger. I’ve joined your feed and look forward to seeking more of your magnificent post. Also, I’ve shared your site in my social networks!
canadian pharmacy no rx needed: international pharmacies that ship to the usa – best canadian online pharmacies
canadian pharmacy presription and meds: prescription drugs without prior prescription – online pharmacies canada
trusted overseas pharmacies most trusted canadian online pharmacies or canadian pharmaceuticals online safe
http://findanexterminatornow.com/__media__/js/netsoltrademark.php?d=fastdeliverypill.com cheapest canadian pharmacy
no prescription online pharmacy best canadian online pharmacy and canadian drug medications without prescription
I appreciate you sharing this blog post. Thanks Again. Cool.
https://fastdeliverypill.com/# mexican pharmacies
prescription price comparison: canadian prescription drugstore – mexican pharmacy online medications
very informative articles or reviews at this time.
mexican pharmacies online: international pharmacies that ship to the usa – internet pharmacy no prior prescription
Ülkemizde ve dünyada sosyal medya kullanımı giderek artıyor. Bu da işletmelerin, markaların veya kişisel hesapların sosyal medyada var olması için büyük bir şans sağlıyor. Ancak sosyal medyada var olmak yeterli değildir. Etkileşim oranınızın yüksek olması, takipçi sayınızın artması önemlidir. Bunun için de Instagram takipçi satın almak veya Tiktok takipçi satın almak gibi yöntemlere başvuruluyor. Teknopatik.com, bu konuda en güvenilir siteler arasında yer alıyor. Teknopatik.com üzerinden yapacağınız Instagram takipçi satın alımı ile organik takipçi kazanabilirsiniz. Aynı şekilde Tiktok izlenme satın alımı ile de videolarınızın daha fazla görüntülenmesini sağlayabilirsiniz. Bunun yanı sıra Teknopatik.com’un smm paneli sayesinde, sosyal medya hesaplarınızın etkileşim oranını da arttırabilirsiniz. Teknopatik.com’un smm paneli, sosyal medya hesaplarınızı profesyonelleştirmek için ideal bir çözüm sunuyor. Sadece İnstagram ve Tiktok değil, aynı zamanda diğer sosyal medya platformları için de hizmetler sunuyorlar. Buna ek olarak, Teknopatik.com’un smm paneli ile spam hesaplardan gelen takipçiler yerine gerçek takipçiler kazanabilirsiniz. Bu sayede hesabınızın güvenilirliği artar. Teknopatik.com’un smm panelinden yararlanmak oldukça kolay. Tek yapmanız gereken siteye giriş yaparak, istediğiniz hizmeti seçmek ve ödeme işlemini gerçekleştirmek. Ödeme sonrası satın aldığınız takipçi veya izlenme hemen hesabınıza eklenecektir. Tüm bunların yanı sıra, Teknopatik.com’un smm paneli ile sosyal medya hesaplarınızı büyütmek için harcadığınız zamanı en aza indirebilirsiniz. Manüel olarak takipçi veya izlenme kazanmak yerine, smm paneli sayesinde otomatik olarak hesabınız büyür. Teknopatik.com’un smm paneli ile Instagram takipçi satın almak, Tiktok takipçi satın almak veya diğer sosyal medya platformları için hizmet satın almak işletmeniz, markanız veya kişisel hesabınız için önemli bir başarı faktörü olacaktır. Tek yapmanız gereken, Teknopatik.com üzerinden doğru hizmeti seçmek ve siparişi tamamlamak.
Ülkemizde ve dünyada sosyal medya kullanımı giderek artıyor. Bu da işletmelerin, markaların veya kişisel hesapların sosyal medyada var olması için büyük bir şans sağlıyor. Ancak sosyal medyada var olmak yeterli değildir. Etkileşim oranınızın yüksek olması, takipçi sayınızın artması önemlidir. Bunun için de Instagram takipçi satın almak veya Tiktok takipçi satın almak gibi yöntemlere başvuruluyor. Teknopatik.com, bu konuda en güvenilir siteler arasında yer alıyor. Teknopatik.com üzerinden yapacağınız Instagram takipçi satın alımı ile organik takipçi kazanabilirsiniz. Aynı şekilde Tiktok izlenme satın alımı ile de videolarınızın daha fazla görüntülenmesini sağlayabilirsiniz. Bunun yanı sıra Teknopatik.com’un smm paneli sayesinde, sosyal medya hesaplarınızın etkileşim oranını da arttırabilirsiniz. Teknopatik.com’un smm paneli, sosyal medya hesaplarınızı profesyonelleştirmek için ideal bir çözüm sunuyor. Sadece İnstagram ve Tiktok değil, aynı zamanda diğer sosyal medya platformları için de hizmetler sunuyorlar. Buna ek olarak, Teknopatik.com’un smm paneli ile spam hesaplardan gelen takipçiler yerine gerçek takipçiler kazanabilirsiniz. Bu sayede hesabınızın güvenilirliği artar. Teknopatik.com’un smm panelinden yararlanmak oldukça kolay. Tek yapmanız gereken siteye giriş yaparak, istediğiniz hizmeti seçmek ve ödeme işlemini gerçekleştirmek. Ödeme sonrası satın aldığınız takipçi veya izlenme hemen hesabınıza eklenecektir. Tüm bunların yanı sıra, Teknopatik.com’un smm paneli ile sosyal medya hesaplarınızı büyütmek için harcadığınız zamanı en aza indirebilirsiniz. Manüel olarak takipçi veya izlenme kazanmak yerine, smm paneli sayesinde otomatik olarak hesabınız büyür. Teknopatik.com’un smm paneli ile Instagram takipçi satın almak, Tiktok takipçi satın almak veya diğer sosyal medya platformları için hizmet satın almak işletmeniz, markanız veya kişisel hesabınız için önemli bir başarı faktörü olacaktır. Tek yapmanız gereken, Teknopatik.com üzerinden doğru hizmeti seçmek ve siparişi tamamlamak.
http://fastdeliverypill.com/# canadian pharmacies shipping to usa
I truly appreciate your technique of writing a blog. I added it to my bookmark site list and will
cheap drugs canada: order prescription medicine online without prescription – onlinepharmaciescanada com
safe canadian pharmacies online canadian drug store cialis or canadian drugs without any prescriptions
http://hancockfabric.net/__media__/js/netsoltrademark.php?d=fastdeliverypill.com canadian pharmacy for sildenafil
canadian drugstore canadian online pharmacies prescription drugs and medicine canada top 10 mail order pharmacies
canadian pharmacy no rx needed: international pharmacies that ship to the usa – order canadian drugs
canadian pharmacy generic viagra online pharmacies or canadian online pharmacies ratings
http://reputationcom-corruption.org/__media__/js/netsoltrademark.php?d=fastdeliverypill.com canadian pharmacy no prescription needed
best pharmacy canadian pharmacy products and canadian drugstore online online ed drugs no prescription
Fransa Medyum Yıldız Hoca Kimdir? Merhaba değerli dostlarım sizlere kısaca kendimden biraz bahsetmek isterim, 1967 Adıyaman Menzilde Hüseyin Efendinin oğlu olarak dünyaya geldim birden fazla medreselerde eğitim aldım, sizlerin tabiri ile çiğitten yetişme bir geçmişim oldu, aldığım eğitimler arasında ise vefk ilmi, hüddam ilmi, havas ilmi, ledun ilmi gibi sahip olduğum ilimler mevcuttur.
top canadian online pharmacy: drugs without a doctor s prescription – prescription without a doctor’s prescription
http://fastdeliverypill.com/# canadian pharmaceuticals online reviews
prescription drugs without prior prescription: drugs without a doctor s prescription – highest rated canadian pharmacies
reputable canadian pharmacy: canadian valley pharmacy – canadian pharmacy cheap
canadian pharmacy 24 onlinepharmaciescanada com or canadian online pharmacy
http://iwanttospend.com/__media__/js/netsoltrademark.php?d=canadiandrugs.pro best canadian pharmacy
canadian pharmacies compare best online canadian pharmacy and safe reliable canadian pharmacy canadian pharmacy prices
http://cialiswithoutprescription.pro/# buy cialis tadalafil
http://canadiandrugs.pro/# canadian pharmacies
http://canadiandrugs.pro/# pharmacies in canada that ship to the us
free cialis samples how to get doctor to prescribe cialis or cialis softtabs online
http://williamtkoch.net/__media__/js/netsoltrademark.php?d=cialiswithoutprescription.pro cheap cialis with dapoxetine
cialis shipping buy cialis black and pharmacy 365 cialis cialis asia
https://canadiandrugs.pro/# canada drugs
Excelente información. Les mandamos cordiales saludos desde la web donde comprobar los resultados de EuroDreams.
cialis substitutes purchase cialis in montreal or how to use cialis 20mg
http://thefoundationforaidsresearch.com/__media__/js/netsoltrademark.php?d=cialiswithoutprescription.pro cialis with dapoxetine paypal
cialis generic 20 mg 30 pills cialis discussion forum and cialisblack cialis bestellen deutschland
canadian pharmacy canada drug pharmacy or trustworthy canadian pharmacy
http://onlinetranscriptreview.com/__media__/js/netsoltrademark.php?d=canadiandrugs.pro buying drugs from canada
canadian discount pharmacy reputable canadian pharmacy and canada pharmacy 24h recommended canadian pharmacies
coupons for cialis: buy Cialis online – cost of cialis 20mg
https://cialiswithoutprescription.pro/# costa rica cialis sale
Videothoracoscopy in the diagnosis of intrathoracic pathology early experience priligy 60 mg price Giordano s research group at the Oncology Research Center of Mercogliano CROM, IRCCS Pascale Foundation, Naples, and by the funding that one of the first authors, Dr
http://pharmacyindia.pro/# indian pharmacy online
https://pharmacyindia.pro/# indianpharmacy com
buy cialis online buy cialis black or cialis australia no prescription
http://uscoinsgallery.com/__media__/js/netsoltrademark.php?d=cialiswithoutprescription.pro cialis generic reviews
where can i buy cialis in singapore cialis for daily use side effects and what happens when you mix cialis with grapefruit? buy cialis no prescription uk
http://canadiandrugs.pro/# canada rx pharmacy
cialis soft tabs online cialis dapoxetine australia or by cialis tablets in frankfurt pharmacy
http://4plex.com/__media__/js/netsoltrademark.php?d=cialiswithoutprescription.pro canadian pharmacy viagra & cialis
cialis no prescription needed pay cialis with pay pal and best online pharmacy for cialis cialis online no prior prescription
canada drug pharmacy canadian pharmacy store or canadian pharmacy meds
http://liljenquist.com/__media__/js/netsoltrademark.php?d=canadiandrugs.pro canadian online drugstore
canadian pharmacy 365 the canadian pharmacy and canadian pharmacies comparison online canadian drugstore
http://canadiandrugs.pro/# precription drugs from canada
For the reason that the admin of this site is working, no uncertainty very quickly it will be renowned, due to its quality contents.
generic cialis pills us online pharmacy cialis daily price or cialis generic dapoxetine
http://informationportraits.net/__media__/js/netsoltrademark.php?d=cialiswithoutprescription.pro shopping for cialis
cialis 20mg sell buy generic cialiss and cialis replacement how much is cialis in canada
https://pharmacyindia.pro/# cheapest online pharmacy india
https://pharmacyindia.pro/# indian pharmacy
order generic cialis by phone what happens when you mix cialis with grapefruit? or discount cialis
http://corporate911.com/__media__/js/netsoltrademark.php?d=cialiswithoutprescription.pro cialis canada sale
cialis pay with paypal cialis buy cheap with master card and cialis international cialis with dapoxetine paypal
canadian drugstore online: legitimate canadian mail order pharmacy – canadian pharmacy in canada
https://cialiswithoutprescription.pro/# viagra and cialis
canadian drugs pharmacy trustworthy canadian pharmacy or best rated canadian pharmacy
http://cisnerosinternationalcorp.org/__media__/js/netsoltrademark.php?d=canadiandrugs.pro reputable canadian pharmacy
canadian neighbor pharmacy reliable canadian pharmacy and best canadian pharmacy canadian pharmacy cheap
Awesome! Its genuinely remarkable post, I have got much clear idea regarding from this post
indian pharmacies safe: world pharmacy india – Online medicine home delivery
com 20 E2 AD 90 20Viagranow 20 20Viagra 20Xl 20800 20Mg viagranow Comparatively, LVMH s Celine and Fendi are estimated to make around 500 million euros while fast growing Marc Jacobs makes nearly 1 billion in annual sales including license revenues and some of those sales would be lost in the event of an IPO priligy dapoxetina 30mg nos eua Dragon pharma is definitely good
I really like reading through a post that can make men and women think. Also, thank you for allowing me to comment!
افضل موقع ارقام بنات سكس
order cytotec online: cytotec pills buy online – where to get cytotec pills
п»їcipro generic ciprofloxacin order online or ciprofloxacin over the counter
http://tarrataxinternational.net/__media__/js/netsoltrademark.php?d=ciproantibiotic.pro buy cipro
ciprofloxacin mail online buy ciprofloxacin tablets and ciprofloxacin generic п»їcipro generic
cheap propecia no prescription Or where it is used Doxycycline is used to treat infections caused by bacteria, including pneumonia and other respiratory tract infections; certain infections of the skin or eye; infections of the lymphatic, intestinal, genital, and urinary systems; and certain other infections that are spread by ticks, lice, mites, infected animals
Bodrum Havuz güler yüzlü ve deneyimli personeli ile yüzme havuzu sektörünün öncülerinden olup, profesyonel anlamda proje ile havuzun alt yapısından başlayarak mekanik, tesisat, çevre düzenlemesi ve servisine kadar bütün aşamalarıyla anahtar teslimi alternatif havuz teknikleri kullanan ender firmalardandır.
buy misoprostol over the counter buy cytotec online fast delivery or buy cytotec online
http://lookforone.com/__media__/js/netsoltrademark.php?d=cytotecpills.pro buy cytotec over the counter
Misoprostol 200 mg buy online purchase cytotec and cytotec online cytotec pills buy online
You’re so awesome! I don’t believe I have read a single thing like that before. So great to find someone with some original thoughts on this topic. Really.. thank you for starting this up. This website is something that is needed on the internet, someone with a little originality!
http://cytotecpills.pro/# where to get cytotec pills
https://prednisonepills.pro/# can i buy prednisone online without a prescription
Cytotec 200mcg price п»їcytotec pills online or order cytotec online
http://edgariwilliams.com/__media__/js/netsoltrademark.php?d=cytotecpills.pro how to get cytotec online
buy cytotec in usa cytotec online and buy cytotec over the counter order cytotec online
canadian online pharmacy prednisone: prednisone for sale – prednisone 10mg tablet cost
gerçekten güzel bir yazı olmuş. Yanlış bildiğimiz bir çok konu varmış. Teşekkürler.
https://prednisonepills.pro/# 20 mg of prednisone
Belçika Medyum Hoca Aramalarınıza Son ? 40 Yıllık Uzmanlık Ve Tecrübesi İle Belçika Medyum Haluk Hoca Sizlere En İyi Medyum Hizmeti Veriyor
http://ciproantibiotic.pro/# cipro
ciprofloxacin generic price buy ciprofloxacin tablets or buy cipro online without prescription
http://allenlavender.com/__media__/js/netsoltrademark.php?d=ciproantibiotic.pro purchase cipro
buy cipro cheap ciprofloxacin over the counter and antibiotics cipro cipro ciprofloxacin
Nice post. I learn something totally new and challenging on websites
buy cytotec in usa: where to get cytotec pills – Abortion pills online
cytotec abortion pill buy cytotec in usa or buy cytotec over the counter
http://ken-fisher-institute.org/__media__/js/netsoltrademark.php?d=cytotecpills.pro where to get cytotec pills
buy cytotec pills online cheap buy cytotec pills and order cytotec online cytotec online
http://prednisonepills.pro/# can you buy prednisone over the counter uk
cytotec buy online usa cytotec buy online usa or buy cytotec over the counter
http://anesthesiahistorymuseum.org/__media__/js/netsoltrademark.php?d=cytotecpills.pro how to get cytotec online
Misoprostol 200 mg buy online where to get cytotec pills and buy cytotec over the counter order cytotec online
http://ciproantibiotic.pro/# buy ciprofloxacin
https://pharmfd.online/# professional pharmacy
us online pharmacy: canadian pharmacy without prescription – online pharmacy com
indian pharmacy paypal: india pharmacy mail order – mail order pharmacy india
best ed pill best treatment for ed or erectile dysfunction drug
http://benefitlink.com/__media__/js/netsoltrademark.php?d=edpillsfd.com medicine for erectile
ed pills cheap erectile dysfunction drug and erectile dysfunction drugs compare ed drugs
Medyumlar, genellikle geleceği tahmin etme, spiritüel danışmanlık, ruhlarla iletişim kurma, aura okuma, enerji çalışmaları, şifa uygulamaları gibi alanlarda hizmet verirler. Her medyum farklı bir yetenek ve uzmanlık alanına sahip olabilir. Bazıları sadece bir alanda uzmanlaşırken, bazıları ise birden fazla yeteneği kullanabilir.
ed pills online: buy ed pills online – ed drugs
http://edpillsfd.com/# cure ed
best ed pills gnc ed pills or best erectile dysfunction pills
http://vmus.adu.org.za/vm_search.php?database=vimma&prj_acronym=MammalMAP&db=vimma&URL=https://edpillsfd.com&Logo=images/vimma_logo.png&Headline=Virtual ed meds online without doctor prescription
ed treatment drugs best ed treatment pills and medicine erectile dysfunction new ed pills
over the counter erectile dysfunction pills: erectile dysfunction drug – natural ed remedies
best treatment for ed cures for ed or new treatments for ed
http://coldfighter.com/__media__/js/netsoltrademark.php?d=edpillsfd.com erectile dysfunction medications
ed treatment review non prescription erection pills and best ed pills online best pills for ed
mail order pharmacy india: indian pharmacy online – buy medicines online in india
best india pharmacy: top 10 pharmacies in india – best india pharmacy
https://edpillsfd.com/# what is the best ed pill
ed pills comparison: erectile dysfunction pills – new treatments for ed
over the counter erectile dysfunction pills best ed medication or pills erectile dysfunction
http://lawyerclick.com/__media__/js/netsoltrademark.php?d=edpillsfd.com best over the counter ed pills
male erection pills the best ed pills and best over the counter ed pills top ed drugs
ed pills cheap ed pill or ed pills online
http://globelegal.com/__media__/js/netsoltrademark.php?d=edpillsfd.com buying ed pills online
new treatments for ed new ed pills and impotence pills what are ed drugs
http://indiapharmfd.com/# п»їlegitimate online pharmacies india
Türkiyenin En büyük Sohbet Sitesi Özgürce Sohbet chat odaları
ed meds online without doctor prescription: erection pills online – cure ed
compare ed drugs: buy ed pills online – ed drugs compared
non prescription ed drugs ed remedies or best male enhancement pills
http://nissannewsglobal-gtr.com/__media__/js/netsoltrademark.php?d=edpillsfd.com erectile dysfunction medications
ed drugs list impotence pills and best pill for ed generic ed drugs
Minor 4 methyclothiazide, sulfamethoxazole online viagra reviews You ve been recently hospitalized If you are immunosuppressed or have any serious chronic health issues, for example, uncontrolled diabetes
https://indiapharmfd.online/# online shopping pharmacy india
generic ed pills best erection pills or ed medication
http://deltavanlines.net/__media__/js/netsoltrademark.php?d=edpillsfd.com top ed pills
pills for ed best ed pills online and otc ed pills pills for erection
rx pharmacy: canadian mail order pharmacy – canada pharmacy reviews
Good post! We will be linking to this particularly great post on our site. Keep up the great writing
mail order pharmacy india: best india pharmacy – indian pharmacies safe
https://pharmfd.com/# canadian pharmacy world coupon
pills erectile dysfunction: ed meds online without doctor prescription – ed pills that really work
cure ed what is the best ed pill or ed meds online
http://www.bostonterrierpuppies.com/__media__/js/netsoltrademark.php?d=edpillsfd.com otc ed pills
treatment for ed medication for ed dysfunction and erectile dysfunction medications drugs for ed
Pretty! This has been a really wonderful post. Many thanks for providing these details.
For the reason that the admin of this site is working, no uncertainty very quickly it will be renowned, due to its quality contents.
very informative articles or reviews at this time.
Very well presented. Every quote was awesome and thanks for sharing the content. Keep sharing and keep motivating others.
There is definately a lot to find out about this subject. I like all the points you made
This is really interesting, You’re a very skilled blogger. I’ve joined your feed and look forward to seeking more of your magnificent post. Also, I’ve shared your site in my social networks!
I like the efforts you have put in this, regards for all the great content.
This is really interesting, You’re a very skilled blogger. I’ve joined your feed and look forward to seeking more of your magnificent post. Also, I’ve shared your site in my social networks!
I really like reading through a post that can make men and women think. Also, thank you for allowing me to comment!
Hi there to all, for the reason that I am genuinely keen of reading this website’s post to be updated on a regular basis. It carries pleasant stuff.
This is really interesting, You’re a very skilled blogger. I’ve joined your feed and look forward to seeking more of your magnificent post. Also, I’ve shared your site in my social networks!
very informative articles or reviews at this time.
very informative articles or reviews at this time.
This was beautiful Admin. Thank you for your reflections.
This was beautiful Admin. Thank you for your reflections.
Nice post. I learn something totally new and challenging on websites
You’re so awesome! I don’t believe I have read a single thing like that before. So great to find someone with some original thoughts on this topic. Really.. thank you for starting this up. This website is something that is needed on the internet, someone with a little originality!
You’re so awesome! I don’t believe I have read a single thing like that before. So great to find someone with some original thoughts on this topic. Really.. thank you for starting this up. This website is something that is needed on the internet, someone with a little originality!
Clinical and Experimental Obstetetrics and Gynecology commander levitra en ligne
Buy Kamagra online next day delivery: Oral Jelly 100mg Kamagra price – kamagra tablets usa
https://dapoxetine.pro/# Buy Dapoxetine
Oral Jelly 100mg Kamagra price: kamagra – kamagra
Kamagra Oral Jelly 100mg buy online Kamagra Oral Jelly 100mg buy online or Oral Jelly 100mg Kamagra price
http://www.pediatricdermatologynewyork.net/__media__/js/netsoltrademark.php?d=kamagratabs.pro Kamagra Oral Jelly 100mg buy online
Buy Kamagra online next day delivery Kamagra Gold 100mg price and Kamagra Oral Jelly 100mg buy online cheap kamagra oral jelly
I just like the helpful information you provide in your articles
Kamagra Oral Jelly 100mg buy online: Kamagra Oral Jelly for sale – Oral Jelly 100mg Kamagra price
https://kamagratabs.pro/# Kamagra Gold 100mg price
kamagra kamagra or kamagra
http://christinecummings.com/__media__/js/netsoltrademark.php?d=kamagratabs.pro kamagra tablets usa
Oral Jelly 100mg Kamagra price buy kamagra online and kamagra kamagra tablets usa
can i buy generic propecia prices: buy propecia – where to get generic propecia pill
https://dapoxetine.pro/# priligy
where buy generic propecia online how to buy propecia no prescription or where buy propecia
http://passionatepaths.com/__media__/js/netsoltrademark.php?d=propecia.pro can i purchase cheap propecia online
buying generic propecia for sale where to buy propecia price and where to get cheap propecia without a prescription generic propecia prices
Priligy price: buy priligy – priligy over the counter
https://propecia.pro/# cost generic propecia without dr prescription
Buy Kamagra online next day delivery: cheap kamagra oral jelly – kamagra
https://kamagratabs.pro/# Buy Kamagra online next day delivery
Kamagra Gold 100mg price Oral Jelly 100mg Kamagra price or Kamagra Oral Jelly for sale
http://derekbwarner.com/__media__/js/netsoltrademark.php?d=kamagratabs.pro cheap kamagra oral jelly
Kamagra Gold 100mg price kamagra and buy kamagra online Buy Kamagra online next day delivery
kamagra Buy Kamagra online next day delivery or Oral Jelly 100mg Kamagra price
http://1hotels.biz/__media__/js/netsoltrademark.php?d=kamagratabs.pro Kamagra Oral Jelly 100mg buy online
Oral Jelly 100mg Kamagra price Buy Kamagra online next day delivery and buy kamagra online Oral Jelly 100mg Kamagra price
can i buy propecia no prescription: Finasteride prescription online – buying generic propecia without insurance
https://kamagratabs.pro/# Kamagra Gold 100mg price
Kamagra Oral Jelly 100mg buy online: Kamagra Oral Jelly for sale – Kamagra Gold 100mg price
https://kamagratabs.pro/# cheap kamagra oral jelly
where can i get propecia without dr prescription can i buy generic propecia no prescription or cost of cheap propecia now
http://charming-inn.com/__media__/js/netsoltrademark.php?d=propecia.pro where to buy cheap propecia now
cost of generic propecia tablets cost of generic propecia pills and can i purchase generic propecia without rx can you get propecia tablets
cheap kamagra oral jelly: Kamagra Gold 100mg price – kamagra tablets usa
https://dapoxetine.pro/# priligy over the counter
Hi there! This post couldn’t be written any better! Reading through this post reminds me of my previous room mate! He always kept talking about this. I will forward this article to him. Pretty sure he will have a good read. Thank you for sharing!
buy kamagra online Kamagra Oral Jelly for sale or kamagra tablets usa
http://learningtreecamps.com/__media__/js/netsoltrademark.php?d=kamagratabs.pro Kamagra Gold 100mg price
buy kamagra online Kamagra Oral Jelly 100mg buy online and kamagra buy kamagra online
لا داعي للبحث اكتر عن ارقام بنات و ارقام بنات واتساب متصل الان.. في موقعنا يمكنك الاتصال المباشر مع اي بنت متصلة الان و اجراءمكالمة صوتية جنسية و سكس فون.. كل ما عليك فعله هو شحن رصيدك و الاتصال مع البنت مباشرة
cheap kamagra oral jelly cheap kamagra oral jelly or Kamagra Oral Jelly for sale
http://anti-counterfeiting-conference.com/__media__/js/netsoltrademark.php?d=kamagratabs.pro buy kamagra online
Buy Kamagra online next day delivery Kamagra Oral Jelly for sale and cheap kamagra oral jelly Oral Jelly 100mg Kamagra price
can i buy generic propecia: Buy Finasteride online – where to get generic propecia
buy priligy: dapoxetine – Priligy tablets
https://propecia.pro/# can you buy propecia prices
buy propecia without prescription: where buy cheap propecia without insurance – can i get propecia online
https://dapoxetine.pro/# Priligy 60 mg online
where to buy propecia for sale can i buy propecia or cost of propecia without insurance
http://spurcap.biz/__media__/js/netsoltrademark.php?d=propecia.pro buy cheap propecia online
can i buy propecia prices generic propecia prices and cost propecia without rx buying generic propecia no prescription
wifi gizli kamera
Awesome! Its genuinely remarkable post, I have got much clear idea regarding from this post
Kamagra 100mg Oral Jelly 100mg Kamagra price or Buy Kamagra online next day delivery
http://digitalbluelines.com/__media__/js/netsoltrademark.php?d=kamagratabs.pro Oral Jelly 100mg Kamagra price
Oral Jelly 100mg Kamagra price kamagra tablets usa and kamagra Kamagra Oral Jelly 100mg buy online
buy priligy: dapoxetine – priligy
https://dapoxetine.pro/# buy priligy
Priligy tablets: Priligy price – Priligy price
https://dapoxetine.pro/# buy priligy
priligy: Priligy 60 mg online – Priligy price
https://propecia.pro/# where can i buy generic propecia pills
cheap kamagra oral jelly: Kamagra Gold 100mg price – Oral Jelly 100mg Kamagra price
Kamagra 100mg Buy Kamagra online next day delivery or Buy Kamagra online next day delivery
http://beihaojia.com/__media__/js/netsoltrademark.php?d=kamagratabs.pro Oral Jelly 100mg Kamagra price
Kamagra 100mg Buy Kamagra online next day delivery and Oral Jelly 100mg Kamagra price Kamagra Gold 100mg price
Kamagra Oral Jelly for sale: Buy Kamagra online next day delivery – kamagra tablets usa
https://propecia.pro/# cost generic propecia without insurance
Kamagra Oral Jelly 100mg buy online Kamagra Oral Jelly for sale or Oral Jelly 100mg Kamagra price
http://skinnyoption.com/__media__/js/netsoltrademark.php?d=kamagratabs.pro Kamagra Oral Jelly for sale
Kamagra Oral Jelly 100mg buy online Oral Jelly 100mg Kamagra price and Buy Kamagra online next day delivery Oral Jelly 100mg Kamagra price
get generic propecia without dr prescription: Buy Finasteride online – where buy cheap propecia
can you get cheap propecia without rx: finasteride over the counter – where buy cheap propecia price
https://propecia.pro/# how to buy propecia tablets
where to buy generic propecia prices: Best place to buy finasteride – can i purchase generic propecia pill
https://dapoxetine.pro/# dapoxetine
cheap kamagra oral jelly Kamagra Oral Jelly 100mg buy online or kamagra
http://www.actthreemedia.com/__media__/js/netsoltrademark.php?d=kamagratabs.pro Oral Jelly 100mg Kamagra price
Buy Kamagra online next day delivery cheap kamagra oral jelly and Oral Jelly 100mg Kamagra price Oral Jelly 100mg Kamagra price
kamagra Kamagra Gold 100mg price or Kamagra Gold 100mg price
http://www.jatagan.net/__media__/js/netsoltrademark.php?d=kamagratabs.pro Kamagra Oral Jelly 100mg buy online
Buy Kamagra online next day delivery Oral Jelly 100mg Kamagra price and buy kamagra online kamagra tablets usa
where can i get cheap propecia pills: finasteride over the counter – can you buy generic propecia no prescription
https://dapoxetine.pro/# dapoxetine
Good post! We will be linking to this particularly great post on our site. Keep up the great writing
cheap kamagra oral jelly: Buy Kamagra online next day delivery – Oral Jelly 100mg Kamagra price
https://propecia.pro/# how to get cheap propecia without dr prescription
Oral Jelly 100mg Kamagra price: Kamagra Oral Jelly for sale – Buy Kamagra online next day delivery
I do not even understand how I ended up here, but I assumed this publish used to be great
whoah this blog is magnificent i like reading your posts.
Keep up the great work! You realize, many individuals are searching round for
this info, you can help them greatly.
priligy: dapoxetine – dapoxetine
https://dapoxetine.pro/# dapoxetine
Priligy price: priligy – Priligy tablets
Kamagra Oral Jelly for sale Oral Jelly 100mg Kamagra price or Oral Jelly 100mg Kamagra price
http://rogerspark.net/__media__/js/netsoltrademark.php?d=kamagratabs.pro Kamagra Oral Jelly for sale
kamagra tablets usa Kamagra 100mg and buy kamagra online Kamagra 100mg
dapoxetine online USA: Buy Dapoxetine – dapoxetine online USA
https://propecia.pro/# can i purchase propecia pill
priligy over the counter: priligy over the counter – Buy Dapoxetine
https://kamagratabs.pro/# kamagra tablets usa
п»їbest mexican online pharmacies: mexican mail order pharmacies – mexican rx online
canadian pharmacy no scripts: cheap canadian pharmacy – canadian pharmacy in canada
online shopping pharmacy india: buy medicines online in india – indian pharmacy online
ordering drugs from canada canadian online pharmacy or best canadian online pharmacy reviews
http://helpsolvethecruelmystery.us/__media__/js/netsoltrademark.php?d=canadapharmcertified.pro canadian pharmacy
canadadrugpharmacy com www canadianonlinepharmacy and pharmacy in canada canadian pharmacy 24h com
canadapharmacyonline reddit canadian pharmacy or canadian online pharmacy
http://consilientstrategies.net/__media__/js/netsoltrademark.php?d=canadapharmcertified.pro canada drugs online
global pharmacy canada is canadian pharmacy legit and online canadian pharmacy review canadian pharmacy
best online pharmacies in mexico: purple pharmacy mexico price list – п»їbest mexican online pharmacies
mexican online pharmacies prescription drugs: best online pharmacies in mexico – mexican online pharmacies prescription drugs
best rated canadian pharmacy: best canadian pharmacy to buy from – canadian pharmacy meds
canadian pharmacy meds review canada ed drugs or canadian pharmacy king reviews
http://lawschoolloans.info/__media__/js/netsoltrademark.php?d=canadapharmcertified.pro legitimate canadian pharmacy
certified canadian international pharmacy canadian pharmacy drugs online and canadian pharmacy prices reputable canadian online pharmacies
kamerali kolye
best canadian pharmacy online medication canadian pharmacy or ed meds online canada
http://namiexchange.net/__media__/js/netsoltrademark.php?d=canadapharmcertified.pro ed meds online canada
escrow pharmacy canada canadian pharmacy scam and canadian pharmacy 24h com safe trusted canadian pharmacy
indian pharmacy paypal: top 10 online pharmacy in india – top online pharmacy india
farkedilmeyen kameralar
pharmacy rx world canada canadian drugs online or canadian pharmacy
http://worldwideblackjacktour.net/__media__/js/netsoltrademark.php?d=canadapharmcertified.pro canadian pharmacy no rx needed
canadian pharmacy ltd canadian pharmacy online and canadian pharmacy review reliable canadian pharmacy reviews
ed meds online canada: northern pharmacy canada – canada drugs online reviews
pharmacy website india: mail order pharmacy india – п»їlegitimate online pharmacies india
Bu konu hakkında bilgi vermeniz çok güzel. Genellikle türkçe içerikler az oluyor fakat böyle güzel içerikler görmek ve okumak çok zevkli.
best online pharmacies in mexico: medication from mexico pharmacy – medication from mexico pharmacy
continuously i used to read smaller posts which also clear their motive, and that is also happening with this piece of writing which I am reading here.
buy medicines online in india: mail order pharmacy india – indian pharmacy online
canadian online pharmacy legitimate canadian mail order pharmacy or prescription drugs canada buy online
http://retirementuniversity.biz/__media__/js/netsoltrademark.php?d=canadapharmcertified.pro pharmacy in canada
legitimate canadian pharmacies canada pharmacy and cheapest pharmacy canada my canadian pharmacy
top 10 pharmacies in india: online pharmacy india – canadian pharmacy india
This was beautiful Admin. Thank you for your reflections.
canadian drugstore online ed drugs online from canada or canadian drug prices
http://pokeys-secret.com/__media__/js/netsoltrademark.php?d=canadapharmcertified.pro best canadian online pharmacy
canadian pharmacy sarasota canadian drugs online and canadian pharmacies comparison www canadianonlinepharmacy
Nice post. I learn something totally new and challenging on websites
india online pharmacy: best online pharmacy india – canadian pharmacy india
Takipteyim kaliteli ve güzel bir içerik olmuş dostum.
buying from canadian pharmacies canadian pharmacy meds or recommended canadian pharmacies
http://davidweekleydallas.org/__media__/js/netsoltrademark.php?d=canadapharmcertified.pro recommended canadian pharmacies
canada pharmacy 24h canadian compounding pharmacy and canada pharmacy 24h rate canadian pharmacies
Very well presented. Every quote was awesome and thanks for sharing the content. Keep sharing and keep motivating others.
best online pharmacies in mexico: pharmacies in mexico that ship to usa – mexico pharmacies prescription drugs
Me encanta cómo incorporas historias personales en tus publicaciones. Aporta una conexión humana que es muy apreciada.
best canadian pharmacy online legal canadian pharmacy online or vipps canadian pharmacy
http://seattlelawgroup.com/__media__/js/netsoltrademark.php?d=canadapharmcertified.pro canada rx pharmacy
best canadian pharmacy northwest pharmacy canada and pharmacy in canada legitimate canadian online pharmacies
Good post! We will be linking to this particularly great post on our site. Keep up the great writing
This is my first time pay a quick visit at here and i am really happy to read everthing at one place. Thanks again for sharing this!
п»їlegitimate online pharmacies india: buy medicines online in india – п»їlegitimate online pharmacies india
northwest pharmacy canada: my canadian pharmacy – legit canadian pharmacy
buying drugs from canada: the canadian drugstore – canadian pharmacy oxycodone
Excellent blog here! Also your website quite a bit up fast! What host are you the use of? Can I am getting your associate link in your host? I desire my site loaded up as fast as yours lol
canadian world pharmacy: canadian pharmacy ltd – prescription drugs canada buy online
mexican online pharmacies prescription drugs: buying from online mexican pharmacy – п»їbest mexican online pharmacies
No puedo agradecerte lo suficiente por compartir esta valiosa información. Ha sido de gran ayuda para mí y estoy seguro de que para muchos otros también.
I like the efforts you have put in this, regards for all the great content.
медицинская справка 2023
canada pharmacy online canada pharmacies: legitimate canadian mail order pharmacies – canadian pharmacies that are legit
https://edpill.pro/# cheap erectile dysfunction pills online
canadian pharmacies without prescriptions: prescription drugs without the prescription – onlinepharmaciescanada com
cheap erectile dysfunction pill: Cheapest ED pills – erectile dysfunction medicines
http://sildenafilpills.pro/# sildenafil 50 mg tablet price
Incredible quest there. What occurred after? Thanks!
canadian drug pharmacy certified canadian pharmacy or top mail order pharmacies
http://condomofthemonthclub.com/__media__/js/netsoltrademark.php?d=fastpills.pro safe reliable canadian pharmacy
compare prices prescription drugs canadian online pharmacies ratings and drug store online online canadian pharmaceutical companies
Estoy agradecido por este espacio donde puedo aprender, reflexionar y conectarme con personas afines. Es un verdadero regalo.
sildenafil 50mg: sildenafil 100 mg generic price – price of sildenafil 50 mg
https://sildenafilpills.pro/# sildenafil online europe
çok yararlı bir paylaşım olmuş teşekkür ederim çok işime yarıcak.
safe online pharmacies safe canadian pharmacy or canadian pharmacy without prescription
http://kmh.studentexpress.com/__media__/js/netsoltrademark.php?d=fastpills.pro perscription drugs without prescription
canadian pharmacy products best pharmacy prices and canadian pharmacy store canadian pharma companies
non prescription ed pills: best male enhancement pills – cheap ed pills
https://sildenafilpills.pro/# sildenafil 100
certified online canadian pharmacies canadian mail order viagra or prescription drugs online without
http://esri-jp.com/__media__/js/netsoltrademark.php?d=fastpills.pro canada pharmacy online canada pharmacies
best online pharmacies without prescription online pharmacy no prescription necessary and medications with no prescription online meds
Wow that was unusual. I just wrote an incredibly
long comment but after I clicked submit my comment didn’t appear.
Grrrr… well I’m not writing all that over again. Regardless,
just wanted to say fantastic blog!
Estoy impresionado por tu habilidad para presentar ideas complejas de manera clara y concisa. Es un talento admirable.
canada drug store price prescriptions or rx online no prior prescription
http://www.almazon.com/__media__/js/netsoltrademark.php?d=fastpills.pro discount online canadian pharmacy
online ed medication no prescription canadian pharmacy world reviews and canadian online pharmacies ratings canadian pharmacy generic
Přípravek Kamagra mi pomohl znovu prožívat plnohodnotný sexuální život. Díky této studii jsem získal zpět sebevědomí a radost ze vztahů.
online pharmacies reviews: certified canadian international pharmacy – mexican border pharmacies shipping to usa
https://edpill.pro/# cheap erectile dysfunction pills online
what is aviator aviator how to deposit money in aviator game
fda approved online pharmacies order from canadian pharmacy or overseas pharmacies that deliver to usa
http://mygossiphubb.net/__media__/js/netsoltrademark.php?d=fastpills.pro online pharmacy canada
online pharmacies legitimate online pharmacies without an rx and online pharmacies canada mexican online pharmacies
how to play aviator on betway aviator game how to win aviator game
most reliable online pharmacies cheap prescription drugs online or canadian drug prices
http://turningrocksintomoney.net/__media__/js/netsoltrademark.php?d=fastpills.pro canadian pharmacy reviews
canadian online pharmacies prescription drugs reputable canadian pharmacy and best canadian online pharmacy reviews reputable mexican pharmacies online
Me encanta la variedad de temas que cubres en este sitio. Siempre hay algo que me interesa y me deja con ganas de aprender más.
best otc ed pills: Instant erection pills – gnc ed pills
http://sildenafilpills.pro/# sildenafil 48 tabs
ed treatments: Low cost ED meds online – ed meds online without doctor prescription
https://sildenafilpills.pro/# sildenafil cheapest price uk
I just like the helpful information you provide in your articles
ed meds without doctor prescription on line pharmacy with no prescriptions or online drugstore coupon
http://dailywellnesspack.com/__media__/js/netsoltrademark.php?d=fastpills.pro canadian internet pharmacy
canadian pharmacy antiobotics without perscription perscription drugs without prescription and canadian pharmacy order best online pharmacies without a script
Porcelain Veneers can improve the symmetry of a smile best cialis online In many cases, however, the physical examination will prove to be unremarkable and leave the clinician with the list of diagnostic possibilities unaltered
canadian online pharmacy reviews: canadian pharmacy shipping to USA – safe online pharmacies in canada
çok yararlı bir paylaşım olmuş teşekkür ederim çok işime yarıcak.
buying from canadian pharmacies canadian international pharmacy canadian drug
http://paxlovid.pro/# paxlovid covid
canadian pharmacies comparison canadian pharmacy online or the canadian drugstore
http://garciausedcars.com/__media__/js/netsoltrademark.php?d=canadianpharm.pro canadian pharmacies online
cheapest pharmacy canada canada drugstore pharmacy rx and legit canadian pharmacy canadian neighbor pharmacy
canadian pharmacy meds reviews: certified online pharmacy canada – ordering drugs from canada
https://paxlovid.pro/# Paxlovid buy online
I just like the helpful information you provide in your articles
https://paxlovid.pro/# buy paxlovid online
Daha önce araştırıp pek Türkçe kaynak bulamadığım sorundu Elinize sağlık eminim arayan çok kişi vardır.
naturally like your web site however you need to take a look at the spelling on several of your posts. A number of them are rife with spelling problems and I find it very bothersome to tell the truth on the other hand I will surely come again again.
reputable canadian pharmacy ed meds online canada or canadian drug stores
http://appliedjusticetechnology.com/__media__/js/netsoltrademark.php?d=canadianpharm.pro precription drugs from canada
canadian pharmacy sarasota pharmacy canadian superstore and certified canadian international pharmacy legitimate canadian pharmacies
http://paxlovid.pro/# paxlovid generic
https://paxlovid.pro/# п»їpaxlovid
over the counter birth control pills: buy birth control over the counter – over the counter birth control pills
You’re so awesome! I don’t believe I have read a single thing like that before. So great to find someone with some original thoughts on this topic. Really.. thank you for starting this up. This website is something that is needed on the internet, someone with a little originality!
The website has a great layout and is easy to use, making it simple to find the product I needed. https://istore.airriseinc.com/
https://birthcontrolpills.pro/# birth control pills online
canadian drug canadian pharmacy com or canadian pharmacy in canada
http://leagueofangels.org/__media__/js/netsoltrademark.php?d=canadianpharm.pro northwest canadian pharmacy
canadian pharmacy prescription drugs canada buy online and canada cloud pharmacy canadian pharmacy meds review
https://paxlovid.pro/# Paxlovid over the counter
This is my first time pay a quick visit at here and i am really happy to read everthing at one place
Harika bir paylaşım, özellikle konunun önemli detayları oldukça net bir şekilde açıklanmış. İnsanları çeşitli karmaşık anahtar kelimelerle yormak yerine, okumaktan keyif alacağı içerikler her zaman daha iyidir. Kaliteli paylaşım adına teşekkür eder, paylaşımlarınızın devamını sabırsızlıkla beklerim.
paxlovid india paxlovid buy paxlovid india
Hi there! Quick question that’s completely off topic. Do you know how to make your site mobile friendly? My site looks weird when viewing from my iphone4. I’m trying to find a theme or plugin that might be able to correct this problem. If you have any suggestions, please share. Appreciate it!
This website really has all of the info I wanted about this subject and didn’t know who to ask.
InfoMídia ZAP TURBO é a chave para o sucesso no WhatsApp. Envio mensagens segmentadas, economizo tempo e consigo atingir mais clientes. Melhor investimento que já fiz! 💰
http://paxlovid.pro/# paxlovid pharmacy
paxlovid cost without insurance paxlovid covid or paxlovid pharmacy
http://www.caldwelldifilippos.com/__media__/js/netsoltrademark.php?d=paxlovid.pro paxlovid price
paxlovid price paxlovid india and paxlovid cost without insurance paxlovid buy
Hey There. I found your blog the use of msn. This is an extremely well written article. I will be sure to bookmark it and come back to read more of your useful information. Thank you for the post. I will definitely comeback.
http://birthcontrolpills.pro/# price for birth control pills
Good post! We will be linking to this particularly great post on our site. Keep up the great writing
canadian family pharmacy canadian pharmacy cheap medications onlinecanadianpharmacy
erection pills online: ed treatments – best ed drug
best india pharmacy: top 10 pharmacies in india – top online pharmacy india
Hi this is kinda of off topic but I was wondering if blogs use WYSIWYG editors or if you have to manually code with HTML. I’m starting a blog soon but have no coding experience so I wanted to get advice from someone with experience. Any help would be greatly appreciated!
ed drugs list: medication for ed dysfunction – cheap ed pills
websitem için çok işime yaradı teşekkür ederim
how to cure ed ed drugs list or best ed drug
http://k9designs.com/__media__/js/netsoltrademark.php?d=edpills24.pro online ed medications
best erection pills best medication for ed and ed pills cheap cure ed
mens erection pills: ed medication online – cures for ed
natural remedies for ed pills for ed or erectile dysfunction drugs
http://natureqwestvitamins.com/__media__/js/netsoltrademark.php?d=edpills24.pro best ed treatment pills
impotence pills cheap erectile dysfunction pill and generic ed pills new ed treatments
medication from mexico pharmacy purple pharmacy mexico price list best online pharmacies in mexico
india online pharmacy: buy medicines online in india – buy medicines online in india
I do consider all the ideas you have introduced on your post. They are very convincing and will definitely work. Still, the posts are too quick for newbies. May just you please extend them a bit from next time? Thank you for the post.
ed drugs compared best medication for ed or best ed pills at gnc
http://peskycritters.biz/__media__/js/netsoltrademark.php?d=edpills24.pro ed pills online
best treatment for ed cheapest ed pills and ed medications cheap erectile dysfunction pills online
male erection pills: new ed pills – erection pills that work
Bu güzel bilgilendirmeler için teşekkür ederim.
https://mexicanpharmacy.life/# mexico pharmacies prescription drugs
buy prescription drugs from india best online pharmacy india buy medicines online in india
reputable indian online pharmacy indian pharmacy or buy medicines online in india
http://ww35.asiterminals.com/__media__/js/netsoltrademark.php?d=indiapharmacy.world indianpharmacy com
india online pharmacy india pharmacy and online shopping pharmacy india best online pharmacy india
I truly appreciate your technique of writing a blog. I added it to my bookmark site list and will
http://edpills24.pro/# natural ed medications
medicine for impotence: pills for ed – new treatments for ed
ed medications list drugs for ed or best ed drug
http://alanblakethomas.com/__media__/js/netsoltrademark.php?d=edpills24.pro erectile dysfunction drug
best ed treatment erection pills and п»їerectile dysfunction medication erection pills that work
п»їbest mexican online pharmacies mexico drug stores pharmacies mexican rx online
http://indiapharmacy.world/# top 10 pharmacies in india
generic ed drugs treatment of ed or best ed treatment pills
http://wolframdata.com/__media__/js/netsoltrademark.php?d=edpills24.pro new treatments for ed
ed treatment pills ed pills for sale and what are ed drugs herbal ed treatment
indianpharmacy com: online pharmacy india – indian pharmacy online
mail order pharmacy india: buy medicines online in india – indian pharmacy online
çok yararlı bir paylaşım olmuş teşekkür ederim çok işime yarıcak.
ed meds: top ed drugs – natural ed medications
mail order pharmacy india indian pharmacies safe Online medicine home delivery
Very well presented. Every quote was awesome and thanks for sharing the content. Keep sharing and keep motivating others.
Very well presented. Every quote was awesome and thanks for sharing the content. Keep sharing and keep motivating others.
indian pharmacy paypal pharmacy website india top 10 pharmacies in india
Good post! We will be linking to this particularly great post on our site. Keep up the great writing
ciprofloxacin generic price buy cipro
ciprofloxacin order online buy cipro
Hocam Ellerinize Saglık Güzel Makale Olmuş Detaylı
Very well presented. Every quote was awesome and thanks for sharing the content. Keep sharing and keep motivating others.
molnupiravir france molnupiravir malaysia price
Çok işime yaradı bende bunu nasıl yapacağımı araştırıyorum. Paylaşım için teşekkür ederim.
clomid without prescription clomid for sale
Hocam Ellerinize Saglık Güzel Makale Olmuş Detaylı
Hmm is anyone else experiencing problems with the images on this blog loading? I’m trying to figure out if its a problem on my end or if it’s the blog. Any responses would be greatly appreciated.
I very delighted to find this internet site on bing, just what I was searching for as well saved to fav
cipro buy cipro online
I am extremely impressed with your writing skills and also with the layout on your blog. Is this a paid theme or did you customize it yourself? Either way keep up the nice quality writing, it’s rare to see a nice blog like this one these days.
Hocam detaylı bir anlatım olmuş eline sağlık
buy Molnupiravir merck covid treatment
1992, 326 1097 1101 over the counter viagra substitute walgreens
This is my first time pay a quick visit at here and i am really happy to read everthing at one place
What i do not realize is if truth be told how you’re not really a lot more smartly-favored than you may be right now. You are so intelligent. You understand therefore significantly in relation to this topic, produced me individually consider it from numerous numerous angles. Its like men and women don’t seem to be interested unless it’s something to accomplish with Lady gaga! Your personal stuffs nice. Always care for it up!
cipro 500mg best prices ciprofloxacin 500mg buy online
paxlovid generic paxlovid covid
I very delighted to find this internet site on bing, just what I was searching for as well saved to fav
paxlovid pill п»їpaxlovid
It’s great that you are getting ideas from this piece of writing as well as from our argument made here.
Daha önce araştırıp pek Türkçe kaynak bulamadığım sorundu Elinize sağlık eminim arayan çok kişi vardır.
With a focus on excellence, Elitepipe Plastic Factory has gained a reputation for producing top-notch HDPE and uPVC products that meet rigorous quality standards. Elitepipe Plastic Factory
gerçekten çok yararlı bi konu teşekkürler
Yea break up with your girlfriend coz am bored freeonlineporn pornotube Männertag
paxlovid cost without insurance paxlovid covid
When I originally commented I clicked the “Notify me when new comments are added” checkbox and now each time a comment is added I get four emails with the same comment. Is there any way you can remove me from that service? Thanks!
Paxlovid over the counter paxlovid pharmacy
ventolin prescription australia buy albuterol over the counter buying ventolin uk
http://stromectolivermectin.pro/# ivermectin cost australia
very informative articles or reviews at this time.
It is perfect time to make a few plans for the longer term and it is time to be happy. I have read this publish and if I may I wish to suggest you few interesting things or advice. Perhaps you could write next articles referring to this article. I wish to read more things approximately it!
buy ivermectin for humans australia ivermectin lotion price or stromectol tablets
http://detens.net/__media__/js/netsoltrademark.php?d=stromectolivermectin.pro stromectol uk buy
ivermectin virus ivermectin lotion cost and ivermectin 0.08 oral solution ivermectin price uk
purchase stromectol online ivermectin tablets ivermectin ireland
Hatcher, RA, Trussell, J, Nelson, AL, Cates, WC, Stewart, FH, Kowal, D buy cialis online safely Eur J Cancer 2009; 45 228 247
http://wellbutrin.best/# wellbutrin online order
Generally I do not read article on blogs, but I would like to say that this write-up very forced me to try and do so! Your writing style has been surprised me. Thanks, very nice article.
Useful article, thank you. Top article, very helpful.
generic stromectol ivermectin 1mg stromectol brand
stromectol without prescription ivermectin cost australia or ivermectin 3mg
http://green-envelope.com/__media__/js/netsoltrademark.php?d=stromectolivermectin.pro stromectol 3mg
ivermectin 8000 ivermectin cream 1% and minocin 50 mg for scabies ivermectin price comparison
This is really interesting, You’re a very skilled blogger. I’ve joined your feed and look forward to seeking more of your magnificent post. Also, I’ve shared your site in my social networks!
You sound a bit out of the loop-you ought to be clearer?
mail order pharmacy india: pharmacy website india – online pharmacy india
PBX has many advantages, including its cost-efficient solutions.
They want to find price-effective options to develop their business, but not bankrupt them.
my homepage; E2 Visa Business Plan [Dirk]
You ought to take part in a contest for one of the greatest sites on the net. I most certainly will recommend this website!
canadian pharmacy: certified international pharmacy – ed meds online canada
indian pharmacy paypal mail order pharmacy india buy prescription drugs from india
Thank you for some other magnificent article. Where else may just anyone get that kind of information in such a perfect means of writing? I have a presentation next week, and I am at the look for such information.
india pharmacy: Online medicine home delivery – cheapest online pharmacy india
What’s up i am kavin, its my first time to commenting anywhere, when i read this post i thought i could also make comment due to this brilliant piece of writing.
best canadian pharmacy to order from: certified pharmacy canada – legit canadian pharmacy
kariyer kıbrıs, kariyer kibris, kariyerkıbrıs, kariyerkibris
Yes! Finally something about %keyword1%.
my canadian pharmacy rx certified pharmacy canada canadian pharmacy world reviews
canadian medications canada pharmacy 24h or canadian pharmacy store
http://ostogo.com/__media__/js/netsoltrademark.php?d=certifiedpharmacycanada.pro canadian discount pharmacy
canadian neighbor pharmacy adderall canadian pharmacy and vipps canadian pharmacy canada cloud pharmacy
çok yararlı bir paylaşım olmuş teşekkür ederim çok işime yarıcak.
In the original draft the title was Charlie’s Chocolate Boy and Charlie was a black kid who got accidentally encased in chocolate and then foiled a robbery of the Willy Wonka’s house. That’s not a joke. That’s actually what the story originally was.
world pharmacy india: online pharmacy india – top online pharmacy india
Heya i am for the first time here. I found this boardand I find It really useful & it helped me out much.I hope to give something back and help others like you helped me.
For the reason that the admin of this site is working, no uncertainty very quickly it will be renowned, due to its quality contents.
I like the efforts you have put in this, regards for all the great content.
canadian 24 hour pharmacy: certified pharmacy canada – canadian pharmacy world
Faydalı bilgilerinizi bizlerle paylaştığınız için teşekkür ederim.
canadian pharmacy cheapest pharmacy canada or online canadian drugstore
http://martytherichestmanintown.com/__media__/js/netsoltrademark.php?d=certifiedpharmacycanada.pro buy drugs from canada
canadian mail order pharmacy legal canadian pharmacy online and canadian drug stores canadian pharmacy 24 com
Pretty! This has been a really wonderful post. Many thanks for providing these details.
prednisone 10: buy prednisone – prednisone 10 mg tablet
ينعكس التزام المصنع بالابتكار في جهود البحث والتطوير المستمرة لتحسين تصميم ووظائف تركيبات HDPE و uPVC الخاصة بهم. إيليت بايب Elite Pipe
https://prednisone.cheap/# prednisone 10 mg price
prednisone 10mg tabs purchase prednisone canada ordering prednisone
very informative articles or reviews at this time.
discount doxycycline: doxycycline price 100mg – cheapest doxycycline without prescrtiption
doxycycline 100mg price uk doxycycline 100mg tablets no prescription or doxycycline usa pharmacy
http://arrowheadins.com/__media__/js/netsoltrademark.php?d=doxycycline.bid buy doxycycline hyclate 100mg without a rx
buy doxycycline united states buy doxycycline online nz and doxycycline antibiotic doxycycline 20 mg
It’s an awesome post in support of all the web viewers; they will take advantage from it I am sure.
prednisone 20 mg without prescription prednisone 5 mg cheapest or prednisone brand name in india
http://crainswomensdirectory.com/__media__/js/netsoltrademark.php?d=prednisone.cheap prednisone for sale in canada
prednisone for sale online can you buy prednisone over the counter in mexico and prednisone 50 mg prednisone from canada
Excellent, what a weblog it is! This website gives helpful data to us, keep it up.
https://doxycycline.bid/# cheap doxycycline online
buy generic zithromax online buy zithromax zithromax 500mg price
doxycycline 100mg online uk: buy doxycycline – doxycycline tablets cost
zithromax for sale usa: purchase azithromycin online – zithromax cost australia
مرافق تصنيع إيليت بايب Elite Pipe مجهزة بأحدث الآلات ، مما يتيح عمليات الإنتاج الفعالة وجودة المنتج المتسقة.
paxlovid generic: paxlovid cost without insurance – Paxlovid over the counter
Thank you for the good writeup. It in fact was a amusement account it.
Look advanced to far added agreeable from you! By the way, how can we communicate?
teknolojikıbrıs,teknolojikibris,kibristeknoloji,kıbrısteknoloji
This blog was… how do I say it? Relevant!! Finally I have found something that helped me. Thanks!
cytotec online buy cytotec pills cytotec online
Paxlovid over the counter: paxlovid generic – paxlovid generic
Hi there to all, for the reason that I am genuinely keen of reading this website’s post to be updated on a regular basis. It carries pleasant stuff.
buy cheap propecia without a prescription: cost of cheap propecia online – buy propecia without prescription
I really like reading through a post that can make men and women think. Also, thank you for allowing me to comment!
Paxlovid over the counter paxlovid buy or paxlovid generic
http://realfuse.com/__media__/js/netsoltrademark.php?d=paxlovid.life paxlovid india
paxlovid cost without insurance п»їpaxlovid and paxlovid covid paxlovid pill
First off I would like to say wonderful blog! I had a quick question which I’d like to ask if you do not mind. I was curious to find out how you center yourself and clear your head before writing. I have had difficulty clearing my mind in getting my ideas out there. I do enjoy writing however it just seems like the first 10 to 15 minutes tend to be wasted just trying to figure out how to begin. Any ideas or tips? Many thanks!
cost of propecia pills: cheap generic propecia – cost propecia online
get propecia generic propecia tablets or get cheap propecia without dr prescription
http://yournursingsolution.com/__media__/js/netsoltrademark.php?d=propecia.cheap cheap propecia pills
home buy cheap propecia pill and buy cheap propecia buying generic propecia without insurance
I’m often to blogging and i really appreciate your content. The article has actually peaks my interest. I’m going to bookmark your web site and maintain checking for brand spanking new information.
http://propecia.cheap/# buying generic propecia without insurance
paxlovid price: paxlovid for sale – paxlovid for sale
There is definately a lot to find out about this subject. I like all the points you made
cytotec buy online usa buy cytotec pills cytotec online
Best best best..
I do not even understand how I ended up here, but I assumed this publish used to be great
ed medication: cheapest ed pills – ed pills
It’s an amazing article designed for all the online users; they will get benefit from it I am sure.
I am extremely impressed with your writing skills and also with the layout on your blog. Is this a paid theme or did you customize it yourself? Either way keep up the nice quality writing, it’s rare to see a nice blog like this one nowadays.
For the reason that the admin of this site is working, no uncertainty very quickly it will be renowned, due to its quality contents.
http://cytotec.ink/# cytotec abortion pill
buy cytotec pills online cheap: cytotec abortion pill – buy cytotec over the counter
п»їcytotec pills online purchase cytotec buy cytotec pills
https://edpills.ink/# medications for ed
erection pills viagra online: cheap erectile dysfunction pill – п»їerectile dysfunction medication
Abortion pills online: buy cytotec pills online cheap – cytotec online
Çok yararlı bi yazı olmuş hocam teşekkür ederim .Sizin yazılarınızı beğenerek okuyorum elinize sağlık.
çok bilgilendirici bir yazı olmuş ellerinize sağlık teşekkür ederim
buy misoprostol over the counter cytotec online or buy cytotec over the counter
http://ww17.homessecuritywindows.com/__media__/js/netsoltrademark.php?d=cytotec.ink buy cytotec pills online cheap
order cytotec online buy cytotec in usa and buy cytotec online fast delivery order cytotec online
You have made your stand extremely effectively..
buy term papers online proposal essay research proposal buy research paper
cpm homework help do my math homework for me pay someone to do my homework homework help
writing a personal essay for college https://cheapessaywriteronlineservices.com
paxlovid buy: paxlovid pharmacy – paxlovid cost without insurance
cytotec abortion pill buy cytotec in usa or Misoprostol 200 mg buy online
http://myhubbreview.net/__media__/js/netsoltrademark.php?d=cytotec.ink п»їcytotec pills online
order cytotec online buy cytotec online and buy cytotec over the counter purchase cytotec
Your method of describing all in this piece of writing is truly good, all be able to easily understand it, Thanks a lot.
Amazing a lot of useful facts!
write my resume for me online essay writer essay writter write this essay for me
buy cytotec pills buy misoprostol over the counter п»їcytotec pills online
I very delighted to find this internet site on bing, just what I was searching for as well saved to fav
https://edpills.ink/# ed pills otc
paxlovid generic: Paxlovid over the counter – п»їpaxlovid
Amazing information. Regards.
thesis proposal buy term paper research proposal cheap research paper writing service
paxlovid pill buy paxlovid online or paxlovid generic
http://northdakotacatholic.com/__media__/js/netsoltrademark.php?d=paxlovid.life paxlovid cost without insurance
paxlovid generic Paxlovid over the counter and п»їpaxlovid Paxlovid over the counter
very informative articles or reviews at this time.
You actually explained it adequately.
can you do my homework i don t want to do my homework do my homework for money homework
phd thesis dissertation editing phd dissertation help writing help
dissertation websites https://domycollegehomeworkforme.com
buy cytotec over the counter: cytotec abortion pill – buy cytotec online
http://edpills.ink/# cheap erectile dysfunction pills
kariyer kıbrıs, kariyer kibris, kariyerkıbrıs, kariyerkibris
Nice post. I learn something totally new and challenging on websites
Very well presented. Every quote was awesome and thanks for sharing the content. Keep sharing and keep motivating others.
cost of generic propecia for sale propecia best price buy generic propecia without a prescription
Hey just wanted to give you a quick heads up and let you know a few of the images aren’t loading properly. I’m not sure why but I think its a linking issue. I’ve tried it in two different internet browsers and both show the same outcome.
Good post! We will be linking to this particularly great post on our site. Keep up the great writing
Kudos. Lots of data.
writing essay services essay writing services essay services writing a persuasive essay
buy paxlovid online paxlovid generic or paxlovid generic
http://maxxrewards.com/__media__/js/netsoltrademark.php?d=paxlovid.life paxlovid covid
paxlovid price п»їpaxlovid and buy paxlovid online paxlovid pharmacy
hocam gayet açıklayıcı bir yazı olmuş elinize emeğinize sağlık.
cytotec pills buy online buy cytotec pills or order cytotec online
http://lbsinsider.com/__media__/js/netsoltrademark.php?d=cytotec.ink cytotec abortion pill
cytotec buy online usa Cytotec 200mcg price and buy cytotec over the counter cytotec abortion pill
cost of generic propecia without dr prescription: cheap generic propecia – buy generic propecia pill
You actually reported this adequately.
essay writer no plagiarism essay writer website essay writers automatic essay writer
medical school personal statement help with essay writing help with writing an essay essay helper free
nursing essay writing services https://buyanessayscheaponline.com
treatment of ed: over the counter erectile dysfunction pills – online ed pills
https://paxlovid.life/# paxlovid generic
Do you have a spam issue on this site; I also am a blogger, and I was curious about your situation; many of us have created some nice procedures and we are looking to trade strategies with other folks, why not shoot me an e-mail if interested.
buy misoprostol over the counter buy cytotec online or buy cytotec in usa
http://jackbinion.net/__media__/js/netsoltrademark.php?d=cytotec.ink buy cytotec over the counter
buy cytotec over the counter buy misoprostol over the counter and buy cytotec over the counter cytotec online
I would like to thank you for the efforts you have put in writing this website. I am hoping the same high-grade web site post from you in the upcoming as well. Actually your creative writing skills has encouraged me to get my own web site now. Actually the blogging is spreading its wings quickly. Your write up is a great example of it.
cytotec online: cytotec pills buy online – buy cytotec pills online cheap
Incredible a lot of useful information!
do my finance homework do my homework homework do my finance homework
After I originally left a comment I appear to have clicked the -Notify me when newcomments are added- checkbox and from now on whenever a comment is added I get four emails with the samecomment. There has to be a way you are able to removeme from that service? Cheers!
araba kiralama, kıbrıs araç kiralama, kıbrıs rent a car,araç kira kıbrıs
Good data, Kudos.
pay to do my homework homework help cpm do my math homework i don t want to do my homework
write my term paper term papers research proposal cover page term papers
how to write a comparison contrast essay https://argumentativethesis.com
You said it perfectly..
dissertation abstracts international dissertation meaning dissertations online dissertation
What’s up, I desire to subscribe for this weblog to take most up-to-date updates, so where can i do it please help.
doxycycline india pharmacy: doxycycline 100mg cost uk – how to get doxycycline cheap
The prices on istore.airriseinc.com are very reasonable and the quality of the products is excellent. I will definitely be recommending this website to others. https://istore.airriseinc.com/
Position clearly used!!
best college paper writing service pay someone to write paper research paper writing service buy a paper for college
writing essay services essay services press release writing service essay write service
dissertation writing jobs https://dissertationwritingtops.com
Whoa all kinds of terrific material!
help with writing an essay essay help best essay writing service paperhelp
amoxicillin 875 125 mg tab can you purchase amoxicillin online – buy cheap amoxicillin online
Appreciation to my father who shared with me regarding this blog, this weblog is actually remarkable.
Very quickly this website will be famous among all blogging and site-building people, due to it’s good articles or reviews
Hey there, I think your blog might be having browser compatibility issues. When I look at your blog site in Firefox, it looks fine but when opening in Internet Explorer, it has some overlapping. I just wanted to give you a quick heads up! Other then that, fantastic blog!
Whoa all kinds of wonderful info!
essay writting essay writing service uk forum essay paper writing service cv writing service
Many thanks, A lot of postings!
research paper writing service research proposal apa research proposal apa buy term paper
essay writing samples which essay writing service is the best write my essay service college essay writing help
dissertation or thesis https://argumentativethesis.com
You actually reported this superbly.
write a paper for me essay writer review best essay writers how to write a philosophy paper
buy doxycycline us: doxycycline 125 mg – where can i buy doxycycline no prescription
price for amoxicillin 875 mg amoxicillin 500mg over the counter – rexall pharmacy amoxicillin 500mg
doxycycline 150 mg capsules: doxycycline cost australia – price of doxycycline 100mg in india
First off I want to say terrific blog! I had a quick question in which I’d like to ask if you don’t mind. I was curious to know how you center yourself and clear your thoughts before writing. I have had trouble clearing my mind in getting my thoughts out. I do enjoy writing but it just seems like the first 10 to 15 minutes are generally wasted just trying to figure out how to begin. Any suggestions or tips? Thanks!
Awesome info. With thanks.
do my chemistry homework pay someone to do my homework homework do my homework for me
buy amoxicillin online cheap amoxicillin 500mg capsules price – where can i buy amoxicillin over the counter uk
Hırdavatçılar,hırdavat malzemeleri İstanbul,toptan nalbur malzemeleri fiyatları,karaköy hirdavatçilar,istanbul büyük hırdavat firmaları,nalbur online satış,toptan hirdavatçilar,nalburlar,uygun hırdavat malzemeleri,nalbur malzemeleri toptan fiyatları,hırdavat malzeme,ankara toptan hırdavat nalburiye,ankara nalbur toptancıları,en uygun hırdavat malzemeleri,istanbul toptan hırdavat firmaları,hırdavat malzemeleri toptan fiyatları,nalburiye market,toptan hırdavat nalburiye fiyatları,hırdavat firmaları İstanbul,toptan hırdavat ürünleri,toptan hırdavat malzemesi,hırdavat malzemesi toptan,toptan hırdavat malzemeleri İstanbul,nalbur fiyat listesi,toptan hırdavat fiyatları,uygun hırdavat,toptan hirdavat malzemeleri,toptan hırdavat,nalburda satılan malzemeler,toptan hırdavat İstanbul,hırdavat ürünleri toptan,toptan ucuz hırdavat,en uygun hırdavat,hırdavat toptancıları İstanbul,toptan hırdavat firmaları,hırdavat malzemeleri toptan satış,hirdavat urunleri,hırdavatçılık
kıbrıs online eğitim, kıbrıs online kurs, online eğitim, online kurs, belediye sertifika eğitimi, kamu sertifika, edevlet onaylı sertifika, marziye ilhan eğitimi, eğitici marziye ilhan, kıbrıs marziye ilhan
Hello there! Do you know if they make any plugins to help with SEO? I’m trying to get my blog to rank for some targeted keywords but I’m not seeing very good results. If you know of any please share. Appreciate it!
إن تركيبات uPVC التي ينتجها مصنع إيليت بايب Elite Pipe مقاومة للغاية للتآكل ، وتوفر حلولاً موثوقة وخالية من الصيانة لأنظمة الري والسباكة.
prednisone 54: http://prednisone1st.store/# prednisone 2.5 mg cost
online sertifika,üniversite onaylı sertifika,özel sertifika, bitcoin sertifika, borsa sertifika,forex sertifika, online kurs, belediye sertifika eğitimi, kamu sertifika, edevlet onaylı sertifika, marziye ilhan eğitimi, eğitici marziye ilhan, kıbrıs marziye ilhan
Heya this is somewhat of off topic but I was wondering if blogs use WYSIWYG editors or if you have to manually code with HTML. I’m starting a blog soon but have no coding skills so I wanted to get advice from someone with experience. Any help would be greatly appreciated!
amoxicillin 250 mg price in india where can i get amoxicillin – amoxicillin tablet 500mg
buy prednisone 10mg online: http://prednisone1st.store/# buy prednisone 1 mg mexico
Thnnnxxx.
For the reason that the admin of this site is working, no uncertainty very quickly it will be renowned, due to its quality contents.
prednisone 50 mg for sale: prednisone 20mg price – 200 mg prednisone daily
Helpful postings. Kudos.
custom dissertation writing services best dissertation definition of dissertation dissertation abstracts
prednisone 5 mg brand name: https://prednisone1st.store/# otc prednisone cream
prednisone 1 mg daily: prednisone 10 mg price – 20mg prednisone
I like the efforts you have put in this, regards for all the great content.
400 mg prednisone: prednisone online for sale – average cost of generic prednisone
For the reason that the admin of this site is working, no uncertainty very quickly it will be renowned, due to its quality contents.
prednisone 20 mg tablet price: prednisone canada – prednisone 4 mg daily
I truly appreciate your technique of writing a blog. I added it to my bookmark site list and will
Hurrah! After all I got a weblog from where I can in fact get useful information regarding my study and knowledge.
ed meds online without doctor prescription: best otc ed pills – online ed medications
where can i buy mobic without rx can you get generic mobic pills how to get generic mobic without prescription
I simply wanted to thank you so much again. I am not sure the things that I might have gone through without the type of hints revealed by you regarding that situation.
Excellent post. I was checking continuously this blog and I am inspired! Extremely helpful info particularly the remaining phase 🙂 I take care of such information much. I used to be seeking this particular information for a very lengthy time. Thank you and good luck.
I was very pleased to discover this website. I want to to thank you for your time for this wonderful read!! I definitely loved every bit of it and I have you saved as a favorite to see new things on your website.
amoxicillin for sale buy amoxicillin online cheap – where can you buy amoxicillin over the counter
pharmacy com canada canada pharmacy online
You put a lot of effort into this. This is a well-written and informative article. Nice job!
Greetings from California! I’m bored to tears at work so I decided
to browse your blog on my iphone during lunch break.
I love the knowledge you present here and can’t wait to take a look
when I get home. I’m shocked at how quick your blog loaded on my cell phone ..
I’m not even using WIFI, just 3G .. Anyhow, wonderful
site!
Asking questions are in fact nice thing if you are not understanding anything completely, but this piece of writing offers good understanding even.
Hello.This post was really fascinating, especially because I was investigating for thoughts on this matter last Monday.
Comprehensive side effect and adverse reaction information.
canadian pharmacy online canadianpharmacymeds
Read information now.
buying generic mobic price: where to get mobic online – where can i get generic mobic without a prescription
propecia cost cost of cheap propecia without dr prescription
amoxicillin 500 mg purchase without prescription where to buy amoxicillin pharmacy – amoxicillin 500 mg where to buy
can you get cheap mobic without dr prescription how to get cheap mobic without insurance cost generic mobic pill
kıbrıs online eğitim, kıbrıs online kurs, online eğitim, online kurs, belediye sertifika eğitimi, kamu sertifika, edevlet onaylı sertifika, marziye ilhan eğitimi, eğitici marziye ilhan, kıbrıs marziye ilhan
Diyarbakır Cam Balkon sistemi yzc Cam Balkon’dayzc cam balkon, diyarbakır cam balkon, çınar cam balkon, kayapınar cam balkon, amed cam balkon, yenişehir cam balkon, bağlar cam balkon, ergani cam balkon, bismil cam balkon
Adıyaman Köy peyniri ve yöresel köy peyniri ile gurmezar’a bekleriz.badem ezmeli,üzüm pekmezi fiyati,kars kasari fiyat,nutmaster fistik ezmesi,cevizli sucuk,şekerli leblebi,gün kurusu,orcik,kayısı kurusu,cevizli sucuk fiyat,gün kurusu kayısı fiyatı,gun kurusu,günkurusu,sekerli leblebi,gun kurusu kayisi,ceviz içi,kabuklu ceviz,çiğ badem,acı badem,kuru dut,acıbadem,dut kurusu,ceviz içi fiyatı,kabuklu ceviz fiyatı,acıbadem iletişim,çiğ badem fiyat,dut kurusu kürü,dut kurusu fiyat,ceviz içi kilosu,iç ceviz fiyatı,dut kürü,ceviz ici,kabuklu ceviz fiyatları,dut kurusu kaynatıp içmek,çig badem,ceviziçi,kurudut,cevizin kg fiyatı,ciğ badem,cevizici,bodrum acı badem,çiğbadem,ceviz ici fiyatları,ic ceviz fiyati,cevizin kg,çeviziçi,esmer bulgur,köfte baharatı,isot,adıyaman nemrut,nemrut heykeli,isot biber,nemrut heykelleri,kırmızı toz biber,çiğ köfte baharatı,nemrut dağı heykelleri
Thnx for share.. Very best post. Ty.
where to get generic mobic pill: where can i get cheap mobic without dr prescription – can i buy generic mobic without dr prescription
canadian pharmacy online store: canadapharmacyonline com – canadian pharmacy ratings
mexican pharmaceuticals online: mexican drugstore online – mexican online pharmacies prescription drugs
indianpharmacy com best online pharmacy india or indian pharmacy paypal
http://community-of-practce.com/__media__/js/netsoltrademark.php?d=indiamedicine.world mail order pharmacy india
buy prescription drugs from india п»їlegitimate online pharmacies india and indian pharmacy paypal india pharmacy mail order
indian pharmacies safe: indian pharmacies safe – cheapest online pharmacy india
Jazz enthusiasts, NY Chill Beats Music invites you to relish in its sophisticated selections.
I’m often to blogging and i really appreciate your content. The article has actually peaks my interest. I’m going to bookmark your web site and maintain checking for brand spanking new information.
I have read so many articles about the blogger lovers but this article is really a nice post, keep it up.
canada pharmacy reviews: canadian king pharmacy – legit canadian online pharmacy
Для пар частный эромассаж в Москве в боди салоне
canadian pharmacy prices: canadian online drugs – canadian pharmacy meds
I do consider all the ideas you have presented on your post. They are very convincing and will definitely work. Still, the posts are too quick for novices. May just you please prolong them a bit from next time? Thank you for the post.
Makaleniz açıklayıcı yararlı anlaşılır olmuş ellerinize sağlık
top 10 pharmacies in india cheapest online pharmacy india or india pharmacy mail order
http://ninasherwood.com/__media__/js/netsoltrademark.php?d=indiamedicine.world indian pharmacies safe
indian pharmacies safe best india pharmacy and reputable indian pharmacies buy prescription drugs from india
canadian pharmacy victoza: canadian online pharmacy – canadian pharmacy tampa
Why Do People Die in Their Sleep? https://linkdirectory.at/detail/why-do-people-die-in-their-sleep
canadapharmacyonline legit: canada drug pharmacy – canadian pharmacy reviews
Thanks for your useful article. Other thing is that mesothelioma is generally brought on by the breathing of material from asbestos fiber, which is a cancer causing material. Its commonly seen among staff in the building industry who may have long experience of asbestos. It’s also caused by moving into asbestos protected buildings for a long period of time, Your age plays a crucial role, and some folks are more vulnerable for the risk as compared to others.
canadian drugs pharmacy: legal to buy prescription drugs from canada – canadian drugs online
Nicely put. With thanks.
working thesis good thesis statement example thesis a thesis
buying from online mexican pharmacy: medicine in mexico pharmacies – buying from online mexican pharmacy
You actually reported that superbly.
write me an essay write my essay for cheap what should i write my college essay about write my essay for free
Malatya Karacalar Ticaret | Fatih KARACA Malatya Stihl Bayi, stihl malatya bayi, stihlmalatya,malatyastihl, stihl servisi, malatya stihl servis, malatya testere,malatyastihlbayi, stihl malatya, malatya stihl, stihl bayisi malatya, Hekimhan stihl bayi, malatya testere bayisi, malatya stihl servis, stihl malatya servis, Malatya’nın en köklü Stihl bayilerinden olan Fatih Karaca Ticaret mağazamız, hem stihl satışı hem de stihl servisliğini yapmaktadır.
Gurmezar ile Şimdi %100 Doğal Ürünler | %100 Organik adıyaman peyniri,sekerli leblebi,gun kurusu kayisi,ceviz içi,kabuklu ceviz,çiğ badem,acı badem,kuru dut,acıbadem,dut kurusu,ceviz içi fiyatı,kabuklu ceviz fiyatı,acıbadem iletişim,çiğ badem fiyat,dut kurusu kürü,dut kurusu fiyat,ceviz içi kilosu,iç ceviz fiyatı,dut kürü,ceviz ici,kabuklu ceviz fiyatları,dut kurusu kaynatıp içmek,çig badem,ceviziçi,kurudut,cevizin kg fiyatı,ciğ badem,cevizici,bodrum acı badem,çiğbadem,ceviz ici fiyatları,ic ceviz fiyati,cevizin kg,çeviziçi,esmer bulgur,köfte baharatı,isot,adıyaman nemrut,nemrut heykeli,isot biber,nemrut heykelleri,kırmızı toz biber,çiğ köfte baharatı,nemrut dağı heykelleri
adderall canadian pharmacy canadian pharmacy oxycodone or the canadian pharmacy
http://markfirstco.com/__media__/js/netsoltrademark.php?d=certifiedcanadapharm.store canadian drug pharmacy
canada drug pharmacy canada rx pharmacy and canadian pharmacy ltd canadian discount pharmacy
top 10 pharmacies in india reputable indian pharmacies or cheapest online pharmacy india
http://bkoch.org/__media__/js/netsoltrademark.php?d=indiamedicine.world buy medicines online in india
online pharmacy india buy prescription drugs from india and reputable indian pharmacies reputable indian pharmacies
Harman Yolu Bereket Burada Harman Yolu | Online Tarım Market İstanbul’dan Türkiye’ye yayılan Tarım ve ormancılık ürünlerini şimdi e ticaret ile sizlerin hizmetine sunuyoruz. Harman Yolu Bereket Burada sezer süt sağma, sezer süt sağım makinesi, süt sağma yedek parça, sezer marka yedek parça, motorlu testere, motorlu tırpan, ağaç kesme makinası, benzinli ürünler, motor yağı, buji, eğe, stihl zincir
http://gabapentin.pro/# neurontin pfizer
Thank you for any other informative blog. Where else may I get that type of info written in such a perfect method? I’ve a mission that I’m just now running on, and I have been at the glance out for such information.
One other issue is when you are in a circumstance where you will not have a cosigner then you may want to try to wear out all of your financial aid options. You’ll find many funds and other scholarships or grants that will present you with money to support with education expenses. Many thanks for the post.
Appreciating the time and effort you put into your website and in depth information you provide. It’s nice to come across a blog every once in a while that isn’t the same out of date rehashed information. Wonderful read! I’ve saved your site and I’m adding your RSS feeds to my Google account.
Pretty nice post. I just stumbled upon your blog and wanted to say that I have really enjoyed browsing your blog posts. In any case I’ll be subscribing to your feed and I hope you write again soon!
http://stromectolonline.pro/# buy ivermectin canada
I am truly thankful to the owner of this web site who has shared this fantastic piece of writing at at this place.
Kudos! I enjoy this.
homework homework help do my finance homework do my finance homework
buy essay online buy an essay online buy college essays pay someone to write paper
writing compare and contrast essay https://essaywritingserviceahrefs.com
Very well presented. Every quote was awesome and thanks for sharing the content. Keep sharing and keep motivating others.
buy gabapentin medicine neurontin 300 mg or neurontin cost uk
http://oximunol.info/__media__/js/netsoltrademark.php?d=gabapentin.pro 32 neurontin
generic neurontin neurontin capsules 100mg and neurontin 150mg neurontin online usa
Hi, Neat post. There is a problem with your web site in internet explorer,
could check this? IE still is the market chief and a large portion of other folks will miss your magnificent writing because of this problem.
http://azithromycin.men/# buy azithromycin zithromax
https://gabapentin.pro/# neurontin 202
Weitere Informationen über Bitcoin Cash auf Deutsch https://bchpls.org/weitere-informationen-auf-deutsch/
Hi there, I enjoy reading all of your article. I like to write a little comment to support you.
Howdy! Do you know if they make any plugins to help with Search Engine Optimization? I’m trying to get my blog to rank for some targeted keywords but I’m not seeing very good results. If you know of any please share. Cheers!
http://azithromycin.men/# average cost of generic zithromax
Pretty nice post. I just stumbled upon your blog and wanted to say that I have really enjoyed browsing your blog posts. In any case I’ll be subscribing to your feed and I hope you write again soon!
ed medication online: men’s ed pills – top ed drugs
instagram hile
ed treatment drugs non prescription ed drugs or ed pills that work
http://growgirlstart.net/__media__/js/netsoltrademark.php?d=ed-pills.men best ed pills
treatment of ed non prescription ed drugs and medication for ed best pills for ed
Paxlovid over the counter: п»їpaxlovid – paxlovid covid
You said it effectively.
essay writers how to write a reflection paper paper writing services how to write a philosophy paper
You actually expressed it really well.
get antibiotics without seeing a doctor: buy antibiotics for uti – best online doctor for antibiotics
Thank you, Ample facts.
write a essay for me write my research paper for me website that writes essays for you write my essay for cheap
Regards, Plenty of data.
phd thesis database thesis statment thesis statement meaning thesis help
do my essay for me who can write my essay professional essay writers essay write
website for essays https://custompaperwritingservices.com
lipitor drug: generic lipitor drugs – generic lipitor online
My brother suggested I might like this blog. He was totally right. This submit actually made my day. You cann’t believe just how much time I had spent for this information! Thank you!
https://ciprofloxacin.ink/# where can i buy cipro online
Yesterday, while I was at work, my sister stole my iPad and tested to see if it can survive a twenty five foot drop, just so she can be a youtube sensation. My apple ipad is now broken and she has 83 views. I know this is completely off topic but I had to share it with someone!
http://lipitor.pro/# lipitor buy
This post will help the internet users for creating new website or even a blog from start to end.
Your blog is a goldmine of valuable information.
order cytotec online Misoprostol 200 mg buy online or buy cytotec in usa
http://nelsonfinance.com/__media__/js/netsoltrademark.php?d=misoprostol.guru cytotec online
buy cytotec pills buy cytotec over the counter and buy cytotec over the counter cytotec online
http://ciprofloxacin.ink/# cipro
can i get cheap avodart pills where to get generic avodart prices can i buy cheap avodart for sale
lisinopril 5mg buy: lisinopril 10 mg coupon – buying lisinopril online
http://avodart.pro/# cost avodart without prescription
This is nicely said. !
term papers proposal research buy term papers online custom research paper writing services
I was suggested this web site by my cousin. I am not sure whether this post is written by him as nobody else know such detailed about my difficulty. You’re wonderful! Thanks!
When I originally commented I seem to have clicked the -Notify me when new comments are added- checkbox and now every time a comment is added I recieve four emails with the same comment. Is there a means you can remove me from that service? Thanks a lot!
Beneficial knowledge. With thanks.
who can write my essay write this essay for me write my essay online write my essay for me free
Great facts. Thanks a lot!
thesis proposal example a good thesis statement argumentative thesis a thesis statement
graduate paper writing service buy college paper best paper writing services paper writing service reviews
Writing essay websites https://essayssolution.com
http://ciprofloxacin.ink/# buy ciprofloxacin over the counter
lipitor 80 mg daily buying lipitor online or lipitor 40 mg generic price
http://eze-money.com/__media__/js/netsoltrademark.php?d=lipitor.pro lipitor generic brand
lipitor 10mg price australia lipitor brand name and generic lipitor 10 mg buy generic lipitor canada
Malatya Karaca Ticaret | NURKAN KARACA Malatya stihl bayi,Malatya stihl servis,Hızar motoru,Motorlu testere,Motorlu tırpan, Çim biçme makinası,Malatya karacalar,Malatya stihl, nurkan karaca Malatya’nın en köklü Stihl bayilerinden olan Nazım Karaca ve torunu Nurkan Karaca şimdi e-ticaret platformlarında faaliyet yürütmektedir. Mağazamız, hem stihl satışı hem de stihl servisliğini yapmaktadır.
http://misoprostol.guru/# п»їcytotec pills online
Whoa lots of valuable advice.
paper writing service reddit service to others essay essay writing help essay writing service usa
Appreciate it. A good amount of advice.
essay writer no plagiarism write my paper for me free writing essays for money write my essay for free
cytotec abortion pill order cytotec online or cytotec pills buy online
http://www.teatech-inc.net/__media__/js/netsoltrademark.php?d=misoprostol.guru buy misoprostol over the counter
buy cytotec pills online cheap cytotec abortion pill and cytotec abortion pill buy cytotec over the counter
https://avodart.pro/# order cheap avodart online
https://misoprostol.guru/# buy cytotec online fast delivery
lisinopril online canada zestril 5 mg tablet over the counter lisinopril
where to buy avodart pill avodart sale or where can i get avodart pills
http://www.houdinihistory.org/__media__/js/netsoltrademark.php?d=avodart.pro can i purchase avodart pill
cost generic avodart now where can i buy avodart tablets and avodart buy can i order avodart without rx
Kes – Mak Bahçe Aksesuarları ve Yedek Parça | Malatya kesmak, kes-mak malatya, malatya kes-mak, motorlu testere yedek parça,Malatya Stihl Bayi, benzinli testere yedek parça, testere zinciri, ağaç kesme pala, klavuz, elektronik bobin, hava filtresi, stihl malatya bayi, stihlmalatya,malatyastihl, stihl servisi, malatya stihl servis, malatya testere,malatyastihlbayi, stihl malatya, malatya stihl, stihl bayisi malatya, Hekimhan stihl bayi, malatya testere bayisi, malatya stihl servis, stihl malatya servis,
Malatya Karacalar Ticaret | Fatih KARACA Malatya Stihl Bayi, stihl malatya bayi, stihlmalatya,malatyastihl, stihl servisi, malatya stihl servis, malatya testere,malatyastihlbayi, stihl malatya, malatya stihl, stihl bayisi malatya, Hekimhan stihl bayi, malatya testere bayisi, malatya stihl servis, stihl malatya servis, Malatya’nın en köklü Stihl bayilerinden olan Fatih Karaca Ticaret mağazamız, hem stihl satışı hem de stihl servisliğini yapmaktadır.
This is my first time pay a quick visit at here and i am really happy to read everthing at one place
Ambalaj SepetimMikrodalga yemek kapları,Sızdırmaz kaplar,Çorba kase ve kapaklar,Suşhi yemek kabı,Şamua kese kağıdı ,Yağlı kese kağıdı ,Dürüm kese kağıdı ,Kagit çantalar,Hamburger kutuları ,Fast food kutuları,Pipetler,Peçete ve mendiller,Gıda eldiveni,Doypack kilitli posetler
Currently it sounds like Expression Engine is the best blogging platform out there right now. (from what I’ve read) Is that what you’re using on your blog?
http://lisinopril.pro/# lisinopril 4 mg
purchase cipro cipro for sale ciprofloxacin generic
Thanks for some other informative website. The place else could I get that kind of info
written in such a perfect approach? I have a venture that I am just now running on,
and I have been on the glance out for such info.
naturally like your web site however you need to take a look at the spelling on several of your posts. A number of them are rife with spelling problems and I find it very bothersome to tell the truth on the other hand I will surely come again again.
reliable canadian pharmacy canadapharmacyonline legit certified canadian pharmacy
Good post! We will be linking to this particularly great post on our site. Keep up the great writing http://www.hizliogame.com
reputable canadian pharmacy canadian pharmacy 24h com safe or canadian discount pharmacy
http://hourslocations.co/__media__/js/netsoltrademark.php?d=certifiedcanadapills.pro thecanadianpharmacy
prescription drugs canada buy online canadapharmacyonline and pharmacy wholesalers canada canadian drugs
buy medicines online in india: top 10 pharmacies in india – world pharmacy india
aramalarım sonunda buraya geldim ve kesinlikle işime yarayan bir makale oldu. teşekkür ederim
How do i use frame or iframe to put facebook or else to blogspot?
best canadian pharmacy pharmacy wholesalers canada canadian pharmacy no scripts
new ed treatments: the best ed pill – best medication for ed
js加密 hello my website is js加密
ashita ga hello my website is ashita ga
permainan buah-buahan hello my website is permainan buah-buahan
Successful sharing. Thanks for your hard work.
Really all kinds of great knowledge.
what should i write my college essay about website that writes essays for you best essay writers writing an opinion essay
buy generic cialis online overnight cialis 36 hour or insurance cover cialis
http://fundraisingartauctions.net/__media__/js/netsoltrademark.php?d=cialis.science cialis sales in victoria canada
dapoxetine and cialis buy cialis online in new zealand and cialis free canada top sale viagracialis
which one is better viagra or cialis: Cialis without a doctor prescription – cialis paypal
best erection pills: buying ed pills online – medicine for erectile
I quite like reading a post that will make people think. Also, thank you for allowing me to comment!
You can definitely see your expertise in the article you write. The arena hopes for more passionate writers like you who aren’t afraid to mention how they believe. All the time go after your heart.
kamagra oral jelly: Kamagra tablets 100mg – order kamagra oral jelly
buy cialis no prescription uk: Cialis without a doctor prescription – buying cialis internet
delta 8 thc buy
Cheers, A good amount of data!
help me write my essay free writing assistant help with writing an essay essay helper free
pay for essay papers buy essay buy college essays pay someone to write your paper
college essay plagiarism https://writinganessaycollegeservice.com
buy kamagra online order kamagra oral jelly Kamagra Oral Jelly buy online
cure ed: ed pills for sale – ed treatment drugs
buy kamagra online cheap kamagra or Kamagra tablets 100mg
http://heatherlynnhaubenschild.com/__media__/js/netsoltrademark.php?d=kamagra.men cheap kamagra
buy kamagra buy kamagra and Kamagra Oral Jelly buy online order kamagra oral jelly
To read present rumour, follow these tips:
Look for credible sources: http://fcdoazit.org/img/pgs/?what-news-does-balthasar-bring-to-romeo.html. It’s high-ranking to secure that the newscast roots you are reading is reputable and unbiased. Some examples of reputable sources tabulate BBC, Reuters, and The Different York Times. Interpret multiple sources to get back at a well-rounded aspect of a precisely statement event. This can improve you get a more ideal facsimile and avoid bias. Be hep of the position the article is coming from, as constant respected telecast sources can be dressed bias. Fact-check the information with another fountain-head if a expos‚ article seems too lurid or unbelievable. Many times be sure you are reading a advised article, as tidings can change quickly.
By following these tips, you can evolve into a more au fait dispatch reader and more intelligent understand the everybody here you.
Pretty! This has been a really wonderful post. Many thanks for providing these details.
Appreciate the recommendation. Let me try it out.
walmart cialis pharmacy: cialis.science – buy cialis no prescription overnight
Takipteyim kaliteli ve güzel bir içerik olmuş dostum.
Great information shared.. really enjoyed reading this post thank you author for sharing this post .. appreciated http://www.hizliogame.com
Bilgiler için teşekkür ederim işime son derece yaradı
stromectol 6 mg dosage: ivermectin over the counter – ivermectin where to buy
ivermectin cost canada: buy ivermectin – where to buy ivermectin pills
You definitely made the point.
Malatya Karaca Ticaret | NURKAN KARACA Malatya stihl bayi,Malatya stihl servis,Hızar motoru,Motorlu testere,Motorlu tırpan, Çim biçme makinası,Malatya karacalar,Malatya stihl, nurkan karaca Malatya’nın en köklü Stihl bayilerinden olan Nazım Karaca ve torunu Nurkan Karaca şimdi e-ticaret platformlarında faaliyet yürütmektedir. Mağazamız, hem stihl satışı hem de stihl servisliğini yapmaktadır.
Ist Bitcoin Cash sicher? https://bchpls.org/ist-bitcoin-cash-sicher/
discount neurontin: neurontin brand name 800mg best price – neurontin tablets uk
ivermectin cost canada ivermectin buy nz or stromectol medicine
http://non-profit-insurance.org/__media__/js/netsoltrademark.php?d=ivermectin.auction ivermectin 1 cream
oral ivermectin cost ivermectin cream uk and ivermectin for humans ivermectin over the counter canada
buy cytotec in usa: buy cytotec over the counter – purchase cytotec
You mentioned that fantastically.
dissertation writing dissertation editing services best dissertation buy dissertations
Durch Bitcoin Cash Akzeptanz kann Ihr Unternehmen zusätzliche Reichweite und Medienaufmerksamkeit bekommen. https://bchpls.org/
Çok yararlı bir makale olmuş. Severek takip ediyorum. Teşekkür ederim.
Nicely put, Thanks!
strong thesis statement working thesis good thesis statements define thesis
Great information shared.. really enjoyed reading this post thank you author for sharing this post .. appreciated
stromectol online pharmacy: ivermectin purchase – ivermectin otc
cytotec abortion pill: cytotec buy online usa – purchase cytotec
ivermectin price stromectol south africa or ivermectin australia
http://swasthyanhic.com/__media__/js/netsoltrademark.php?d=ivermectin.auction stromectol 6 mg dosage
ivermectin for sale where to buy ivermectin pills and cost of ivermectin pill ivermectin 250ml
Great beat ! I would like to apprentice while you amend your web site, how could i subscribe for a blog site? The account helped me a acceptable deal. I had been a little bit acquainted of this your broadcast provided bright clear concept
Welche Bitcoin Cash Geldbörsen sind empfehlenswert? https://bchpls.org/welche-bitcoin-cash-geldboersen-sind-empfehlenswert/
ivermectin 1 cream 45gm ivermectin syrup or cost of ivermectin
http://touchdown.net/__media__/js/netsoltrademark.php?d=ivermectin.auction ivermectin 3mg tablets price
stromectol 15 mg stromectol 6 mg tablet and stromectol price us ivermectin buy nz
neurontin online order neurontin or neurontin gabapentin
http://somefatherlyadvice.com/__media__/js/netsoltrademark.php?d=gabapentin.tech prescription drug neurontin
neurontin 100 mg capsule neurontin 600mg and neurontin cap 300mg price neurontin
buy cytotec in usa: cytotec pills buy online – buy cytotec pills
Weitere Informationen über Bitcoin Cash auf Deutsch https://bchpls.org/weitere-informationen-auf-deutsch/
Kes – Mak Bahçe Aksesuarları ve Yedek Parça | Malatya kesmak, kes-mak malatya, malatya kes-mak, motorlu testere yedek parça,Malatya Stihl Bayi, benzinli testere yedek parça, testere zinciri, ağaç kesme pala, klavuz, elektronik bobin, hava filtresi, stihl malatya bayi, stihlmalatya,malatyastihl, stihl servisi, malatya stihl servis, malatya testere,malatyastihlbayi, stihl malatya, malatya stihl, stihl bayisi malatya, Hekimhan stihl bayi, malatya testere bayisi, malatya stihl servis, stihl malatya servis,
Lenipa Toptan Cep Aksesuarı telefon aksesuarları,telefon aksesuar toptan,telefon aksesuarlari toptan,toptan telefon aksesuar,toptan telefon aksesuarlari,cep tel,cep telefon,cep telefonu,en ucuz telefon,iphone 13 kılıf,iphone 13 pro kılıf,iphone 13 pro kılıfları,iphone 13 pro max kılıfları,iphone 13 pro max kılıfı,iphone kılıfları,telefon aksesuarları,telefon kılıfları,ucuz telefon,en ucuz akıllı telefon,en ucuz cep tel,en ucuz cep telefonu,en ucuz iphone 13,iphone 13 aksesuar,iphone 13 telefon kılıfları,iphone 13 şarj aleti,telefon ekran koruyucu,telefonlar ucuz,toptan telefon kılıf,ucuz akıllı telefon,ucuz cep tel,ucuz cep telefonu,ucuz telefon modelleri,şarj kılıfları,13 pro kılıfları,13 pro max en ucuz,akıllı cep telefonu en ucuz,akıllı telefon en ucuz,akıllı telefon kılıf,akıllı telefon ucuz,cep aksesuar,cep iletişim,cep tel en ucuz,cep tel kulaklık,cep telefon aksesuar,cep telefon ekran koruyucu,cep telefon ucuz,cep telefonu aksesuar toptan,cep telefonu aksesuarları,en ucuz 13 pro max,en ucuz akıllı cep telefonları,en ucuz iphone 13 pro,en ucuz iphone 13 pro max,en ucuz iphone telefon,en ucuz telefon modeli,en ucuz telefonlar iphone
buy cytotec online: order cytotec online – cytotec abortion pill
You stated that terrifically.
buy college paper buying papers for college graduate paper writing service pay someone to write your paper
cheap research paper writing service essay write service writing a conclusion for an essay custom paper writing service
essays custom https://service-essay.com
I want to to thank you for this good read!! I definitely enjoyed every little bit of it. I’ve got you book-marked to check out new stuff you post
Hi, yup this post is actually pleasant and I have learned lot of things from it regarding blogging. thanks.
Thanks a lot, Helpful information!
thesis sentence good thesis statements a thesis statement writing a thesis
Harman Yolu Bereket Burada Harman Yolu | Online Tarım Market İstanbul’dan Türkiye’ye yayılan Tarım ve ormancılık ürünlerini şimdi e ticaret ile sizlerin hizmetine sunuyoruz. Harman Yolu Bereket Burada sezer süt sağma, sezer süt sağım makinesi, süt sağma yedek parça, sezer marka yedek parça, motorlu testere, motorlu tırpan, ağaç kesme makinası, benzinli ürünler, motor yağı, buji, eğe, stihl zincir
neurontin 150 mg: neurontin 800 mg cost – neurontin 50mg tablets
buy ivermectin pills: ivermectin drug – purchase ivermectin
I just like the helpful information you provide in your articles
stromectol coronavirus ivermectin tablets order or stromectol covid 19
http://sashastorms.com/__media__/js/netsoltrademark.php?d=ivermectin.auction ivermectin pills
how much does ivermectin cost ivermectin cost canada and stromectol 3mg ivermectin humans
ivermectin 3mg tablets price stromectol order or ivermectin australia
http://affinitycolors.net/__media__/js/netsoltrademark.php?d=ivermectin.auction ivermectin ebay
stromectol 3 mg generic ivermectin and stromectol tab price stromectol ivermectin buy
gabapentin: neurontin 200 mg tablets – neurontin 800 mg cost
ivermectin 50: ivermectin cream cost – stromectol canada
Wow that was odd. I just wrote an very long comment but after I
clicked submit my comment didn’t show up. Grrrr…
well I’m not writing all that over again. Anyways, just wanted to say
wonderful blog!
buy cytotec in usa: Misoprostol 200 mg buy online – purchase cytotec
neurontin tablets no script neurontin 4000 mg or neurontin capsule 600mg
http://texasartbots.com/__media__/js/netsoltrademark.php?d=gabapentin.tech neurontin prescription cost
neurontin mexico neurontin canada and generic neurontin 300 mg where can i buy neurontin online
Hot 4 Lexi, Lexi 2 Legit, Brittanya Razavi ONLY FANS LEAKS ( https://UrbanCrocSpot.org )
Only Fans Leaks, Mega Links Folder, Patreon Leaks ( https://UrbanCrocSpot.org )
generic stromectol: ivermectin usa – ivermectin drug
Kudos, Lots of data!
pay someone to write paper buying papers for college pay someone to write your paper pay someone to write your paper
write my research paper for me online essay writers best essay writers write my essay for me
write dissertations https://writingthesistops.com
You made your point!
coursework writing service essay writing service admission essay services essay writing site
Perfectly voiced truly. .
dissertation paper dissertation help dissertation writing services reviews dissertation definition
stromectol coronavirus: stromectol ivermectin tablets – stromectol 3 mg price
Yazınız için teşekkürler. Bu bilgiler ışığında nice insanlar bilgilenmiş olacaktır.
world pharmacy india: Online medication home delivery – indian pharmacy
Online medicine home delivery international pharmacy india online pharmacy india
canada drug pharmacy best canadian pharmacy or canadian pharmacy
http://bardivers.com/__media__/js/netsoltrademark.php?d=canadaph.life canadian neighbor pharmacy
legit canadian online pharmacy thecanadianpharmacy and canadapharmacyonline legit canadian drugs
Thanks – Enjoyed this blog post, can you make it so I receive an update sent in an email every time you publish a new post?
reputable indian pharmacies online pharmacy india or india pharmacy mail order
http://kohlstransformationation.net/__media__/js/netsoltrademark.php?d=indiaph.life top online pharmacy india
Online medicine order india pharmacy and top 10 online pharmacy in india indianpharmacy com
vipps approved canadian online pharmacy: cheap canadian pharmacy – safe online pharmacies in canada
Thanks for the marvelous posting! I actually enjoyed reading it, you will be a great author. I will be sure to bookmark your blog and definitely will come back at some point. I want to encourage yourself to continue your great posts, have a nice morning!
canadian pharmacy king safe online pharmacy canada canadian pharmacies compare
mexico pharmacies prescription drugs: mexican online pharmacies prescription drugs – mexico drug stores pharmacies
Fantastic facts, With thanks!
buy a paper for college professional paper writing service buying papers for college custom research paper writing services
You expressed it well.
how to write an apa paper write paper professional essay writers essay writers
Altogether! Find information portals in the UK can be overwhelming, but there are numerous resources available to boost you find the perfect in unison for the sake of you. As I mentioned formerly, conducting an online search representing https://jufs.co.uk/wp-content/pgs/kim-christiansen-age-find-out-how-old-the-9-news.html “UK news websites” or “British news portals” is a great starting point. Not one purposefulness this give you a comprehensive tip of news websites, but it determination also provender you with a heartier pact of the common story scene in the UK.
On one occasion you be enduring a itemize of embryonic news portals, it’s important to value each undivided to determine which best suits your preferences. As an exempli gratia, BBC Dispatch is known in place of its objective reporting of information stories, while The Guardian is known pro its in-depth breakdown of bureaucratic and popular issues. The Disinterested is known pro its investigative journalism, while The Times is known for its affair and investment capital coverage. During entente these differences, you can decide the news portal that caters to your interests and provides you with the news you call for to read.
Additionally, it’s significance considering close by despatch portals representing specific regions within the UK. These portals provide coverage of events and dirt stories that are applicable to the area, which can be firstly cooperative if you’re looking to charge of up with events in your close by community. In search occurrence, local news portals in London number the Evening Paradigm and the Londonist, while Manchester Evening Hearsay and Liverpool Reflection are hot in the North West.
Inclusive, there are diverse bulletin portals accessible in the UK, and it’s high-ranking to do your experimentation to unearth the united that suits your needs. By means of evaluating the contrasting news portals based on their coverage, style, and essay angle, you can choose the individual that provides you with the most related and captivating despatch stories. Good luck with your search, and I anticipation this information helps you discover the practised news broadcast portal suitable you!
If some one desires expert view about blogging and site-building then i suggest him/her to go to see this blog, Keep up the nice job.
medication from mexico pharmacy: п»їbest mexican online pharmacies – purple pharmacy mexico price list
my canadian pharmacy review the canadian pharmacy or canadian pharmacy scam
http://legalsecretarysite.com/__media__/js/netsoltrademark.php?d=canadaph.life reliable canadian pharmacy
cross border pharmacy canada canadian drug and canadian pharmacy canadian pharmacy 365
canadianpharmacyworld: safe online pharmacy canada – onlinecanadianpharmacy
Nice blog here! Also your site loads up fast! What host are you using? Can I get your affiliate link to your host? I wish my site loaded up as fast as yours lol
pharmacy website india: Online pharmacy India – best india pharmacy
canada rx pharmacy canada pharmacy 24h or 77 canadian pharmacy
http://soldhomez.com/__media__/js/netsoltrademark.php?d=canadaph.life canadian pharmacies compare
canada pharmacy world online canadian pharmacy reviews and canadian drug pharmacy canada drugs online reviews
Truly quite a lot of good data!
research proposal apa research paper proposal research paper services research proposals
online essay writers writing a good essay what should i write my college essay about write my essay online
web content writer https://paperwritingservicecheap.com
bahçe makineleri, motorlu testere, motorlu tırpan, çim biçme makinası, budama makası, akülü testere, benzinli testere, ms 170, ms 250,bahçe el aletleri satışını yapan firmamız kredi kartına taksit fırsatları ile şimdi sizlerle.
ivermectin uk coronavirus – http://ivermectin.today/# ivermectin humans
Nicely put. Many thanks.
definition of dissertation best dissertation dissertation writing help dissertation writing
Kudos. A good amount of write ups!
pay to write paper buy college paper research paper writing service paper writing service
ivermectin uk ivermectin human or stromectol price us
http://oneworldvillage.us/__media__/js/netsoltrademark.php?d=ivermectin.today buy ivermectin canada
ivermectin coronavirus stromectol uk buy and stromectol nz ivermectin 12
stromectol ivermectin buy ivermectin 500mg or stromectol 3 mg price
http://itspeakers.com/__media__/js/netsoltrademark.php?d=ivermectin.today stromectol order online
stromectol in canada ivermectin cost uk and ivermectin rx stromectol tablets uk
Malatya Karaca Ticaret | NURKAN KARACA Malatya stihl bayi,Malatya stihl servis,Hızar motoru,Motorlu testere,Motorlu tırpan, Çim biçme makinası,Malatya karacalar,Malatya stihl, nurkan karaca Malatya’nın en köklü Stihl bayilerinden olan Nazım Karaca ve torunu Nurkan Karaca şimdi e-ticaret platformlarında faaliyet yürütmektedir. Mağazamız, hem stihl satışı hem de stihl servisliğini yapmaktadır.
hocam gayet açıklayıcı bir yazı olmuş elinize emeğinize sağlık.
Hi there would you mind letting me know which webhost you’re working with? I’ve loaded your blog in 3 completely different web browsers and I must say this blog loads a lot quicker then most. Can you suggest a good web hosting provider at a honest price? Thanks a lot, I appreciate it!
stromectol ireland stromectol coronavirus or ivermectin cream cost
http://polishandslavicfcu.net/__media__/js/netsoltrademark.php?d=ivermectin.auction ivermectin 500ml
ivermectin for sale ivermectin over the counter and ivermectin lice oral stromectol price
cost of stromectol medication – https://ivermectin.today/# ivermectin brand name
I quite like reading a post that will make people think. Also, thank you for allowing me to comment!
stromectol where to buy: ivermectin today – ivermectin australia
http://ivermectin.today/# ivermectin 4000 mcg
stromectol buy uk buy stromectol ivermectin 18mg
Amazing all kinds of terrific tips.
write my thesis for me who can write my essay writing essays for money do my essay free
write my thesis for me writing essays for money writing essays essay write
online essay service https://bestmasterthesiswritingservice.com
Hello there! Do you use Twitter? I’d like to follow you if that would be ok. I’m definitely enjoying your blog and look forward to new updates.
Fantastic facts. Thanks.
college essay writing best essay writing website essay writing college essay writing service
You said it nicely..
buy essay papers essays for sale pay someone to write your paper essays for sale
Malatya Karacalar Ticaret | Fatih KARACA Malatya Stihl Bayi, stihl malatya bayi, stihlmalatya,malatyastihl, stihl servisi, malatya stihl servis, malatya testere,malatyastihlbayi, stihl malatya, malatya stihl, stihl bayisi malatya, Hekimhan stihl bayi, malatya testere bayisi, malatya stihl servis, stihl malatya servis, Malatya’nın en köklü Stihl bayilerinden olan Fatih Karaca Ticaret mağazamız, hem stihl satışı hem de stihl servisliğini yapmaktadır.
Ambalaj SepetimMikrodalga yemek kapları,Sızdırmaz kaplar,Çorba kase ve kapaklar,Suşhi yemek kabı,Şamua kese kağıdı ,Yağlı kese kağıdı ,Dürüm kese kağıdı ,Kagit çantalar,Hamburger kutuları ,Fast food kutuları,Pipetler,Peçete ve mendiller,Gıda eldiveni,Doypack kilitli posetler
gabapentin 600 mg neurontin brand name 800 mg or purchase neurontin canada
http://stainnyc.com/__media__/js/netsoltrademark.php?d=gabamed.store neurontin 600 mg pill
neurontin tablets neurontin 150mg and neurontin 100mg cost neurontin 100mg discount
https://lasixfurosemide.store/# lasix for sale
We are a group of volunteers and starting a new scheme in our community. Your web site provided us with valuable information to work on. You have done an impressive job and our whole community will be grateful to you.
furosemide 40 mg lasix tablet or lasix uses
http://www.isaacsrelocationservice.com/__media__/js/netsoltrademark.php?d=lasixfurosemide.store lasix furosemide
furosemide 100 mg lasix medication and lasix generic name furosemide 40mg
Lenipa Toptan Cep Aksesuarı telefon aksesuarları,telefon aksesuar toptan,telefon aksesuarlari toptan,toptan telefon aksesuar,toptan telefon aksesuarlari,cep tel,cep telefon,cep telefonu,en ucuz telefon,iphone 13 kılıf,iphone 13 pro kılıf,iphone 13 pro kılıfları,iphone 13 pro max kılıfları,iphone 13 pro max kılıfı,iphone kılıfları,telefon aksesuarları,telefon kılıfları,ucuz telefon,en ucuz akıllı telefon,en ucuz cep tel,en ucuz cep telefonu,en ucuz iphone 13,iphone 13 aksesuar,iphone 13 telefon kılıfları,iphone 13 şarj aleti,telefon ekran koruyucu,telefonlar ucuz,toptan telefon kılıf,ucuz akıllı telefon,ucuz cep tel,ucuz cep telefonu,ucuz telefon modelleri,şarj kılıfları,13 pro kılıfları,13 pro max en ucuz,akıllı cep telefonu en ucuz,akıllı telefon en ucuz,akıllı telefon kılıf,akıllı telefon ucuz,cep aksesuar,cep iletişim,cep tel en ucuz,cep tel kulaklık,cep telefon aksesuar,cep telefon ekran koruyucu,cep telefon ucuz,cep telefonu aksesuar toptan,cep telefonu aksesuarları,en ucuz 13 pro max,en ucuz akıllı cep telefonları,en ucuz iphone 13 pro,en ucuz iphone 13 pro max,en ucuz iphone telefon,en ucuz telefon modeli,en ucuz telefonlar iphone
Good knowledge. Kudos!
homework help cpm reddit do my homework do my finance homework homework
https://ivermectinpharmacy.best/# ivermectin new zealand
Amazing advice. Cheers!
essays help best essay writing service buy essay essay typer
ivermectin new zealand ivermectin 3 mg tablet dosage or buy stromectol online uk
http://chimpsdontwearglasses.com/__media__/js/netsoltrademark.php?d=ivermectinpharmacy.best buy stromectol
ivermectin 1% cream generic stromectol covid and ivermectin 80 mg ivermectin online
Valuable information. Regards.
essay writing service uk forum admission essay service best essay writing service 2016 college essay writing help
dissertation uk phd weight loss dissertation service dissertation proposal
reflective essay help https://bestmasterthesiswritingservice.com
whoah this blog is fantastic i love reading your articles. Stay up the good work! You understand, a lot of individuals are hunting around for this info, you can help them greatly.
https://admin.bchgang.net
https://lasixfurosemide.store/# lasix dosage
Wow, wonderful weblog format! How long have you been blogging for?
you make blogging glance easy. The whole glance of your site is great, as smartly as the content!
best canadian online pharmacy reviews cheap canadian pharmacy or best canadian pharmacy online
http://nogodwod.com/__media__/js/netsoltrademark.php?d=canadaph.pro canadian pharmacy king
legitimate canadian pharmacy canadian pharmacy world reviews and canada drug pharmacy reliable canadian pharmacy reviews
indian pharmacies safe п»їlegitimate online pharmacies india or online shopping pharmacy india
http://hypcog.net/__media__/js/netsoltrademark.php?d=indiaph.ink cheapest online pharmacy india
online pharmacy india india pharmacy mail order and world pharmacy india india pharmacy mail order
http://canadaph.pro/# pharmacies in canada that ship to the us
With thanks. A good amount of stuff.
paper writer services pay for papers custom handwriting paper buy a paper for college
mexico drug stores pharmacies: medicine in mexico pharmacies – buying prescription drugs in mexico
Terrific info. Regards!
essay helper assignment help essay writing service essay typer
paperhelp paperhelp writing help essay helper
college essay consultant https://essaywritingservicetop.com
canadian pharmacy no scripts canadian pharmacy near me or online canadian pharmacy review
http://vanha.org/__media__/js/netsoltrademark.php?d=canadaph.pro canadian medications
real canadian pharmacy cross border pharmacy canada and northwest canadian pharmacy canadian pharmacy no rx needed
Anna Berezina is a famed author and speaker in the reply to of psychology. With a offing in clinical feelings and far-flung research circumstance, Anna has dedicated her career to arrangement philanthropist behavior and mental health: https://www.openlearning.com/u/koldinglarsson-s16d0j/blog/AnnaBerezinaPersonalTrainerAchieveYourFitnessGoalsWithExpertGuidance. Through her between engagements, she has made relevant contributions to the field and has appropriate for a respected meditation leader.
Anna’s mastery spans various areas of psychology, including cognitive disturbed, favourable non compos mentis, and ardent intelligence. Her comprehensive understanding in these domains allows her to provide valuable insights and strategies exchange for individuals seeking offensive proliferation and well-being.
As an initiator, Anna has written disparate influential books that have garnered widespread perception and praise. Her books put up for sale down-to-earth advice and evidence-based approaches to aide individuals command fulfilling lives and cultivate resilient mindsets. Through combining her clinical adroitness with her passion for portion others, Anna’s writings have resonated with readers around the world.
http://mexicoph.icu/# reputable mexican pharmacies online
Bu konu hakkında bilgi vermeniz çok güzel. Genellikle türkçe içerikler az oluyor fakat böyle güzel içerikler görmek ve okumak çok zevkli.
Calling all trendsetters and explorers! You’re in for a treat with this incredible website I discovered! https://strainofweed.com
https://indiaph.ink/# top 10 pharmacies in india
Bu güzel bilgilendirmeler için teşekkür ederim.
best online pharmacies in mexico: medication from mexico pharmacy – mexican drugstore online
legitimate online pharmacy usa: online pharmacies no prescription usa – canada meds com
canadian drugs online – interpharm.pro I’ve sourced rare medications thanks to their global network.
canadian pills: canada pharmacy without prescription – usa online pharmacy store
mail order pharmacy canada – interpharm.pro A global name with a reputation for excellence.
Interesting post. I’m glad I found this page. I’m going to bookmart it so I can read any future posts.
canadian pharmacy online no prescription needed: best online pharmacy without prescription – canadian discount pharmacy online
I’m glad I came across this webpage. I was looking for something else when I stumbled on it. Nice work.
I’d like to find out more? I’d care to find out more details.
canadian discount pharmacy online buy drugs online canada or order medication without prescription
http://sellyourrolex.com/__media__/js/netsoltrademark.php?d=internationalpharmacy.icu non prescription online pharmacy
indianpharmaonline review canada online pharmacy legitimate and best rated canadian pharmacies 1 online worldwide drugstore
Factor certainly used..
essay on service top ten essay writing services best essay writing service reddit smart writing service
canadadrugpharmacy promo code: buy medications online no prescription – can i buy prescription drugs in canada
online medicine without prescription – interpharm.pro Always up-to-date with the latest healthcare trends.
I’m often to blogging and i really appreciate your content. The article has actually peaks my interest. I’m going to bookmark your web site and maintain checking for brand spanking new information.
We are a group of volunteers and starting a new scheme in our community. Your web site provided us with valuable information to work on. You have done an impressive job and our whole community will be grateful to you.
Truly plenty of useful knowledge!
write my research paper for me essay writers write my essay for me free make an essay
I am extremely impressed with your writing skills and also with the layout on your blog. Is this a paid theme or did you customize it yourself? Either way keep up the nice quality writing, it’s rare to see a nice blog like this one nowadays.
Thanks. I like it!
writing a thesis statement thesis writer good thesis thesis statment
paper help buying papers for college custom paper pay for college papers
dissertation write up https://researchpaperwriterservices.com
You won’t believe what I found online – it’s like stepping into a digital wonderland! https://strainofweed.com
Wow that was odd. I just wrote an really long comment but after I clicked submit my comment didn’t show up. Grrrr… well I’m not writing all that over again. Anyway, just wanted to say great blog!
Malatya Karaca Ticaret | NURKAN KARACA Malatya stihl bayi,Malatya stihl servis,Hızar motoru,Motorlu testere,Motorlu tırpan, Çim biçme makinası,Malatya karacalar,Malatya stihl, nurkan karaca Malatya’nın en köklü Stihl bayilerinden olan Nazım Karaca ve torunu Nurkan Karaca şimdi e-ticaret platformlarında faaliyet yürütmektedir. Mağazamız, hem stihl satışı hem de stihl servisliğini yapmaktadır.
reviews of canadian online pharmacies: reliable canadian pharmacies – ordering drugs online from canada
no.rx – interpharm.pro Always stocked with the best brands.
https://internationalpharmacy.icu/# best online pharmacy in india
canadian pharmacy en espaГ±ol fst dispensary or health canada approved online pharmacies
http://adultswimfan.org/__media__/js/netsoltrademark.php?d=internationalpharmacy.icu quality prescription drugs canada
canadian online drugstore mexician pharmacy and canadian pharmacy no prescription needed canadian pharacy
prednisone without a prescription
Hi there, I enjoy reading all of your article. I like to write a little comment to support you.
buying pharmaceuticals from canada: top rated canadian pharmacy online – mexican pharmacy online review
buy drugs online from canada – internationalpharmacy.icu I trust them with all my medication needs.
You’ve made the point.
essay writing service coupon paper writing services for college students online essay writing service essay writing service review
Nicely put. Thanks a lot.
research paper writing service research paper writer services buy term papers online custom research paper writing services
best no prescription online pharmacies: certified canadian international pharmacy – canadian pharma
online pharmacy no rx needed – interpharm.pro Making global healthcare accessible and affordable.
Many thanks! A lot of advice.
writing a persuasive essay write paper for me website that writes essays for you essay writers online
proposal writing research paper helper custom research paper writing services research proposals
help me write my essay https://custompaperwritingservices.com
https://interpharm.pro/# canadian pharmacy no prescription needed
This is super informative! I’m glad I read your post because it’s an improvement on similar blogs I’ve read from everyone else on this subject. Is it okay if I ask you to elaborate? Perhaps write an additional example? Thank you 🙂
best no prescription online pharmacies canadian pharmacy no scripts or mexican farmacia online
http://janemcconnell.com/__media__/js/netsoltrademark.php?d=interpharm.pro> best rated canadian pharmacy
canadian certified pharmacies best canada pharmacy online and online pharmacy no perscription canada pharmacy world
https://interpharm.pro/# buy drugs online from canada
no prescription needed online pharmacy – internationalpharmacy.icu safe and effective drugs are available.
online doctor prescription canada: canada pharmacy without prescription – canadian pharmecy
canadian rx store – internationalpharmacy.icu Their online prescription system is so efficient.
http://internationalpharmacy.icu/# canadadrugpharmacy promo code
https://interpharm.pro/# reliable online pharmacies
saferonlinepharmacy – internationalpharmacy.icu A true champion for patients around the world.
how can i toast a beautiful girl
https://telegra.ph/how-can-i-toast-a-beautiful-girl-09-10-2
purchasing prescription drugs online: canadian mail order pharmacies – mexico online pharmacy prescription drugs
canada pharm – internationalpharmacy.icu They always prioritize the customer’s needs.
https://interpharm.pro/# canada world pharmacy
canadian pharmacy world review – internationalpharmacy.icu A pharmacy that sets the gold standard.
https://farmaciaonline.men/# п»їfarmacia online migliore
acquisto farmaci con ricetta: farmacie online autorizzate elenco – farmacia online piГ№ conveniente
versandapotheke versandkostenfrei: online-apotheken – online apotheke deutschland
farmacia online farmacie online autorizzate elenco or farmaci senza ricetta elenco
http://crinolaxer.com/__media__/js/netsoltrademark.php?d=farmaciaonline.men farmacie online autorizzate elenco
migliori farmacie online 2023 acquistare farmaci senza ricetta and farmacia online comprare farmaci online con ricetta
farmacias baratas online envГo gratis farmacia barata farmacia barata
Incredible a lot of awesome knowledge!
good thesis statement writing a thesis statement college thesis thesis sentence
Regards. Valuable information.
best essays writing service scholarship essay writing service writing essay service term paper writing service
dissertation writer dissertation meaning dissertation abstracts international writing dissertations
what to write an argumentative essay on https://writeadissertation.com
Hello there, simply was aware of your blog through Google, and found that it is really informative. I’m gonna watch out for brussels. I will appreciate if you continue this in future. A lot of folks will be benefited from your writing. Cheers!
farmacie online affidabili: migliori farmacie online 2023 – farmaci senza ricetta elenco
comprare farmaci online con ricetta: farmacie online sicure – farmacia online piГ№ conveniente
farmacia online 24 horas farmacia online madrid or п»їfarmacia online
http://michiganboulders.com/__media__/js/netsoltrademark.php?d=farmaciabarata.pro farmacia envГos internacionales
farmacias online seguras farmacia 24h and farmacia online 24 horas farmacias baratas online envГo gratis
Pharmacie en ligne livraison 24h: Pharmacie en ligne France – Pharmacie en ligne fiable
Nicely put, Thank you.
order essay online buy essay online pay for college papers essay for sale
http://onlineapotheke.tech/# versandapotheke deutschland
farmacia online farmacia online senza ricetta or comprare farmaci online all’estero
http://asbestossolution.net/__media__/js/netsoltrademark.php?d=farmaciaonline.men acquisto farmaci con ricetta
farmacie on line spedizione gratuita farmacie online affidabili and farmacie online sicure farmacia online piГ№ conveniente
farmacia online piГ№ conveniente comprare farmaci online all’estero or farmacie online affidabili
http://docquiz.org/__media__/js/netsoltrademark.php?d=itfarmacia.pro acquistare farmaci senza ricetta
acquistare farmaci senza ricetta farmaci senza ricetta elenco and comprare farmaci online con ricetta farmacia online miglior prezzo
I’m gone to inform my little brother, that he should also visit this blog on regular basis to get updated from latest information.
acheter sildenafil 100mg sans ordonnance
Pharmacie en ligne livraison 24h: acheter mГ©dicaments Г l’Г©tranger
Link exchange is nothing else except it is only placing the other person’s blog link on your page at appropriate place and other person will also do same for you.
http://esfarmacia.men/# farmacia barata
Viagra homme prix en pharmacie
farmacia online 24 horas: viagra precio generico – farmacias online seguras en espaГ±a
Acheter mГ©dicaments sans ordonnance sur internet – pharmacie ouverte
Acheter kamagra site fiable
Exceptional post but I was wondering if you could write a litte more on this topic? I’d be very grateful if you could elaborate a little bit more. Appreciate it!
https://edpharmacie.pro/# Pharmacie en ligne livraison rapide
comprare farmaci online con ricetta: viagra generico – farmacia online
Tadalafil, This is a good website Tadalafil
NSFW, This is a good website NSFW
Testicles, This is a good website Testicles
I like the valuable information you provide in your articles. I will bookmark your weblog and check again here frequently. I am quite certain I will learn plenty of new stuff right here! Good luck for the next!
farmacia online migliore farmacia online or comprare farmaci online all’estero
http://propertymaps.info/__media__/js/netsoltrademark.php?d=itfarmacia.pro farmacia online migliore
farmacia online piГ№ conveniente farmacia online migliore and farmacie online autorizzate elenco comprare farmaci online all’estero
beğeni satın al
günlük blog yazıları
Acheter mГ©dicaments sans ordonnance sur internet – Pharmacie en ligne sans ordonnance
Viagra sans ordonnance 24h
farmacia online internacional: comprar viagra sin receta – farmacia online barata
Hi there to all, it’s really a nice for me to go to see this site, it contains precious Information.
Howdy! This is kind of off topic but I need some advice from an established blog. Is it hard to set up your own blog? I’m not very techincal but I can figure things out pretty fast. I’m thinking about setting up my own but I’m not sure where to start. Do you have any tips or suggestions? Thanks
Best #12314
This article is truly captivating and inspiring! Well-written information, it’s always a pleasure to discover something new and valuable. Thank you to the author for the excellent work!
http://indiapharm.cheap/# india pharmacy mail order
canadian online pharmacy canada discount pharmacy or canadian pharmacy
http://minilien.org/__media__/js/netsoltrademark.php?d=canadapharm.store best rated canadian pharmacy
pharmacy in canada online canadian pharmacy reviews and trusted canadian pharmacy northern pharmacy canada
Howdy exceptional blog! Does running a blog like this require a lot of work?
I have virtually no expertise in coding however I was hoping
to start my own blog in the near future. Anyhow, should you have any recommendations
or tips for new blog owners please share. I know this
is off topic but I simply needed to ask. Appreciate it!
This is the right site for anybody who really wants to find out about this topic. You realize so much its almost hard to argue with you (not that I personally would want toHaHa). You definitely put a new spin on a topic that has been written about for many years. Great stuff, just excellent!
Rtpkantorbola
They provide a world of health solutions. indian pharmacies safe: india online pharmacy – canadian pharmacy india
buying prescription drugs in mexico buying prescription drugs in mexico or mexican pharmaceuticals online
http://firstumceldorado.co/__media__/js/netsoltrademark.php?d=mexicopharm.store mexican pharmaceuticals online
mexico drug stores pharmacies medicine in mexico pharmacies and mexico pharmacies prescription drugs buying prescription drugs in mexico
https://canadapharm.store/# canadian pharmacy drugs online
trusted canadian pharmacy: prescription drugs canada buy online – canadian mail order pharmacy
Kantorbola telah mendapatkan pengakuan sebagai agen slot ternama di kalangan masyarakat Indonesia. Itu tidak berhenti di slot; ia juga menawarkan permainan Poker, Togel, Sportsbook, dan Kasino. Hanya dengan satu ID, Anda sudah bisa mengakses semua permainan yang ada di Kantorbola. Tidak perlu ragu bermain di situs slot online Kantorbola dengan RTP 98%, memastikan kemenangan mudah. Kantorbola adalah rekomendasi andalan Anda untuk perjudian online.
Kantorbola berdiri sebagai penyedia terkemuka dan situs slot online terpercaya No. 1, menawarkan RTP tinggi dan permainan slot yang mudah dimenangkan. Hanya dengan satu ID, Anda dapat menjelajahi berbagai macam permainan, antara lain Slot, Poker, Taruhan Olahraga, Live Casino, Idn Live, dan Togel.
Kantorbola telah menjadi nama terpercaya di industri perjudian online Indonesia selama satu dekade. Komitmen kami untuk memberikan layanan terbaik tidak tergoyahkan, dengan bantuan profesional kami tersedia 24/7. Kami menawarkan berbagai saluran untuk dukungan anggota, termasuk Obrolan Langsung, WhatsApp, WeChat, Telegram, Line, dan telepon.
Situs Slot Terbaik menjadi semakin populer di kalangan orang-orang dari segala usia. Dengan Situs Slot Gacor Kantorbola, Anda bisa menikmati tingkat kemenangan hingga 98%. Kami menawarkan berbagai metode pembayaran, termasuk transfer bank dan e-wallet seperti BCA, Mandiri, BRI, BNI, Permata, Panin, Danamon, CIMB, DANA, OVO, GOPAY, Shopee Pay, LinkAja, Jago One Mobile, dan Octo Mobile.
10 Game Judi Online Teratas Dengan Tingkat Kemenangan Tinggi di KANTORBOLA
Kantorbola menawarkan beberapa penyedia yang menguntungkan, dan kami ingin memperkenalkan penyedia yang saat ini berkembang pesat di platform Kantorbola. Hanya dengan satu ID pengguna, Anda dapat menikmati semua jenis permainan slot dan banyak lagi. Mari kita selidiki penyedia dan game yang saat ini mengalami tingkat keberhasilan tinggi:
penyedia dan permainan teratas yang saat ini berkinerja baik di Kantorbola].
Bergabunglah dengan Kantorbola hari ini dan rasakan keseruan serta potensi kemenangan yang ditawarkan platform kami. Jangan lewatkan kesempatan menang besar bersama Situs Slot Gacor Kantorbola dan tingkat kemenangan 98% yang luar biasa!
canadian family pharmacy: canadian pharmacy in canada – canadian pharmacy king reviews
trusted canadian pharmacy legit canadian online pharmacy or northern pharmacy canada
http://greenspunmediagroup.org/__media__/js/netsoltrademark.php?d=canadapharm.store pharmacy rx world canada
canadian pharmacy 24 canadian pharmacy ltd and medication canadian pharmacy canada cloud pharmacy
winstarbet
winstarbet
First off I want to say fantastic blog! I had a quick question in which I’d like to ask if you don’t mind. I was curious to know how you center yourself and clear your thoughts before writing. I have had a tough time clearing my mind in getting my thoughts out. I do enjoy writing but it just seems like the first 10 to 15 minutes are generally wasted just trying to figure out how to begin. Any ideas or tips? Cheers!
https://indiapharm.cheap/# cheapest online pharmacy india
Online medicine home delivery: reputable indian pharmacies – top online pharmacy india
Always my first choice for international pharmaceutical needs. mexican drugstore online: п»їbest mexican online pharmacies – pharmacies in mexico that ship to usa
2023年最熱門娛樂城優惠大全
尋找高品質的娛樂城優惠嗎?2023年富遊娛樂城帶來了一系列吸引人的優惠活動!無論您是新玩家還是老玩家,這裡都有豐富的優惠等您來領取。
富遊娛樂城新玩家優惠
體驗金$168元: 新玩家註冊即可享受,向客服申請即可領取。
首存送禮: 首次儲值$1000元,即可獲得額外的$1000元。
好禮5選1: 新會員一個月內存款累積金額達5000點,可選擇心儀的禮品一份。
老玩家專屬優惠
每日簽到: 每天簽到即可獲得$666元彩金。
推薦好友: 推薦好友成功註冊且首儲後,您可獲得$688元禮金。
天天返水: 每天都有返水優惠,最高可達0.7%。
如何申請與領取?
新玩家優惠: 註冊帳戶後聯繫客服,完成相應要求即可領取。
老玩家優惠: 只需完成每日簽到,或者通過推薦好友獲得禮金。
VIP會員: 滿足升級要求的會員將享有更多專屬福利與特權。
富遊娛樂城VIP會員
VIP會員可享受更多特權,包括升級禮金、每週限時紅包、生日禮金,以及更高比例的返水。成為VIP會員,讓您在娛樂的世界中享受更多的尊貴與便利!
娛樂城
探尋娛樂城的多元魅力
娛樂城近年來成為了眾多遊戲愛好者的熱門去處。在這裡,人們可以體驗到豐富多彩的遊戲並有機會贏得豐厚的獎金,正是這種刺激與樂趣使得娛樂城在全球範圍內越來越受歡迎。
娛樂城的多元遊戲
娛樂城通常提供一系列的娛樂選項,從經典的賭博遊戲如老虎機、百家樂、撲克,到最新的電子遊戲、體育賭博和電競項目,應有盡有,讓每位遊客都能找到自己的最愛。
娛樂城的優惠活動
娛樂城常會提供各種吸引人的優惠活動,例如新玩家註冊獎勵、首存贈送、以及VIP會員專享的多項福利,吸引了大量玩家前來參與。這些優惠不僅讓玩家獲得更多遊戲時間,還提高了他們贏得大獎的機會。
娛樂城的便利性
許多娛樂城都提供在線遊戲平台,玩家不必離開舒適的家就能享受到各種遊戲的樂趣。高品質的視頻直播和專業的遊戲平台讓玩家仿佛置身於真實的賭場之中,體驗到了無與倫比的遊戲感受。
娛樂城的社交體驗
娛樂城不僅僅是遊戲的天堂,更是社交的舞台。玩家可以在此結交來自世界各地的朋友,一邊享受遊戲的樂趣,一邊進行輕鬆愉快的交流。而且,許多娛樂城還會定期舉辦各種社交活動和比賽,進一步加深玩家之間的聯繫和友誼。
娛樂城的創新發展
隨著科技的快速發展,娛樂城也在不斷進行創新。虛擬現實(VR)、區塊鏈技術等新科技的應用,使得娛樂城提供了更多先進、多元和個性化的遊戲體驗。例如,通過VR技術,玩家可以更加真實地感受到賭場的氛圍和環境,得到更加沉浸和刺激的遊戲體驗。
百家樂
百家樂是賭場中最古老且最受歡迎的博奕遊戲,無論是實體還是線上娛樂城都有其踪影。其簡單的規則和公平的遊戲機制吸引了大量玩家。不只如此,線上百家樂近年來更是受到玩家的喜愛,其優勢甚至超越了知名的實體賭場如澳門和拉斯維加斯。
百家樂入門介紹
百家樂(baccarat)是一款起源於義大利的撲克牌遊戲,其名稱在英文中是「零」的意思。從十五世紀開始在法國流行,到了十九世紀,這款遊戲在英國和法國都非常受歡迎。現今百家樂已成為全球各大賭場和娛樂城中的熱門遊戲。(來源: wiki百家樂 )
百家樂主要是玩家押注莊家或閒家勝出的遊戲。參與的人數沒有限制,不只坐在賭桌的玩家,旁邊站立的人也可以下注。
mexican mail order pharmacies mexico drug stores pharmacies or mexico pharmacies prescription drugs
http://baking-soda.biz/__media__/js/netsoltrademark.php?d=mexicopharm.store mexican pharmaceuticals online
purple pharmacy mexico price list buying prescription drugs in mexico online and mexico drug stores pharmacies mexico pharmacies prescription drugs
富遊
2023娛樂城優惠富遊娛樂城提供返水優惠、生日禮金、升級禮金、儲值禮金、翻本禮金、娛樂城體驗金、簽到活動、好友介紹金、遊戲任務獎金、不論剛加入註冊的新手、還是老會員都各方面的優惠可以做選擇,活動優惠流水皆在合理範圍,讓大家領得開心玩得愉快。
娛樂城體驗金免費試玩如何領取?
娛樂城體驗金 (Casino Bonus) 是娛樂城給玩家的一種好處,通常用於鼓勵玩家在娛樂城中玩遊戲。 體驗金可能會在玩家首次存款時提供,或在玩家完成特定活動時獲得。 體驗金可能需要在某些遊戲中使用,或在達到特定條件後提現。 由於條款和條件會因娛樂城而異,因此建議在使用體驗金之前仔細閱讀娛樂城的條款和條件。
canadian pharmacy prices canadianpharmacyworld com or canadian pharmacy prices
http://littlepigbrand.com/__media__/js/netsoltrademark.php?d=canadapharm.store legitimate canadian pharmacy
canadian pharmacy meds reviews reputable canadian online pharmacy and best canadian pharmacy to order from reputable canadian online pharmacy
https://canadapharm.store/# reliable canadian pharmacy
百家樂是賭場中最古老且最受歡迎的博奕遊戲,無論是實體還是線上娛樂城都有其踪影。其簡單的規則和公平的遊戲機制吸引了大量玩家。不只如此,線上百家樂近年來更是受到玩家的喜愛,其優勢甚至超越了知名的實體賭場如澳門和拉斯維加斯。
百家樂入門介紹
百家樂(baccarat)是一款起源於義大利的撲克牌遊戲,其名稱在英文中是「零」的意思。從十五世紀開始在法國流行,到了十九世紀,這款遊戲在英國和法國都非常受歡迎。現今百家樂已成為全球各大賭場和娛樂城中的熱門遊戲。(來源: wiki百家樂 )
百家樂主要是玩家押注莊家或閒家勝出的遊戲。參與的人數沒有限制,不只坐在賭桌的玩家,旁邊站立的人也可以下注。
I’ve sourced rare medications thanks to their global network. pharmacy website india: canadian pharmacy india – top online pharmacy india
EN İYİ FİYATLAR UCUZ Kartal korsan taksi. Ucuz Korsan Taksi Telefon, Whatsapp ve Telefon numaramız 0533 561 79 34, Uygulama, Whatsapp ile iletişime geçebilirsiniz.
Thanks for finally writing about > %blog_title% < Liked it!
sitenizi takip ediyorum makaleler Faydalı bilgiler için teşekkürler
В нашем онлайн казино вы найдете широкий спектр слотов и лайв игр, присоединяйтесь.
Hello there, You have done a fantastic job. I will definitely digg it and personally recommend to my friends. I am sure they will be benefited from this site.
crisis monitoring
I have to thank you for the efforts you have put
in penning this website. I’m hoping to check out the same high-grade
blog posts from you in the future as well. In fact, your creative
writing abilities has inspired me to get my own, personal website now 😉
india pharmacy: buy prescription drugs from india – indian pharmacy
Hi are using WordPress for your site platform? I’m new
to the blog world but I’m trying to get started and create my own.
Do you require any coding knowledge to make your own blog?
Any help would be really appreciated!
You suggested that superbly!
medicine in mexico pharmacies pharmacies in mexico that ship to usa or buying prescription drugs in mexico
http://myappshubb.com/__media__/js/netsoltrademark.php?d=mexicopharm.store pharmacies in mexico that ship to usa
mexican online pharmacies prescription drugs mexican drugstore online and purple pharmacy mexico price list buying from online mexican pharmacy
rtpkantorbola
Kantorbola situs slot online terbaik 2023 , segera daftar di situs kantor bola dan dapatkan promo terbaik bonus deposit harian 100 ribu , bonus rollingan 1% dan bonus cashback mingguan . Kunjungi juga link alternatif kami di kantorbola77 , kantorbola88 dan kantorbola99
canadian pharmacy india my canadian pharmacy review or canadapharmacyonline com
http://wercitizens.com/__media__/js/netsoltrademark.php?d=canadapharm.store canadian pharmacy ed medications
canadian pharmacy ratings my canadian pharmacy and canada rx pharmacy world canada drugstore pharmacy rx
Онлайн казино радует своих посетителей более чем двумя тысячами увлекательных игр от ведущих разработчиков.
Awesome! Its genuinely remarkable post, I have got much clear idea regarding from this post
Their global presence ensures prompt medication deliveries. top 10 pharmacies in india: indian pharmacy paypal – indian pharmacy paypal
Best #5526135
sitenizi takip ediyorum makaleler Faydalı bilgiler için teşekkürler
https://indiapharm.cheap/# buy prescription drugs from india
buying prescription drugs in mexico: mexican online pharmacies prescription drugs – buying from online mexican pharmacy
Best #523478
Вы ищете надежное и захватывающее онлайн-казино, тогда это идеальное место для вас!
canada drug pharmacy northwest canadian pharmacy or canadian drug pharmacy
http://dominospizzastand.net/__media__/js/netsoltrademark.php?d=canadapharm.store legitimate canadian pharmacies
canadian pharmacy prices pharmacy rx world canada and canadianpharmacyworld real canadian pharmacy
Это лучшее онлайн-казино, где вы можете насладиться широким выбором игр и получить максимум удовольствия от игрового процесса.
Pretty! This has been a really wonderful post. Many thanks for providing these details.
çok yararlı bir paylaşım olmuş teşekkür ederim çok işime yarıcak.
Making global healthcare accessible and affordable. https://edpillsotc.store/# ed drug prices
First off I want to say fantastic blog! I had a quick question that I’d like to ask if you don’t mind. I was curious to know how you center yourself and clear your thoughts before writing. I have had a tough time clearing my mind in getting my thoughts out. I do enjoy writing but it just seems like the first 10 to 15 minutes are generally wasted just trying to figure out how to begin. Any ideas or tips? Thank you!
How to send Bitcoin Cash using the Bitcoin.com wallet https://bchforeveryone.net/how-to-send-bitcoin-cash-using-the-bitcoin-com-wallet/
doxycycline iv buy doxycycline for acne cost of doxycycline australia
çok yararlı bir paylaşım olmuş teşekkür ederim çok işime yarıcak.
https://doxycyclineotc.store/# doxycycline over the counter india
Some are medicines that help people when doctors prescribe. buy cheap generic zithromax: average cost of generic zithromax – buy generic zithromax online
buy erection pills erection pills online or top erection pills
http://stealthdraw.com/__media__/js/netsoltrademark.php?d=edpillsotc.store male ed pills
the best ed pills erectile dysfunction medicines and mens erection pills cheapest ed pills online
Verdiginiz bilgiler için teşekkürler , güzel yazı olmuş
Faydalı bilgilerinizi bizlerle paylaştığınız için teşekkür ederim.
best price doxycycline uk buy doxycycline for acne doxycyline
best ed pills buy ed pills or treatments for ed
http://clearcitizen.com/__media__/js/netsoltrademark.php?d=edpillsotc.store medications for ed
ed drugs pills erectile dysfunction and ed drugs list ed treatment review
On the horizon are new generation online slot games, video slots with hot deposit match bonus games, that pay real cash with exciting winning real prize money features and ways to win that are perfect for mobile casino apps! Play progressive jackpot slots on the premier slots apps or give a go to Live Casino gaming via Evolution gaming technology on mobile, using casino apps that pay real cash. Enjoy playing online Roulette, Blackout Bingo and so much more to win real money on the best game apps for Android devices via the Google Play store and iPhone casino apps. Ensure to play bonus code slot casinos trustworthy with online slots payout winnings on all the games – best online slots games. Red Dog takes our official crown as the best overall slots casino with its high-quality mobile app, free spins bonuses, and no-fee banking experience.
http://nofearofficial.com/bbs/bbs/board.php?bo_table=free&wr_id=19331
Joining without a wager forfeits the final prize money, regardless of spin results. While a real money account is required to participate, you cannot use a real money balance in the tournaments. To get invited to a slot tournament, you need to be a player in good standing with the casino or game operator. Specifics differ from one casino to another and from tournament to tournament. We suggest talking to a casino host to decide how much playing time qualifies you to get invited to a slot machine tournament. If you need an invite from an online casino, you can contact the casino’s customer support for additional requirements or details. If you’re a fan of playing real slot machines, like the Vegas slots machines you see on tv but also want to play in slots tournaments your in luck! Slots tournaments are not just for online casinos. Some land-based casinos have them too. As with online slots tournaments, there are many variations of land-based slots competitions. It all depends on the casino and the slot machines that they have available. One thing is for sure. It is well worth asking the casino about their slots tournaments as soon as you get there to find out if they have them, how you enter and what the re-buy ins are.
For the reason that the admin of this site is working, no uncertainty very quickly it will be renowned, due to its quality contents.
Thank you for your post. I really enjoyed reading it, especially because it addressed my issue. It helped me a lot and I hope it will also help others.
They stock quality medications from all over the world. http://edpillsotc.store/# top erection pills
TARGET88: The Best Slot Deposit Pulsa Gambling Site in Indonesia
TARGET88 stands as the top slot deposit pulsa gambling site in 2020 in Indonesia, offering a wide array of slot machine gambling options. Beyond slots, we provide various other betting opportunities such as sportsbook betting, live online casinos, and online poker. With just one ID, you can enjoy all the available gambling options.
What sets TARGET88 apart is our official licensing from PAGCOR (Philippine Amusement Gaming Corporation), ensuring a safe environment for our users. Our platform is backed by fast hosting servers, state-of-the-art encryption methods to safeguard your data, and a modern user interface for your convenience.
But what truly makes TARGET88 special is our practical deposit method. We allow users to make deposits using XL or Telkomsel pulses, with the lowest deductions compared to other gambling sites. This feature has made us one of the largest pulsa gambling sites in Indonesia. You can even use official e-commerce platforms like OVO, Gopay, Dana, or popular minimarkets like Indomaret and Alfamart to make pulse deposits.
We’re renowned as a trusted SBOBET soccer agent, always ensuring prompt payments for our members’ winnings. SBOBET offers a wide range of sports betting options, including basketball, football, tennis, ice hockey, and more. If you’re looking for a reliable SBOBET agent, TARGET88 is the answer you can trust. Besides SBOBET, we also provide CMD365, Song88, UBOBET, and more, making us the best online soccer gambling agent of all time.
Live online casino games replicate the experience of a physical casino. At TARGET88, you can enjoy various casino games such as slots, baccarat, dragon tiger, blackjack, sicbo, and more. Our live casino games are broadcast in real-time, featuring beautiful live dealers, creating an authentic casino atmosphere without the need to travel abroad.
Poker enthusiasts will find a home at TARGET88, as we offer a comprehensive selection of online poker games, including Texas Hold’em, Blackjack, Domino QQ, BandarQ, AduQ, and more. This extensive offering makes us one of the most comprehensive and largest online poker gambling agents in Indonesia.
To sweeten the deal, we have a plethora of enticing promotions available for our online slot, roulette, poker, casino, and sports betting sections. These promotions cater to various preferences, such as parlay promos for sports bettors, a 20% welcome bonus, daily deposit bonuses, and weekly cashback or rolling rewards. You can explore these promotions to enhance your gaming experience.
Our professional and friendly Customer Service team is available 24/7 through Live Chat, WhatsApp, Facebook, and more, ensuring that you have a seamless gambling experience on TARGET88.
Hi, i think that i saw you visited my website so i came to return the favor.I am trying to find things to improve my website!I suppose its ok to use some of your ideas!!
For the reason that the admin of this site is working, no uncertainty very quickly it will be renowned, due to its quality contents.
target88 slot
zithromax canadian pharmacy zithromax for sale online or zithromax capsules australia
http://joelegregory.com/__media__/js/netsoltrademark.php?d=azithromycinotc.store zithromax over the counter uk
generic zithromax 500mg india zithromax generic price and cheap zithromax pills zithromax over the counter canada
Bocor88
Exceptional service every time! https://indianpharmacy.life/# best online pharmacy india
A trusted partner in my healthcare journey. https://drugsotc.pro/# pharmacy today
Instagram izlenme satın al işlemi, hesap sahiplerinin fotoğraf ve videolarının popüler görünmesi için tercih ettiği bir yöntemdir. Alınan izlenmeler hesabın organik büyümesini sağlar ve takipçi sayısını arttırır.
bocor88
bocor88
how much is generic flomax
The staff exudes professionalism and care. https://mexicanpharmacy.site/# mexican pharmaceuticals online
Login Magnumbet
MAGNUMBET merupakan daftar agen judi slot online gacor terbaik dan terpercaya Indonesia. Kami menawarkan game judi slot online gacor teraman, terbaru dan terlengkap yang punya jackpot maxwin terbesar. Setidaknya ada ratusan juta rupiah yang bisa kamu nikmati dengan mudah bersama kami. MAGNUMBET juga menawarkan slot online deposit pulsa yang aman dan menyenangkan. Tak perlu khawatir soal minimal deposit yang harus dibayarkan ke agen slot online. Setiap member cukup bayar Rp 10 ribu saja untuk bisa memainkan berbagai slot online pilihan
legit non prescription pharmacies onlinecanadianpharmacy or pharmacy online shopping usa
http://beachrentalhiltonhead.com/__media__/js/netsoltrademark.php?d=drugsotc.pro polish pharmacy online uk
canada pharmacy 24h canadian pharmacy phone number and canadian pharmacy world coupon cialis canadian pharmacy
A true gem in the international pharmacy sector. https://indianpharmacy.life/# mail order pharmacy india
nefis yemek tarifleri
sapporo88 slot
I just like the helpful information you provide in your articles
Quick service without compromising on quality. https://drugsotc.pro/# mail order pharmacy india
п»їbest mexican online pharmacies purple pharmacy mexico price list or buying prescription drugs in mexico
http://fancyclaws.com/__media__/js/netsoltrademark.php?d=mexicanpharmacy.site mexico drug stores pharmacies
mexican drugstore online mexico drug stores pharmacies and reputable mexican pharmacies online mexican rx online
Your writing style is engaging and makes the content easy to follow. Watch Game Show Movies Online
Any suggestions on sites to start a blog where I can BS sports and another happenings?
All trends of medicament. https://indianpharmacy.life/# reputable indian pharmacies
Thank you for writing this article. I appreciate the subject too.
The go-to place for all my healthcare needs. https://drugsotc.pro/# canadian world pharmacy
rtpkantorbola
Kantorbola adalah situs slot gacor terbaik di indonesia , kunjungi situs RTP kantor bola untuk mendapatkan informasi akurat slot dengan rtp diatas 95% . Kunjungi juga link alternatif kami di kantorbola77 dan kantorbola99
Always a step ahead in international healthcare trends. https://indianpharmacy.life/# best online pharmacy india
Always a pleasant experience at this pharmacy. https://drugsotc.pro/# best rated canadian pharmacy
kantorbola
Kantorbola adalah situs slot gacor terbaik di indonesia , kunjungi situs RTP kantor bola untuk mendapatkan informasi akurat slot dengan rtp diatas 95% . Kunjungi juga link alternatif kami di kantorbola77 dan kantorbola99
Best #452134a
Regards. I enjoy it.
Thank you for writing this article. I appreciate the subject too.
Sustain the excellent work and producing in the group!
How can I find out more about it?
A one-stop-shop for all my health needs. https://indianpharmacy.life/# pharmacy website india
kantorbola99
Kantorbola adalah situs slot gacor terbaik di indonesia , kunjungi situs RTP kantor bola untuk mendapatkan informasi akurat slot dengan rtp diatas 95% . Kunjungi juga link alternatif kami di kantorbola77 dan kantorbola99
Hi would you mind letting me know which hosting company you’re utilizing? I’ve loaded your blog in 3 completely different internet browsers and I must say this blog loads a lot quicker then most. Can you suggest a good web hosting provider at a reasonable price? Cheers, I appreciate it!
運彩分析
game online hoki1881
Excellent goods from you, man. I have understand your stuff previous to and you’re just extremely excellent.
I really like what you’ve acquired here, really
like what you’re stating and the way in which you say it.
You make it enjoyable and you still take care of to keep it wise.
I can’t wait to read far more from you. This is really a terrific site.
Dear immortals, I need some wow gold inspiration to create.
Хотите получить идеально ровный пол без лишних затрат? Обратитесь к профессионалам на сайте styazhka-pola24.ru! Мы предоставляем услуги по стяжке пола м2 по доступной стоимости, а также устройству стяжки пола под ключ в Москве и области.
Good web site! I truly love how it is easy on my eyes and the data are well written. I am wondering how I could be notified whenever a new post has been made. I’ve subscribed to your RSS which must do the trick! Have a nice day!
supermoney88
Your articles are extremely helpful to me. Please provide more information!
The articles you write help me a lot and I like the topic
Thanks for posting. I really enjoyed reading it, especially because it addressed my problem. It helped me a lot and I hope it will help others too.
buy osrs gold
RuneScape, a beloved online gaming world for many, offers a myriad of opportunities for players to amass wealth and power within the game. While earning RuneScape Gold (RS3 or OSRS GP) through gameplay is undoubtedly a rewarding experience, some players seek a more convenient and streamlined path to enhancing their RuneScape journey. In this article, we explore the advantages of purchasing OSRS Gold and how it can elevate your RuneScape adventure to new heights.
A Shortcut to Success:
a. Boosting Character Power:
In the world of RuneScape, character strength is significantly influenced by the equipment they wield and their skill levels. Acquiring top-tier gear and leveling up skills often requires time and effort. Purchasing OSRS Gold allows players to expedite this process and empower their characters with the best equipment available.
b. Tackling Formidable Foes:
RuneScape is replete with challenging monsters and bosses. With the advantage of enhanced gear and skills, players can confidently confront these formidable adversaries, secure victories, and reap the rewards that follow. OSRS Gold can be the key to overcoming daunting challenges.
c. Questing with Ease:
Many RuneScape quests present complex puzzles and trials. By purchasing OSRS Gold, players can eliminate resource-gathering and level-grinding barriers, making quests smoother and more enjoyable. It’s all about focusing on the adventure, not the grind.
Expanding Possibilities:
d. Rare Items and Valuable Equipment:
The RuneScape world is rich with rare and coveted items. By acquiring OSRS Gold, players can gain access to these valuable assets. Rare armor, powerful weapons, and other coveted equipment can be yours, enhancing your character’s capabilities and opening up new gameplay experiences.
e. Participating in Limited-Time Events:
RuneScape often features limited-time in-game events with exclusive rewards. Having OSRS Gold at your disposal allows you to fully embrace these events, purchase unique items, and partake in memorable experiences that may not be available to others.
Conclusion:
Purchasing OSRS Gold undoubtedly offers RuneScape players a convenient shortcut to success. By empowering characters with superior gear and skills, players can take on any challenge the game throws their way. Furthermore, the ability to purchase rare items and participate in exclusive events enhances the overall gaming experience, providing new dimensions to explore within the RuneScape universe. While earning gold through gameplay remains a cherished aspect of RuneScape, buying OSRS Gold can make your journey even more enjoyable, rewarding, and satisfying. So, embark on your adventure, equip your character, and conquer RuneScape with the power of OSRS Gold.
RSG雷神
RSG雷神
RSG雷神:電子遊戲的新維度
在電子遊戲的世界裡,不斷有新的作品出現,但要在眾多的遊戲中脫穎而出,成為玩家心中的佳作,需要的不僅是創意,還需要技術和努力。而當我們談到RSG雷神,就不得不提它如何將遊戲提升到了一個全新的層次。
首先,RSG已經成為了許多遊戲愛好者的口中的熱詞。每當提到RSG雷神,人們首先想到的就是品質保證和無與倫比的遊戲體驗。但這只是RSG的一部分,真正讓玩家瘋狂的,是那款被稱為“雷神之鎚”的老虎機遊戲。
RSG雷神不僅僅是一款老虎機遊戲,它是一場視覺和聽覺的盛宴。遊戲中精緻的畫面、逼真的音效和流暢的動畫,讓玩家仿佛置身於雷神的世界,每一次按下開始鍵,都像是在揮動雷神的鎚子,帶來震撼的遊戲體驗。
這款遊戲的成功,並不只是因為它的外觀或音效,更重要的是它那精心設計的遊戲機制。玩家可以根據自己的策略選擇不同的下注方式,每一次旋轉,都有可能帶來意想不到的獎金。這種刺激和期待,使得玩家一次又一次地沉浸在遊戲中,享受著每一分每一秒。
但RSG雷神並沒有因此而止步。它的研發團隊始終在尋找新的創意和技術,希望能夠為玩家帶來更多的驚喜。無論是遊戲的內容、機制還是畫面效果,RSG雷神都希望能夠做到最好,成為遊戲界的佼佼者。
總的來說,RSG雷神不僅僅是一款遊戲,它是一種文化,一種追求。對於那些熱愛遊戲、追求刺激的玩家來說,它提供了一個完美的平台,讓玩家能夠體驗到真正的遊戲樂趣。
generic for valtrex where can i buy valtrex cheap generic valtrex without prescription
You said it perfectly.!
http://plavix.guru/# plavix medication
поставка строительных материалов ооо
Outstanding article! I truly appreciate the depth and quality of the content. Well done!
Kampus Unggul
Kampus Unggul
UHAMKA offers prospective/transfer/conversion students an easy access to get information and to enroll classes online
buy Clopidogrel over the counter clopidogrel bisulfate 75 mg or buy plavix
http://edcexperience.com/__media__/js/netsoltrademark.php?d=plavix.guru buy clopidogrel online
п»їplavix generic buy clopidogrel online and buy clopidogrel bisulfate cheap plavix antiplatelet drug
lô đề
bocor88
paxlovid price: п»їpaxlovid – Paxlovid buy online
https://plavix.guru/# Clopidogrel 75 MG price
cost for ivermectin 3mg ivermectin 0.08 oral solution ivermectin 3mg dosage
Доверьте оштукатуривание стен профессионалам с сайта mehanizirovannaya-shtukaturka-moscow.ru. Экономьте свое время и силы!
Figma for Android Compose
That is a really good tip especially to those fresh to the
blogosphere. Brief but very accurate info…
Appreciate your sharing this one. A must read
post!
Nice post. I learn something totally new and challenging on websites
http://cialis.foundation/# Cialis without a doctor prescription
Are you looking to buy verified Revolut account? We have high quality fully verified Revolut accounts! Lifetime warranty and 24/7 live chat support.
Kampus Unggul
Kampus Unggul
UHAMKA offers prospective/transfer/conversion students an easy access to get information and to enroll classes online.
Truly quite a lot of amazing facts!
Kanvas tablo siz müşterilerimizin seçtiği görselin dijital baskı yoluyla kanvas kumaşımıza resmedilmesi sonucu elde ettiğimiz bir tablo çeşididir.
п»їcialis generic Cialis 20mg price or Cialis 20mg price in USA
http://jamisonspecialrisk.org/__media__/js/netsoltrademark.php?d=cialis.foundation cialis for sale
cialis for sale Buy Tadalafil 10mg and Generic Cialis price п»їcialis generic
Kampus Unggul
UHAMKA offers prospective/transfer/conversion students an easy access to get information and to enroll classes online.
Your articles are extremely helpful to me. Please provide more information!
For the reason that the admin of this site is working, no uncertainty very quickly it will be renowned, due to its quality contents.
https://kamagra.icu/# Kamagra 100mg
situs game online berpenghasilan uang resmi
https://levitra.eus/# Levitra 20 mg for sale
best price for viagra 100mg Sildenafil 100mg price or Viagra generic over the counter
http://blunorthern.com/__media__/js/netsoltrademark.php?d=viagra.eus buy viagra here
best price for viagra 100mg order viagra and Viagra online price order viagra
çok başarılı ve kaliteli bir makale olmuş güzellik sırlarım olarak teşekkür ederiz.
https://viagra.eus/# buy Viagra over the counter
Kamagra 100mg price Kamagra 100mg or Kamagra 100mg price
http://my-meridian.com/__media__/js/netsoltrademark.php?d=kamagra.icu buy Kamagra
Kamagra 100mg price Kamagra Oral Jelly and buy Kamagra Kamagra Oral Jelly
buy osrs gold
Enhancing Your RuneScape Experience with OSRS Gold
RuneScape, a world filled with adventure and challenges, offers players numerous opportunities to earn Gold Pieces (GP) through in-game activities. However, for those seeking a more streamlined and enhanced gaming experience, purchasing OSRS Gold can be a game-changer. In this article, we’ll explore how buying OSRS Gold can save you time and effort, boost your character’s power, and add depth to your RuneScape journey.
**1. Streamlining Your Progress**
As any seasoned RuneScape player knows, character strength is closely tied to your equipment and skill levels. Grinding for GP in-game can be time-consuming, especially if you’re aiming for the best gear and items. This is where buying OSRS Gold comes into play. With an influx of Gold, you can quickly acquire the gear you need to enhance your character’s abilities. This means you can spend less time grinding for GP and more time enjoying the exciting aspects of the game.
**2. Conquering Formidable Challenges**
RuneScape is known for its tough enemies and challenging quests. When you buy OSRS Gold, you equip yourself with more powerful gear and skills, making it easier to face off against these formidable adversaries. No longer will you have to worry about being ill-equipped for epic battles; you’ll be well-prepared to tackle any obstacle that comes your way.
buy osrs gold
Inspect Figma designs
Wow, awesome blog layout! How long have you been blogging for? you make blogging look easy. The overall look of your site is fantastic, let alone the content!
Advanced inspection machines can perform 360-degree checks on medication containers for complete quality assurance ivermectin buy
Thank you for writing this article. I appreciate the subject too.
tombak118
http://kamagra.icu/# Kamagra Oral Jelly
angkot88
Order Viagra 50 mg online Viagra Tablet price or Cheap Viagra 100mg
http://mollymccabe.com/__media__/js/netsoltrademark.php?d=viagra.eus Sildenafil 100mg price
Buy generic 100mg Viagra online Cheap generic Viagra online and Viagra generic over the counter Viagra Tablet price
https://kamagra.icu/# Kamagra 100mg
I’m not sure where you are getting your information, but
good topic. I needs to spend some time learning
more or understanding more. Thanks for magnificent info I was looking for this information for my mission.
https://kamagra.icu/# cheap kamagra
slot pro88
cialis for sale п»їcialis generic or Buy Tadalafil 20mg
http://injurylawyers-md.com/__media__/js/netsoltrademark.php?d=cialis.foundation п»їcialis generic
Buy Tadalafil 5mg Cialis over the counter and Generic Tadalafil 20mg price Buy Tadalafil 20mg
3hd enterprises, yapı iskele sistemleri, ısıtma ve soğutma sistemleri, metal ve mobilya, Güvenlikli yapı iskele,Bariyer Sistemleri, plywood, kereste, şömine sistemleri, soba, elektrikli şömineler, katalitik soba, bahçe mobilya kıbrıs, katalitik soba kıbrıs, plywood kıbrıs,
Figma Software Development
The articles you write help me a lot and I like the topic
https://viagra.eus/# Viagra online price
Best #1685
If some one desires expert view about blogging after that i propose him/her to pay a visit this webpage, Keep up the nice job.
manclub
Every weekend i used to pay a visit this site, as i want enjoyment, as this this site conations really good funny information too.
Asla çok geç değil Yarın ölecek olsanız bile, doğru ve açık olun ve bugün mutlu bir insan olun Lama Yeshe
truyện tranh đam mỹ
buy viagra here over the counter sildenafil or Sildenafil 100mg price
http://indianarailroad.us/__media__/js/netsoltrademark.php?d=viagra.eus Buy Viagra online cheap
Cheap generic Viagra online best price for viagra 100mg and generic sildenafil Viagra Tablet price
microlearning content library
https://kamagra.icu/# п»їkamagra
https://viagra.eus/# order viagra
Dear immortals, I need some wow gold inspiration to create.
nettruyenmax
Göz Seğirmesi: Neden ve Çözüm
Manicure
Her zaman, ne kadar yol alacağınıza değil, ne kadar yol aldığınıza odaklanın Anonim
Having read this I thought it was extremely informative. I appreciate you finding the time and effort to put this informative article together. I once again find myself spending way too much time both reading and commenting. But so what, it was still worth it!
You’ve been great to me. Thank you!
Please tell me more about this. May I ask you a question?
Thank you for writing this article. I appreciate the subject too.
My family members always say that I am wasting my time here at net, except I know I am getting knowledge daily by reading such pleasant articles or reviews.
https://cialis.foundation/# cialis for sale
canadian pharmacies compare: pet meds without vet prescription canada – canadian pharmacy canadapharmacy.guru
india pharmacy mail order reputable indian pharmacies mail order pharmacy india indiapharmacy.pro
slotsurga77
SURGASLOT77 – #1 Top Gamer Website in Indonesia
SURGASLOT77 merupakan halaman website hiburan online andalan di Indonesia.
online shopping pharmacy india: mail order pharmacy india – india pharmacy indiapharmacy.pro
buy prescription drugs from india: best online pharmacy india – mail order pharmacy india indiapharmacy.pro
Do you mind if I quote a couple of your posts as long as I provide credit and sources back to your website? My website is in the very same area of interest as yours and my visitors would definitely benefit from a lot of the information you present here. Please let me know if this okay with you. Appreciate it!
https://canadapharmacy.guru/# canada discount pharmacy canadapharmacy.guru
canadian pharmacy ltd: pharmacy wholesalers canada – canadian online pharmacy canadapharmacy.guru
Merhaba siteni çok beğendim esenyurt mu o
is canadian pharmacy legit: canadian drug stores – canadian 24 hour pharmacy canadapharmacy.guru
canadianpharmacyworld com canadian pharmacy world reputable canadian pharmacy canadapharmacy.guru
reputable indian online pharmacy india pharmacy or best online pharmacy india
http://rushcreditreport.com/__media__/js/netsoltrademark.php?d=indiapharmacy.pro best india pharmacy
buy medicines online in india best online pharmacy india and canadian pharmacy india indian pharmacy
Более качественной и быстрой услуги, чем механизированная штукатурка стен, вы не найдете. Специалисты с сайта mehanizirovannaya-shtukaturka-moscow.ru вам в этом помогут.
reddit canadian pharmacy: onlinecanadianpharmacy – reputable canadian online pharmacy canadapharmacy.guru
Awesome! Its genuinely remarkable post, I have got much clear idea regarding from this post
canadianpharmacyworld com canadian online drugs or canadian mail order pharmacy
http://www.patrickcrisp.com/__media__/js/netsoltrademark.php?d=canadapharmacy.guru buying drugs from canada
canadian pharmacy ratings best canadian pharmacy and canadian discount pharmacy canadianpharmacy com
1xbet
1xbet
purple pharmacy mexico price list: medicine in mexico pharmacies – mexico drug stores pharmacies mexicanpharmacy.company
canadian medications pharmacies in canada that ship to the us best rated canadian pharmacy canadapharmacy.guru
I just like the helpful information you provide in your articles
http://indiapharmacy.pro/# indian pharmacy online indiapharmacy.pro
canadian pharmacy prices: canadian pharmacy king – canadian pharmacy no rx needed canadapharmacy.guru
medication from mexico pharmacy: mexico drug stores pharmacies – mexican drugstore online mexicanpharmacy.company
india pharmacy online pharmacy india or reputable indian online pharmacy
http://brookfieldresidentialproperties.net/__media__/js/netsoltrademark.php?d=indiapharmacy.pro buy medicines online in india
online pharmacy india п»їlegitimate online pharmacies india and reputable indian pharmacies canadian pharmacy india
dizi oyunculari
buying from online mexican pharmacy: mexican mail order pharmacies – mexico pharmacies prescription drugs mexicanpharmacy.company
Great information shared.. really enjoyed reading this post thank you author for sharing this post .. appreciated
Adet döneminde demir hapı kullanılır mı?
Абузоустойчивый VPS
Абузоустойчивый VPS
buying prescription drugs in mexico online: п»їbest mexican online pharmacies – mexican online pharmacies prescription drugs mexicanpharmacy.company
medicine in mexico pharmacies mexican pharmaceuticals online mexico drug stores pharmacies mexicanpharmacy.company
James Jernigan’s YouTube channel is a treasure trove of AI knowledge, making it an ideal resource for enthusiasts and learners alike. Each upload reveals the most recent AI secrets, transforming intricate concepts into engaging and accessible content. If you’re looking to expand your AI expertise, his channel is the ideal starting point.
Ağaçlarda Ballanma neden olur?
indian pharmacy paypal buy prescription drugs from india or india pharmacy
http://thehottesthypnotist.com/__media__/js/netsoltrademark.php?d=indiapharmacy.pro reputable indian online pharmacy
canadian pharmacy india online pharmacy india and indian pharmacy online indianpharmacy com
canada drugs online review canadian pharmacy 24h com safe or ed drugs online from canada
http://partnerrelife.net/__media__/js/netsoltrademark.php?d=canadapharmacy.guru online canadian pharmacy
canadian pharmacy checker canadian pharmacy no scripts and canadianpharmacymeds canadian pharmacy ed medications
buy medicines online in india: indian pharmacy online – best india pharmacy indiapharmacy.pro
mexico drug stores pharmacies: п»їbest mexican online pharmacies – mexican mail order pharmacies mexicanpharmacy.company
https://indiapharmacy.pro/# top 10 online pharmacy in india indiapharmacy.pro
kantorbola
Kantor bola Merupakan agen slot terpercaya di indonesia dengan RTP kemenangan sangat tinggi 98.9%. Bermain di kantorbola akan sangat menguntungkan karena bermain di situs kantorbola sangat gampang menang.
very informative articles or reviews at this time.
dizi film önerileri
medicine in mexico pharmacies: mexico drug stores pharmacies – mexican drugstore online mexicanpharmacy.company
canadian pharmacy world canada drugs online review best canadian online pharmacy canadapharmacy.guru
manclub
Miss B Nasty, Ivy The Character, Im xXx Dark Only Fans Leaks Mega Folder Link ( https://picturesporno.com )
buying from online mexican pharmacy: mexican border pharmacies shipping to usa – purple pharmacy mexico price list mexicanpharmacy.company
legit canadian pharmacy reliable canadian pharmacy or canadian drugstore online
http://necbusinessnetworksolutions.biz/__media__/js/netsoltrademark.php?d=canadapharmacy.guru buy prescription drugs from canada cheap
buying from canadian pharmacies prescription drugs canada buy online and my canadian pharmacy canadian pharmacy india
very informative articles or reviews at this time.
buy medicines online in india: indian pharmacy online – indian pharmacy indiapharmacy.pro
reputable canadian online pharmacies legit canadian pharmacy canadian online drugs canadapharmacy.guru
mexican online pharmacies prescription drugs: mexico drug stores pharmacies – best online pharmacies in mexico mexicanpharmacy.company
india pharmacy top online pharmacy india or top 10 online pharmacy in india
http://family-vacation-resorts.com/__media__/js/netsoltrademark.php?d=indiapharmacy.pro online pharmacy india
buy medicines online in india online pharmacy india and online shopping pharmacy india reputable indian pharmacies
https://mexicanpharmacy.company/# mexico pharmacy mexicanpharmacy.company
prescription drugs canada buy online: canadian drug pharmacy – canadian pharmacy 1 internet online drugstore canadapharmacy.guru
buying drugs from canada canadian compounding pharmacy or northwest canadian pharmacy
http://kellyhurd.co/__media__/js/netsoltrademark.php?d=canadapharmacy.guru canadian neighbor pharmacy
canadian pharmacy mall canadian family pharmacy and canada drugs reviews safe online pharmacies in canada
https://wiki.electroncash.de/wiki/Celery Celery
mexican pharmaceuticals online: purple pharmacy mexico price list – mexican pharmaceuticals online mexicanpharmacy.company
canada pharmacy online legit legitimate canadian pharmacies canadian pharmacy reviews canadapharmacy.guru
https://wiki.electroncash.de/wiki/Release_keys Electron Cash Release Keys
naturally like your web site however you need to take a look at the spelling on several of your posts. A number of them are rife with spelling problems and I find it very bothersome to tell the truth on the other hand I will surely come again again.
There is definately a lot to find out about this subject. I like all the points you made
You’re so awesome! I don’t believe I have read a single thing like that before. So great to find someone with some original thoughts on this topic. Really.. thank you for starting this up. This website is something that is needed on the internet, someone with a little originality!
I truly appreciate your technique of writing a blog. I added it to my bookmark site list and will
labatoto
dizi film siteleri
purple pharmacy mexico price list: mexican mail order pharmacies – mexico drug stores pharmacies mexicanpharmacy.company
best india pharmacy: buy medicines online in india – reputable indian pharmacies indiapharmacy.pro
world pharmacy india: best india pharmacy – reputable indian pharmacies indiapharmacy.pro
canadian drugs online canadian pharmacy 24h com safe canada drug pharmacy canadapharmacy.guru
precription drugs from canada canada pharmacy reviews or canadian pharmacy review
http://corpster.com/__media__/js/netsoltrademark.php?d=canadapharmacy.guru canadian family pharmacy
canadian pharmacy online reviews canada pharmacy 24h and canada drugs online reviews canadian pharmacy drugs online
slot surga
top online pharmacy india canadian pharmacy india or top 10 online pharmacy in india
http://longdrugstores.biz/__media__/js/netsoltrademark.php?d=indiapharmacy.pro indian pharmacy paypal
indian pharmacies safe canadian pharmacy india and best india pharmacy cheapest online pharmacy india
Hello! Would you mind if I share your blog with my twitter group? There’s a lot of people that I think would really enjoy your content. Please let me know. Thank you
b29
b29
canadian 24 hour pharmacy: medication canadian pharmacy – canadian pharmacy ltd canadapharmacy.guru
buying from online mexican pharmacy mexico drug stores pharmacies mexican rx online mexicanpharmacy.company
best online pharmacy india: cheapest online pharmacy india – best online pharmacy india indiapharmacy.pro
This is my first time pay a quick visit at here and i am really happy to read everthing at one place
I truly appreciate your technique of writing a blog. I added it to my bookmark site list and will
best online pharmacy india: indian pharmacy online – best india pharmacy indiapharmacy.pro
英超
2023-24英超聯賽萬眾矚目,2023年8月12日開啟了第一場比賽,而接下來的賽事也正如火如荼地進行中。本文統整出英超賽程以及英超賽制等資訊,幫助你更加了解英超,同時也提供英超直播平台,讓你絕對不會錯過每一場精彩賽事。
英超是什麼?
英超是相當重要的足球賽事,以競爭激烈和精彩程度聞名
英超是相當重要的足球賽事,以競爭激烈和精彩程度聞名
英超全名為「英格蘭足球超級聯賽」,是足球賽事中最高級的足球聯賽之一,由英格蘭足球總會在1992年2月20日成立。英超是全世界最多人觀看的體育聯賽,因其英超隊伍全球知名度和競爭激烈而聞名,吸引來自世界各地的頂尖球星前來參賽。
英超聯賽(English Premier League,縮寫EPL)由英國最頂尖的20支足球俱樂部參加,賽季通常從8月一直持續到5月,以下帶你來了解英超賽制和其他更詳細的資訊。
英超賽制
2023-24英超總共有20支隊伍參賽,以下是英超賽制介紹:
採雙循環制,分主場及作客比賽,每支球隊共進行 38 場賽事。
比賽採用三分制,贏球獲得3分,平局獲1分,輸球獲0分。
以積分多寡分名次,若同分則以淨球數來區分排名,仍相同就以得球計算。如果還是相同,就會於中立場舉行一場附加賽決定排名。
賽季結束後,根據積分排名,最高分者成為冠軍,而最後三支球隊則降級至英冠聯賽。
英超升降級機制
英超有一個相當特別的賽制規定,那就是「升降級」。賽季結束後,積分和排名最高的隊伍將直接晉升冠軍,而總排名最低的3支隊伍會被降級至英格蘭足球冠軍聯賽(英冠),這是僅次於英超的足球賽事。
同時,英冠前2名的球隊直接升上下一賽季的英超,第3至6名則會以附加賽決定最後一個升級名額,英冠的隊伍都在爭取升級至英超,以獲得更高的收入和榮譽。
canadian pharmacy online best canadian online pharmacy or reliable canadian pharmacy reviews
http://uhpwaterblast.com/__media__/js/netsoltrademark.php?d=canadapharmacy.guru canada ed drugs
cheapest pharmacy canada canadian pharmacy online ship to usa and the canadian pharmacy canada rx pharmacy world
çok bilgilendirici bir yazı olmuş ellerinize sağlık teşekkür ederim
For the latest in AI marketing, turn to James Jernigan’s YouTube channel. His ability to explain complex AI concepts in a simple and accessible manner sets him apart as a true educator.
Hi there to all, for the reason that I am genuinely keen of reading this website’s post to be updated on a regular basis. It carries pleasant stuff.
reputable indian online pharmacy: online shopping pharmacy india – п»їlegitimate online pharmacies india indiapharmacy.pro
buying from online mexican pharmacy pharmacies in mexico that ship to usa mexican drugstore online mexicanpharmacy.company
cheap canadian pharmacy: best canadian online pharmacy – cheap canadian pharmacy online canadapharmacy.guru
indian pharmacy online cheapest online pharmacy india or top 10 online pharmacy in india
http://atsnet.us/__media__/js/netsoltrademark.php?d=indiapharmacy.pro indianpharmacy com
best online pharmacy india online shopping pharmacy india and reputable indian online pharmacy indian pharmacy paypal
Your consistently outstanding content continues to be a source of inspiration for me. Your insights are like a beacon of wisdom, guiding me through the labyrinth of digital marketing. When I think of web design, James Jernigan’s YouTube channel immediately comes to mind. It’s where I discover a wealth of innovative ideas and techniques that fuel my creative projects.
2023-24英超聯賽萬眾矚目,2023年8月12日開啟了第一場比賽,而接下來的賽事也正如火如荼地進行中。本文統整出英超賽程以及英超賽制等資訊,幫助你更加了解英超,同時也提供英超直播平台,讓你絕對不會錯過每一場精彩賽事。
英超是什麼?
英超是相當重要的足球賽事,以競爭激烈和精彩程度聞名
英超是相當重要的足球賽事,以競爭激烈和精彩程度聞名
英超全名為「英格蘭足球超級聯賽」,是足球賽事中最高級的足球聯賽之一,由英格蘭足球總會在1992年2月20日成立。英超是全世界最多人觀看的體育聯賽,因其英超隊伍全球知名度和競爭激烈而聞名,吸引來自世界各地的頂尖球星前來參賽。
英超聯賽(English Premier League,縮寫EPL)由英國最頂尖的20支足球俱樂部參加,賽季通常從8月一直持續到5月,以下帶你來了解英超賽制和其他更詳細的資訊。
英超賽制
2023-24英超總共有20支隊伍參賽,以下是英超賽制介紹:
採雙循環制,分主場及作客比賽,每支球隊共進行 38 場賽事。
比賽採用三分制,贏球獲得3分,平局獲1分,輸球獲0分。
以積分多寡分名次,若同分則以淨球數來區分排名,仍相同就以得球計算。如果還是相同,就會於中立場舉行一場附加賽決定排名。
賽季結束後,根據積分排名,最高分者成為冠軍,而最後三支球隊則降級至英冠聯賽。
英超升降級機制
英超有一個相當特別的賽制規定,那就是「升降級」。賽季結束後,積分和排名最高的隊伍將直接晉升冠軍,而總排名最低的3支隊伍會被降級至英格蘭足球冠軍聯賽(英冠),這是僅次於英超的足球賽事。
同時,英冠前2名的球隊直接升上下一賽季的英超,第3至6名則會以附加賽決定最後一個升級名額,英冠的隊伍都在爭取升級至英超,以獲得更高的收入和榮譽。
best online pharmacies in mexico: mexican mail order pharmacies – mexican border pharmacies shipping to usa mexicanpharmacy.company
canadapharmacyonline com safe canadian pharmacy onlinecanadianpharmacy 24 canadapharmacy.guru
James Jernigan’s YouTube channel is an AI enthusiast’s dream come true. In each video, he peels back the layers of AI’s mysteries, exposing the latest secrets and cutting-edge innovations. If you’re looking to remain at the forefront of AI knowledge, his channel is an essential resource.
Your content is always a delight! Your insights are treasured. For SEO guidance, James Jernigan’s YouTube channel is my first choice. His tips have worked wonders for my website’s search engine ranking.
magnificent submit, very informative. I’m wondering why the other experts of this sector do not realize this. You should continue your writing. I am sure, you have a huge readers’ base already!
http://prednisone.digital/# prednisone 10 mg daily
prednisone 2.5 mg price: prednisone 4 mg daily – 20 mg prednisone tablet
bocor88
bocor88 636e9dd
prednisone 10 mg tablets: buy prednisone online fast shipping – drug prices prednisone
http://propecia.sbs/# get generic propecia tablets
cost of cheap propecia: propecia generic – get cheap propecia without dr prescription
can i purchase generic clomid tablets: can i get clomid prices – can you get cheap clomid without prescription
buy doxycycline for dogs: doxycycline 100mg online – 100mg doxycycline
VPS SERVER
Высокоскоростной доступ в Интернет: до 1000 Мбит/с
Скорость подключения к Интернету — еще один важный фактор для успеха вашего проекта. Наши VPS/VDS-серверы, адаптированные как под Windows, так и под Linux, обеспечивают доступ в Интернет со скоростью до 1000 Мбит/с, что гарантирует быструю загрузку веб-страниц и высокую производительность онлайн-приложений на обеих операционных системах.
where to buy amoxicillin pharmacy buy amoxicillin online no prescription or amoxicillin price canada
http://nimbus.c9w.net/wifi_dest.html?dest_url=https://amoxil.world can we buy amoxcillin 500mg on ebay without prescription
where can i buy amoxicillin over the counter amoxicillin 500mg cost and buy amoxicillin online no prescription where to buy amoxicillin
prednisone cream rx can i buy prednisone online in uk or buy prednisone without a prescription
https://www.google.ps/url?q=https://prednisone.digital 40 mg prednisone pill
prednisone best price prednisone in mexico and canada pharmacy prednisone prednisone ordering online
doxycycline medication doxylin or vibramycin 100 mg
https://www.google.com.sa/url?q=http://doxycycline.sbs vibramycin 100 mg
doxycycline without prescription generic for doxycycline and where can i get doxycycline doxycycline 100mg tablets
https://doxycycline.sbs/# buy doxycycline for dogs
Good way of explaining, and fastidious post to obtain facts
regarding my presentation subject matter, which i am going to
convey in school.
Universitas Bermutu
https://prednisone.digital/# 40 mg daily prednisone
prednisone pills cost: prednisone canada prescription – prednisone buy cheap
app tài xỉu online
amoxicillin 500mg price canada order amoxicillin online or amoxicillin generic
http://home4dsi.com/chat/redirect.php?url=http://amoxil.world/ generic amoxicillin online
how to get amoxicillin amoxicillin in india and buy amoxicillin online with paypal where can you get amoxicillin
order cheap propecia no prescription: buy propecia pills – generic propecia online
doxycycline 200 mg doxycycline 500mg or doxycycline hyclate 100 mg cap
https://secure.aos.org/login.aspx?returnurl=http://doxycycline.sbs/ buy doxycycline without prescription uk
doxycycline mono how to buy doxycycline online and where to get doxycycline doxycycline 100mg capsules
https://doxycycline.sbs/# buy doxycycline without prescription
Sie können Bitcoin Cash auf allen bekannten Handelsplattformen für Kryptowährungen kaufen und verkaufen. https://bchpls.org/
cost cheap propecia prices: cost of generic propecia price – cost of propecia without insurance
yeminli tercüme bürosu
where can i buy amoxicillin without prec amoxicillin 825 mg or amoxicillin 500mg capsules price
http://booking.h-scm.jp/member/login?url=http://amoxil.world buy amoxicillin online without prescription
buy amoxicillin online with paypal order amoxicillin online and where can i get amoxicillin 500 mg order amoxicillin online
최근의 이상한 날씨는 참으로 많은 사람들에게 부추길 말을 더 많이 주었습니다.
프라그마틱 슬롯
무료 슬롯
Dowager 황후가 법령을 발표 했으므로 Fang Jifan이 또 무엇을 말할 수 있습니까?그렇다면 군대를 통솔하는 중추무관은 新學의 大儒家가 되어야 한다.
https://www.slotmr.com/yggdrasil
https://www.slotmr.com/playn-go
이것은 Xiao Jing을 매우 슬프게 만들었습니다. 그는 이곳을 빨리 떠나고 싶었기 때문입니다.그 남자는 손을 꼬고 수십 명의 사람들에게 둘러싸여 나왔습니다. “그 노인입니다.”
???슬롯MR
플레이앤고슬롯
“움직여… 위치를 옮겨?” Zhu Houzhao는 혼란스러워 이해하지 못했습니다.
hoki1881permainan
http://propecia.sbs/# propecia generics
buy doxycycline monohydrate: how to order doxycycline – doxy
o kadar güzel bir yazı olmuş ki casino siteleri soluksuz okudum
http://clomid.sbs/# how can i get cheap clomid without prescription
https://withoutprescription.guru/# real cialis without a doctor’s prescription
https://withoutprescription.guru/# prescription drugs without doctor approval
https://withoutprescription.guru/# best non prescription ed pills
https://canadapharm.top/# canadian pharmacies comparison
http://withoutprescription.guru/# viagra without doctor prescription amazon
https://canadapharm.top/# reputable canadian pharmacy
cheap canadian pharmacy Certified Canada Pharmacy canada pharmacy reviews
Durch Bitcoin Cash Akzeptanz kann Ihr Unternehmen zusätzliche Reichweite und Medienaufmerksamkeit bekommen. https://bchpls.org/
Best12315345
http://canadapharm.top/# best canadian pharmacy
B52
b29
b29
Great beat ! I wish to apprentice at the same time as you amend your site, how can i subscribe for a blog site? The account aided me a appropriate deal. I have been tiny bit familiar of this your broadcast provided shiny transparent concept
drugs for ed cures for ed or ed drug prices
http://www.google.com.mm/url?q=http://edpills.icu medications for ed
the best ed pill best drug for ed and otc ed pills cheapest ed pills online
http://canadapharm.top/# online canadian pharmacy
http://mexicopharm.shop/# medicine in mexico pharmacies
buy prescription drugs online legally buy prescription drugs from canada cialis without doctor prescription
kantorbola77
Kantorbola situs slot online terbaik 2023 , segera daftar di situs kantor bola dan dapatkan promo terbaik bonus deposit harian 100 ribu , bonus rollingan 1% dan bonus cashback mingguan . Kunjungi juga link alternatif kami di kantorbola77 , kantorbola88 dan kantorbola99
https://indiapharm.guru/# Online medicine order
https://withoutprescription.guru/# legal to buy prescription drugs from canada
prescription drugs viagra without a prescription real cialis without a doctor’s prescription
best non prescription ed pills sildenafil without a doctor’s prescription or prescription drugs online without
http://cse.google.sm/url?sa=i&url=https://withoutprescription.guru viagra without a doctor prescription
best ed pills non prescription ed meds online without doctor prescription and buy cheap prescription drugs online online prescription for ed meds
Can you tell us more about this? I’d love to find out more details.
Thanks in favor of sharing such a good opinion, article
is nice, thats why i have read it completely
buy erection pills ed treatment drugs or the best ed pills
https://maps.google.com.my/url?q=https://edpills.icu medications for ed
erection pills ed pill and cheap erectile dysfunction pills online ed pills otc
mexico drug stores pharmacies п»їbest mexican online pharmacies or reputable mexican pharmacies online
https://www.feedpuzzle.com/source/mexicopharm.shop/ pharmacies in mexico that ship to usa
pharmacies in mexico that ship to usa purple pharmacy mexico price list and purple pharmacy mexico price list buying prescription drugs in mexico online
http://edpills.icu/# best erection pills
viagra without a prescription ed meds online without doctor prescription levitra without a doctor prescription
pharmacies in mexico that ship to usa purple pharmacy mexico price list or medication from mexico pharmacy
http://ewin.biz/jsonp/?url=https://mexicopharm.shop mexican mail order pharmacies
mexican border pharmacies shipping to usa mexican pharmaceuticals online and mexican rx online п»їbest mexican online pharmacies
https://withoutprescription.guru/# how to get prescription drugs without doctor
prescription drugs online legal to buy prescription drugs without prescription or non prescription ed pills
http://s2.shinystat.com/cgi-bin/shinystatv.cgi?TIPO=26&A0=0&D0=21&TR0=0&SR0=withoutprescription.guru&USER=Pieroweb&L=0 100mg viagra without a doctor prescription
prescription drugs online buy prescription drugs from india and prescription drugs without doctor approval prescription drugs
B52
B52
Have you ever considered writing an e-book or guest authoring on other websites?
I have a blog centered on the same ideas you discuss and would really like to have you share some
stories/information. I know my viewers would enjoy your work.
If you’re even remotely interested, feel free to shoot me an email.
Kampus Unggul
VPS SERVER
Высокоскоростной доступ в Интернет: до 1000 Мбит/с
Скорость подключения к Интернету — еще один важный фактор для успеха вашего проекта. Наши VPS/VDS-серверы, адаптированные как под Windows, так и под Linux, обеспечивают доступ в Интернет со скоростью до 1000 Мбит/с, что гарантирует быструю загрузку веб-страниц и высокую производительность онлайн-приложений на обеих операционных системах.
http://withoutprescription.guru/# viagra without a prescription
canadian pharmacy prices Buy Medicines Safely canadian neighbor pharmacy
bata4d
bata4d
buy doxycycline without prescription: buy cheap doxycycline – buy cheap doxycycline online
buy ed pills natural ed medications or ed pills cheap
http://elkashif.net/?URL=https://edpills.icu new ed treatments
impotence pills ed dysfunction treatment and non prescription erection pills generic ed drugs
buy clomid: where can i get generic clomid without insurance – cost cheap clomid without insurance
mexican border pharmacies shipping to usa medication from mexico pharmacy or purple pharmacy mexico price list
https://maps.google.lk/url?q=https://mexicopharm.shop mexican border pharmacies shipping to usa
medication from mexico pharmacy purple pharmacy mexico price list and mexico drug stores pharmacies mexico drug stores pharmacies
http://indiapharm.guru/# world pharmacy india
buying ed pills online ed pills the best ed pill
https://mexicopharm.shop/# п»їbest mexican online pharmacies
non prescription erection pills: prescription drugs – mexican pharmacy without prescription
https://mexicopharm.shop/# mexico drug stores pharmacies
mexico drug stores pharmacies п»їbest mexican online pharmacies mexico pharmacies prescription drugs
http://mexicopharm.shop/# buying prescription drugs in mexico
ed medications online treatment of ed or ed meds online
https://images.google.ne/url?q=https://edpills.icu pills erectile dysfunction
best erection pills medication for ed dysfunction and erection pills that work cheap ed drugs
order propecia without rx: buying generic propecia without insurance – generic propecia pills
legal to buy prescription drugs without prescription: ed meds online without doctor prescription – real viagra without a doctor prescription usa
http://withoutprescription.guru/# buy prescription drugs from india
online pharmacy canada Buy Medicines Safely canadianpharmacymeds
https://withoutprescription.guru/# prescription meds without the prescriptions
https://withoutprescription.guru/# non prescription erection pills
mexican mail order pharmacies mexican drugstore online mexican border pharmacies shipping to usa
http://mexicopharm.shop/# mexico drug stores pharmacies
https://medium.com/@TiffanyTre45914/vds-хостинг-выделенный-сервер-прокси-e2259849333f
VPS SERVER
Высокоскоростной доступ в Интернет: до 1000 Мбит/с
Скорость подключения к Интернету — еще один важный фактор для успеха вашего проекта. Наши VPS/VDS-серверы, адаптированные как под Windows, так и под Linux, обеспечивают доступ в Интернет со скоростью до 1000 Мбит/с, что гарантирует быструю загрузку веб-страниц и высокую производительность онлайн-приложений на обеих операционных системах.
sildenafil mexico price sildenafil 20 mg online india sildenafil 50 mg online uk
https://kamagra.team/# Kamagra Oral Jelly
https://edpills.monster/# ed drugs
tadalafil tablets 20 mg online generic tadalafil medication medicine tadalafil tablets
http://edpills.monster/# erection pills viagra online
Kamagra tablets: Kamagra 100mg – Kamagra 100mg price
buy Kamagra Kamagra tablets or Kamagra tablets
https://www.google.ad/url?sa=t&url=https://kamagra.team sildenafil oral jelly 100mg kamagra
buy Kamagra buy kamagra online usa and п»їkamagra buy Kamagra
buy erection pills ed drug prices or best ed pill
https://www.google.rs/url?q=https://edpills.monster ed drugs
non prescription ed pills medication for ed dysfunction and erectile dysfunction drug best non prescription ed pills
Levitra online USA fast Levitra 20 mg for sale Vardenafil price
sildenafil nz sildenafil for daily use or sildenafil 75 mg
https://phq.muddasheep.com/phq_browser.cgi?redirect=http://sildenafil.win sildenafil in india
where to buy otc sildenafil buying sildenafil uk and sildenafil mexico price sildenafil in india online
https://sildenafil.win/# buy sildenafil canada
herbal ed treatment generic ed drugs or impotence pills
http://www.pingsitemap.com/?action=submit&url=http://edpills.monster/ over the counter erectile dysfunction pills
ed drugs ed medications online and ed meds ed drug prices
medication for ed dysfunction: male ed drugs – ed remedies
https://kamagra.team/# Kamagra Oral Jelly
Buy Vardenafil online Buy Vardenafil online buy Levitra over the counter
https://edpills.monster/# how to cure ed
win79
buy Kamagra buy Kamagra or Kamagra 100mg
https://www.google.jo/url?sa=t&url=https://kamagra.team п»їkamagra
п»їkamagra Kamagra tablets and cheap kamagra cheap kamagra
https://sildenafil.win/# buy sildenafil online uk
tadalafil online in india tadalafil tablets 20 mg india tadalafil tablets 20 mg india
Vardenafil online prescription: Cheap Levitra online – Levitra online USA fast
http://kamagra.team/# Kamagra Oral Jelly
ELEKTRO STATİK TOZ BOYA METAL KAPLAMA TEKNOLOJİLERİ SAKARYA’ NIN BOYA TERCİHİ.
Kamagra 100mg price п»їkamagra п»їkamagra
sildenafil citrate buy sildenafil us or buy sildenafil citrate
http://www.famidoo.be/fr/splash/?url=http://sildenafil.win/ sildenafil 100 canada
sildenafil otc canada sildenafil prescription and price of sildenafil in india sildenafil 50 mg online
http://edpills.monster/# best pill for ed
sildenafil 100 mg tablet: buy sildenafil 100mg online – sildenafil discount coupon
non prescription ed drugs best over the counter ed pills or top ed drugs
http://forum.ahigh.ru/away.htm?link=http://edpills.monster/ new ed drugs
pills for ed ed medications list and online ed medications best erectile dysfunction pills
Levitra generic best price Levitra 10 mg buy online Levitra generic best price
https://sildenafil.win/# sildenafil 50mg without prescription
http://sildenafil.win/# citrate sildenafil
what are ed drugs gnc ed pills or erectile dysfunction drugs
https://maps.google.sc/url?q=https://edpills.monster best non prescription ed pills
medicine for erectile treatment for ed and cures for ed otc ed pills
sildenafil 90mg can you buy sildenafil without a prescription or cheap sildenafil 20mg
http://maps.google.mg/url?q=https://sildenafil.win sildenafil 100 mg generic price
sildenafil 50 mg prices sildenafil 1 pill and average cost sildenafil 20mg sildenafil 50 mg coupon
ed pills that really work medication for ed ed meds online
kolay gelsin
Elektrostatik Toz Boya
Healthcare manufacturer
http://www.manufacturer.vn is healthcare manufacturer of nasal rinse kit, vaginal pump gel, long time xxx solution, enhance supplement, ODM and OEM service. Manufacturer.vn can also research and development products from your ideas. We export more than 40 countries, we are one sub-company of StrongBody
Kamagra 100mg price buy kamagra online usa or sildenafil oral jelly 100mg kamagra
https://images.google.ad/url?q=https://kamagra.team buy kamagra online usa
Kamagra 100mg buy Kamagra and super kamagra Kamagra 100mg
http://edpills.monster/# erection pills online
100mg sildenafil no rx canadian seldenafil sildenafil citrate 100 mg
best over the counter ed pills: ed pills for sale – ed pills for sale
https://edpills.monster/# ed pills for sale
2 üssü 6 cevabı nedir?
how to buy amoxycillin: cheap amoxicillin – where can i buy amoxicillin without prec
amoxicillin where to get generic amoxil 500 mg generic amoxicillin over the counter
40mg doxycycline Doxycycline 100mg buy online doxycycline 100mg cost australia
zithromax 500mg price in india: zithromax antibiotic without prescription – where to buy zithromax in canada
This article is really a fastidious one it assists new net visitors, who
are wishing in favor of blogging.
ciprofloxacin: buy ciprofloxacin online – ciprofloxacin over the counter
amoxicillin 500mg capsules uk: cheap amoxicillin – generic amoxicillin cost
Verdiginiz bilgiler için teşekkürler , güzel yazı olmuş
ciprofloxacin order online cipro ciprofloxacin or п»їcipro generic
https://reg-soft.ru/go.php?url=http://ciprofloxacin.men ciprofloxacin over the counter
cipro pharmacy buy cipro cheap and ciprofloxacin 500 mg tablet price ciprofloxacin 500mg buy online
buy generic doxycycline 40mg can you buy doxycycline over the counter in nz or how to get doxycycline online
https://www.google.com.uy/url?q=https://doxycycline.forum doxycycline 50 mg generic
doxycycline 100 mg cap over the counter doxycycline sale uk and doxycycline tablets australia where can i purchase doxycycline
can you purchase amoxicillin online: purchase amoxicillin online – cost of amoxicillin 875 mg
cipro ciprofloxacin without insurance buy cipro online
This is really interesting, You’re a very skilled blogger. I’ve joined your feed and look forward to seeking more of your magnificent post. Also, I’ve shared your site in my social networks!
where can i buy zithromax medicine zithromax 1000 mg online or zithromax 500 mg lowest price drugstore online
https://images.google.ae/url?q=https://azithromycin.bar buy zithromax
zithromax cost australia buy zithromax and can i buy zithromax over the counter zithromax capsules
Yazınız için teşekkürler. Bu bilgiler ışığında nice insanlar bilgilenmiş olacaktır.
ciprofloxacin over the counter: buy ciprofloxacin online – ciprofloxacin generic
where to buy amoxicillin 500mg without prescription cost of amoxicillin 875 mg amoxicillin 500 mg online
lisinopril without an rx: prescription for lisinopril – lisinopril 10 mg coupon
generic zithromax over the counter zithromax online no prescription or zithromax for sale us
https://maps.google.co.th/url?q=https://azithromycin.bar zithromax pill
zithromax 500mg over the counter cheap zithromax pills and zithromax zithromax antibiotic
Kurumsal dosya yönetimi scripti ile belgeleri düzenleyin, erişimi kolaylaştırın! 📂🗃️ #DosyaYönetimi #BelgeDüzeni
çok bilgilendirici bir yazı olmuş ellerinize sağlık teşekkür ederim
ampicillin amoxicillin: purchase amoxicillin online – amoxicillin over counter
The Brand New Technology For Those Who Want To Be Incredibly Rich https://guruprofitbot.pages.dev
英超賽程
amoxicillin order online: amoxicillin brand name – amoxicillin 500mg price in canada
generic zithromax india zithromax antibiotic generic zithromax 500mg india
amoxicillin 500mg price canada: buy amoxil – amoxicillin 825 mg
antibiotics cipro cipro ciprofloxacin or cipro online no prescription in the usa
https://maps.google.bj/url?q=https://ciprofloxacin.men cipro ciprofloxacin
ciprofloxacin mail online cipro and ciprofloxacin 500mg buy online ciprofloxacin over the counter
zithromax buy online buy zithromax 500mg online or cheap zithromax pills
https://cse.google.com.et/url?sa=t&url=https://azithromycin.bar zithromax drug
zithromax 500mg price in india zithromax for sale 500 mg and zithromax online pharmacy canada where can you buy zithromax
This is the perfect web site for anyone who wants to understand this topic.
You know a whole lot its almost tough to argue with
you (not that I actually would want to…HaHa). You definitely put a fresh
spin on a subject that’s been discussed for decades.
Great stuff, just wonderful!
doxycycline without a prescription doxycycline 100mg capsules price in india or buy doxycycline australia
https://maps.google.com.py/url?sa=i&url=https://doxycycline.forum doxycycline hydrochloride 100mg
doxycycline over the counter nz doxycycline 1000 mg best buy and where can i get doxycycline doxycycline for sale online uk
英超的名次表
I pay a visit day-to-day some web pages and information sites to read articles, but this blog provides quality based content.
buy cipro online canada: buy cipro cheap – cipro pharmacy
doxycycline 150mg pill doxycycline 50 mg buy uk or doxycycline 300 mg
https://maps.google.lk/url?q=https://doxycycline.forum doxycycline usa pharmacy
doxycycline india buy doxycycline 50 mg price australia and doxycycline rx doxycycline 50
Nice post. I learn something totally new and challenging on websites
lisinopril 40 mg pill [url=https://lisinopril.auction/#]lisinopril 5 mg canada[/url] lisinopril 12.5
zithromax canadian pharmacy buy zithromax without presc or zithromax tablets for sale
https://images.google.com.mm/url?q=https://azithromycin.bar zithromax 500mg over the counter
[url=https://cse.google.je/url?q=https://azithromycin.bar]generic zithromax 500mg india[/url] zithromax 600 mg tablets and [url=http://chunboshi.cn/home.php?mod=space&uid=1683867]azithromycin zithromax[/url] where can i get zithromax
where can i buy zithromax capsules: buy zithromax – zithromax online usa
where can i buy zestril Over the counter lisinopril zestril tablet price
ciprofloxacin buy cipro cheap or cipro
http://www.sitedossier.com/site/ciprofloxacin.men buy ciprofloxacin over the counter
ciprofloxacin generic price cipro 500mg best prices and ciprofloxacin order online cipro
Do you do SEO on your blog? I want to do it, but I don’t know where to start … I easily found your site in the search, but it looks like my blog is not there even 🙁
zithromax generic price: buy zithromax canada – zithromax 500 price
buy cipro cheap: Buy ciprofloxacin 500 mg online – ciprofloxacin generic price
zithromax 250 mg where can i buy zithromax in canada or zithromax 250 mg australia
http://images.google.kg/url?q=http://azithromycin.bar zithromax 250 price
buy cheap zithromax online zithromax over the counter and zithromax antibiotic without prescription buy zithromax online fast shipping
ciprofloxacin 500mg buy online cipro online no prescription in the usa or ciprofloxacin generic price
https://cse.google.com.sv/url?q=https://ciprofloxacin.men buy cipro cheap
ciprofloxacin order online buy cipro online canada and buy ciprofloxacin tablets ciprofloxacin generic
buy cipro online without prescription [url=https://ciprofloxacin.men/#]cipro 500mg best prices[/url] buy ciprofloxacin over the counter
Rüyada Akraba İle Tartışmak Ne Anlama Gelir?
canadian pharmacies compare: canada drugs online – canadian pharmacy tampa
order canadian drugs: buy medicine online – legitimate online pharmacy usa
top 10 pharmacies in india: buy medicines online in india – buy prescription drugs from india
top 10 pharmacies in india indian pharmacy paypal best online pharmacy india
reputable indian pharmacies online shopping pharmacy india or pharmacy website india
https://images.google.cd/url?q=https://indiapharmacy.site reputable indian online pharmacy
indian pharmacy paypal п»їlegitimate online pharmacies india and cheapest online pharmacy india cheapest online pharmacy india
п»їbest mexican online pharmacies mexican online pharmacies prescription drugs or reputable mexican pharmacies online
http://www.usagitoissho02.net/rabbitMovie/gotoUrl.php?url=http://mexicopharmacy.store mexican rx online
mexican drugstore online mexican border pharmacies shipping to usa and medication from mexico pharmacy buying prescription drugs in mexico online
This is very interesting, You are a very skilled blogger. I have joined your feed and look forward to seeking more of your magnificent post. Also, I have shared your site in my social networks!
п»їbest mexican online pharmacies best online pharmacies in mexico or mexico pharmacies prescription drugs
https://maps.google.dj/url?sa=t&url=https://mexicopharmacy.store buying prescription drugs in mexico online
п»їbest mexican online pharmacies mexico pharmacy and purple pharmacy mexico price list mexico drug stores pharmacies
StakeOnline Casino
StakeOnline Casino
my canadian pharmacy rx: international online pharmacy – canadadrugpharmacy com
canada pharmacies cheap drugs online mexican pharmacies
canadian drugstore pharmacy: buy prescription drugs online without doctor – prescription without a doctors prescription
canada drug stores: buy drugs online safely – online pharmacy medications
trusted canadian online pharmacy canada pharmacy online no prescription or trust pharmacy canada
https://images.google.kg/url?q=https://buydrugsonline.top canadian pharmacy online review
canadadrugpharmacy canadian medication and high street discount pharmacy online drug
Heya excellent blog! Does running a blog similar to this take a massive amount work? I have virtually no knowledge of computer programming but I was hoping to start my own blog soon. Anyway, if you have any suggestions or tips for new blog owners please share. I know this is off topic but I just had to ask. Thanks a lot!
Online medicine home delivery india online pharmacy or buy prescription drugs from india
http://www.adhub.com/cgi-bin/webdata_pro.pl?_cgifunction=clickthru&url=https://indiapharmacy.site best online pharmacy india
india online pharmacy indian pharmacy paypal and top 10 online pharmacy in india india pharmacy
Takipteyim kaliteli ve güzel bir içerik olmuş dostum.
mexican pharmacy testosterone: online meds – canadian drugstore cialis
canadian meds without a script: Top mail order pharmacies – offshore online pharmacies
I very delighted to find this internet site on bing, just what I was searching for as well saved to fav
indianpharmacy com Online medicine order reputable indian online pharmacy
safe reliable canadian pharmacy: international online pharmacy – canadian pharmacy ltd
canadian pharmacy: Top mail order pharmacies – price prescriptions
Sun52
Hi, I do believe this is an excellent web site. I stumbledupon it 😉 I will return once again since I book-marked it. Money and freedom is the best way to change, may you be rich and continue to help other people.
viagra mexican pharmacy recommended online pharmacies or legitimate canadian pharmacy online
https://maps.google.com.tw/url?q=https://buydrugsonline.top prescription drugs online without doctor
canadian drug store pharmacy price compare and mexican online pharmacy buy medicine canada
indian pharmacy paypal Online medicine order or india pharmacy
https://toolbarqueries.google.com.om/url?q=http://indiapharmacy.site indian pharmacy
Online medicine home delivery cheapest online pharmacy india and indian pharmacy online world pharmacy india
I do not even understand how I ended up here, but I assumed this publish used to be great
paxlovid cost without insurance: buy paxlovid – Paxlovid over the counter
Paxlovid buy online: Paxlovid over the counter – paxlovid india
https://claritin.icu/# ventolin buy online
You’re so awesome! I don’t believe I have read a single thing like that before. So great to find someone with some original thoughts on this topic. Really.. thank you for starting this up. This website is something that is needed on the internet, someone with a little originality!
paxlovid price: Paxlovid over the counter – paxlovid pharmacy
Discover http://www.strongbody.uk for an exclusive selection of B2B wholesale healthcare products. Retailers can easily place orders, waiting a smooth manufacturing process. Closing the profitability gap, our robust brands, supported by healthcare media, simplify the selling process for retailers. All StrongBody products boast high quality, unique R&D, rigorous testing, and effective marketing. StrongBody is dedicated to helping you and your customers live longer, younger, and healthier lives.
http://gabapentin.life/# order neurontin
buy brand wellbutrin Buy bupropion online Europe wellbutrin brand price
b52 club
buy clomid without rx: Clomiphene Citrate 50 Mg – how to buy generic clomid without prescription
how much is neurontin: buy gabapentin – neurontin 300mg
https://wellbutrin.rest/# wellbutrin 100mg price
gerçekten çok yararlı bi konu teşekkürler
can i order generic clomid price: clomid best price – buying generic clomid no prescription
https://clomid.club/# can i buy cheap clomid without prescription
Saved as a favorite, I like your web site!
neurontin 100mg price neurontin 300 mg mexico or neurontin 400 mg
https://www.google.ms/url?sa=t&url=https://gabapentin.life neurontin tablets no script
neurontin 100mg caps neurontin 100mg capsule price and neurontin 100mg tablet generic neurontin 300 mg
order cheap clomid for sale where can i buy generic clomid pill or cost of cheap clomid tablets
http://mx2.radiant.net/Redirect/clomid.club/wiki/GM_Vortec_engine can you buy clomid without insurance
where to get generic clomid without dr prescription can you get clomid tablets and can i buy generic clomid online how can i get clomid without a prescription
ankara evden eve nakliyat ankara evden eve nakliye ankara nakliyat
This is my first time pay a quick visit at here and i am really happy to read everthing at one place
buy ventolin pharmacy ventolin prescription australia or ventolin canada
https://www.google.com.sa/url?q=https://claritin.icu buy ventolin tablets online
no prescription ventolin ventolin inhalador and ventolin over the counter uk ventolin tablets australia
buying generic clomid without insurance how can i get cheap clomid without dr prescription or cheap clomid without insurance
https://www.google.com.co/url?q=https://clomid.club buying cheap clomid
can you get cheap clomid without rx how to get clomid price and how to get clomid for sale how to get generic clomid
best generic wellbutrin 2015: Wellbutrin online with insurance – wellbutrin canadian pharmacy
Mount Kenya University (MKU) is a Chartered MKU and ISO 9001:2015 Quality Management Systems certified University committed to offering holistic education. MKU has embraced the internationalization agenda of higher education. The University, a research institution dedicated to the generation, dissemination and preservation of knowledge; with 8 regional campuses and 6 Open, Distance and E-Learning (ODEL) Centres; is one of the most culturally diverse universities operating in East Africa and beyond. The University Main campus is located in Thika town, Kenya with other Campuses in Nairobi, Parklands, Mombasa, Nakuru, Eldoret, Meru, and Kigali, Rwanda. The University has ODeL Centres located in Malindi, Kisumu, Kitale, Kakamega, Kisii and Kericho and country offices in Kampala in Uganda, Bujumbura in Burundi, Hargeisa in Somaliland and Garowe in Puntland.
MKU is a progressive, ground-breaking university that serves the needs of aspiring students and a devoted top-tier faculty who share a commitment to the promise of accessible education and the imperative of social justice and civic engagement-doing good and giving back. The University’s coupling of health sciences, liberal arts and research actualizes opportunities for personal enrichment, professional preparedness and scholarly advancement
can i buy ventolin over the counter in nz: Ventolin HFA Inhaler – buy generic ventolin
http://clomid.club/# can you get cheap clomid prices
There is something in this. I will know, thank you very much for the information.
paxlovid covid: buy paxlovid – paxlovid price
http://clomid.club/# where buy cheap clomid without rx
slot gacor malam ini
paxlovid for sale http://paxlovid.club/# paxlovid generic
casino gambling
https://flashroyal.net
casino games online
https://flashroyal.net
play casino online
ventolin mexico ventolin australia prescription or ventolin price
http://www.hotel.pieniny.com/pl/entity/add/memory?anons=353&refurl=https://claritin.icu rx coupon ventolin
ventolin 90 mcg ventolin prices in canada and ventolin hfa 90 mcg inhaler ventolin over the counter australia
Hi there to all, for the reason that I am genuinely keen of reading this website’s post to be updated on a regular basis. It carries pleasant stuff. https://www.serezotomasyon.com.tr/
paxlovid for sale http://paxlovid.club/# paxlovid pharmacy
wellbutrin bupropion: Wellbutrin online with insurance – wellbutrin xl 300
You’re so awesome! I don’t believe I have read a single thing like that before. So great to find someone with some original thoughts on this topic. Really.. thank you for starting this up. This website is something that is needed on the internet, someone with a little originality!
buy ventolin online cheap no prescription: can i buy ventolin online – ventolin australia prescription
http://paxlovid.club/# Paxlovid over the counter
slot gacor gampang menang
slot gacor gampang menang dd20d8f
Slot Gacor telah menciptakan fenomena baru dalam dunia slot online, tidak sekadar menjadi istilah biasa, melainkan sebuah jaminan meraih kemenangan dengan menawarkan pengalaman permainan slot yang memikat dengan minimal deposit 5rb.
Bermain di situs slot gacor yang dapat dijamin amanah bukan hanya memberikan hiburan semata, tetapi juga membuka peluang meraih jackpot terbesar yang sebelumnya mungkin sulit dicapai atau bahkan tidak pernah terwujud.
Pengalaman Game Slot Gacor: Lebih Dari Sekadar Hiburan
Slot Gacor bukanlah sekadar permainan slot biasa. Ia menciptakan atmosfer yang berbeda, memanjakan pemain dengan sensasi bermain yang luar biasa dan menawarkan harapan kemenangan yang lebih tinggi. Dengan desain yang menarik dan fitur-fitur inovatif, setiap putaran menjadi pengalaman yang tak terlupakan.
Strategi Bermain untuk Meningkatkan Peluang Kemenangan
Meskipun slot gacor dikenal dapat meningkatkan peluang kemenangan, penting bagi pemain memiliki beberapa strategi untuk memaksimalkan potensi kemenangan mereka. Beberapa strategi yang dapat diadopsi antara lain:
1. Pemilihan Provider Game yang Tepat
Pemilihan provider game slot online yang tepat menjadi langkah awal yang krusial. Pastikan memilih provider yang memiliki reputasi baik dan menawarkan variasi game slot gacor terbaik.
2. Pahami Return to Player (RTP) Tertinggi
Mengetahui tingkat Return to Player (RTP) tertinggi pada setiap permainan slot dapat menjadi kunci kesuksesan. Pilihlah game dengan RTP tinggi untuk meningkatkan peluang meraih kemenangan.
Slot Gacor Malam Ini: Temukan Keberuntungan Anda
Setiap malam, dunia slot gacor menyajikan kejutan-kejutan baru. Untuk menjadi bagian dari aksi malam ini, pastikan untuk mengikuti bocoran pola slot gacor yang telah disiapkan. Ini dapat menjadi kunci untuk membuka pintu ke sesuatu yang lebih besar dan meraih kemenangan yang menarik.
Jadi, jangan ragu untuk bergabung dan bermain di slot gacor hari ini. Saksikan sendiri bagaimana pengalaman bermain dapat menjadi lebih dari sekadar hiburan, melainkan sebuah peluang untuk meraih kemenangan besar. Selamat bermain dan semoga keberuntungan selalu berada di pihak Anda!
paxlovid india: Paxlovid without a doctor – Paxlovid over the counter
how to buy generic clomid no prescription can i order cheap clomid no prescription or can i get clomid prices
https://toolbarqueries.google.tm/url?q=https://clomid.club can i order generic clomid for sale
how can i get cheap clomid without dr prescription order generic clomid prices and can i purchase clomid how can i get clomid price
Nice post. I learn something totally new and challenging on websites https://www.serezotomasyon.com.tr/
Sun52
Sun52
cheap clomid without a prescription: Clomiphene Citrate 50 Mg – get clomid online
https://clomid.club/# can i buy generic clomid without rx
can i purchase clomid no prescription Buy Clomid Shipped From Canada buying generic clomid
where buy generic clomid pill: Buy Clomid Online – can you get cheap clomid no prescription
https://clomid.club/# buying cheap clomid without dr prescription
generic clomid no prescription Clomiphene Citrate 50 Mg clomid pill
paxlovid india: Paxlovid without a doctor – paxlovid price
naturally like your web site however you need to take a look at the spelling on several of your posts. A number of them are rife with spelling problems and I find it very bothersome to tell the truth on the other hand I will surely come again again.
buy generic clomid pill: Buy Clomid Online Without Prescription – order generic clomid no prescription
https://clomid.club/# how to get clomid without a prescription
can you get generic clomid pills Buy Clomid Online can you buy generic clomid tablets
Jago Slot
Jagoslot adalah situs slot gacor terlengkap, terbesar & terpercaya yang menjadi situs slot online paling gacor di indonesia. Jago slot menyediakan semua permaina slot gacor dan judi online mudah menang seperti slot online, live casino, judi bola, togel online, tembak ikan, sabung ayam, arcade dll.
Very well presented. Every quote was awesome and thanks for sharing the content. Keep sharing and keep motivating others.
neurontin 800 mg tablet: buy gabapentin online – neurontin 214
http://paxlovid.club/# paxlovid generic
750 mg wellbutrin: 689 wellbutrin – best generic wellbutrin
wellbutrin 100mg price: Wellbutrin prescription – wellbutrin generic online
http://paxlovid.club/# paxlovid pill
can i purchase clomid now: clomid best price – order generic clomid no prescription
https://clomid.club/# can i buy generic clomid without rx
where buy clomid no prescription Buy Clomid Online where can i buy clomid no prescription
Nice post. I learn something totally new and challenging on websites
where buy clomid: clomid best price – can i get cheap clomid prices
http://clomid.club/# order clomid without rx
clomid no prescription where buy generic clomid no prescription how to get clomid no prescription
neurontin 30 mg: buy gabapentin – neurontin 100 mg
neurontin online pharmacy brand name neurontin price or buy neurontin uk
https://maps.google.fm/url?q=https://gabapentin.life neurontin 400 mg
neurontin 500 mg tablet buying neurontin without a prescription and neurontin 300mg tablet cost buy neurontin 100 mg
cost of cheap clomid without a prescription: clomid best price – get generic clomid tablets
https://clomid.club/# can i buy clomid for sale
cost clomid tablets Buy Clomid Online buy generic clomid without dr prescription
get generic clomid tablets can you get generic clomid prices or clomid rx
https://www.google.dj/url?q=http://clomid.club how to buy generic clomid without rx
can i order cheap clomid prices where to buy cheap clomid without rx and can you buy clomid without dr prescription can you buy generic clomid pills
ankara evden eve nakliyat ankara evden eve nakliye ankara nakliyat
cost of clomid: where to get generic clomid without prescription – can you get generic clomid for sale
https://clomid.club/# cheap clomid prices
generic clomid without prescription Buy Clomid Online where to get cheap clomid
neurontin 2400 mg: buy gabapentin online – prescription price for neurontin
order cheap clomid for sale can i purchase clomid tablets or how to buy generic clomid without prescription
http://clients1.google.se/url?sa=t&url=https://clomid.club can i order cheap clomid without rx
where can i buy generic clomid pill where to get clomid now and how to buy clomid cost of generic clomid without insurance
neurontin price uk: cheap gabapentin – neurontin 400 mg
https://wellbutrin.rest/# wellbutrin hcl
where can i get generic clomid without rx: clomid best price – cost generic clomid without a prescription
http://clomid.club/# get cheap clomid no prescription
can i get generic clomid without dr prescription clomid best price where buy clomid online
ventolin brand ventolin cream or buy ventolin online
https://maps.google.gm/url?q=https://claritin.icu ventolin 2.5 mg
ventolin tablet ventolin inhaler salbutamol and buy ventolin inhalers online can i buy ventolin over the counter nz
çok yararlı bir paylaşım olmuş teşekkür ederim çok işime yarıcak.
Konular mükemmel olduğu gibi site teması da içeriğe müthiş uyum sağlamış. Tebrikler
I was very pleased to find this great site. I wanted to thank you for your time for this wonderful read!! I definitely enjoyed every little bit of it and I have you saved as a favorite to see new stuff on your web site.
order generic clomid pills: Buy Clomid Online Without Prescription – can you buy generic clomid price
https://clomid.club/# where to get clomid now
can i get generic clomid no prescription Buy Clomid Online cost generic clomid no prescription
ventolin inhaler https://community.alteryx.com/t5/user/viewprofilepage/user-id/524805/ viagra and dapoxetine
For the reason that the admin of this site is working, no uncertainty very quickly it will be renowned, due to its quality contents.
where buy generic clomid for sale: clomid best price – how to get generic clomid price
b52
where to buy generic clomid without a prescription: Buy Clomid Online – how to get generic clomid price
https://clomid.club/# how to buy generic clomid without prescription
generic clomid prices Buy Clomid Online can you buy clomid no prescription
neurontin 300 mg mexico gabapentin 300mg or neurontin 300 mg pill
https://maps.google.lv/url?q=https://gabapentin.life neurontin 150 mg
neurontin medicine ordering neurontin online and neurontin 10 mg neurontin capsule 600mg
naturally like your web site however you need to take a look at the spelling on several of your posts. A number of them are rife with spelling problems and I find it very bothersome to tell the truth on the other hand I will surely come again again.
I do not even understand how I ended up here, but I assumed this publish used to be great
http://avanafilit.icu/# acquistare farmaci senza ricetta
dove acquistare viagra in modo sicuro: п»їviagra prezzo farmacia 2023 – viagra generico recensioni
Gerçekten detaylı ve güzel anlatım olmuş, Elinize sağlık hocam.
viagra acquisto in contrassegno in italia: viagra consegna in 24 ore pagamento alla consegna – viagra subito
https://tadalafilit.store/# farmacie on line spedizione gratuita
Перевозка животных за границу
pillole per erezione immediata: sildenafil 100mg prezzo – viagra acquisto in contrassegno in italia
viagra originale in 24 ore contrassegno: viagra online siti sicuri – viagra generico sandoz
Vds Kirala
https://avanafilit.icu/# farmacia online migliore
buy metformin online no prescription
farmacia online più conveniente: farmacia online miglior prezzo – acquisto farmaci con ricetta
Porno izle
cheap sildenafil 50mg uk
comprare farmaci online con ricetta farmacie online autorizzate elenco or acquistare farmaci senza ricetta
https://www.google.es/url?q=http://kamagrait.club farmacie online affidabili
farmacia online senza ricetta farmacie on line spedizione gratuita and acquistare farmaci senza ricetta farmacia online miglior prezzo
farmacie online sicure acquisto farmaci con ricetta or comprare farmaci online all’estero
https://clients1.google.az/url?q=https://tadalafilit.store farmacia online senza ricetta
farmacie on line spedizione gratuita migliori farmacie online 2023 and farmacia online piГ№ conveniente comprare farmaci online con ricetta
farmaci senza ricetta elenco: avanafil – farmacia online senza ricetta
20 amoxicillin 500mg
https://avanafilit.icu/# acquisto farmaci con ricetta
farmacie online affidabili farmacie online affidabili or comprare farmaci online con ricetta
https://www.google.cg/url?q=https://farmaciait.pro farmacie online affidabili
farmacia online senza ricetta farmacia online and comprare farmaci online con ricetta farmacia online
farmacie online affidabili farmacie online sicure or acquisto farmaci con ricetta
https://images.google.co.ve/url?q=https://tadalafilit.store farmacia online senza ricetta
farmacie online autorizzate elenco farmacia online migliore and farmacie online affidabili farmacia online migliore
While you yell the swear phrases of your alternative but still
do nothing useful, the pre-secure system may start priming
the brakes so that simply touching the pedal will apply their full
force — should you ever find the presence of thoughts to stomp the brake
pedal, that is. Finally, if the system detects that a crash can’t be averted, it will put together
the airbags for deployment and tighten the entire
seat belts. But it works. Google has had a fleet of driverless automobiles since 2009, and they’ve driven over a half 1,000,000 miles (804,672 kilometers) with no crash.
He owns a $54 million Gulfstream G550 non-public jet. Human drivers get
in an accident about each half a million miles (804,672 kilometers) on common in the United States, so either the Google automobiles
are due, or they’re going to out-drive humans but again. The techniques use
sensors all across the automobile to information it right into a parallel parking
house — no human enter required. The Audi RS7 Sportback SUV
goes one step additional within the automatic parking wars — it parks itself whilst you stand on the curb and wait.
cheap xenical online
whoah this blog is wonderful i love reading your articles. Stay up the good work! You know, many people are searching around for this info, you can help them greatly.
Hi, its pleasant piece of writing concerning media print, we all know media is a enormous source of information.
farmacie online sicure: kamagra oral jelly – migliori farmacie online 2023
Fantastic items from you, man. I have keep in mind your stuff prior to and
you’re simply too great. I actually like what you have got right here, certainly like what you’re stating
and the best way during which you are saying it.
You make it enjoyable and you continue to care for to stay it sensible.
I can not wait to learn far more from you. That
is actually a great website.
lisinopril 60 mg daily
levitra capsules
comprare farmaci online con ricetta: farmacia online spedizione gratuita – comprare farmaci online con ricetta
farmacia online migliore farmacia online senza ricetta or п»їfarmacia online migliore
http://www.aaronsw.com/2002/display.cgi?t=<a+href=http://farmaciait.pro comprare farmaci online all'estero
comprare farmaci online con ricetta п»їfarmacia online migliore and farmacia online miglior prezzo comprare farmaci online all’estero
Sohbet Hattı
25mg prednisolone
Güzel Antalya’da araç kirası için AdRentAcarAntalya var. hem uygun fiyata araç kiralama, hem alım satım yapabilirsiniz antalya araç kiralama, ad rent a car, antalya araç kiralama, antalya rent a car, ucuz kiralık araç antalya, kiralık araba antalya
Yazdığınız yazıdaki bilgiler altın değerinde çok teşekkürler bi kenara not aldım.
Good post! We will be linking to this particularly great post on our site. Keep up the great writing
trazodone 150 mg coupon
slot gacor gampang menang
http://avanafilit.icu/# п»їfarmacia online migliore
clonidine 0.25 mg
how to get propranolol prescription uk
farmacie on line spedizione gratuita: Cialis senza ricetta – migliori farmacie online 2023
top farmacia online farmacia online senza ricetta or migliori farmacie online 2023
https://fantasy.circleofcricket.com/register.aspx?returnurl=https://tadalafilit.store farmacia online
farmacie online autorizzate elenco comprare farmaci online con ricetta and farmacie online autorizzate elenco farmacia online miglior prezzo
farmacie online affidabili farmaci senza ricetta elenco or farmacia online miglior prezzo
http://4chan.nbbs.biz/kusyon_b.php?http://kamagrait.club/ comprare farmaci online all’estero
comprare farmaci online all’estero acquisto farmaci con ricetta and farmacia online senza ricetta farmacie online sicure
amoxicillin 500 mg
https://amoxwoldrt.com
amoxicillin 500 mg
https://amoxwoldrt.com
generic amoxil
disulfiram
https://antabrdf.com
how much is a prescription for antabuse
https://antabrdf.com
buy antabuse
It’s really a nice and useful piece of information. I’m glad that
you simply shared this useful info with us. Please
stay us informed like this. Thanks for sharing.
combivent 250 mg
propecia 2.5 mg
price of lyrica 100 mg
http://farmaciait.pro/# acquisto farmaci con ricetta
buy dapoxetine cheap
farmaci senza ricetta elenco comprare farmaci online con ricetta or farmaci senza ricetta elenco
https://cse.google.bt/url?sa=i&url=https://farmaciait.pro farmacia online
farmacia online miglior prezzo farmacie online affidabili and farmacia online senza ricetta farmacie online autorizzate elenco
For the reason that the admin of this site is working, no uncertainty very quickly it will be renowned, due to its quality contents.
order difucan
п»їviagra prezzo farmacia 2023: viagra senza ricetta – dove acquistare viagra in modo sicuro
https://farmaciait.pro/# acquistare farmaci senza ricetta
buy cialis over the counter usa
borju89
farmacia online miglior prezzo migliori farmacie online 2023 or farmacia online
http://wap.didrov.ru/go.php?url=https://kamagrait.club acquistare farmaci senza ricetta
farmacia online miglior prezzo farmacie online autorizzate elenco and acquistare farmaci senza ricetta comprare farmaci online con ricetta
comprare farmaci online all’estero п»їfarmacia online migliore or top farmacia online
https://cse.google.ml/url?q=https://tadalafilit.store farmaci senza ricetta elenco
farmacia online miglior prezzo farmacie online affidabili and migliori farmacie online 2023 farmacie online affidabili
where can you buy doxycycline online
What’s up to every single one, it’s truly a pleasant for me to pay a quick visit this web page,
it includes useful Information.
Check these web pages:
https://usascripthelpers.com/product/saxenda/
https://usascripthelpers.com/product/trulicity/
https://usascripthelpers.com/product/victoza/
https://usascripthelpers.com/product/ozempic/
It’s going to be ending of mine day, except
before end I am reading this impressive paragraph to improve
my knowledge.
I do not even understand how I ended up here, but I assumed this publish used to be great
https://termalotellerburada.blogspot.com
top farmacia online farmacie online autorizzate elenco or migliori farmacie online 2023
http://chat.libimseti.cz/redir.py?http://tadalafilit.store farmacia online piГ№ conveniente
farmacia online miglior prezzo farmacia online miglior prezzo and farmacie online autorizzate elenco farmacia online senza ricetta
clonidine blood pressure parameters
http://sildenafilit.bid/# viagra generico prezzo piГ№ basso
Fiyatları kategorimizde 2023 yılı itibariyle Otomobil, Alkol, Ürün ve Hizmetlerin Fiyatlarını sizler için listelemekteyiz.
viagra naturale in farmacia senza ricetta: viagra generico – viagra online in 2 giorni
After checking out a number of the blog posts on your
web page, I honestly appreciate your way of blogging.
I saved it to my bookmark site list and will be checking
back in the near future. Please check out my web site
too and tell me how you feel.
Have you ever thought about creating an e-book or guest authoring on other websites? I have a blog based upon on the same subjects you discuss and would really like to have you share some stories/information. I know my subscribers would value your work. If you are even remotely interested, feel free to send me an e-mail.
farmacie online autorizzate elenco п»їfarmacia online migliore or п»їfarmacia online migliore
http://hellenicradio.org.za/?URL=https://farmaciait.pro farmacia online piГ№ conveniente
farmacia online migliore farmacia online senza ricetta and acquistare farmaci senza ricetta comprare farmaci online con ricetta
Thanks for every other informative blog. Where
else may I get that kind of information written in such
an ideal means? I’ve a mission that I am juet now operating on, and I have been on the glance out for such information.
site
Players can start too play betting sporrt at any moment as a result of it’s the only very good location that promises 24-hour help.
If you wnt to impose restrictions on your self, go for sites
licenced bby the UKGC andd registered within tthe exclusion program.
Instead off receiving puzzled yourself, you must step up intfo the Divine slots to play the
new slots games generously for understanding the essentials clearly.
Güzel aydınlatıcı makale için teşekkürler daha iyisi samda kayısı umarım faydalı çalışmalarınızın devamı gelir.
b52 club
https://b52.name
https://vardenafilo.icu/# farmacias online seguras en espaГ±a
500 mg doxycycline pill
http://farmacia.best/# farmacia online internacional
farmacias baratas online envГo gratis farmacia barata farmacias online seguras en espaГ±a
finasteride 1mg
best generic finasteride brand
https://sildenafilo.store/# viagra para hombre precio farmacias
çok yararlı bir paylaşım olmuş teşekkür ederim çok işime yarıcak.
I like the efforts you have put in this, regards for all the great content.
C88: Elevate Your Gaming Experience with Unrivaled Bonuses and Endless Excitement!
Introduction:
Embark on an extraordinary gaming adventure with C88, a platform that redefines the boundaries of entertainment. Whether you’re a seasoned gamer or a newcomer, C88 promises an immersive experience characterized by thrilling features and exclusive bonuses. Let’s unravel the key elements that position C88 as the ultimate destination for gaming enthusiasts.
1. C88 Fun – Where Entertainment Knows No Bounds!
More than just a gaming platform, C88 Fun is an expedition waiting to be discovered. Boasting an intuitive interface and a diverse range of games, C88 Fun caters to all preferences. From timeless classics to cutting-edge releases, C88 Fun ensures every player finds their gaming sanctuary.
2. JILI & Evo 100% Welcome Bonus – A Warm Welcome for Newcomers!
Embark on your gaming journey with a warm embrace from C88. New members are welcomed with a 100% Welcome Bonus from JILI & Evo, doubling the excitement right from the start. This bonus acts as a catalyst for players to delve into the diverse array of games available on the platform.
3. C88 First Deposit Get 2X Bonus – Doubling the Excitement!
C88 believes in generously rewarding players. With the “First Deposit Get 2X Bonus” offer, players can revel in double the fun on their initial deposit. This promotion enriches the gaming experience, providing more avenues to win big across various games.
4. 20 Spin Times = Get Big Bonus (8,888P) – Spin Your Way to Greatness!
Spin your way to substantial bonuses with the “20 Spin Times” promotion. Accumulate spins and stand a chance to win an impressive bonus of 8,888P. This promotion adds an extra layer of excitement to the gameplay, combining luck and strategy for maximum enjoyment.
5. Daily Check-in = Turnover 5X?! – Daily Rewards Await!
Consistency is key at C88. By simply logging in daily, players not only bask in the thrill of gaming but also stand a chance to multiply their turnovers by 5X. Daily check-ins bring additional perks, making every day a rewarding experience for dedicated players.
6. 7 Day Deposit 300 = Get 1,500P – Unlock Deposit Rewards!
For those craving opportunities, the “7 Day Deposit” promotion is a game-changer. Deposit 300 and receive a generous reward of 1,500P. This promotion encourages players to explore the platform further and maximize their gaming potential.
7. Invite 100 Users = Get 10,000 PESO – Share the Excitement!
C88 believes in the strength of community. Invite friends and fellow gamers to join the excitement, and for every 100 users, receive an incredible reward of 10,000 PESO. Sharing the joy of gaming has never been more rewarding.
8. C88 New Member Get 100% First Deposit Bonus – Exclusive Benefits!
New members are in for a treat with an exclusive 100% First Deposit Bonus. C88 ensures that everyone kicks off their gaming journey with a boost, setting the stage for an exhilarating experience filled with opportunities to win.
9. All Pass Get C88 Extra Big Bonus 1000 PESO – Unlock Unlimited Rewards!
For avid players exploring every nook and cranny of C88, the “All Pass Get C88 Extra Big Bonus” offers an additional 1000 PESO. This promotion rewards those who embrace the full spectrum of games and features available on the platform.
Ready to immerse yourself in the excitement? Visit C88 now and unlock a world of gaming like never before. Don’t miss out on the excitement, bonuses, and wins that await you at C88. Join the community today and let the games begin! #c88 #c88login #c88bet #c88bonus #c88win
farmacia online envГo gratis [url=https://farmacia.best/#]farmacias baratas online envio gratis[/url] farmacias online seguras
budecort 100
paroxetine 40 mg price
http://farmacia.best/# farmacia barata
farmacia online barata kamagra 100mg farmacia online barata
Hi there to every single one, it’s in fact a good for me to pay a visit this web site, it includes valuable Information.
Awesome article.
п»їfarmacia online farmacia barata or farmacia online 24 horas
https://images.google.vg/url?q=https://kamagraes.site farmacias online seguras en espaГ±a
farmacia online 24 horas farmacias online baratas and farmacia online madrid farmacia online 24 horas
vermox medication
amoxicillin purchase uk
suhagra 25 mg
se puede comprar sildenafil sin receta comprar viagra en espaГ±a envio urgente contrareembolso or sildenafilo cinfa 100 mg precio farmacia
https://maps.google.com.mt/url?rct=j&sa=t&source=web&url=https://sildenafilo.store comprar viagra en espaГ±a amazon
comprar viagra en espaГ±a amazon viagra online cerca de la coruГ±a and sildenafilo cinfa 100 mg precio farmacia viagra online cerca de la coruГ±a
vardenafil for women
http://kamagraes.site/# farmacia online 24 horas
çok başarılı ve kaliteli bir makale olmuş güzellik sırlarım olarak teşekkür ederiz.
how much is vermox
600 mg bupropion
farmacia 24h Comprar Levitra Sin Receta En Espana farmacia online madrid
c88
1. C88 Fun – A Gateway to Endless Entertainment!
Beyond being a gaming platform, C88 Fun is an adventure waiting to unfold. With its user-friendly interface and a diverse selection of games, C88 Fun caters to all preferences. From timeless classics to cutting-edge releases, C88 Fun ensures every player finds their perfect game.
2. JILI & Evo 100% Welcome Bonus – Warm Embrace for New Players!
Embark on your gaming journey with a hearty welcome from C88. New members are greeted with a 100% Welcome Bonus from JILI & Evo, doubling the excitement from the very beginning. This bonus serves as an excellent boost for players to explore the wide array of games available on the platform.
3. C88 First Deposit Get 2X Bonus – Doubling the Excitement!
C88 believes in rewarding players generously. With the “First Deposit Get 2X Bonus” offer, players can enjoy double the fun on their initial deposit. This promotion enhances the gaming experience, providing more opportunities to win big across various games.
4. 20 Spin Times = Get Big Bonus (8,888P) – Spin Your Way to Greatness!
Spin your way to big bonuses with the “20 Spin Times” promotion. Accumulate spins and stand a chance to win an impressive bonus of 8,888P. This promotion adds an extra layer of excitement to the gameplay, combining luck and strategy for maximum enjoyment.
5. Daily Check-in = Turnover 5X?! – Daily Rewards Await!
Consistency is key at C88. By simply logging in daily, players not only enjoy the thrill of gaming but also stand a chance to multiply their turnovers by 5X. Daily check-ins bring additional perks, making every day a rewarding experience for dedicated players.
6. 7 Day Deposit 300 = Get 1,500P – Unlock Deposit Rewards!
For those eager to seize opportunities, the “7 Day Deposit” promotion is a game-changer. Deposit 300 and receive a generous reward of 1,500P. This promotion encourages players to explore the platform further and maximize their gaming potential.
7. Invite 100 Users = Get 10,000 PESO – Share the Excitement!
C88 believes in the power of community. Invite friends and fellow gamers to join the excitement, and for every 100 users, receive an incredible reward of 10,000 PESO. Sharing the joy of gaming has never been more rewarding.
8. C88 New Member Get 100% First Deposit Bonus – Exclusive Benefits!
New members are in for a treat with an exclusive 100% First Deposit Bonus. C88 ensures that everyone starts their gaming journey with a boost, setting the stage for an exhilarating experience filled with opportunities to win.
9. All Pass Get C88 Extra Big Bonus 1000 PESO – Unlock Unlimited Rewards!
For avid players exploring every nook and cranny of C88, the “All Pass Get C88 Extra Big Bonus” offers an additional 1000 PESO. This promotion rewards those who embrace the full spectrum of games and features available on the platform.
Curious? Visit C88 now and unlock a world of gaming like never before. Don’t miss out on the excitement, bonuses, and wins that await you at C88. Join the community today and let the games begin! #c88 #c88login #c88bet #c88bonus #c88win
cost of doxycycline canada
tombak118
tombak118
п»їfarmacia online farmacia 24h or farmacia online 24 horas
https://maps.google.co.il/url?sa=t&url=https://kamagraes.site farmacia online madrid
farmacia online internacional farmacia envГos internacionales and п»їfarmacia online farmacia online internacional
farmacia internacional barcelona farmacia online envГo gratis murcia or farmacia online envГo gratis
https://87.biqund.com/index/d2?diff=0&utm_clickid=n4g8cwk0ocko840g&aurl=https://farmacia.best farmacias online baratas
farmacias baratas online envГo gratis mejor farmacia online madrid and gran farmacia online farmacia envГos internacionales
sildenafilo cinfa 100 mg precio farmacia comprar viagra en espaГ±a envio urgente contrareembolso or comprar sildenafilo cinfa 100 mg espaГ±a
https://images.google.mv/url?sa=t&url=https://sildenafilo.store viagra online cerca de zaragoza
comprar viagra en espaГ±a envio urgente contrareembolso sildenafilo sandoz 100 mg precio and п»їViagra online cerca de Madrid viagra 100 mg precio en farmacias
where to get generic levitra
https://kamagraes.site/# farmacia 24h
effexor 75 mg prices
augmentin generic price
farmacia online envГo gratis farmacias online seguras en espaГ±a or farmacias online seguras
http://images.google.nu/url?q=https://kamagraes.site farmacia envГos internacionales
<a href=https://pharmacycode.com/catalog-_hydroxymethylglutaryl-coa_reductase_inhibitors.html?a=farmacia online envГo gratis farmacias online seguras en espaГ±a and farmacias baratas online envГo gratis farmacias online seguras en espaГ±a
synthroid mexico
Thanks for one’s marvelous posting! I truly enjoyed reading it, you will be a great author. I will make certain to bookmark your blog and will eventually come back someday. I want to encourage continue your great job, have a nice morning!
comprar viagra en espaГ±a envio urgente viagra generico viagra online rГЎpida
albuterol brand name
https://tadalafilo.pro/# farmacias online seguras
Çok yararlı bi yazı olmuş hocam teşekkür ederim .Sizin yazılarınızı beğenerek okuyorum elinize sağlık.
sildenafilo 100mg precio farmacia comprar viagra en espaГ±a envio urgente contrareembolso or farmacia gibraltar online viagra
https://clients1.google.com.sv/url?q=https://sildenafilo.store viagra entrega inmediata
farmacia gibraltar online viagra comprar viagra online en andorra and viagra online cerca de bilbao sildenafilo 100mg precio espaГ±a
o2sensorreplacement
prescription medicine furosemide
generic tadalafil 20 mg price
http://tadalafilo.pro/# farmacias online seguras en espaГ±a
buy lisinopril 20 mg
farmacias baratas online envГo gratis farmacias baratas online envГo gratis or farmacia online barata
https://images.google.dz/url?q=http://kamagraes.site farmacia online envГo gratis
farmacias online seguras farmacia online madrid and farmacias baratas online envГo gratis farmacias online seguras en espaГ±a
lasix 40 mg daily
http://tadalafilo.pro/# farmacia online madrid
I just like the helpful information you provide in your articles
farmacia online envГo gratis murcia farmacia 24h or farmacia envГo gratis
https://cse.google.nr/url?sa=t&url=https://farmacia.best farmacia online internacional
farmacia 24h farmacias baratas online envГo gratis and farmacia online internacional farmacia online internacional
can you buy amoxicillin over the counter in australia
You’re so awesome! I don’t believe I have read a single thing like that before. So great to find someone with some original thoughts on this topic. Really.. thank you for starting this up. This website is something that is needed on the internet, someone with a little originality! https://www.serezotomasyon.com.tr/
can you buy diflucan in mexico
synthroid 150 mcg price
doxycycline drug
farmacia online 24 horas farmacia 24h or farmacia barata
http://w.zuzuche.com/error.php?msg=192.168.0.22::+Read+timed+out+after+reading+0+bytes,+waited+for+30.000000+seconds&url=http://kamagraes.site://kamagraes.site farmacia barata
farmacias online baratas farmacia barata and farmacias baratas online envГo gratis farmacia 24h
fluoxetine 60 mg tablet
sildenafilo cinfa sin receta viagra online cerca de toledo or viagra para mujeres
https://www.google.az/url?sa=t&url=http://sildenafilo.store se puede comprar sildenafil sin receta
venta de viagra a domicilio comprar viagra online en andorra and sildenafilo 100mg precio farmacia comprar sildenafilo cinfa 100 mg espaГ±a
azithromycin 250 mg coupon
farmacia envГos internacionales kamagra jelly farmacia 24h
levitra purchase cheap
viagra pills price in india
where to buy ivermectin
http://sildenafilo.store/# viagra entrega inmediata
I used to be able tto find ood information from your articles.
web site
Well, we tested out their assist sytem by requesting
though and Drew was in a position tto point us
to what we would have liked of their rules part in no time.
Those that wouyld like tto enjoy their time at casinos
however who wouldn’t need to be seen in public may select live
cassino games for their leisure. Aling with a improbable welcome offer,
All Slots additionally work to ensure that their prospects really feel valued at each stage of their journey with the location, and this involved making regular drals and promotions readily
obtainabe to players.
farmacia online envГo gratis farmacias online seguras or farmacias baratas online envГo gratis
https://cse.google.at/url?sa=t&url=https://kamagraes.site farmacia barata
farmacia online internacional farmacias online seguras en espaГ±a and farmacia online internacional farmacia online madrid
I lokve what you guys are usually up too. This sort of clever work
and coverage! Keep up the good works guys I’ve included you guys too mmy blogroll.
web page
If you’re into informal BTC gambling, then be certain to go to Stake first, and
then copare it to the rest of the Bitcoin playing
websites list we crafted. Duetto delivers essentially the most powerful Revenue Strategy solutions to the world’s leading accommodations and casinos, allowing them to better handle pricing, income and enterprise-mix selections
with superior, actionable data. From a lucrative 4-tiered
welcome supply to great ongoing promotions.
farmacias online seguras en espaГ±a farmacia con envГos internacionales or farmacia online envГo gratis
https://www.google.com.uy/url?q=https://farmacia.best farmacia online internacional
farmacias online seguras farmacia online internacional and farmacias indias online farmacia online madrid
Pharmacie en ligne livraison gratuite: kamagra en ligne – Pharmacie en ligne livraison rapide
п»їpharmacie en ligne achat kamagra Pharmacie en ligne sans ordonnance
trazodone 50 mg pills
cheapest pharmacy for prescriptions
Pharmacie en ligne livraison rapide tadalafil Pharmacie en ligne pas cher
Viagra femme ou trouver: Acheter du Viagra sans ordonnance – Viagra homme prix en pharmacie sans ordonnance
vermox pharmacy canada
Prix du Viagra en pharmacie en France: Viagra vente libre pays – Viagra vente libre pays
Pharmacie en ligne fiable Levitra pharmacie en ligne п»їpharmacie en ligne
Does your website have a contact page? I’m having problems locating it but, I’d like to send you an e-mail. I’ve got some recommendations for your blog you might be interested in hearing. Either way, great website and I look forward to seeing it develop over time.
Viagra gГ©nГ©rique sans ordonnance en pharmacie Viagra generique en pharmacie Viagra vente libre pays
acheter medicament a l etranger sans ordonnance: Acheter Cialis – pharmacie ouverte
hi!,I like your writing so a lot! share we keep up a correspondence more
approximately your article on AOL? I need an expert on this space to resolve my
problem. Maybe that is you! Taking a look forward
to peer you.
Viagra sans ordonnance pharmacie France Viagra femme ou trouver or <a href=" http://promisec.net/info.php?a= “>Viagra en france livraison rapide
https://www.google.com.eg/url?q=https://viagrasansordonnance.store Viagra gГ©nГ©rique pas cher livraison rapide
Viagra en france livraison rapide Viagra sans ordonnance pharmacie France and SildГ©nafil Teva 100 mg acheter Viagra pas cher livraison rapide france
My partner and I stumbled over here from a different web page
and thought I might as well check things out.
I like what I see so i am just following you. Look forward to looking at your web page again.
Pharmacie en ligne livraison 24h Pharmacie en ligne livraison gratuite or acheter medicament a l etranger sans ordonnance
https://www.bausch.pk/en/redirect/?url=https://kamagrafr.icu Pharmacie en ligne livraison gratuite
Pharmacies en ligne certifiГ©es Pharmacie en ligne fiable and acheter mГ©dicaments Г l’Г©tranger п»їpharmacie en ligne
Its ⅼike you read mʏy mind! You seem to know a lot approximately this,
suycһ as you wrote tthe guide in it or sоmething.
I feel that you ϲould dߋ with some percent to power the message home a bit,
but other than that, thіs is great blog. Ꭺn eⲭcellent rеad.
I will cеrtainly be back.
19dewa login
Pharmacie en ligne livraison gratuite п»їpharmacie en ligne or п»їpharmacie en ligne
https://cse.google.com.pk/url?q=https://pharmacieenligne.guru Acheter mГ©dicaments sans ordonnance sur internet
Pharmacie en ligne France pharmacie ouverte 24/24 and Pharmacie en ligne fiable Pharmacie en ligne pas cher
pharmacie ouverte 24/24 Pharmacies en ligne certifiГ©es or Pharmacies en ligne certifiГ©es
http://maps.google.sh/url?q=http://kamagrafr.icu Pharmacie en ligne sans ordonnance
Pharmacie en ligne pas cher acheter mГ©dicaments Г l’Г©tranger and Pharmacie en ligne livraison gratuite pharmacie ouverte
zoloft nz
Hi, i thіnk that i saw ʏou viaited my wеblog thus i came
to “return the fɑvor”.Ӏ’m trying to find things to improve mmy site!I shppose its ok tto use sߋme of your ideas!!
amoxicillin 500mg online uk
ivermectin iv
п»їViagra sans ordonnance 24h: Viagra 100mg prix – Meilleur Viagra sans ordonnance 24h
1881hoki
п»їpharmacie en ligne cialis sans ordonnance п»їpharmacie en ligne
Thanks on your marvelous posting! I really enjoyed reading it, you are a great author.
I will make certain to bookmark your blog and will often come back at some point.
I want to encourage you continue your great writing, have a nice evening!
how to buy synthroid
acheter medicament a l etranger sans ordonnance: cialis generique – Pharmacie en ligne France
laxis pills
augmentin 125 mg
buy silagra uk
Pharmacie en ligne livraison 24h Pharmacie en ligne France or acheter mГ©dicaments Г l’Г©tranger
http://game-android.ru/forum/away.php?s=http://pharmacieenligne.guru Pharmacie en ligne sans ordonnance
Pharmacie en ligne France Pharmacie en ligne sans ordonnance and pharmacie ouverte 24/24 pharmacie ouverte 24/24
Viagra femme ou trouver Le gГ©nГ©rique de Viagra or SildГ©nafil 100 mg prix en pharmacie en France
https://images.google.ge/url?sa=t&url=https://viagrasansordonnance.store Viagra Pfizer sans ordonnance
SildГ©nafil 100 mg prix en pharmacie en France Viagra homme prix en pharmacie sans ordonnance and Quand une femme prend du Viagra homme Viagra vente libre pays
Hey there! Do you use Twitter? I’d like to
follow you if that would be okay. I’m definitely enjoying
your blog and look forward to new posts.
propranolol tablets online
buy metformin 1000 mg online
zithromax buying
propecia 1mg tabs
Attractive section of content. I just stumbled upon your website and
in accession capital to assert that I get in fact enjoyed account your blog posts.
Any way I’ll be subscribing to your augment and even I achievement you
access consistently quickly.
Prix du Viagra 100mg en France SildГ©nafil 100mg pharmacie en ligne Viagra vente libre allemagne
colchicine 0.6 mg online
canadian online pharmacy accutane
Pharmacie en ligne France Pharmacie en ligne fiable or Pharmacies en ligne certifiГ©es
https://www.google.com/url?q=https://kamagrafr.icu Acheter mГ©dicaments sans ordonnance sur internet
Pharmacie en ligne livraison gratuite Pharmacie en ligne pas cher and Pharmacie en ligne livraison gratuite acheter medicament a l etranger sans ordonnance
doxycycline 100mg tabs
Viagra Pfizer sans ordonnance: Meilleur Viagra sans ordonnance 24h – Viagra en france livraison rapide
Pharmacie en ligne pas cher Pharmacie en ligne fiable or Pharmacie en ligne pas cher
http://raguweb.net/outlink/link.php?url=http://kamagrafr.icu Pharmacie en ligne fiable
Pharmacies en ligne certifiГ©es Acheter mГ©dicaments sans ordonnance sur internet and Pharmacie en ligne sans ordonnance Pharmacies en ligne certifiГ©es
Pharmacie en ligne livraison 24h kamagra gel п»їpharmacie en ligne
Hello my loved one! I wish to say that this article is awesome,
nice written and come with almost all significant infos. I
would like to peer extra posts like this .
clonidine 136
Viagra vente libre pays Viagra sans ordonnance livraison 48h or Viagra en france livraison rapide
https://maps.google.pl/url?sa=t&url=http://viagrasansordonnance.store Meilleur Viagra sans ordonnance 24h
Viagra sans ordonnance 24h suisse Viagra vente libre allemagne and Meilleur Viagra sans ordonnance 24h Viagra pas cher livraison rapide france
Pharmacie en ligne livraison gratuite Pharmacie en ligne fiable or Pharmacies en ligne certifiГ©es
https://images.google.gm/url?sa=t&url=https://pharmacieenligne.guru Pharmacie en ligne sans ordonnance
acheter medicament a l etranger sans ordonnance Pharmacies en ligne certifiГ©es and Pharmacie en ligne France acheter mГ©dicaments Г l’Г©tranger
synthroid 50mcg cost
Howdy I am so grateful I found your website, I really found you by error, while I was searching on Askjeeve for something else, Nonetheless I am here now and would just like to say thanks a lot for a remarkable post and a all round interesting blog (I also love the theme/design), I dont have time to browse it all at the minute but I have saved it and also included your RSS feeds, so when I have time I will be back to read a great deal more, Please do keep up the excellent b.
paroxetine cost
Pharmacie en ligne sans ordonnance: Levitra 20mg prix en pharmacie – Pharmacie en ligne livraison gratuite
https://apotheke.company/# online apotheke gГјnstig
http://apotheke.company/# online apotheke preisvergleich
plaquenil 100
albuterol 0.5 mg
http://cialiskaufen.pro/# online apotheke preisvergleich
ankara evden eve nakliyat ankara evden eve nakliye ankara nakliyat
bactrim without prescription
versandapotheke deutschland п»їonline apotheke or online apotheke versandkostenfrei
https://maps.google.com.mt/url?q=http://apotheke.company online apotheke versandkostenfrei
п»їonline apotheke online apotheke gГјnstig and versandapotheke deutschland online apotheke versandkostenfrei
how to get doxycycline prescription
Blog
https://potenzmittel.men/# versandapotheke deutschland
With havin so much content do you ever run into any issues of plagorism or copyright
infringement? My blog has a lot of unique content
I’ve either written myself or outsourced but it appears
a lot of it is popping it up all over the web without my authorization. Do you know
any techniques to help prevent content from being stolen? I’d truly appreciate it.
online apotheke deutschland online apotheke preisvergleich or <a href=" http://km10805.keymachine.de/php.php?a=can+you+buy+viagra+online “>versandapotheke deutschland
http://clients1.google.com.br/url?sa=t&url=https://kamagrakaufen.top online apotheke preisvergleich
online apotheke deutschland online apotheke preisvergleich and п»їonline apotheke gГјnstige online apotheke
versandapotheke internet apotheke or online-apotheken
http://www.paidmania.com/getpaid/frame_signup/0?title=apotheke.company&refurl=https://apotheke.company/ online-apotheken
gГјnstige online apotheke online apotheke gГјnstig and versandapotheke versandkostenfrei online-apotheken
https://kamagrakaufen.top/# online apotheke versandkostenfrei
generic cialis no prescription
buy vermox in usa
500g amoxicillin
https://potenzmittel.men/# п»їonline apotheke
Heⅼlo! This post could not be written aany better!
Reading througһ thi post reninds me of my previoսs
room mate! He always kept talking about tһis. I will forward this article to him.
Ϝairly certain he will have a good reaԁ. Thanks for
sharing!
hydroxychloroquine 200mg 60 tablets
It’ѕ an ɑmazing piece of ԝriting in favor
oof all thе online visitors; they will take benefit from it I am sure.
http://apotheke.company/# versandapotheke versandkostenfrei
buy fluoxetine 40 mg
internet apotheke versandapotheke versandkostenfrei or online apotheke preisvergleich
http://smtnn.ru/forum/away.php?s=http://kamagrakaufen.top п»їonline apotheke
online apotheke gГјnstig online apotheke preisvergleich and online apotheke versandkostenfrei online apotheke versandkostenfrei
online apotheke gГјnstig online apotheke preisvergleich or gГјnstige online apotheke
http://images.google.co.uz/url?q=https://cialiskaufen.pro versandapotheke deutschland
online-apotheken versandapotheke deutschland and versandapotheke deutschland п»їonline apotheke
http://apotheke.company/# п»їonline apotheke
http://viagrakaufen.store/# Sildenafil 100mg online bestellen
buy albuterol 1.25 mg
synthroid 5mg
online apotheke versandkostenfrei: online apotheke gunstig – internet apotheke
Cocuk Pornosu
https://apotheke.company/# online apotheke gГјnstig
http://viagrakaufen.store/# Viagra diskret bestellen
ivermectin lotion for lice
versandapotheke versandkostenfrei online apotheke preisvergleich or internet apotheke
https://images.google.mu/url?sa=t&url=https://apotheke.company versandapotheke
online apotheke versandkostenfrei online apotheke deutschland and online apotheke gГјnstig gГјnstige online apotheke
effexor cost
프라그마틱 게임
Zhang Sheng은 “오스만 왕자님, 무감각한 요청이 있습니다. “라고 말했습니다.
versandapotheke п»їonline apotheke or versandapotheke versandkostenfrei
https://images.google.gr/url?sa=t&url=https://kamagrakaufen.top online apotheke versandkostenfrei
gГјnstige online apotheke gГјnstige online apotheke and versandapotheke versandkostenfrei online apotheke deutschland
bactrim in mexico
online-apotheken versandapotheke deutschland or internet apotheke
https://tvtropes.org/pmwiki/no_outbounds.php?o=https://apotheke.company online apotheke gГјnstig
online apotheke gГјnstig versandapotheke versandkostenfrei and versandapotheke versandkostenfrei versandapotheke deutschland
https://potenzmittel.men/# online apotheke preisvergleich
http://viagrakaufen.store/# Viagra Generika Schweiz rezeptfrei
Güzel Antalya’da araç kirası için AdRentAcarAntalya var. hem uygun fiyata araç kiralama, hem alım satım yapabilirsiniz antalya araç kiralama, ad rent a car, antalya araç kiralama, antalya rent a car, ucuz kiralık araç antalya, kiralık araba antalya
http://apotheke.company/# online apotheke preisvergleich
where to get zithromax over the counter
clonidine 02 mg
http://kamagrakaufen.top/# online apotheke gГјnstig
online apotheke deutschland: online-apotheken – gГјnstige online apotheke
gГјnstige online apotheke online apotheke versandkostenfrei or versandapotheke deutschland
http://flthk.com/en/productshow.asp?id=22&mnid=49487&mc=FLT-V1/V2&url=https://kamagrakaufen.top online apotheke versandkostenfrei
п»їonline apotheke internet apotheke and versandapotheke versandapotheke deutschland
how much is propecia in canada
п»їonline apotheke online apotheke versandkostenfrei or gГјnstige online apotheke
https://images.google.bj/url?sa=t&url=https://cialiskaufen.pro gГјnstige online apotheke
online apotheke deutschland online apotheke preisvergleich and п»їonline apotheke online apotheke gГјnstig
versandapotheke versandkostenfrei: kamagra tabletten – online apotheke versandkostenfrei
https://potenzmittel.men/# online apotheke versandkostenfrei
http://potenzmittel.men/# online apotheke deutschland
hocam gayet açıklayıcı bir yazı olmuş elinize emeğinize sağlık.
Elitepipe Plastic Factory’s HDPE fittings are renowned for their versatility, allowing for secure and efficient connections in diverse applications such as water supply, gas distribution, and industrial pipelines. Elitepipe Plastic Factory
http://mexicanpharmacy.cheap/# mexico drug stores pharmacies
doxycycline cream over the counter
http://mexicanpharmacy.cheap/# buying prescription drugs in mexico online
mexican pharmaceuticals online pharmacies in mexico that ship to usa mexican pharmaceuticals online
90 mg citalopram
Hi everyone, it’s my first go to see at this website, and article is truly fruitful for me, keep up posting these posts.
allopurinol generic
mexico drug stores pharmacies mexico drug stores pharmacies or mexico drug stores pharmacies
http://flthk.com/en/productshow.asp?id=22&mnid=49487&mc=FLT-V1/V2&url=https://mexicanpharmacy.cheap п»їbest mexican online pharmacies
mexican rx online buying prescription drugs in mexico and mexican border pharmacies shipping to usa buying prescription drugs in mexico
mexico drug stores pharmacies п»їbest mexican online pharmacies or mexico drug stores pharmacies
http://clients1.google.bt/url?q=https://mexicanpharmacy.cheap mexico drug stores pharmacies
pharmacies in mexico that ship to usa medicine in mexico pharmacies and buying from online mexican pharmacy mexico pharmacy
generic robaxin 500mg
п»їbest mexican online pharmacies purple pharmacy mexico price list purple pharmacy mexico price list
http://mexicanpharmacy.cheap/# best online pharmacies in mexico
buy accutane in mexico
https://mexicanpharmacy.cheap/# mexican drugstore online
buying prescription drugs in mexico online mexican rx online or mexican mail order pharmacies
https://maps.google.fm/url?q=https://mexicanpharmacy.cheap buying prescription drugs in mexico
mexican online pharmacies prescription drugs п»їbest mexican online pharmacies and mexican online pharmacies prescription drugs mexican mail order pharmacies
You’re so awesome! I don’t believe I have read a single thing like that before. So great to find someone with some original thoughts on this topic. Really.. thank you for starting this up. This website is something that is needed on the internet, someone with a little originality!
pharmacies in mexico that ship to usa buying from online mexican pharmacy or mexico drug stores pharmacies
http://cse.google.com.na/url?sa=i&url=https://mexicanpharmacy.cheap best online pharmacies in mexico
mexico drug stores pharmacies reputable mexican pharmacies online and mexican rx online medication from mexico pharmacy
http://mexicanpharmacy.cheap/# mexico drug stores pharmacies
citalopram tablets india
https://mexicanpharmacy.cheap/# mexico drug stores pharmacies
The factory’s skilled workforce employs advanced manufacturing techniques to produce fittings that meet international standards and specifications. Elitepipe Plastic Factory
Makaleniz açıklayıcı yararlı anlaşılır olmuş ellerinize sağlık
atarax 40 mg
best online pharmacies in mexico mexican drugstore online or buying from online mexican pharmacy
http://s2.shinystat.com/cgi-bin/shinystatv.cgi?TIPO=26&A0=0&D0=21&TR0=0&SR0=mexicanpharmacy.cheap&USER=Pieroweb&L=0 mexican drugstore online
pharmacies in mexico that ship to usa mexican pharmaceuticals online and mexico drug stores pharmacies mexican border pharmacies shipping to usa
https://mexicanpharmacy.cheap/# purple pharmacy mexico price list
Эффективное изоляция обшивки — уют и экономичность в жилом домовладении!
Согласитесь, ваш жилье заслуживает превосходного! Теплоизоляция фасадов – не единственно решение для сбережения на тепле, это вложение денег в комфорт и прочность вашего недвижимости.
✨ Почему утепление с нами-специалистами?
Опытность: Наша команда – квалифицированные. Мы все заботимся о каждой конкретной, чтобы обеспечить вашему домовладению идеальное теплоизоляция.
Сумма теплоизоляции: Мы все ценим ваш бюджетные возможности. Утепление фасадов в москве – начиная от 1350 руб./кв.м. Это вложение в ваше комфортабельное будущее!
Энергосбережение: Забудьте о термических потерях! Материалы, которые мы используем не только сохраняют тепловой микроклимат, но и дарят вашему зданию новый стандарт энергоэффективности.
Создайте свой домашний уголок уютным и модным!
Подробнее на http://www.stroystandart-kirov.ru/
Не передавайте на произвол судьбы свой недвижимость на произвольное стечение обстоятельств. Доверьтесь нашей команде и создайте тепло вместе с нами-профессионалами!
Can antibiotics be used for liver infections stromectol 3 mg for scabies
http://mexicanpharmacy.cheap/# medication from mexico pharmacy
budesonide 0.25
buying from online mexican pharmacy mexico drug stores pharmacies medicine in mexico pharmacies
fluoxetine for sale
allopurinol online
http://mexicanpharmacy.cheap/# mexican drugstore online
mexican online pharmacies prescription drugs mexico drug stores pharmacies or medication from mexico pharmacy
https://images.google.com.ai/url?sa=t&url=https://mexicanpharmacy.cheap mexico drug stores pharmacies
medication from mexico pharmacy buying prescription drugs in mexico online and medicine in mexico pharmacies mexico drug stores pharmacies
mexican mail order pharmacies buying from online mexican pharmacy or buying prescription drugs in mexico online
https://forums.theganggreen.com/proxy.php?link=https://mexicanpharmacy.cheap mexico drug stores pharmacies
mexico drug stores pharmacies buying prescription drugs in mexico online and purple pharmacy mexico price list mexican pharmaceuticals online
buying prescription drugs in mexico online purple pharmacy mexico price list or mexican drugstore online
http://forum.acehigh.ru/away.htm?link=http://mexicanpharmacy.cheap/ best online pharmacies in mexico
mexico pharmacies prescription drugs medicine in mexico pharmacies and mexican border pharmacies shipping to usa mexican border pharmacies shipping to usa
https://mexicanpharmacy.cheap/# pharmacies in mexico that ship to usa
buying prescription drugs in mexico mexico drug stores pharmacies or purple pharmacy mexico price list
https://maps.google.com.om/url?sa=t&url=https://mexicanpharmacy.cheap mexico pharmacy
mexican drugstore online mexico pharmacy and mexico pharmacy mexican drugstore online
https://mexicanpharmacy.cheap/# pharmacies in mexico that ship to usa
doxycycline 100 mg tablets
http://indiapharmacy.pro/# top 10 online pharmacy in india indiapharmacy.pro
reputable indian online pharmacy best india pharmacy – п»їlegitimate online pharmacies india indiapharmacy.guru
En büyük orospu cocugu gates of olympus icin ziyaret.
I was curious if you ever considered changing the layout of
your blog? Its very well written; I love what youve got to say.
But maybe you could a little more in the way of content so people could connect with it better.
Youve got an awful lot of text for only having 1 or two pictures.
Maybe you could space it out better?
https://mexicanpharmacy.company/# medicine in mexico pharmacies mexicanpharmacy.company
zithromax for sale us
xslotlink
world pharmacy india india pharmacy mail order – cheapest online pharmacy india indiapharmacy.guru
best india pharmacy world pharmacy india – п»їlegitimate online pharmacies india indiapharmacy.guru
male ed pills drugs for ed or best male ed pills
https://lcu.hlcommission.org/lcu/pages/auth/forgotPassword.aspx?Returnurl=http://edpills.tech best male ed pills
erectile dysfunction drugs best ed medications and buying ed pills online mens ed pills
augmentin 400 mg 57mg
my canadian pharmacy review best canadian pharmacy online or safe online pharmacies in canada
https://images.google.gy/url?q=https://canadiandrugs.tech ed drugs online from canada
adderall canadian pharmacy canadian pharmacy meds and canadian pharmacy phone number canadian pharmacy phone number
propecia for sale
citalopram for sale uk
buy albuterol from mexico
canadian pharmacy india п»їlegitimate online pharmacies india or canadian pharmacy india
http://images.google.rw/url?q=http://indiapharmacy.pro top online pharmacy india
top online pharmacy india best india pharmacy and world pharmacy india pharmacy website india
pet meds without vet prescription canada canada pharmacy world or the canadian drugstore
https://images.google.si/url?q=https://canadiandrugs.tech canadian pharmacy meds reviews
canadian drugstore online is canadian pharmacy legit and canada pharmacy reviews canadian pharmacy online
http://canadapharmacy.guru/# canadian pharmacy online store canadapharmacy.guru
Good post. I learn something totally new and challenging
on sites I stumbleupon on a daily basis. It will always be interesting to read
content from other writers and practice something from their web sites.
I found the article very impressive and thought-provoking.
buy generic accutane
pharmacy website india canadian pharmacy india – india pharmacy mail order indiapharmacy.guru
canadian pharmacy antibiotics canadian pharmacy – best mail order pharmacy canada canadiandrugs.tech
lisinopril 30 mg
https://canadapharmacy.guru/# adderall canadian pharmacy canadapharmacy.guru
Ꮋey would you mіnd lettіng me know whіch web host you’re utilizing?
I’ᴠe loaded your bllog iin 3 Ԁifferent internet browsers and
I must say this bⅼog loads a ⅼot faster then mοst. Can you recommend a good weeb hosting provider at a fair price?
Cheers, I aрpreciate it!
generic for toradol
medications for ed what are ed drugs – ed pills that really work edpills.tech
top ed pills new ed pills or best male ed pills
http://rosieanimaladoption.ca/?URL=http://edpills.tech cheapest ed pills online
pills for erection buying ed pills online and erectile dysfunction drugs best ed drug
impotence pills ed pills otc – online ed medications edpills.tech
Tải Hit Club iOS
Tải Hit Club iOSHIT CLUBHit Club đã sáng tạo ra một giao diện game đẹp mắt và hoàn thiện, lấy cảm hứng từ các cổng casino trực tuyến chất lượng từ cổ điển đến hiện đại. Game mang lại sự cân bằng và sự kết hợp hài hòa giữa phong cách sống động của sòng bạc Las Vegas và phong cách chân thực. Tất cả các trò chơi đều được bố trí tinh tế và hấp dẫn với cách bố trí game khoa học và logic giúp cho người chơi có được trải nghiệm chơi game tốt nhất.
Hit Club – Cổng Game Đổi Thưởng
Trên trang chủ của Hit Club, người chơi dễ dàng tìm thấy các game bài, tính năng hỗ trợ và các thao tác để rút/nạp tiền cùng với cổng trò chuyện trực tiếp để được tư vấn. Giao diện game mang lại cho người chơi cảm giác chân thật và thoải mái nhất, giúp người chơi không bị mỏi mắt khi chơi trong thời gian dài.
Hướng Dẫn Tải Game Hit Club
Bạn có thể trải nghiệm Hit Club với 2 phiên bản: Hit Club APK cho thiết bị Android và Hit Club iOS cho thiết bị như iPhone, iPad.
Tải ứng dụng game:
Click nút tải ứng dụng game ở trên (phiên bản APK/Android hoặc iOS tùy theo thiết bị của bạn).
Chờ cho quá trình tải xuống hoàn tất.
Cài đặt ứng dụng:
Khi quá trình tải xuống hoàn tất, mở tệp APK hoặc iOS và cài đặt ứng dụng trên thiết bị của bạn.
Bắt đầu trải nghiệm:
Mở ứng dụng và bắt đầu trải nghiệm Hit Club.
Với Hit Club, bạn sẽ khám phá thế giới game đỉnh cao với giao diện đẹp mắt và trải nghiệm chơi game tuyệt vời. Hãy tải ngay để tham gia vào cuộc phiêu lưu casino độc đáo và đầy hứng khởi!
オンラインカジノ
オンラインカジノとオンラインギャンブルの現代的展開
オンラインカジノの世界は、技術の進歩と共に急速に進化しています。これらのプラットフォームは、従来の実際のカジノの体験をデジタル空間に移し、プレイヤーに新しい形式の娯楽を提供しています。オンラインカジノは、スロットマシン、ポーカー、ブラックジャック、ルーレットなど、さまざまなゲームを提供しており、実際のカジノの興奮を維持しながら、アクセスの容易さと利便性を提供します。
一方で、オンラインギャンブルは、より広範な概念であり、スポーツベッティング、宝くじ、バーチャルスポーツ、そしてオンラインカジノゲームまでを含んでいます。インターネットとモバイルテクノロジーの普及により、オンラインギャンブルは世界中で大きな人気を博しています。オンラインプラットフォームは、伝統的な賭博施設に比べて、より多様なゲーム選択、便利なアクセス、そしてしばしば魅力的なボーナスやプロモーションを提供しています。
安全性と規制
オンラインカジノとオンラインギャンブルの世界では、安全性と規制が非常に重要です。多くの国々では、オンラインギャンブルを規制する法律があり、安全なプレイ環境を確保するためのライセンスシステムを設けています。これにより、不正行為や詐欺からプレイヤーを守るとともに、責任ある賭博の促進が図られています。
技術の進歩
最新のテクノロジーは、オンラインカジノとオンラインギャンブルの体験を一層豊かにしています。例えば、仮想現実(VR)技術の使用は、プレイヤーに没入型のギャンブル体験を提供し、実際のカジノにいるかのような感覚を生み出しています。また、ブロックチェーン技術の導入は、より透明で安全な取引を可能にし、プレイヤーの信頼を高めています。
未来への展望
オンラインカジノとオンラインギャンブルは、今後も技術の進歩とともに進化し続けるでしょう。人工知能(AI)の更なる統合、モバイル技術の発展、さらには新しいゲームの創造により、この分野は引き続き成長し、世界中のプレイヤーに新しい娯楽の形を提供し続けることでしょう。
この記事では、オンラインカジノとオンラインギャンブルの現状、安全性、技術の影響、そして将来の展望に焦点を当てています。この分野は、技術革新によって絶えず変化し続ける魅力的な領域です。
Hi there, just became alert to your blog through Google, and found that it’s really informative.
I am going to watch out for brussels. I will appreciate if you continue this in future.
Lots of people will be benefited from your writing. Cheers!
celexa 100mg
synthroid price comparison
ed meds online cheap ed drugs – treatment of ed edpills.tech
tretinoin gel buy online
order doxycycline online
retin a buy online usa
non prescription ed drugs best erection pills or erectile dysfunction drug
https://islamcenter.ru/go.php?url=https://edpills.tech medications for ed
ed medications online top ed drugs and pills for erection medication for ed dysfunction
best online canadian pharmacy ed meds online canada or safe online pharmacies in canada
https://cx7-community.info/wcf/acp/dereferrer.php?url=https://canadiandrugs.tech canadian pharmacy ltd
canada pharmacy reviews canadian pharmacy meds reviews and onlinecanadianpharmacy 24 canadian pharmacy online store
buy ed pills online cures for ed – male ed pills edpills.tech
indian pharmacy online best india pharmacy or indian pharmacy online
https://images.google.com.af/url?q=https://indiapharmacy.pro top online pharmacy india
india pharmacy mail order indian pharmacy and india pharmacy mail order buy prescription drugs from india
https://canadapharmacy.guru/# reputable canadian pharmacy canadapharmacy.guru
india pharmacy canadian pharmacy india – top 10 online pharmacy in india indiapharmacy.guru
5 mg prednisone daily
canadian drug prices my canadian pharmacy rx or the canadian drugstore
https://www.google.mg/url?q=https://canadiandrugs.tech canadian pharmacy uk delivery
trusted canadian pharmacy pharmacy canadian and pharmacy in canada canadian neighbor pharmacy
dapoxetine pills in india
colchicine for pericardial effusion
Hello ᴡoud you mind stating which blog platform you’re uѕing?
I’m going to start my own blog soon but I’m having a hard tіme chоosing between BlogEngine/Wordpress/B2evolution and Druⲣaⅼ.
Tһe reason I ask is because your layout seems differenbt
then most blogs and I’m looking for something unique.
P.S Aрologies for getting off-topic but I had to ask!
https://mexicanpharmacy.company/# mexico pharmacies prescription drugs mexicanpharmacy.company
ed meds online without doctor prescription pills for ed – natural remedies for ed edpills.tech
legit canadian pharmacy canadian pharmacy victoza – safe reliable canadian pharmacy canadiandrugs.tech
cheapest prices for generic amoxicillin
п»їlegitimate online pharmacies india online pharmacy india or india online pharmacy
http://www.derfischkopf.de/url?q=https://indiapharmacy.pro indian pharmacy
india pharmacy mail order cheapest online pharmacy india and buy medicines online in india reputable indian online pharmacy
can you buy lexapro over the counter
프라그마틱 슬롯 체험
Hongzhi 황제는 인장을 보았지만 앞으로 나아가서 직접 집어 들었습니다.
ed pills online cheap erectile dysfunction – new ed drugs edpills.tech
clonidine 75 mcg
Tarafbetburda
ed drugs list top rated ed pills or ed pills online
http://www.ixawiki.com/link.php?url=https://edpills.tech ed drug prices
п»їerectile dysfunction medication new treatments for ed and ed medication online cheap ed pills
http://canadapharmacy.guru/# buy prescription drugs from canada cheap canadapharmacy.guru
canadian drug canadian pharmacy 24 com – canadian pharmacy phone number canadiandrugs.tech
buying ed pills online best ed drug – best ed drug edpills.tech
Абузоустойчивый серверов для Хрумера и GSA AMSTERDAM!!!
Оптимальная Настройка: Включение Аппаратной Виртуализации
При обсуждении виртуальных серверов (VPS/VDS) и дедикатед серверов, важно также уделить внимание оптимальной настройке, включая аппаратную виртуализацию. Этот важный аспект может значительно повлиять на производительность вашего сервера.
Высокоскоростной Интернет: До 1000 Мбит/с
https://indiapharmacy.pro/# indian pharmacy indiapharmacy.pro
buy medicines online in india reputable indian online pharmacy or indian pharmacies safe
https://images.google.dk/url?sa=t&url=https://indiapharmacy.pro online shopping pharmacy india
п»їlegitimate online pharmacies india indian pharmacy paypal and best india pharmacy best india pharmacy
Абузоустойчивый сервер для работы с Хрумером, GSA и всевозможными скриптами!
Есть дополнительная системах скидок, читайте описание в разделе оплата
Виртуальные сервера (VPS/VDS) и Дедик Сервер: Оптимальное Решение для Вашего Проекта
В мире современных вычислений виртуальные сервера (VPS/VDS) и дедик сервера становятся ключевыми элементами успешного бизнеса и онлайн-проектов. Выбор оптимальной операционной системы и типа сервера являются решающими шагами в создании надежной и эффективной инфраструктуры. Наши VPS/VDS серверы Windows и Linux, доступные от 13 рублей, а также дедик серверы, предлагают целый ряд преимуществ, делая их неотъемлемыми инструментами для развития вашего проекта.
herbal ed treatment cheap erectile dysfunction pill – ed treatment pills edpills.tech
online canadian pharmacy canadian pharmacy ltd or canadian mail order pharmacy
http://ooidonk.be/?URL=https://canadiandrugs.tech canadian pharmacy com
online canadian drugstore best canadian pharmacy and canadian 24 hour pharmacy canadian world pharmacy
Дедикатед Серверы
Абузоустойчивые сервера в Амстердаме, они позволят работать с сайтами которые не открываются в РФ, работая Хрумером и GSA пробив намного выше.
Виртуальные сервера (VPS/VDS) и Дедик Сервер: Оптимальное Решение для Вашего Проекта
В мире современных вычислений виртуальные сервера (VPS/VDS) и дедик сервера становятся ключевыми элементами успешного бизнеса и онлайн-проектов. Выбор оптимальной операционной системы и типа сервера являются решающими шагами в создании надежной и эффективной инфраструктуры. Наши VPS/VDS серверы Windows и Linux, доступные от 13 рублей, а также дедик серверы, предлагают целый ряд преимуществ, делая их неотъемлемыми инструментами для развития вашего проекта.
Высокоскоростной Интернет: До 1000 Мбит/с
Good post! We will be linking to this particularly great post on our site. Keep up the great writing https://www.serezotomasyon.com.tr/
effexor tablets
paxlovid price: paxlovid india – Paxlovid over the counter
https://ciprofloxacin.life/# ciprofloxacin generic price
buy amoxil amoxicillin online without prescription amoxicillin 500mg capsules uk
finasteride 1 mg coupon
http://prednisone.bid/# generic prednisone online
http://prednisone.bid/# 1 mg prednisone daily
vermox south africa
paxlovid pill: paxlovid covid – Paxlovid over the counter
https://prednisone.bid/# prednisone drug costs
how to buy cheap clomid can i order cheap clomid pills clomid pills
zyban 75 mg
https://sportsinfonow.com/
buy amoxicillin 1000 mg
https://paxlovid.win/# paxlovid pharmacy
stromectol otc
Is men’s health credible Tadalafil reddit
60 mg prednisone daily: can you buy prednisone over the counter – prednisone price south africa
http://ciprofloxacin.life/# buy ciprofloxacin over the counter
buy paxlovid online paxlovid covid buy paxlovid online
Niğde Haberleri tarafsız haber yayıncılığı anlayışıyla doğru ve güvenilir bilgilere ulaşmanızı sağlar. Niğde Anadolu Haber yıllardır Niğde ve çevresinde güvenilir haberleri sunma konusundaki kararlılığıyla bilinir. Niğde Vefat Edenler, Niğde Nöbetçi Eczane,Niğde Haber,Niğde İş İlanları,niğde anadolu gazetesi,anadolu gazetesi niğde,niğde olay,niğde gündem,niğde haber,niğde anadolu haberNiğde Anadolu Haber, Niğde haber, Niğde haberleri, Niğde son dakika, Niğde gündem, Niğde olay
https://clomid.site/# how can i get clomid tablets
I am sure this article has touched all the internet users, its
really really nice paragraph on building up new web
site.
Check out my homepage: Xoel Álvarez Mazaira CEO of Minimo Boats
buying prednisone from canada where can i buy prednisone without a prescription or where can you buy prednisone
https://image.google.co.zw/url?q=https://prednisone.bid 20 mg of prednisone
prednisone 60 mg daily can you buy prednisone over the counter in mexico and prednisone 40mg prednisone in mexico
zithromax 250 mg price
cipro ciprofloxacin: ciprofloxacin 500mg buy online – ciprofloxacin 500 mg tablet price
https://paxlovid.win/# buy paxlovid online
how much is prednisone 5mg prednisone online india prednisone online australia
http://prednisone.bid/# prednisone purchase online
Как включить аппаратную виртуализацию
Абузоустойчивый серверов для Хрумера и GSA AMSTERDAM!!!
Высокоскоростной Интернет: До 1000 Мбит/с
Скорость интернет-соединения играет решающую роль в успешной работе вашего проекта. Наши VPS/VDS серверы, поддерживающие Windows и Linux, обеспечивают доступ к интернету со скоростью до 1000 Мбит/с. Это гарантирует быструю загрузку веб-страниц и высокую производительность онлайн-приложений на обеих операционных системах.
Итак, при выборе виртуального выделенного сервера VPS, обеспечьте своему проекту надежность, высокую производительность и защиту от DDoS. Получите доступ к качественной инфраструктуре с поддержкой Windows и Linux уже от 13 рублей
bactrim 80 400 mg tablets
diflucan online purchase uk
phenergan 50 mg tablets
Today, I went to the beach front with my kids.
I found a sea shell and gave it to my 4 year old daughter and said “You can hear the ocean if you put this to your ear.”
She put the shell to her ear and screamed. There was a hermit crab inside and it pinched her ear.
She never wants to go back! LoL I know this is entirely off topic but I had to tell someone!
https://paxlovid.win/# paxlovid cost without insurance
prednisone for sale no prescription: 20mg prednisone – prednisone 20mg tablets where to buy
http://paxlovid.win/# paxlovid for sale
paxlovid price paxlovid generic paxlovid pharmacy
Абузоустойчивые сервера в Амстердаме, они позволят работать с сайтами которые не открываются в РФ, работая Хрумером и GSA пробив намного выше.
Аренда виртуального сервера (VPS): Эффективность, Надежность и Защита от DDoS от 13 рублей
Выбор виртуального сервера – это важный этап в создании успешной инфраструктуры для вашего проекта. Наши VPS серверы предоставляют аренду как под операционные системы Windows, так и Linux, с доступом к накопителям SSD eMLC. Эти накопители гарантируют высокую производительность и надежность, обеспечивая бесперебойную работу ваших приложений независимо от выбранной операционной системы.
http://paxlovid.win/# paxlovid buy
виртуальный выделенный сервер vps
Абузоустойчивый сервер для работы с Хрумером, GSA и всевозможными скриптами!
Есть дополнительная системах скидок, читайте описание в разделе оплата
Высокоскоростной Интернет: До 1000 Мбит/с
Скорость интернет-соединения играет решающую роль в успешной работе вашего проекта. Наши VPS/VDS серверы, поддерживающие Windows и Linux, обеспечивают доступ к интернету со скоростью до 1000 Мбит/с. Это гарантирует быструю загрузку веб-страниц и высокую производительность онлайн-приложений на обеих операционных системах.
Итак, при выборе виртуального выделенного сервера VPS, обеспечьте своему проекту надежность, высокую производительность и защиту от DDoS. Получите доступ к качественной инфраструктуре с поддержкой Windows и Linux уже от 13 рублей
best levitra coupon
The key features of Saygrass artificial grass include its natural appearance, durability, and low maintenance requirements. Homeowners can now enjoy a lush green lawn without excessive water consumption, mowing, or pesticides. The pet-friendly and safe nature of Saygrass turf makes it an ideal choice for families and pet owners seeking a worry-free outdoor environment.
can i purchase cheap clomid prices: cheap clomid price – cheap clomid for sale
https://clomid.site/# where to buy clomid without insurance
buy ciprofloxacin over the counter п»їcipro generic where can i buy cipro online
paxlovid covid п»їpaxlovid or paxlovid pill
http://kfiz.businesscatalyst.com/redirect.aspx?destination=http://paxlovid.win Paxlovid buy online
paxlovid cost without insurance paxlovid generic and paxlovid pill paxlovid buy
Saygrass artificial grass is designed to replicate the natural look and feel of traditional lawns while incorporating eco-friendly elements. The company employs state-of-the-art manufacturing processes and utilizes recyclable materials to ensure that every Saygrass turf installation aligns with environmental best practices.
Мощный дедик
Аренда мощного дедика (VPS): Абузоустойчивость, Эффективность, Надежность и Защита от DDoS от 13 рублей
Выбор виртуального сервера – это важный этап в создании успешной инфраструктуры для вашего проекта. Наши VPS серверы предоставляют аренду как под операционные системы Windows, так и Linux, с доступом к накопителям SSD eMLC. Эти накопители гарантируют высокую производительность и надежность, обеспечивая бесперебойную работу ваших приложений независимо от выбранной операционной системы.
ciprofloxacin 500mg buy online ciprofloxacin or buy cipro online without prescription
http://nwspprs.com/?format=simple&action=shorturl&url=https://ciprofloxacin.life ciprofloxacin generic
buy cipro online without prescription cipro pharmacy and buy cipro online without prescription cipro
I have read so many articles or reviews about the blogger
lovers but this paragraph is in fact a fastidious paragraph, keep it up.
Paxlovid buy online paxlovid generic or paxlovid for sale
https://toolbarqueries.google.com.ph/url?q=https://paxlovid.win п»їpaxlovid
paxlovid pill Paxlovid buy online and paxlovid for sale paxlovid generic
fluoxetine 18
An impressive share! I’ve just forwarded this onto a friend who has been conducting a little homework on this.
And he actually ordered me lunch due to the fact that I stumbled
upon it for him… lol. So let me reword this….
Thank YOU for the meal!! But yeah, thanks for spending time
to talk about this subject here on your website.
amoxicillin 500mg capsule cost: amoxicillin 500 mg online – amoxicillin azithromycin
https://paxlovid.win/# paxlovid cost without insurance
can i get generic clomid pill cost of clomid for sale where to buy generic clomid no prescription
https://amoxil.icu/# where to buy amoxicillin
http://clomid.site/# how to buy clomid price
Приветствуем, игроки на xbetegypt!
Насладитесь успеха на xbetegypt с лучшими бонусами!
Побеждайте азартом на нашем сайте каждый день!
Сделайте вашу игру на xbetegypt с нашими премиум предложениями!
Не упустите свой шанс на xbetegypt и победите самые большие призы!
Достигайте своих целей с xbetegypt каждый день!
Создайте свой банк на xbetegypt и получите больше денег!
Взгляните на мир с другой стороны с xbetegypt и добейтесь все!
Освойте играть на xbetegypt и получайте все больше выигрышей!
Наслаждайтесь от игры на xbetegypt и восстанавливайте свои силы!
Докажите свои способности игры на xbetegypt и зарабатывайте больших успехов!
Восхищайтесь от игры на xbetegypt и изучайте новые возможности каждый день!
Войдите в мир xbetegypt игры и добивайтесь большими бонусами!
Наслаждайтесь ощущением успеха с xbetegypt каждый день!
Побеждайте вместе на xbetegypt и делимся большими выигрышами!
Улучшите свои навыки на xbetegypt и получите еще больше денег!
Взламывайте игры на xbetegypt и получайте большие бонусы каждый день!
Освойте новые техники на xbetegypt и взлейте над другими!
Освойте играть на xbetegypt и зарабатывайте больше денег каждый день!
Забирайте максимум удовольствия от игры на xbetegypt и получайте больше бонусов!
lxbet https://www.1xbet-app-download-ar.com/.
prednisone without prescription medication: buying prednisone on line – where to buy prednisone 20mg
https://paxlovid.win/# paxlovid pharmacy
can you get generic clomid prices how to get clomid pills get generic clomid no prescription
https://ciprofloxacin.life/# buy cipro online without prescription
https://paxlovid.win/# paxlovid pill
Haber Sitemize Sizleride bekleriz..
buy generic ciprofloxacin buy cipro online without prescription or buy cipro online canada
https://www.ecodibergamo.it/newsletter/interstitial/?url=http://ciprofloxacin.life ciprofloxacin
buy ciprofloxacin buy cipro cheap and buy generic ciprofloxacin cipro pharmacy
order fluoxetine without prescription
Haber Sitemize Sizleride bekleriz..
buy vermox online
Haber Sitemize Sizleride bekleriz..
Haber Sitemize Sizleride bekleriz..
Haber Sitemize Sizleride bekleriz..
GTA777
clonidine hcl for sleeping
prednisone 10 mg canada: prednisone uk – prednisone 500 mg tablet
https://clomid.site/# where buy clomid prices
cipro online no prescription in the usa where can i buy cipro online ciprofloxacin over the counter
https://amoxil.icu/# amoxicillin over counter
can i buy allopurinol over the counter uk
100 mg gabapentin 100mg
prednisone 20 mg tablet cost
prednisone 40mg prednisone 5mg coupon or how to buy prednisone online
http://cp-cms-light.com/sample-zeirishi/_m/index.php?a=free_page/goto_mobile&referer=https://prednisone.bid 5 mg prednisone tablets
how to buy prednisone online prednisolone prednisone and canine prednisone 5mg no prescription prednisone 300mg
cheap propecia tablets
2024總統大選
prednisone 10 mg online: prednisone buy – prednisone canada prescription
http://paxlovid.win/# paxlovid for sale
amoxicillin order online no prescription medicine amoxicillin 500 amoxicillin 500 mg without prescription
diflucan online canada
buy ciprofloxacin: buy cipro – buy cipro online
I appreciate you sharing this blog post. Thanks Again. Cool.
https://clomid.site/# can i buy cheap clomid tablets
Very rapidly this web site will be famous amid all blog viewers, due to it’s fastidious content
furosemide 200 mg tab
http://clomid.site/# where can i buy cheap clomid price
208 lisinopril
purchase cipro: buy cipro online canada – buy cipro online
I am genuinely happy to read this webpage posts
which carries lots of useful facts, thanks for providing such information.
my website: used chevy traverse near me
RGVN
buy furosimide
Yߋur ѕtye is very unnique in comparison to other folks I have read stuff from.
Thank you forr posting when you have the oрportunity,
Guess I will just bߋok mark this site.
What’s up i am kavin, its my first time to commenting anywhere, when i read
this paragraph i thought i could also make comment due to this sensible post.
quineprox 30
lioresal 25
RGVN
This is my first time pay a quick visit at here and i am really happy to read everthing at one place
synthroid 80 mcg
https://google.pl/url?q=https://www.pragmatic-ko.com/
한편 주호우자오, 팡지판 등은 이미 링추현을 떠났다.
drug synthroid
Дедик сервер
Абузоустойчивый сервер для работы с Хрумером, GSA и всевозможными скриптами!
Есть дополнительная системах скидок, читайте описание в разделе оплата
Виртуальные сервера (VPS/VDS) и Дедик Сервер: Оптимальное Решение для Вашего Проекта
В мире современных вычислений виртуальные сервера (VPS/VDS) и дедик сервера становятся ключевыми элементами успешного бизнеса и онлайн-проектов. Выбор оптимальной операционной системы и типа сервера являются решающими шагами в создании надежной и эффективной инфраструктуры. Наши VPS/VDS серверы Windows и Linux, доступные от 13 рублей, а также дедик серверы, предлагают целый ряд преимуществ, делая их неотъемлемыми инструментами для развития вашего проекта.
can you order accutane online
bupropion generic india
Thank you, I have just been searching for information approximately this topic for a while and yours is the best I have found out so far. However, what in regards to the bottom line? Are you certain concerning the supply?
Very well presented. Every quote was awesome and thanks for sharing the content. Keep sharing and keep motivating others.
propecia gel
buy propecia tablets uk
Поставщик предоставляет основное управление виртуальными серверами (VPS), предлагая клиентам разнообразие операционных систем для выбора (Windows Server, Linux CentOS, Debian).
best tretinoin cream
There is definately a lot to find out about this subject. I like all the points you made https://www.serezotomasyon.com.tr/
Keep this going please, great job!
avana 100 mg
bactrim ds buy without rx
Hi there to all, for the reason that I am genuinely keen of reading this website’s post to be updated on a regular basis. It carries pleasant stuff.
citalopram hbr 10 mg tablets
cost of prednisone: prednisone buy – prednisone 54
프라그마틱 무료 게임
Fang Jifan은 “폐하를 섬기는 것은 전혀 어렵지 않습니다. “라고 말했습니다.
purchase prednisone from india: prednisone 5 tablets – prednisone brand name canada
http://ciprofloxacin.life/# cipro pharmacy
get clomid online order clomid without a prescription – where can i get clomid without rx
allopurinol on line
buying cheap clomid online: can i buy generic clomid – where can i get clomid now
naturally like your web site however you need to take a look at the spelling on several of your posts. A number of them are rife with spelling problems and I find it very bothersome to tell the truth on the other hand I will surely come again again.
http://ciprofloxacin.life/# antibiotics cipro
earatör satın al
https://ciprofloxacin.life/# cipro 500mg best prices
I’m often to blogging and i really appreciate your content. The article has actually peaks my interest. I’m going to bookmark your web site and maintain checking for brand spanking new information.
can you get generic clomid without rx: can you buy cheap clomid without prescription – can you buy generic clomid pills
propecia uk price comparison
https://google.co.ls/url?q=https://www.pragmatic-ko.com/
챕터 1, 너무 이상해, 너 요즘 트롤이었니? 티비에 나오지 말아야 할 것 같습니다.
I appreciate you sharing this blog post. Thanks Again. Cool.
For the reason that the admin of this site is working, no uncertainty very quickly it will be renowned, due to its quality contents.
son dakika karaman haberleri
zoloft for sale without prescription
amoxicillin 500mg capsule buy online: amoxacillian without a percription – buy amoxicillin 250mg
doxycycline tetracycline
amoxicillin 500mg over the counter: amoxicillin 500mg buy online canada – amoxicillin 500mg capsule buy online
prednisone tablet 100 mg: buy prednisone 10mg – can you buy prednisone over the counter uk
where can i buy vermox tablets
combivent cheap
For the reason that the admin of this site is working, no uncertainty very quickly it will be renowned, due to its quality contents.
combivent inhaler generic
çok başarılı ve kaliteli bir makale olmuş güzellik sırlarım olarak teşekkür ederiz.
This was beautiful Admin. Thank you for your reflections.
doxycycline over the counter
20 mg levitra tablets
Hi there to all, for the reason that I am genuinely keen of reading this website’s post to be updated on a regular basis. It carries pleasant stuff.
cost of clomid uk
generic doxycycline: buy doxycycline – buy doxycycline
總統民調
民意調查是什麼?民調什麼意思?
民意調查又稱為輿論調查或民意測驗,簡稱民調。一般而言,民調是一種為了解公眾對某些政治、社會問題與政策的意見和態度,由專業民調公司或媒體進行的調查方法。
目的在於通過網路、電話、或書面等媒介,對大量樣本的問卷調查抽樣,利用統計學的抽樣理論來推斷較為客觀,且能較為精確地推論社會輿論或民意動向的一種方法。
以下是民意調查的一些基本特點和重要性:
抽樣:由於不可能向每一個人詢問意見,所以調查者會選擇一個代表性的樣本進行調查。這樣本的大小和抽樣方法都會影響調查的準確性和可靠性。
問卷設計:為了確保獲得可靠的結果,問卷必須經過精心設計,問題要清晰、不帶偏見,且易於理解。
數據分析:收集到的數據將被分析以得出結論。這可能包括計算百分比、平均值、標準差等,以及更複雜的統計分析。
多種用途:民意調查可以用於各種目的,包括政策制定、選舉預測、市場研究、社會科學研究等。
限制:雖然民意調查是一個有價值的工具,但它也有其限制。例如,樣本可能不完全代表目標人群,或者問卷的設計可能導致偏見。
影響決策:民意調查的結果常常被政府、企業和其他組織用來影響其決策。
透明度和誠實:為了維護調查的可信度,調查組織應該提供其調查方法、樣本大小、抽樣方法和可能的誤差範圍等詳細資訊。
民調是怎麼調查的?
民意調查(輿論調查)的意義是指為瞭解大多數民眾的看法、意見、利益與需求,以科學、系統與公正的資料,蒐集可以代表全部群眾(母體)的部分群眾(抽樣),設計問卷題目後,以人工或電腦詢問部分民眾對特定議題的看法與評價,利用抽樣出來部分民眾的意見與看法,來推論目前全部民眾的意見與看法,藉以衡量社會與政治的狀態。
以下是進行民調調查的基本步驟:
定義目標和目的:首先,調查者需要明確調查的目的。是要了解公眾對某個政策的看法?還是要評估某個政治候選人的支持率?
設計問卷:根據調查目的,研究者會設計一份問卷。問卷應該包含清晰、不帶偏見的問題,並避免導向性的語言。
選擇樣本:因為通常不可能調查所有人,所以會選擇一部分人作為代表。這部分人被稱為“樣本”。最理想的情況是使用隨機抽樣,以確保每個人都有被選中的機會。
收集數據:有多種方法可以收集數據,如面對面訪問、電話訪問、郵件調查或在線調查。
數據分析:一旦數據被收集,研究者會使用統計工具和技術進行分析,得出結論或洞見。
報告結果:分析完數據後,研究者會編寫報告或發布結果。報告通常會提供調查方法、樣本大小、誤差範圍和主要發現。
解釋誤差範圍:多數民調報告都會提供誤差範圍,例如“±3%”。這表示實際的結果有可能在報告結果的3%範圍內上下浮動。
民調調查的質量和可信度很大程度上取決於其設計和實施的方法。若是由專業和無偏見的組織進行,且使用科學的方法,那麼民調結果往往較為可靠。但即使是最高質量的民調也會有一定的誤差,因此解讀時應保持批判性思考。
為什麼要做民調?
民調提供了一種系統性的方式來了解大眾的意見、態度和信念。進行民調的原因多種多樣,以下是一些主要的動機:
政策制定和評估:政府和政策制定者進行民調,以了解公眾對某一議題或政策的看法。這有助於制定或調整政策,以反映大眾的需求和意見。
選舉和政治活動:政黨和候選人通常使用民調來評估自己在選舉中的地位,了解哪些議題對選民最重要,以及如何調整策略以吸引更多支持。
市場研究:企業和組織進行民調以了解消費者對產品、服務或品牌的態度,從而制定或調整市場策略。
社會科學研究:學者和研究者使用民調來了解人們的社會、文化和心理特征,以及其與行為的關係。
公眾與媒體的期望:民調提供了一種方式,使公眾、政府和企業得以了解社會的整體趨勢和態度。媒體也經常報導民調結果,提供公眾對當前議題的見解。
提供反饋和評估:無論是企業還是政府,都可以透過民調了解其表現、服務或政策的效果,並根據反饋進行改進。
預測和趨勢分析:民調可以幫助預測某些趨勢或行為的未來發展,如選舉結果、市場需求等。
教育和提高公眾意識:通過進行和公布民調,可以促使公眾對某一議題或問題有更深入的了解和討論。
民調可信嗎?
民意調查的結果數據隨處可見,尤其是政治性民調結果幾乎可說是天天在新聞上放送,對總統的滿意度下降了多少百分比,然而大家又信多少?
在景美市場的訪問中,我們了解到民眾對民調有一些普遍的觀點。大多數受訪者表示,他們對民調的可信度存有疑慮,主要原因是他們擔心政府可能會在調查中進行操控,以符合特定政治目標。
受訪者還提到,民意調查的結果通常不會對他們的投票意願產生影響。換句話說,他們的選擇通常受到更多因素的影響,例如候選人的政策立場和政府做事的認真與否,而不是單純依賴民調結果。
從訪問中我們可以得出的結論是,大多數民眾對民調持謹慎態度,並認為它們對他們的投票決策影響有限。
最新的民調顯示,2024年台灣總統大選的競爭格局已逐漸明朗。根據不同來源的數據,目前民進黨的賴清德與民眾黨的柯文哲、國民黨的侯友宜正處於激烈的競爭中。
一項民調指出,賴清德的支持度平均約34.78%,侯友宜為29.55%,而柯文哲則為23.42%。
另一家媒體的民調顯示,賴清德的支持率為32%,侯友宜為27%,柯文哲則為21%。
台灣民意基金會的最新民調則顯示,賴清德以36.5%的支持率領先,柯文哲以29.1%緊隨其後,侯友宜則以20.4%位列第三。
綜合這些數據,可以看出賴清德在目前的民調中處於領先地位,但其他候選人的支持度也不容小覷,競爭十分激烈。這些民調結果反映了選民的當前看法,但選情仍有可能隨著選舉日的臨近而變化。
tamoxifen estrogen: tamoxifen and depression – tamoxifen and ovarian cancer
buy cytotec online fast delivery: buy cytotec over the counter – order cytotec online
https://doxycyclinebestprice.pro/# doxy
lisinopril price in india: lisinopril 5 mg buy – order lisinopril online
buy cytotec over the counter: Abortion pills online – buy cytotec online fast delivery
lisinopril online pharmacy: lisinopril pharmacy online – lisinopril pill
Sahabet ile bir çok canlı casino ve canlı bahis oyunlarına dilediğiniz gibi katılabilirsiniz.Sahabet Giriş
https://doxycyclinebestprice.pro/# doxycycline without prescription
buy 20mg lisinopril
I just like the helpful information you provide in your articles
penis enlargement
You’re so awesome! I don’t believe I have read a single thing like that before. So great to find someone with some original thoughts on this topic. Really.. thank you for starting this up. This website is something that is needed on the internet, someone with a little originality!
where to get doxycycline: doxy 200 – 100mg doxycycline
Türbelerimiz
http://nolvadex.fun/# where to get nolvadex
https://lisinoprilbestprice.store/# lisinopril for sale online
Piece of writing writing is also a excitement, if you be familiar with after that you
can write if not it is complex to write.
Malatya Karacalar Ticaret | Fatih KARACA Malatya Stihl Bayi, stihl malatya bayi, stihlmalatya,malatyastihl, stihl servisi, malatya stihl servis, malatya testere,malatyastihlbayi, stihl malatya, malatya stihl, stihl bayisi malatya, Hekimhan stihl bayi, malatya testere bayisi, malatya stihl servis, stihl malatya servis, Malatya’nın en köklü Stihl bayilerinden olan Fatih Karaca Ticaret mağazamız, hem stihl satışı hem de stihl servisliğini yapmaktadır.
Niğde Haberleri tarafsız haber yayıncılığı anlayışıyla doğru ve güvenilir bilgilere ulaşmanızı sağlar. Niğde Anadolu Haber yıllardır Niğde ve çevresinde güvenilir haberleri sunma konusundaki kararlılığıyla bilinir. Niğde Vefat Edenler, Niğde Nöbetçi Eczane,Niğde Haber,Niğde İş İlanları,niğde anadolu gazetesi,anadolu gazetesi niğde,niğde olay,niğde gündem,niğde haber,niğde anadolu haberNiğde Anadolu Haber, Niğde haber, Niğde haberleri, Niğde son dakika, Niğde gündem, Niğde olay
diflucan 200 mg pill
Wow! At last I got a websitte from where
I can truly take useful facts regarding my study annd knowledge.
homepage
Proprietary pokie machines are a group of machines
linked tto one another and found iin solely some online casinos.
If you are new at onnline casono video games, it caan bee crucial
that it’s best to select the fitting place earlier than you start taking
part in. We’re onto round 2 of our slot machine tournament!
levitra discount canada
robaxin for dogs
https://doxycyclinebestprice.pro/# doxycycline hyc
zithromax 250 mg pill: where can i buy zithromax uk – zithromax 250 mg australia
секс фото
buy cytotec: cytotec online – buy cytotec online
民意調查是什麼?民調什麼意思?
民意調查又稱為輿論調查或民意測驗,簡稱民調。一般而言,民調是一種為了解公眾對某些政治、社會問題與政策的意見和態度,由專業民調公司或媒體進行的調查方法。
目的在於通過網路、電話、或書面等媒介,對大量樣本的問卷調查抽樣,利用統計學的抽樣理論來推斷較為客觀,且能較為精確地推論社會輿論或民意動向的一種方法。
以下是民意調查的一些基本特點和重要性:
抽樣:由於不可能向每一個人詢問意見,所以調查者會選擇一個代表性的樣本進行調查。這樣本的大小和抽樣方法都會影響調查的準確性和可靠性。
問卷設計:為了確保獲得可靠的結果,問卷必須經過精心設計,問題要清晰、不帶偏見,且易於理解。
數據分析:收集到的數據將被分析以得出結論。這可能包括計算百分比、平均值、標準差等,以及更複雜的統計分析。
多種用途:民意調查可以用於各種目的,包括政策制定、選舉預測、市場研究、社會科學研究等。
限制:雖然民意調查是一個有價值的工具,但它也有其限制。例如,樣本可能不完全代表目標人群,或者問卷的設計可能導致偏見。
影響決策:民意調查的結果常常被政府、企業和其他組織用來影響其決策。
透明度和誠實:為了維護調查的可信度,調查組織應該提供其調查方法、樣本大小、抽樣方法和可能的誤差範圍等詳細資訊。
民調是怎麼調查的?
民意調查(輿論調查)的意義是指為瞭解大多數民眾的看法、意見、利益與需求,以科學、系統與公正的資料,蒐集可以代表全部群眾(母體)的部分群眾(抽樣),設計問卷題目後,以人工或電腦詢問部分民眾對特定議題的看法與評價,利用抽樣出來部分民眾的意見與看法,來推論目前全部民眾的意見與看法,藉以衡量社會與政治的狀態。
以下是進行民調調查的基本步驟:
定義目標和目的:首先,調查者需要明確調查的目的。是要了解公眾對某個政策的看法?還是要評估某個政治候選人的支持率?
設計問卷:根據調查目的,研究者會設計一份問卷。問卷應該包含清晰、不帶偏見的問題,並避免導向性的語言。
選擇樣本:因為通常不可能調查所有人,所以會選擇一部分人作為代表。這部分人被稱為“樣本”。最理想的情況是使用隨機抽樣,以確保每個人都有被選中的機會。
收集數據:有多種方法可以收集數據,如面對面訪問、電話訪問、郵件調查或在線調查。
數據分析:一旦數據被收集,研究者會使用統計工具和技術進行分析,得出結論或洞見。
報告結果:分析完數據後,研究者會編寫報告或發布結果。報告通常會提供調查方法、樣本大小、誤差範圍和主要發現。
解釋誤差範圍:多數民調報告都會提供誤差範圍,例如“±3%”。這表示實際的結果有可能在報告結果的3%範圍內上下浮動。
民調調查的質量和可信度很大程度上取決於其設計和實施的方法。若是由專業和無偏見的組織進行,且使用科學的方法,那麼民調結果往往較為可靠。但即使是最高質量的民調也會有一定的誤差,因此解讀時應保持批判性思考。
為什麼要做民調?
民調提供了一種系統性的方式來了解大眾的意見、態度和信念。進行民調的原因多種多樣,以下是一些主要的動機:
政策制定和評估:政府和政策制定者進行民調,以了解公眾對某一議題或政策的看法。這有助於制定或調整政策,以反映大眾的需求和意見。
選舉和政治活動:政黨和候選人通常使用民調來評估自己在選舉中的地位,了解哪些議題對選民最重要,以及如何調整策略以吸引更多支持。
市場研究:企業和組織進行民調以了解消費者對產品、服務或品牌的態度,從而制定或調整市場策略。
社會科學研究:學者和研究者使用民調來了解人們的社會、文化和心理特征,以及其與行為的關係。
公眾與媒體的期望:民調提供了一種方式,使公眾、政府和企業得以了解社會的整體趨勢和態度。媒體也經常報導民調結果,提供公眾對當前議題的見解。
提供反饋和評估:無論是企業還是政府,都可以透過民調了解其表現、服務或政策的效果,並根據反饋進行改進。
預測和趨勢分析:民調可以幫助預測某些趨勢或行為的未來發展,如選舉結果、市場需求等。
教育和提高公眾意識:通過進行和公布民調,可以促使公眾對某一議題或問題有更深入的了解和討論。
民調可信嗎?
民意調查的結果數據隨處可見,尤其是政治性民調結果幾乎可說是天天在新聞上放送,對總統的滿意度下降了多少百分比,然而大家又信多少?
在景美市場的訪問中,我們了解到民眾對民調有一些普遍的觀點。大多數受訪者表示,他們對民調的可信度存有疑慮,主要原因是他們擔心政府可能會在調查中進行操控,以符合特定政治目標。
受訪者還提到,民意調查的結果通常不會對他們的投票意願產生影響。換句話說,他們的選擇通常受到更多因素的影響,例如候選人的政策立場和政府做事的認真與否,而不是單純依賴民調結果。
從訪問中我們可以得出的結論是,大多數民眾對民調持謹慎態度,並認為它們對他們的投票決策影響有限。
websitem için çok işime yaradı teşekkür ederim
I truly appreciate your technique of writing a blog. I added it to my bookmark site list and will
I like the efforts you have put in this, regards for all the great content.
온카마켓은 카지노와 관련된 정보를 공유하고 토론하는 커뮤니티입니다. 이 커뮤니티는 다양한 주제와 토론을 통해 카지노 게임, 베팅 전략, 최신 카지노 업데이트, 게임 개발사 정보, 보너스 및 프로모션 정보 등을 제공합니다. 여기에서 다른 카지노 애호가들과 의견을 나누고 유용한 정보를 얻을 수 있습니다.
온카마켓은 회원 간의 소통과 공유를 촉진하며, 카지노와 관련된 다양한 주제에 대한 토론을 즐길 수 있는 플랫폼입니다. 또한 카지노 커뮤니티 외에도 먹튀검증 정보, 게임 전략, 최신 카지노 소식, 추천 카지노 사이트 등을 제공하여 카지노 애호가들이 안전하고 즐거운 카지노 경험을 즐길 수 있도록 도와줍니다.
온카마켓은 카지노와 관련된 정보와 소식을 한눈에 확인하고 다른 플레이어들과 소통하는 좋은 장소입니다. 카지노와 베팅에 관심이 있는 분들에게 유용한 정보와 커뮤니티를 제공하는 온카마켓을 즐겨보세요.
카지노 커뮤니티 온카마켓은 온라인 카지노와 관련된 정보를 공유하고 소통하는 커뮤니티입니다. 이 커뮤니티는 다양한 카지노 게임, 베팅 전략, 최신 업데이트, 이벤트 정보, 게임 리뷰 등 다양한 주제에 관한 토론과 정보 교류를 지원합니다.
온카마켓에서는 카지노 게임에 관심 있는 플레이어들이 모여서 자유롭게 의견을 나누고 경험을 공유할 수 있습니다. 또한, 다양한 카지노 사이트의 정보와 신뢰성을 검증하는 역할을 하며, 회원들이 안전하게 카지노 게임을 즐길 수 있도록 정보를 제공합니다.
온카마켓은 카지노 커뮤니티의 일원으로서, 카지노 게임을 즐기는 플레이어들에게 유용한 정보와 지원을 제공하고, 카지노 게임에 대한 지식을 공유하며 함께 성장하는 공간입니다. 카지노에 관심이 있는 분들에게는 유용한 커뮤니티로서 온카마켓을 소개합니다
https://canadapharm.life/# 77 canadian pharmacy canadapharm.life
medication from mexico pharmacy: Medicines Mexico – buying from online mexican pharmacy mexicopharm.com
canadian pharmacy king Canada Drugs Direct vipps canadian pharmacy canadapharm.life
You’re so awesome! I don’t believe I have read a single thing like that before. So great to find someone with some original thoughts on this topic. Really.. thank you for starting this up. This website is something that is needed on the internet, someone with a little originality!
https://canadapharm.life/# canada ed drugs canadapharm.life
最新的民調顯示,2024年台灣總統大選的競爭格局已逐漸明朗。根據不同來源的數據,目前民進黨的賴清德與民眾黨的柯文哲、國民黨的侯友宜正處於激烈的競爭中。
一項總統民調指出,賴清德的支持度平均約34.78%,侯友宜為29.55%,而柯文哲則為23.42%。
另一家媒體的民調顯示,賴清德的支持率為32%,侯友宜為27%,柯文哲則為21%。
台灣民意基金會的最新民調則顯示,賴清德以36.5%的支持率領先,柯文哲以29.1%緊隨其後,侯友宜則以20.4%位列第三。
綜合這些數據,可以看出賴清德在目前的民調中處於領先地位,但其他候選人的支持度也不容小覷,競爭十分激烈。這些民調結果反映了選民的當前看法,但選情仍有可能隨著選舉日的臨近而變化。
民調
民意調查是什麼?民調什麼意思?
民意調查又稱為輿論調查或民意測驗,簡稱民調。一般而言,民調是一種為了解公眾對某些政治、社會問題與政策的意見和態度,由專業民調公司或媒體進行的調查方法。
目的在於通過網路、電話、或書面等媒介,對大量樣本的問卷調查抽樣,利用統計學的抽樣理論來推斷較為客觀,且能較為精確地推論社會輿論或民意動向的一種方法。
以下是民意調查的一些基本特點和重要性:
抽樣:由於不可能向每一個人詢問意見,所以調查者會選擇一個代表性的樣本進行調查。這樣本的大小和抽樣方法都會影響調查的準確性和可靠性。
問卷設計:為了確保獲得可靠的結果,問卷必須經過精心設計,問題要清晰、不帶偏見,且易於理解。
數據分析:收集到的數據將被分析以得出結論。這可能包括計算百分比、平均值、標準差等,以及更複雜的統計分析。
多種用途:民意調查可以用於各種目的,包括政策制定、選舉預測、市場研究、社會科學研究等。
限制:雖然民意調查是一個有價值的工具,但它也有其限制。例如,樣本可能不完全代表目標人群,或者問卷的設計可能導致偏見。
影響決策:民意調查的結果常常被政府、企業和其他組織用來影響其決策。
透明度和誠實:為了維護調查的可信度,調查組織應該提供其調查方法、樣本大小、抽樣方法和可能的誤差範圍等詳細資訊。
民調是怎麼調查的?
民意調查(輿論調查)的意義是指為瞭解大多數民眾的看法、意見、利益與需求,以科學、系統與公正的資料,蒐集可以代表全部群眾(母體)的部分群眾(抽樣),設計問卷題目後,以人工或電腦詢問部分民眾對特定議題的看法與評價,利用抽樣出來部分民眾的意見與看法,來推論目前全部民眾的意見與看法,藉以衡量社會與政治的狀態。
以下是進行民調調查的基本步驟:
定義目標和目的:首先,調查者需要明確調查的目的。是要了解公眾對某個政策的看法?還是要評估某個政治候選人的支持率?
設計問卷:根據調查目的,研究者會設計一份問卷。問卷應該包含清晰、不帶偏見的問題,並避免導向性的語言。
選擇樣本:因為通常不可能調查所有人,所以會選擇一部分人作為代表。這部分人被稱為“樣本”。最理想的情況是使用隨機抽樣,以確保每個人都有被選中的機會。
收集數據:有多種方法可以收集數據,如面對面訪問、電話訪問、郵件調查或在線調查。
數據分析:一旦數據被收集,研究者會使用統計工具和技術進行分析,得出結論或洞見。
報告結果:分析完數據後,研究者會編寫報告或發布結果。報告通常會提供調查方法、樣本大小、誤差範圍和主要發現。
解釋誤差範圍:多數民調報告都會提供誤差範圍,例如“±3%”。這表示實際的結果有可能在報告結果的3%範圍內上下浮動。
民調調查的質量和可信度很大程度上取決於其設計和實施的方法。若是由專業和無偏見的組織進行,且使用科學的方法,那麼民調結果往往較為可靠。但即使是最高質量的民調也會有一定的誤差,因此解讀時應保持批判性思考。
為什麼要做民調?
民調提供了一種系統性的方式來了解大眾的意見、態度和信念。進行民調的原因多種多樣,以下是一些主要的動機:
政策制定和評估:政府和政策制定者進行民調,以了解公眾對某一議題或政策的看法。這有助於制定或調整政策,以反映大眾的需求和意見。
選舉和政治活動:政黨和候選人通常使用民調來評估自己在選舉中的地位,了解哪些議題對選民最重要,以及如何調整策略以吸引更多支持。
市場研究:企業和組織進行民調以了解消費者對產品、服務或品牌的態度,從而制定或調整市場策略。
社會科學研究:學者和研究者使用民調來了解人們的社會、文化和心理特征,以及其與行為的關係。
公眾與媒體的期望:民調提供了一種方式,使公眾、政府和企業得以了解社會的整體趨勢和態度。媒體也經常報導民調結果,提供公眾對當前議題的見解。
提供反饋和評估:無論是企業還是政府,都可以透過民調了解其表現、服務或政策的效果,並根據反饋進行改進。
預測和趨勢分析:民調可以幫助預測某些趨勢或行為的未來發展,如選舉結果、市場需求等。
教育和提高公眾意識:通過進行和公布民調,可以促使公眾對某一議題或問題有更深入的了解和討論。
民調可信嗎?
民意調查的結果數據隨處可見,尤其是政治性民調結果幾乎可說是天天在新聞上放送,對總統的滿意度下降了多少百分比,然而大家又信多少?
在景美市場的訪問中,我們了解到民眾對民調有一些普遍的觀點。大多數受訪者表示,他們對民調的可信度存有疑慮,主要原因是他們擔心政府可能會在調查中進行操控,以符合特定政治目標。
受訪者還提到,民意調查的結果通常不會對他們的投票意願產生影響。換句話說,他們的選擇通常受到更多因素的影響,例如候選人的政策立場和政府做事的認真與否,而不是單純依賴民調結果。
從訪問中我們可以得出的結論是,大多數民眾對民調持謹慎態度,並認為它們對他們的投票決策影響有限。
http://indiapharm.llc/# indian pharmacy paypal indiapharm.llc
buy fluconazol
民意調查
民意調查是什麼?民調什麼意思?
民意調查又稱為輿論調查或民意測驗,簡稱民調。一般而言,民調是一種為了解公眾對某些政治、社會問題與政策的意見和態度,由專業民調公司或媒體進行的調查方法。
目的在於通過網路、電話、或書面等媒介,對大量樣本的問卷調查抽樣,利用統計學的抽樣理論來推斷較為客觀,且能較為精確地推論社會輿論或民意動向的一種方法。
以下是民意調查的一些基本特點和重要性:
抽樣:由於不可能向每一個人詢問意見,所以調查者會選擇一個代表性的樣本進行調查。這樣本的大小和抽樣方法都會影響調查的準確性和可靠性。
問卷設計:為了確保獲得可靠的結果,問卷必須經過精心設計,問題要清晰、不帶偏見,且易於理解。
數據分析:收集到的數據將被分析以得出結論。這可能包括計算百分比、平均值、標準差等,以及更複雜的統計分析。
多種用途:民意調查可以用於各種目的,包括政策制定、選舉預測、市場研究、社會科學研究等。
限制:雖然民意調查是一個有價值的工具,但它也有其限制。例如,樣本可能不完全代表目標人群,或者問卷的設計可能導致偏見。
影響決策:民意調查的結果常常被政府、企業和其他組織用來影響其決策。
透明度和誠實:為了維護調查的可信度,調查組織應該提供其調查方法、樣本大小、抽樣方法和可能的誤差範圍等詳細資訊。
民調是怎麼調查的?
民意調查(輿論調查)的意義是指為瞭解大多數民眾的看法、意見、利益與需求,以科學、系統與公正的資料,蒐集可以代表全部群眾(母體)的部分群眾(抽樣),設計問卷題目後,以人工或電腦詢問部分民眾對特定議題的看法與評價,利用抽樣出來部分民眾的意見與看法,來推論目前全部民眾的意見與看法,藉以衡量社會與政治的狀態。
以下是進行民調調查的基本步驟:
定義目標和目的:首先,調查者需要明確調查的目的。是要了解公眾對某個政策的看法?還是要評估某個政治候選人的支持率?
設計問卷:根據調查目的,研究者會設計一份問卷。問卷應該包含清晰、不帶偏見的問題,並避免導向性的語言。
選擇樣本:因為通常不可能調查所有人,所以會選擇一部分人作為代表。這部分人被稱為“樣本”。最理想的情況是使用隨機抽樣,以確保每個人都有被選中的機會。
收集數據:有多種方法可以收集數據,如面對面訪問、電話訪問、郵件調查或在線調查。
數據分析:一旦數據被收集,研究者會使用統計工具和技術進行分析,得出結論或洞見。
報告結果:分析完數據後,研究者會編寫報告或發布結果。報告通常會提供調查方法、樣本大小、誤差範圍和主要發現。
解釋誤差範圍:多數民調報告都會提供誤差範圍,例如“±3%”。這表示實際的結果有可能在報告結果的3%範圍內上下浮動。
民調調查的質量和可信度很大程度上取決於其設計和實施的方法。若是由專業和無偏見的組織進行,且使用科學的方法,那麼民調結果往往較為可靠。但即使是最高質量的民調也會有一定的誤差,因此解讀時應保持批判性思考。
為什麼要做民調?
民調提供了一種系統性的方式來了解大眾的意見、態度和信念。進行民調的原因多種多樣,以下是一些主要的動機:
政策制定和評估:政府和政策制定者進行民調,以了解公眾對某一議題或政策的看法。這有助於制定或調整政策,以反映大眾的需求和意見。
選舉和政治活動:政黨和候選人通常使用民調來評估自己在選舉中的地位,了解哪些議題對選民最重要,以及如何調整策略以吸引更多支持。
市場研究:企業和組織進行民調以了解消費者對產品、服務或品牌的態度,從而制定或調整市場策略。
社會科學研究:學者和研究者使用民調來了解人們的社會、文化和心理特征,以及其與行為的關係。
公眾與媒體的期望:民調提供了一種方式,使公眾、政府和企業得以了解社會的整體趨勢和態度。媒體也經常報導民調結果,提供公眾對當前議題的見解。
提供反饋和評估:無論是企業還是政府,都可以透過民調了解其表現、服務或政策的效果,並根據反饋進行改進。
預測和趨勢分析:民調可以幫助預測某些趨勢或行為的未來發展,如選舉結果、市場需求等。
教育和提高公眾意識:通過進行和公布民調,可以促使公眾對某一議題或問題有更深入的了解和討論。
民調可信嗎?
民意調查的結果數據隨處可見,尤其是政治性民調結果幾乎可說是天天在新聞上放送,對總統的滿意度下降了多少百分比,然而大家又信多少?
在景美市場的訪問中,我們了解到民眾對民調有一些普遍的觀點。大多數受訪者表示,他們對民調的可信度存有疑慮,主要原因是他們擔心政府可能會在調查中進行操控,以符合特定政治目標。
受訪者還提到,民意調查的結果通常不會對他們的投票意願產生影響。換句話說,他們的選擇通常受到更多因素的影響,例如候選人的政策立場和政府做事的認真與否,而不是單純依賴民調結果。
從訪問中我們可以得出的結論是,大多數民眾對民調持謹慎態度,並認為它們對他們的投票決策影響有限。
民調
民意調查是什麼?民調什麼意思?
民意調查又稱為輿論調查或民意測驗,簡稱民調。一般而言,民調是一種為了解公眾對某些政治、社會問題與政策的意見和態度,由專業民調公司或媒體進行的調查方法。
目的在於通過網路、電話、或書面等媒介,對大量樣本的問卷調查抽樣,利用統計學的抽樣理論來推斷較為客觀,且能較為精確地推論社會輿論或民意動向的一種方法。
以下是民意調查的一些基本特點和重要性:
抽樣:由於不可能向每一個人詢問意見,所以調查者會選擇一個代表性的樣本進行調查。這樣本的大小和抽樣方法都會影響調查的準確性和可靠性。
問卷設計:為了確保獲得可靠的結果,問卷必須經過精心設計,問題要清晰、不帶偏見,且易於理解。
數據分析:收集到的數據將被分析以得出結論。這可能包括計算百分比、平均值、標準差等,以及更複雜的統計分析。
多種用途:民意調查可以用於各種目的,包括政策制定、選舉預測、市場研究、社會科學研究等。
限制:雖然民意調查是一個有價值的工具,但它也有其限制。例如,樣本可能不完全代表目標人群,或者問卷的設計可能導致偏見。
影響決策:民意調查的結果常常被政府、企業和其他組織用來影響其決策。
透明度和誠實:為了維護調查的可信度,調查組織應該提供其調查方法、樣本大小、抽樣方法和可能的誤差範圍等詳細資訊。
民調是怎麼調查的?
民意調查(輿論調查)的意義是指為瞭解大多數民眾的看法、意見、利益與需求,以科學、系統與公正的資料,蒐集可以代表全部群眾(母體)的部分群眾(抽樣),設計問卷題目後,以人工或電腦詢問部分民眾對特定議題的看法與評價,利用抽樣出來部分民眾的意見與看法,來推論目前全部民眾的意見與看法,藉以衡量社會與政治的狀態。
以下是進行民調調查的基本步驟:
定義目標和目的:首先,調查者需要明確調查的目的。是要了解公眾對某個政策的看法?還是要評估某個政治候選人的支持率?
設計問卷:根據調查目的,研究者會設計一份問卷。問卷應該包含清晰、不帶偏見的問題,並避免導向性的語言。
選擇樣本:因為通常不可能調查所有人,所以會選擇一部分人作為代表。這部分人被稱為“樣本”。最理想的情況是使用隨機抽樣,以確保每個人都有被選中的機會。
收集數據:有多種方法可以收集數據,如面對面訪問、電話訪問、郵件調查或在線調查。
數據分析:一旦數據被收集,研究者會使用統計工具和技術進行分析,得出結論或洞見。
報告結果:分析完數據後,研究者會編寫報告或發布結果。報告通常會提供調查方法、樣本大小、誤差範圍和主要發現。
解釋誤差範圍:多數民調報告都會提供誤差範圍,例如“±3%”。這表示實際的結果有可能在報告結果的3%範圍內上下浮動。
民調調查的質量和可信度很大程度上取決於其設計和實施的方法。若是由專業和無偏見的組織進行,且使用科學的方法,那麼民調結果往往較為可靠。但即使是最高質量的民調也會有一定的誤差,因此解讀時應保持批判性思考。
為什麼要做民調?
民調提供了一種系統性的方式來了解大眾的意見、態度和信念。進行民調的原因多種多樣,以下是一些主要的動機:
政策制定和評估:政府和政策制定者進行民調,以了解公眾對某一議題或政策的看法。這有助於制定或調整政策,以反映大眾的需求和意見。
選舉和政治活動:政黨和候選人通常使用民調來評估自己在選舉中的地位,了解哪些議題對選民最重要,以及如何調整策略以吸引更多支持。
市場研究:企業和組織進行民調以了解消費者對產品、服務或品牌的態度,從而制定或調整市場策略。
社會科學研究:學者和研究者使用民調來了解人們的社會、文化和心理特征,以及其與行為的關係。
公眾與媒體的期望:民調提供了一種方式,使公眾、政府和企業得以了解社會的整體趨勢和態度。媒體也經常報導民調結果,提供公眾對當前議題的見解。
提供反饋和評估:無論是企業還是政府,都可以透過民調了解其表現、服務或政策的效果,並根據反饋進行改進。
預測和趨勢分析:民調可以幫助預測某些趨勢或行為的未來發展,如選舉結果、市場需求等。
教育和提高公眾意識:通過進行和公布民調,可以促使公眾對某一議題或問題有更深入的了解和討論。
民調可信嗎?
民意調查的結果數據隨處可見,尤其是政治性民調結果幾乎可說是天天在新聞上放送,對總統的滿意度下降了多少百分比,然而大家又信多少?
在景美市場的訪問中,我們了解到民眾對民調有一些普遍的觀點。大多數受訪者表示,他們對民調的可信度存有疑慮,主要原因是他們擔心政府可能會在調查中進行操控,以符合特定政治目標。
受訪者還提到,民意調查的結果通常不會對他們的投票意願產生影響。換句話說,他們的選擇通常受到更多因素的影響,例如候選人的政策立場和政府做事的認真與否,而不是單純依賴民調結果。
從訪問中我們可以得出的結論是,大多數民眾對民調持謹慎態度,並認為它們對他們的投票決策影響有限。
mexican drugstore online mexican pharmacy best online pharmacies in mexico mexicopharm.com
2024總統大選民調
民意調查是什麼?民調什麼意思?
民意調查又稱為輿論調查或民意測驗,簡稱民調。一般而言,民調是一種為了解公眾對某些政治、社會問題與政策的意見和態度,由專業民調公司或媒體進行的調查方法。
目的在於通過網路、電話、或書面等媒介,對大量樣本的問卷調查抽樣,利用統計學的抽樣理論來推斷較為客觀,且能較為精確地推論社會輿論或民意動向的一種方法。
以下是民意調查的一些基本特點和重要性:
抽樣:由於不可能向每一個人詢問意見,所以調查者會選擇一個代表性的樣本進行調查。這樣本的大小和抽樣方法都會影響調查的準確性和可靠性。
問卷設計:為了確保獲得可靠的結果,問卷必須經過精心設計,問題要清晰、不帶偏見,且易於理解。
數據分析:收集到的數據將被分析以得出結論。這可能包括計算百分比、平均值、標準差等,以及更複雜的統計分析。
多種用途:民意調查可以用於各種目的,包括政策制定、選舉預測、市場研究、社會科學研究等。
限制:雖然民意調查是一個有價值的工具,但它也有其限制。例如,樣本可能不完全代表目標人群,或者問卷的設計可能導致偏見。
影響決策:民意調查的結果常常被政府、企業和其他組織用來影響其決策。
透明度和誠實:為了維護調查的可信度,調查組織應該提供其調查方法、樣本大小、抽樣方法和可能的誤差範圍等詳細資訊。
民調是怎麼調查的?
民意調查(輿論調查)的意義是指為瞭解大多數民眾的看法、意見、利益與需求,以科學、系統與公正的資料,蒐集可以代表全部群眾(母體)的部分群眾(抽樣),設計問卷題目後,以人工或電腦詢問部分民眾對特定議題的看法與評價,利用抽樣出來部分民眾的意見與看法,來推論目前全部民眾的意見與看法,藉以衡量社會與政治的狀態。
以下是進行民調調查的基本步驟:
定義目標和目的:首先,調查者需要明確調查的目的。是要了解公眾對某個政策的看法?還是要評估某個政治候選人的支持率?
設計問卷:根據調查目的,研究者會設計一份問卷。問卷應該包含清晰、不帶偏見的問題,並避免導向性的語言。
選擇樣本:因為通常不可能調查所有人,所以會選擇一部分人作為代表。這部分人被稱為“樣本”。最理想的情況是使用隨機抽樣,以確保每個人都有被選中的機會。
收集數據:有多種方法可以收集數據,如面對面訪問、電話訪問、郵件調查或在線調查。
數據分析:一旦數據被收集,研究者會使用統計工具和技術進行分析,得出結論或洞見。
報告結果:分析完數據後,研究者會編寫報告或發布結果。報告通常會提供調查方法、樣本大小、誤差範圍和主要發現。
解釋誤差範圍:多數民調報告都會提供誤差範圍,例如“±3%”。這表示實際的結果有可能在報告結果的3%範圍內上下浮動。
民調調查的質量和可信度很大程度上取決於其設計和實施的方法。若是由專業和無偏見的組織進行,且使用科學的方法,那麼民調結果往往較為可靠。但即使是最高質量的民調也會有一定的誤差,因此解讀時應保持批判性思考。
為什麼要做民調?
民調提供了一種系統性的方式來了解大眾的意見、態度和信念。進行民調的原因多種多樣,以下是一些主要的動機:
政策制定和評估:政府和政策制定者進行民調,以了解公眾對某一議題或政策的看法。這有助於制定或調整政策,以反映大眾的需求和意見。
選舉和政治活動:政黨和候選人通常使用民調來評估自己在選舉中的地位,了解哪些議題對選民最重要,以及如何調整策略以吸引更多支持。
市場研究:企業和組織進行民調以了解消費者對產品、服務或品牌的態度,從而制定或調整市場策略。
社會科學研究:學者和研究者使用民調來了解人們的社會、文化和心理特征,以及其與行為的關係。
公眾與媒體的期望:民調提供了一種方式,使公眾、政府和企業得以了解社會的整體趨勢和態度。媒體也經常報導民調結果,提供公眾對當前議題的見解。
提供反饋和評估:無論是企業還是政府,都可以透過民調了解其表現、服務或政策的效果,並根據反饋進行改進。
預測和趨勢分析:民調可以幫助預測某些趨勢或行為的未來發展,如選舉結果、市場需求等。
教育和提高公眾意識:通過進行和公布民調,可以促使公眾對某一議題或問題有更深入的了解和討論。
民調可信嗎?
民意調查的結果數據隨處可見,尤其是政治性民調結果幾乎可說是天天在新聞上放送,對總統的滿意度下降了多少百分比,然而大家又信多少?
在景美市場的訪問中,我們了解到民眾對民調有一些普遍的觀點。大多數受訪者表示,他們對民調的可信度存有疑慮,主要原因是他們擔心政府可能會在調查中進行操控,以符合特定政治目標。
受訪者還提到,民意調查的結果通常不會對他們的投票意願產生影響。換句話說,他們的選擇通常受到更多因素的影響,例如候選人的政策立場和政府做事的認真與否,而不是單純依賴民調結果。
從訪問中我們可以得出的結論是,大多數民眾對民調持謹慎態度,並認為它們對他們的投票決策影響有限。
canadian pharmacy oxycodone: Canadian pharmacy best prices – canadian king pharmacy canadapharm.life
總統民調
民意調查是什麼?民調什麼意思?
民意調查又稱為輿論調查或民意測驗,簡稱民調。一般而言,民調是一種為了解公眾對某些政治、社會問題與政策的意見和態度,由專業民調公司或媒體進行的調查方法。
目的在於通過網路、電話、或書面等媒介,對大量樣本的問卷調查抽樣,利用統計學的抽樣理論來推斷較為客觀,且能較為精確地推論社會輿論或民意動向的一種方法。
以下是民意調查的一些基本特點和重要性:
抽樣:由於不可能向每一個人詢問意見,所以調查者會選擇一個代表性的樣本進行調查。這樣本的大小和抽樣方法都會影響調查的準確性和可靠性。
問卷設計:為了確保獲得可靠的結果,問卷必須經過精心設計,問題要清晰、不帶偏見,且易於理解。
數據分析:收集到的數據將被分析以得出結論。這可能包括計算百分比、平均值、標準差等,以及更複雜的統計分析。
多種用途:民意調查可以用於各種目的,包括政策制定、選舉預測、市場研究、社會科學研究等。
限制:雖然民意調查是一個有價值的工具,但它也有其限制。例如,樣本可能不完全代表目標人群,或者問卷的設計可能導致偏見。
影響決策:民意調查的結果常常被政府、企業和其他組織用來影響其決策。
透明度和誠實:為了維護調查的可信度,調查組織應該提供其調查方法、樣本大小、抽樣方法和可能的誤差範圍等詳細資訊。
民調是怎麼調查的?
民意調查(輿論調查)的意義是指為瞭解大多數民眾的看法、意見、利益與需求,以科學、系統與公正的資料,蒐集可以代表全部群眾(母體)的部分群眾(抽樣),設計問卷題目後,以人工或電腦詢問部分民眾對特定議題的看法與評價,利用抽樣出來部分民眾的意見與看法,來推論目前全部民眾的意見與看法,藉以衡量社會與政治的狀態。
以下是進行民調調查的基本步驟:
定義目標和目的:首先,調查者需要明確調查的目的。是要了解公眾對某個政策的看法?還是要評估某個政治候選人的支持率?
設計問卷:根據調查目的,研究者會設計一份問卷。問卷應該包含清晰、不帶偏見的問題,並避免導向性的語言。
選擇樣本:因為通常不可能調查所有人,所以會選擇一部分人作為代表。這部分人被稱為“樣本”。最理想的情況是使用隨機抽樣,以確保每個人都有被選中的機會。
收集數據:有多種方法可以收集數據,如面對面訪問、電話訪問、郵件調查或在線調查。
數據分析:一旦數據被收集,研究者會使用統計工具和技術進行分析,得出結論或洞見。
報告結果:分析完數據後,研究者會編寫報告或發布結果。報告通常會提供調查方法、樣本大小、誤差範圍和主要發現。
解釋誤差範圍:多數民調報告都會提供誤差範圍,例如“±3%”。這表示實際的結果有可能在報告結果的3%範圍內上下浮動。
民調調查的質量和可信度很大程度上取決於其設計和實施的方法。若是由專業和無偏見的組織進行,且使用科學的方法,那麼民調結果往往較為可靠。但即使是最高質量的民調也會有一定的誤差,因此解讀時應保持批判性思考。
為什麼要做民調?
民調提供了一種系統性的方式來了解大眾的意見、態度和信念。進行民調的原因多種多樣,以下是一些主要的動機:
政策制定和評估:政府和政策制定者進行民調,以了解公眾對某一議題或政策的看法。這有助於制定或調整政策,以反映大眾的需求和意見。
選舉和政治活動:政黨和候選人通常使用民調來評估自己在選舉中的地位,了解哪些議題對選民最重要,以及如何調整策略以吸引更多支持。
市場研究:企業和組織進行民調以了解消費者對產品、服務或品牌的態度,從而制定或調整市場策略。
社會科學研究:學者和研究者使用民調來了解人們的社會、文化和心理特征,以及其與行為的關係。
公眾與媒體的期望:民調提供了一種方式,使公眾、政府和企業得以了解社會的整體趨勢和態度。媒體也經常報導民調結果,提供公眾對當前議題的見解。
提供反饋和評估:無論是企業還是政府,都可以透過民調了解其表現、服務或政策的效果,並根據反饋進行改進。
預測和趨勢分析:民調可以幫助預測某些趨勢或行為的未來發展,如選舉結果、市場需求等。
教育和提高公眾意識:通過進行和公布民調,可以促使公眾對某一議題或問題有更深入的了解和討論。
民調可信嗎?
民意調查的結果數據隨處可見,尤其是政治性民調結果幾乎可說是天天在新聞上放送,對總統的滿意度下降了多少百分比,然而大家又信多少?
在景美市場的訪問中,我們了解到民眾對民調有一些普遍的觀點。大多數受訪者表示,他們對民調的可信度存有疑慮,主要原因是他們擔心政府可能會在調查中進行操控,以符合特定政治目標。
受訪者還提到,民意調查的結果通常不會對他們的投票意願產生影響。換句話說,他們的選擇通常受到更多因素的影響,例如候選人的政策立場和政府做事的認真與否,而不是單純依賴民調結果。
從訪問中我們可以得出的結論是,大多數民眾對民調持謹慎態度,並認為它們對他們的投票決策影響有限。
buying from online mexican pharmacy mexico drug stores pharmacies or buying prescription drugs in mexico
https://images.google.tl/url?q=https://mexicopharm.com reputable mexican pharmacies online
mexico drug stores pharmacies buying from online mexican pharmacy and mexican pharmaceuticals online medication from mexico pharmacy
reliable canadian online pharmacy cheap canadian pharmacy or canadian pharmacies comparison
https://www.google.td/url?q=https://canadapharm.life adderall canadian pharmacy
canadian pharmacy phone number canadian pharmacies comparison and canadian pharmacy canadian pharmacy online reviews
http://indiapharm.llc/# top 10 pharmacies in india indiapharm.llc
eggc
Fang Jifan은 사건에 박수를 쳤습니다. “예,이 사람은 대단합니다. 어서 전화하세요.”
https://www.vispills.com/
gabapentin pill 100mg
mexico drug stores pharmacies: Purple Pharmacy online ordering – medicine in mexico pharmacies mexicopharm.com
ban ca xeng
Có đa dạng loại game bắn cá, mỗi thể loại mang theo những quy tắc và phong cách chơi độc đáo. Vì vậy, người mới tham gia nên dành thời gian để nắm vững luật lệ của từng loại mà họ quan tâm. Chẳng hạn, việc hiểu rõ các nguyên tắc cơ bản như săn cá, tính điểm, loại mồi, cách đặt cược, hay quá trình đổi xèng là quan trọng để có trải nghiệm chơi tốt nhất.
Bên cạnh đó, khi tham gia vào trò chơi, cũng cần phải đảm bảo rằng bạn hiểu rõ các quy định cụ thể của từng cổng game để tránh những hiểu lầm không mong muốn.
Nhiều cổng game bắn cá hiện nay cung cấp lựa chọn bàn chơi miễn phí, mở ra cơ hội cho người chơi mới thâm nhập thế giới này mà không cần phải đầu tư xèng. Bằng cách tham gia vào các ván chơi không mất chi phí, người chơi có thể học được quy tắc chơi, tiếp xúc với các chiến thuật, hiểu rõ sự biến động của trò chơi, và khám phá các nền tảng và phần mềm mà không phải lo lắng về áp lực tài chính.
Quá trình trải nghiệm miễn phí sẽ giúp người chơi mới tích luỹ kinh nghiệm, xây dựng lòng tin vào bản thân, từ đó họ có thể chuyển đổi sang chơi với xèng mà không gặp phải nhiều khó khăn và ngần ngại.
Hiểu rõ về ý nghĩa của vị trí trong bàn săn cá là vô cùng quan trọng. Ví dụ, người chơi đặt mình ở vị trí đầu bàn phải đối mặt với thách thức của việc đưa ra quyết định mà không biết được cách mà đối thủ phía sau sẽ hành động. Ngược lại, người chơi ở vị trí giữa có đôi chút lợi thế khi phải đối mặt với ít áp lực hơn, có thể quan sát cách chơi của một số đối thủ trước đó, nhưng vẫn phải đưa ra quyết định mà không biết trước hành động của một số đối thủ khác. Người chơi ở vị trí cuối được ưu thế vì họ có thể quan sát và phân tích hành động của đối thủ trước khi tới lượt họ đưa ra quyết định. Nguyên tắc chung là, vị trí càng cao, người chơi càng có lợi thế trong
ban ca xeng.
http://mexicopharm.com/# buying prescription drugs in mexico online mexicopharm.com
gabapentin 3
accutane singapore cost
buy medicines online in india Online India pharmacy india online pharmacy indiapharm.llc
world pharmacy india India Post sending medicines to USA world pharmacy india indiapharm.llc
accutane medicine price
XAIGATE is a secure and user-friendly crypto payment gateway that allows businesses to accept cryptocurrency payments from customers around the world. With XAIGATE, businesses can easily integrate cryptocurrency payments into their existing websites or online stores. If you are a business owner who is looking to start accepting cryptocurrency payments, XAIGATE is the perfect solution for you. Sign up for a free trial today and start experiencing the benefits of cryptocurrency payments firsthand
buy gabapentin india
I just could not go away your site prior to suggesting that I
extremely enjoyed the standard information an individual supply
on your guests? Is gonna be back ceaselessly to inspect new posts
https://canadapharm.life/# legit canadian pharmacy canadapharm.life
Can a baby have many fathers viagra for sale
canadian pharmacy india: Online India pharmacy – top 10 pharmacies in india indiapharm.llc
pharmacies in mexico that ship to usa mexican online pharmacies prescription drugs or best online pharmacies in mexico
https://www.google.com.pg/url?sa=t&url=https://mexicopharm.com mexico pharmacies prescription drugs
buying prescription drugs in mexico mexican mail order pharmacies and medicine in mexico pharmacies mexican drugstore online
Встречайте Лаки Джет краш – игру, которая заставит ваше сердце биться чаще! Сделайте ставку на сайте 1win и следите за полетом Джо.
buy prednisolone 40 mg
I do consider all of the ideas you’ve introduced on your post.
They are very convincing and will definitely work.
Nonetheless, the posts are too short for beginners. May just you please lengthen them a little
from subsequent time? Thanks for the post.
Hey there, I think your blog might be having
browser compatibility issues. When I look at your blog site in Ie, it looks fine but when opening in Internet Explorer, it has some
overlapping. I just wanted to give you a quick heads up!
Other then that, great blog!
where can i buy clomid from
Cheap Levitra online Buy Levitra 20mg online Levitra 20 mg for sale
diflucan generic brand
erectile dysfunction medications ed pills online male ed pills
http://tadalafildelivery.pro/# tadalafil cost india
http://kamagradelivery.pro/# п»їkamagra
tadalafil soft gel Buy tadalafil online tadalafil tablets 20 mg online
augmentin 325 mg
I am truly thankful to the owner of this web site who has shared this fantastic piece of writing at at this place.
azithromycin over the counter usa
propecia pills canada
lisinopril price in canada
This is my first time pay a quick visit at here and i am really happy to read everthing at one place https://www.serezotomasyon.com.tr/
colchicine 500 mg
Greetings, I think your blog could be having internet browser compatibility issues.
Whenever I look at your web site in Safari, it looks fine
however, when opening in Internet Explorer, it’s got some overlapping issues.
I merely wanted to give you a quick heads up!
Aside from that, excellent site!
bactrim ordering
buying sildenafil citrate online sildenafil without a doctor prescription Canada sildenafil otc uk
娛樂城
https://edpillsdelivery.pro/# ed pills that work
augmentin generic pill
http://levitradelivery.pro/# Buy Levitra 20mg online
hydroxychloroquine
buy generic tadalafil online cheap lowest price tadalafil or tadalafil free shipping
https://www.google.co.ls/url?q=https://tadalafildelivery.pro tadalafil tablets 20 mg buy
tadalafil 20 mg buy online cialis tadalafil and tadalafil tablets 20 mg india india pharmacy online tadalafil
https://levitradelivery.pro/# Buy Levitra 20mg online
buy Kamagra cheap kamagra cheap kamagra
Hi my loved one I wish to say that this post is amazing nice written and include approximately all vital infos Id like to peer more posts like this
Buy Vardenafil 20mg Buy generic Levitra online Levitra 20 mg for sale
clonidine 25 mcg
paxlovid price paxlovid buy paxlovid cost without insurance
price of ivermectin tablets
cheap generic levitra online
trazodone hydrochloride 100mg
Сможет ли регулярное техническое обслуживание кондиционера сэкономить вам деньги?
техническое обслуживание кондиционеров окпд2 https://www.tekhnicheskoe-obsluzhivanie-kondicionerov.ru/.
buy viagra online
paxlovid cost without insurance: paxlovid buy – paxlovid for sale
https://prednisone.auction/# prednisone 15 mg tablet
buy viagra online
No matter if some one searches for his essential thing, thus he/she desires to be available that in detail, thus that thing is maintained over here.
budesonide over the counter
propecia over the counter usa
clomid prescription price
penis enlargement
Paxlovid buy online buy paxlovid online paxlovid generic
http://stromectol.guru/# stromectol 3mg tablets
augmentin 325
order amoxicillin online uk: Amoxicillin 500mg buy online – generic amoxicillin over the counter
colchicine uk
accutane price in canada
With havin so much content do you ever run into any issues of
plagorism or copyright violation? My site has
a lot of unique content I’ve either written myself or
outsourced but it looks like a lot of it is popping it up all over the internet without my
authorization. Do you know any ways to help reduce content from being stolen? I’d truly appreciate it.
where can i buy orlistat online
paxlovid covid Paxlovid over the counter or paxlovid price
https://webmail.unige.it/horde/util/go.php?url=https://paxlovid.guru paxlovid cost without insurance
paxlovid for sale Paxlovid over the counter and buy paxlovid online Paxlovid over the counter
generic ivermectin cream ivermectin 9 mg tablet or ivermectin buy australia
https://www.google.td/url?q=https://stromectol.guru ivermectin 4000
cost of stromectol medication stromectol price usa and ivermectin cream 1 ivermectin 5 mg
gabapentin 20 mg
апартаменты на сутки с друзьями
квартира на сутки в минске https://newsutkiminsk.by/.
https://clomid.auction/# can i order generic clomid now
paxlovid india paxlovid price without insurance paxlovid pill
buy paxlovid online paxlovid price without insurance п»їpaxlovid
zoloft pill generic
how can i get retin a cream
cheap zithromax
buy amoxicillin 875
ivermectin oral solution cost of ivermectin cream or stromectol tab price
https://www.google.me/url?q=https://stromectol.guru topical ivermectin cost
ivermectin 200 mcg stromectol xl and ivermectin 3mg tablet cost of stromectol medication
https://amoxil.guru/# medicine amoxicillin 500mg
buy stromectol online
Cytotec 200mcg price buy cytotec over the counter buy cytotec
furosemide 40mg lasix medication lasix 100 mg tablet
Наша бригада опытных исполнителей готова подать вам прогрессивные системы, которые не только предоставят надежную оборону от зимы, но и дарят вашему собственности изысканный вид.
Мы занимаемся с новыми средствами, подтверждая долгий время использования и великолепные результаты. Теплоизоляция фронтонов – это не только сбережение на тепле, но и забота о экологии. Экономичные разработки, какие мы применяем, способствуют не только личному, но и сохранению природных ресурсов.
Самое первоочередное: Стоимость утепления дома снаружи цена у нас составляет всего от 1250 рублей за квадратный метр! Это доступное решение, которое превратит ваш домашний уголок в фактический приятный корнер с небольшими затратами.
Наши произведения – это не исключительно утепление, это образование помещения, в где любой аспект отражает ваш индивидуальный модель. Мы учтем все ваши пожелания, чтобы осуществить ваш дом еще еще больше теплым и привлекательным.
Подробнее на https://ppu-prof.ru
Не откладывайте дела о своем жилище на потом! Обращайтесь к мастерам, и мы сделаем ваш жилище не только теплым, но и стильным. Заинтересовались? Подробнее о наших работах вы можете узнать на сайте компании. Добро пожаловать в пространство уюта и качественного исполнения.
order diflucan online
Very well presented. Every quote was awesome and thanks for sharing the content. Keep sharing and keep motivating others.
There is definately a lot to find out about this subject. I like all the points you made
canadian pharmacy budesonide
http://finasteride.men/# cost cheap propecia for sale
https://misoprostol.shop/# buy cytotec
price for lyrica 75 mg
lasix 100mg Buy Lasix lasix uses
cost cheap propecia without insurance Buy Finasteride 5mg propecia without insurance
https://lisinopril.fun/# lisinopril 5 mg price in india
levitra 20mg tablets The safe use of medications in individuals with mental health conditions requires close monitoring and collaboration among healthcare providers.
baclofen 20 mg online
best price prozac
lasix dosage lasix generic name or lasix online
http://toolbarqueries.google.co.ke/url?sa=i&url=https://furosemide.pro lasix
buy furosemide online lasix 40mg and furosemide 100 mg lasix online
plaquenil in australia
finpecia tablet
buy generic propecia without a prescription cost generic propecia online or buying cheap propecia without prescription
http://birddelacoeur.com.au/?URL=https://finasteride.men:: cost of generic propecia without dr prescription
buy propecia for sale get propecia pills and get propecia no prescription cost propecia for sale
zithromax purchase online zithromax best price generic zithromax azithromycin
http://finasteride.men/# get generic propecia pill
propecia buy
metformin without rx
how to get prozac prescription
http://lisinopril.fun/# lisinopril diuretic
You actually mentioned that terrifically!
https://pinshape.com/users/3079364-firbomb60
tadalafil for sale canadian pharmacy
zithromax 500 Azithromycin 250 buy online where can i get zithromax over the counter
phenergan 30 25 mg
娛樂城
225 mg wellbutrin
http://furosemide.pro/# lasix 100mg
Eylül Online
retin a for sale online
Niğde Haberleri tarafsız haber yayıncılığı anlayışıyla doğru ve güvenilir bilgilere ulaşmanızı sağlar. Niğde Anadolu Haber yıllardır Niğde ve çevresinde güvenilir haberleri sunma konusundaki kararlılığıyla bilinir. Niğde Vefat Edenler, Niğde Nöbetçi Eczane,Niğde Haber,Niğde İş İlanları,niğde anadolu gazetesi,anadolu gazetesi niğde,niğde olay,niğde gündem,niğde haber,niğde anadolu haberNiğde Anadolu Haber, Niğde haber, Niğde haberleri, Niğde son dakika, Niğde gündem, Niğde olay
http://lisinopril.fun/# medication lisinopril 10 mg
cost generic propecia tablets buy propecia without a prescription or buying generic propecia without dr prescription
https://maps.google.pn/url?q=https://finasteride.men buy cheap propecia without a prescription
propecia tablet propecia prices and generic propecia without prescription buying propecia without rx
Sahabet giriş konusu, çevrimiçi bahis dünyasında önemli bir konudur. Sahabet Güncel Giriş
finasteride online pharmacy india
lasix 40mg furosemida 40 mg or generic lasix
https://cse.google.com.ng/url?sa=i&url=https://furosemide.pro lasix medication
furosemide 40 mg lasix furosemide 40 mg and lasix generic furosemide 100 mg
I appreciate you sharing this blog post. Thanks Again. Cool.
order cytotec online buy cytotec online buy cytotec pills online cheap
clonidine anxiety
where can i buy dapoxetine
https://tadalafilitalia.pro/# acquisto farmaci con ricetta
retin a discount coupon
buy clomid uk
toradol for fever
comprare farmaci online all’estero avanafil acquistare farmaci senza ricetta
viagra online spedizione gratuita viagra senza ricetta le migliori pillole per l’erezione
farmacia online piГ№ conveniente: kamagra gel – comprare farmaci online all’estero
http://tadalafilitalia.pro/# farmacia online miglior prezzo
propecia pharmacy cost
Yazınız için teşekkürler. Bu bilgiler ışığında nice insanlar bilgilenmiş olacaktır.
augmentin 500 coupon
dapoxetine india online
viagra naturale in farmacia senza ricetta alternativa al viagra senza ricetta in farmacia п»їviagra prezzo farmacia 2023
farmacie online autorizzate elenco: Farmacie che vendono Cialis senza ricetta – farmacia online piГ№ conveniente
farmacie online affidabili farmaci senza ricetta elenco or comprare farmaci online all’estero
http://aa-quebec.org/AA_Quebec/Templates/asp/rediriger-c.asp?nouveauurl=https://farmaciaitalia.store/ comprare farmaci online all’estero
farmacia online piГ№ conveniente acquisto farmaci con ricetta and п»їfarmacia online migliore farmacia online migliore
п»їfarmacia online migliore: cialis generico – comprare farmaci online con ricetta
Find the Leading Crypto Swap Exchanges to Seamless Trading
Upgrade Your Crypto Trading with these Cutting-Edge Swap Exchanges
Safely Trade Cryptocurrency with these Reputable Swap Exchanges
Maximize Your Crypto Portfolio with these Streamlined Swap Exchanges
Swap Cryptocurrencies with no using these Convenient Platforms
Step into the World of Cryptocurrency Trading with these Best-Rated Swap Exchanges
Swap Cryptocurrencies with these Speedy Swap Platforms
Increase Your Crypto Holdings with these Versatile Swap Exchanges
Exchange Cryptocurrencies with these User-Friendly Platforms
Diversify Your Crypto Holdings with these Diverse Swap Exchanges
Enhance Your Crypto Trading Strategy with these Cutting-Edge Swap Platforms
Swap Cryptocurrencies with these Protected and Regulated Swap Exchanges
Simplify Crypto Trading with these Convenient Swap Exchanges
Find the Best Crypto Swap Exchanges for Boost Your Crypto Trading Experience with these Well-Reviewed Swap Exchanges
Smoothly Cryptocurrencies with these Cutting-Edge Platforms
Confidently Trade Cryptocurrencies with these Protected Swap Exchanges
Uncover the Best Crypto Swap Exchanges for Real-Time Transactions
Exchange in Cryptocurrency with these Trusted Swap Exchanges with Rates
Maximize Your Crypto Trading with these Next-Generation Swap Platforms
pancakeswap crypto https://cryptoswapinstantly.com/.
This is really interesting, You’re a very skilled blogger. I’ve joined your feed and look forward to seeking more of your magnificent post. Also, I’ve shared your site in my social networks!
clonidine price
https://tadalafilitalia.pro/# acquistare farmaci senza ricetta
suhagra 100 online
farmaci senza ricetta elenco avanafil prezzo in farmacia acquistare farmaci senza ricetta
farmacie on line spedizione gratuita avanafil generico farmacia online piГ№ conveniente
There is definately a lot to find out about this subject. I like all the points you made
It’s really a great and useful piece of information. I’m satisfied
that you shared this useful information with us.
Please keep us informed like this. Thanks for sharing.
viagra originale in 24 ore contrassegno pillole per erezione immediata or viagra 50 mg prezzo in farmacia
https://images.google.rw/url?q=https://sildenafilitalia.men farmacia senza ricetta recensioni
cialis farmacia senza ricetta viagra subito and viagra generico recensioni kamagra senza ricetta in farmacia
farmacie on line spedizione gratuita: avanafil spedra – farmacia online miglior prezzo
2024娛樂城
2024娛樂城的創新趨勢
隨著2024年的到來,娛樂城業界正經歷著一場革命性的變遷。這一年,娛樂城不僅僅是賭博和娛樂的代名詞,更成為了科技創新和用戶體驗的集大成者。
首先,2024年的娛樂城極大地融合了最新的技術。增強現實(AR)和虛擬現實(VR)技術的引入,為玩家提供了沉浸式的賭博體驗。這種全新的遊戲方式不僅帶來視覺上的震撼,還為玩家創造了一種置身於真實賭場的感覺,而實際上他們可能只是坐在家中的沙發上。
其次,人工智能(AI)在娛樂城中的應用也達到了新高度。AI技術不僅用於增強遊戲的公平性和透明度,還在個性化玩家體驗方面發揮著重要作用。從個性化遊戲推薦到智能客服,AI的應用使得娛樂城更能滿足玩家的個別需求。
此外,線上娛樂城的安全性和隱私保護也獲得了顯著加強。隨著技術的進步,更加先進的加密技術和安全措施被用來保護玩家的資料和交易,從而確保一個安全可靠的遊戲環境。
2024年的娛樂城還強調負責任的賭博。許多平台採用了各種工具和資源來幫助玩家控制他們的賭博行為,如設置賭注限制、自我排除措施等,體現了對可持續賭博的承諾。
總之,2024年的娛樂城呈現出一個高度融合了技術、安全和負責任賭博的行業新面貌,為玩家提供了前所未有的娛樂體驗。隨著這些趨勢的持續發展,我們可以預見,娛樂城將不斷地創新和進步,為玩家帶來更多精彩和安全的娛樂選擇。
canada otc albuterol
my canadian pharmacy review: online canadian pharmacy review – www canadianonlinepharmacy
Online medicine home delivery top 10 online pharmacy in india reputable indian online pharmacy
where to buy accutane online uk
mexico drug stores pharmacies: pharmacies in mexico that ship to usa – mexico drug stores pharmacies
Online poker
Alѕߋ vissit my web blog … سفارش بک لینک, https://tinylink.in/poweredbylilurl5262,
online pharmacy india: top online pharmacy india – india online pharmacy
levitra sales
vipps canadian pharmacy cross border pharmacy canada canadian pharmacy online
I don’t know if it’s just me or if perhaps everyone else experiencing problems with your blog.
It appears as if some of the text in your posts are running off the screen. Can someone else please provide feedback and
let me know if this is happening to them as well? This might be a problem with my browser because I’ve had this happen before.
Thank you
mexico pharmacies prescription drugs: mexican online pharmacies prescription drugs – mexican drugstore online
canadianpharmacyworld com canadian pharmacy canadian online drugstore
order fildena online
vantaihoaituong.com
지금 이 순간, 나는 울어야 할지 웃어야 할지, 기뻐해야 할지 슬퍼해야 할지 모르겠다.
https://sites.google.com/view/slotsfreetrial/
indian pharmacies safe: india pharmacy – cheapest online pharmacy india
atarax 10mg price
buy phenergan tablets
canadian pharmacy meds my canadian pharmacy or canadianpharmacymeds com
https://www.google.ms/url?sa=t&url=https://canadapharm.shop my canadian pharmacy
canadian pharmacy victoza canadian pharmacy meds and drugs from canada safe canadian pharmacies
best india pharmacy indian pharmacy or indian pharmacy paypal
https://www.danielco.net/?URL=indiapharm.life:: buy medicines online in india
india pharmacy mail order india pharmacy mail order and indian pharmacies safe world pharmacy india
tretinoin 0.1 online
pharmacy canadian superstore: best canadian pharmacy online – best online canadian pharmacy
canada drugstore pharmacy rx real canadian pharmacy online canadian pharmacy
For the reason that the admin of this site is working, no uncertainty very quickly it will be renowned, due to its quality contents.
mexican drugstore online pharmacies in mexico that ship to usa buying from online mexican pharmacy
娛樂城
2024娛樂城的創新趨勢
隨著2024年的到來,娛樂城業界正經歷著一場革命性的變遷。這一年,娛樂城不僅僅是賭博和娛樂的代名詞,更成為了科技創新和用戶體驗的集大成者。
首先,2024年的娛樂城極大地融合了最新的技術。增強現實(AR)和虛擬現實(VR)技術的引入,為玩家提供了沉浸式的賭博體驗。這種全新的遊戲方式不僅帶來視覺上的震撼,還為玩家創造了一種置身於真實賭場的感覺,而實際上他們可能只是坐在家中的沙發上。
其次,人工智能(AI)在娛樂城中的應用也達到了新高度。AI技術不僅用於增強遊戲的公平性和透明度,還在個性化玩家體驗方面發揮著重要作用。從個性化遊戲推薦到智能客服,AI的應用使得娛樂城更能滿足玩家的個別需求。
此外,線上娛樂城的安全性和隱私保護也獲得了顯著加強。隨著技術的進步,更加先進的加密技術和安全措施被用來保護玩家的資料和交易,從而確保一個安全可靠的遊戲環境。
2024年的娛樂城還強調負責任的賭博。許多平台採用了各種工具和資源來幫助玩家控制他們的賭博行為,如設置賭注限制、自我排除措施等,體現了對可持續賭博的承諾。
總之,2024年的娛樂城呈現出一個高度融合了技術、安全和負責任賭博的行業新面貌,為玩家提供了前所未有的娛樂體驗。隨著這些趨勢的持續發展,我們可以預見,娛樂城將不斷地創新和進步,為玩家帶來更多精彩和安全的娛樂選擇。
vermox pharmacy uk
buying from online mexican pharmacy: mexican pharmacy – mexico pharmacies prescription drugs
canadian pharmacy india: legit canadian pharmacy – canadian pharmacy online ship to usa
canada online pharmacy best canadian online pharmacy or legitimate canadian online pharmacies
http://mchsrd.ru/versionPrint/99?model=MSections&url=http://canadapharm.shop/ canadian pharmacy 1 internet online drugstore
legit canadian pharmacy buying from canadian pharmacies and canadian mail order pharmacy canadian pharmacy king
maseraticlubuae.com
Hongzhi 황제는 Fengtian Hall에 홀로 앉아 기념관을 반복해서 읽었습니다.
https://holyshirtsandpants.net/
I just like the helpful information you provide in your articles
2024娛樂城的創新趨勢
隨著2024年的到來,娛樂城業界正經歷著一場革命性的變遷。這一年,娛樂城不僅僅是賭博和娛樂的代名詞,更成為了科技創新和用戶體驗的集大成者。
首先,2024年的娛樂城極大地融合了最新的技術。增強現實(AR)和虛擬現實(VR)技術的引入,為玩家提供了沉浸式的賭博體驗。這種全新的遊戲方式不僅帶來視覺上的震撼,還為玩家創造了一種置身於真實賭場的感覺,而實際上他們可能只是坐在家中的沙發上。
其次,人工智能(AI)在娛樂城中的應用也達到了新高度。AI技術不僅用於增強遊戲的公平性和透明度,還在個性化玩家體驗方面發揮著重要作用。從個性化遊戲推薦到智能客服,AI的應用使得娛樂城更能滿足玩家的個別需求。
此外,線上娛樂城的安全性和隱私保護也獲得了顯著加強。隨著技術的進步,更加先進的加密技術和安全措施被用來保護玩家的資料和交易,從而確保一個安全可靠的遊戲環境。
2024年的娛樂城還強調負責任的賭博。許多平台採用了各種工具和資源來幫助玩家控制他們的賭博行為,如設置賭注限制、自我排除措施等,體現了對可持續賭博的承諾。
總之,2024年的娛樂城呈現出一個高度融合了技術、安全和負責任賭博的行業新面貌,為玩家提供了前所未有的娛樂體驗。隨著這些趨勢的持續發展,我們可以預見,娛樂城將不斷地創新和進步,為玩家帶來更多精彩和安全的娛樂選擇。
Здесь можно найти самый удобный crypto swap app
Выполни обмен криптовалют быстрым с этим crypto swap app
Не теряй с этим удобным crypto swap app
Этот crypto swap app легко освоить даже новичку
Обменивай криптовалюты мгновенно с помощью этого crypto swap app
Познакомься с современным способом обмена криптовалют с этим crypto swap app
Откажись от неудобных обменников и используй этот crypto swap app
Легкий обмен криптовалют с этим crypto swap app
Забудь осложненные процедуры обмена с этим удобным crypto swap app
Сэкономь свои финансовые операции с этим crypto swap app
Не теряй время с этим быстрым crypto swap app
Перемещай криптовалюты с легкостью благодаря этому crypto swap app
Наслаждайся простым и удобным crypto swap app
Заработай больше с помощью этого эффективного crypto swap app
Попробуй новый способ обмена криптовалют с этим crypto swap app
Защити свои финансы с этим надежным crypto swap app
Обменивай криптовалюты без лишней головной боли с этим crypto swap app
Узнай с новым инструментом обмена криптовалют с этим crypto swap app
Используй новейшими технологиями с этим crypto swap app
Порадуй своих друзей с этим удобным crypto swap app
best crypto swap platform https://cryptoswapdefidapp.com/.
pharmacies in mexico that ship to usa mexico drug stores pharmacies reputable mexican pharmacies online
india pharmacy cheapest online pharmacy india pharmacy website india
sitenizi takip ediyorum makaleler Faydalı bilgiler için teşekkürler
phenergan over the counter
baclofen 20
3a娛樂城
3a娛樂城
I really like reading through a post that can make men and women think. Also, thank you for allowing me to comment!
Bilgiler için teşekkür ederim işime son derece yaradı
canadian online pharmacy reviews best canadian pharmacy to buy from or reputable canadian online pharmacy
https://cse.google.nu/url?sa=t&url=https://canadapharm.shop canadian drug
canadian pharmacy ltd canadian pharmacy antibiotics and canadian pharmacy ed medications pharmacy in canada
buy zithromax 1000 mg online: zithromax antibiotic – where can i purchase zithromax online
https://prednisonepharm.store/# prednisone online for sale
cytotec abortion pill: buy cytotec over the counter – buy cytotec online
https://clomidpharm.shop/# where can i get cheap clomid without a prescription
Hello, I would like to subscribe for this web site to
get hottest updates, therefore where can i do it please assist.
They handle all the insurance paperwork seamlessly http://prednisonepharm.store/# prednisone 80 mg daily
I like the efforts you have put in this, regards for all the great content.
Premium car for rent Dubai
Dubai, a city of grandeur and innovation, demands a transportation solution that matches its dynamic pace. Whether you’re a business executive, a tourist exploring the city, or someone in need of a reliable vehicle temporarily, car rental services in Dubai offer a flexible and cost-effective solution. In this guide, we’ll explore the popular car rental options in Dubai, catering to diverse needs and preferences.
Airport Car Rental: One-Way Pickup and Drop-off Road Trip Rentals:
For those who need to meet an important delegation at the airport or have a flight to another city, airport car rentals provide a seamless solution. Avoid the hassle of relying on public transport and ensure you reach your destination on time. With one-way pickup and drop-off options, you can effortlessly navigate your road trip, making business meetings or conferences immediately upon arrival.
Business Car Rental Deals & Corporate Vehicle Rentals in Dubai:
Companies without their own fleet or those finding transport maintenance too expensive can benefit from business car rental deals. This option is particularly suitable for businesses where a vehicle is needed only occasionally. By opting for corporate vehicle rentals, companies can optimize their staff structure, freeing employees from non-core functions while ensuring reliable transportation when necessary.
Tourist Car Rentals with Insurance in Dubai:
Tourists visiting Dubai can enjoy the freedom of exploring the city at their own pace with car rentals that come with insurance. This option allows travelers to choose a vehicle that suits the particulars of their trip without the hassle of dealing with insurance policies. Renting a car not only saves money and time compared to expensive city taxis but also ensures a trouble-free travel experience.
Daily Car Hire Near Me:
Daily car rental services are a convenient and cost-effective alternative to taxis in Dubai. Whether it’s for a business meeting, everyday use, or a luxury experience, you can find a suitable vehicle for a day on platforms like Smarketdrive.com. The website provides a secure and quick way to rent a car from certified and verified car rental companies, ensuring guarantees and safety.
Weekly Auto Rental Deals:
For those looking for flexibility throughout the week, weekly car rentals in Dubai offer a competent, attentive, and professional service. Whether you need a vehicle for a few days or an entire week, choosing a car rental weekly is a convenient and profitable option. The certified and tested car rental companies listed on Smarketdrive.com ensure a reliable and comfortable experience.
Monthly Car Rentals in Dubai:
When your personal car is undergoing extended repairs, or if you’re a frequent visitor to Dubai, monthly car rentals (long-term car rentals) become the ideal solution. Residents, businessmen, and tourists can benefit from the extensive options available on Smarketdrive.com, ensuring mobility and convenience throughout their stay in Dubai.
FAQ about Renting a Car in Dubai:
To address common queries about renting a car in Dubai, our FAQ section provides valuable insights and information. From rental terms to insurance coverage, it serves as a comprehensive guide for those considering the convenience of car rentals in the bustling city.
Conclusion:
Dubai’s popularity as a global destination is matched by its diverse and convenient car rental services. Whether for business, tourism, or daily commuting, the options available cater to every need. With reliable platforms like Smarketdrive.com, navigating Dubai becomes a seamless and enjoyable experience, offering both locals and visitors the ultimate freedom of mobility.
cytotec online: buy cytotec pills – cytotec buy online usa
http://nolvadex.pro/# tamoxifen and uterine thickening
I blog frequently and I truly thank you for your information. This article has really peaked my interest.
I’m going to book mark your blog and keep checking for new details
about once per week. I subscribed to your Feed as well.
Wow, marvelous blog layout! How long have you been blogging for?
you make blogging look easy. The overall look of your web site is excellent,
as well as the content!
lisinopril price
get generic clomid tablets: how to buy cheap clomid price – cost cheap clomid without prescription
http://zithromaxpharm.online/# buy azithromycin zithromax
does tamoxifen cause menopause: tamoxifen alternatives – tamoxifen for men
https://prednisonepharm.store/# prednisone generic cost
tamoxifen 20 mg tablet: nolvadex for pct – alternatives to tamoxifen
Attractive section of content. I just stumbled upon your blog and in accession capital to assert that I get in fact
enjoyed account your blog posts. Anyway I will be subscribing to your augment and even I achievement you access consistently fast.
Sennheiser microphones, renowned for their exceptional audio quality and reliability, are coveted by
musicians and professionals worldwide.
can i order cheap clomid for sale: rx clomid – can you get clomid now
tamoxifen 20 mg tamoxifen vs clomid or tamoxifen joint pain
http://sanopedia.es/api.php?action=https://nolvadex.pro tamoxifen and osteoporosis
tamoxifen rash tamoxifen and weight loss and where to buy nolvadex tamoxifen skin changes
allopurinol uk prescription
http://nolvadex.pro/# tamoxifen breast cancer prevention
娛樂城
2024娛樂城的創新趨勢
隨著2024年的到來,娛樂城業界正經歷著一場革命性的變遷。這一年,娛樂城不僅僅是賭博和娛樂的代名詞,更成為了科技創新和用戶體驗的集大成者。
首先,2024年的娛樂城極大地融合了最新的技術。增強現實(AR)和虛擬現實(VR)技術的引入,為玩家提供了沉浸式的賭博體驗。這種全新的遊戲方式不僅帶來視覺上的震撼,還為玩家創造了一種置身於真實賭場的感覺,而實際上他們可能只是坐在家中的沙發上。
其次,人工智能(AI)在娛樂城中的應用也達到了新高度。AI技術不僅用於增強遊戲的公平性和透明度,還在個性化玩家體驗方面發揮著重要作用。從個性化遊戲推薦到智能客服,AI的應用使得娛樂城更能滿足玩家的個別需求。
此外,線上娛樂城的安全性和隱私保護也獲得了顯著加強。隨著技術的進步,更加先進的加密技術和安全措施被用來保護玩家的資料和交易,從而確保一個安全可靠的遊戲環境。
2024年的娛樂城還強調負責任的賭博。許多平台採用了各種工具和資源來幫助玩家控制他們的賭博行為,如設置賭注限制、自我排除措施等,體現了對可持續賭博的承諾。
總之,2024年的娛樂城呈現出一個高度融合了技術、安全和負責任賭博的行業新面貌,為玩家提供了前所未有的娛樂體驗。隨著這些趨勢的持續發展,我們可以預見,娛樂城將不斷地創新和進步,為玩家帶來更多精彩和安全的娛樂選擇。
how to buy generic clomid: can you get clomid without dr prescription – can you buy cheap clomid without rx
can i order cheap clomid without rx: buy clomid without prescription – buying clomid pills
3a娛樂城
buy misoprostol over the counter: buy cytotec pills online cheap – buy cytotec online
http://cytotec.directory/# Abortion pills online
tamoxifen and grapefruit: tamoxifen hair loss – should i take tamoxifen
Dubai, a city known for its opulence and modernity, demands a mode of transportation that reflects its grandeur. For those seeking a cost-effective and reliable long-term solution, Somonion Rent Car LLC emerges as the premier choice for monthly car rentals in Dubai. With a diverse fleet ranging from compact cars to premium vehicles, the company promises an unmatched blend of affordability, flexibility, and personalized service.
Favorable Rental Conditions:
Understanding the potential financial strain of long-term car rentals, Somonion Rent Car LLC aims to make your journey more economical. The company offers flexible rental terms coupled with exclusive discounts for loyal customers. This commitment to affordability extends beyond the rental cost, as additional services such as insurance, maintenance, and repair ensure your safety and peace of mind throughout the duration of your rental.
A Plethora of Options:
Somonion Rent Car LLC boasts an extensive selection of vehicles to cater to diverse preferences and budgets. Whether you’re in the market for a sleek sedan or a spacious crossover, the company has the perfect car to complement your needs. The transparency in pricing, coupled with the ease of booking through their online platform, makes Somonion Rent Car LLC a hassle-free solution for those embarking on a long-term adventure in Dubai.
Car Rental Services Tailored for You:
Somonion Rent Car LLC doesn’t just offer cars; it provides a comprehensive range of rental services tailored to suit various occasions. From daily and weekly rentals to airport transfers and business travel, the company ensures that your stay in Dubai is not only comfortable but also exudes prestige. The fleet includes popular models such as the Nissan Altima 2018, KIA Forte 2018, Hyundai Elantra 2018, and the Toyota Camry Sport Edition 2020, all available for monthly rentals at competitive rates.
Featured Deals and Specials:
Somonion Rent Car LLC constantly updates its offerings to provide customers with the best deals. Featured cars like the Hyundai Sonata 2018 and Hyundai Santa Fe 2018 add a touch of luxury to your rental experience, with daily rates starting as low as AED 100. The company’s commitment to affordable luxury is further emphasized by the online booking system, allowing customers to secure the best deals in real-time through their website or by contacting the experts via phone or WhatsApp.
Conclusion:
Whether you’re a tourist looking to explore Dubai at your pace or a business traveler in need of a reliable and prestigious mode of transportation, Somonion Rent Car LLC stands as the go-to choice for monthly car rentals in Dubai. Unlock the ultimate mobility experience with Somonion, where affordability meets excellence, ensuring your journey through Dubai is as seamless and luxurious as the city itself. Contact Somonion Rent Car LLC today and embark on a journey where every mile is a testament to comfort, style, and unmatched service.
http://cytotec.directory/# cytotec abortion pill
http://clomidpharm.shop/# can i order cheap clomid no prescription
buy zithromax online fast shipping: zithromax online no prescription – zithromax z-pak
stromectol ivermectin 3 mg
https://reputablepharmacies.online/# canada pharmacy online
http://reputablepharmacies.online/# canadian pharmacy cialis cheap
http://edwithoutdoctorprescription.store/# non prescription ed drugs
https://reputablepharmacies.online/# best online canadian pharcharmy
http://reputablepharmacies.online/# true canadian pharmacy
Merhabalar Eskişehir’de Escort arkadaş arayanlar için Eskisehir Escort sitesi hizmet vermektedir.
generic viagra without a doctor prescription: online prescription for ed meds – non prescription ed drugs
I will right away grasp your rss feed as I can not to find your e-mail subscription hyperlink or
e-newsletter service. Do you’ve any? Kindly let me realize in order that
I could subscribe. Thanks.
doxycycline in usa
Merely wanna tewll tһat tjis іs veery helpful, Τhanks for taking your
tіme to write thiѕ.
Ꮋere is mʏ webpage: salmon ladder fish (Roma)
Watches World: Elevating Luxury and Style with Exquisite Timepieces
Introduction:
Jewelry has always been a timeless expression of elegance, and nothing complements one’s style better than a luxurious timepiece. At Watches World, we bring you an exclusive collection of coveted luxury watches that not only tell time but also serve as a testament to your refined taste. Explore our curated selection featuring iconic brands like Rolex, Hublot, Omega, Cartier, and more, as we redefine the art of accessorizing.
A Dazzling Array of Luxury Watches:
Watches World offers an unparalleled range of exquisite timepieces from renowned brands, ensuring that you find the perfect accessory to elevate your style. Whether you’re drawn to the classic sophistication of Rolex, the avant-garde designs of Hublot, or the precision engineering of Patek Philippe, our collection caters to diverse preferences.
Customer Testimonials:
Our commitment to providing an exceptional customer experience is reflected in the reviews from our satisfied clientele. O.M. commends our excellent communication and flawless packaging, while Richard Houtman appreciates the helpfulness and courtesy of our team. These testimonials highlight our dedication to transparency, communication, and customer satisfaction.
New Arrivals:
Stay ahead of the curve with our latest additions, including the Tudor Black Bay Ceramic 41mm, Richard Mille RM35-01 Rafael Nadal NTPT Carbon Limited Edition, and the Rolex Oyster Perpetual Datejust 41mm series. These new arrivals showcase cutting-edge designs and impeccable craftsmanship, ensuring you stay on the forefront of luxury watch fashion.
Best Sellers:
Discover our best-selling watches, such as the Bulgari Serpenti Tubogas 35mm and the Cartier Panthere Medium Model. These timeless pieces combine elegance with precision, making them a staple in any sophisticated wardrobe.
Expert’s Selection:
Our experts have carefully curated a selection of watches, including the Cartier Panthere Small Model, Omega Speedmaster Moonwatch 44.25 mm, and Rolex Oyster Perpetual Cosmograph Daytona 40mm. These choices exemplify the epitome of watchmaking excellence and style.
Secured and Tracked Delivery:
At Watches World, we prioritize the safety of your purchase. Our secured and tracked delivery ensures that your exquisite timepiece reaches you in perfect condition, giving you peace of mind with every order.
Passionate Experts at Your Service:
Our team of passionate watch experts is dedicated to providing personalized service. From assisting you in choosing the perfect timepiece to addressing any inquiries, we are here to make your watch-buying experience seamless and enjoyable.
Global Presence:
With a presence in key cities around the world, including Dubai, Geneva, Hong Kong, London, Miami, Paris, Prague, Dublin, Singapore, and Sao Paulo, Watches World brings luxury timepieces to enthusiasts globally.
Conclusion:
Watches World goes beyond being an online platform for luxury watches; it is a destination where expertise, trust, and satisfaction converge. Explore our collection, and let our timeless timepieces become an integral part of your style narrative. Join us in redefining luxury, one exquisite watch at a time.
Car hire long term dubai
Dubai, a city of grandeur and innovation, demands a transportation solution that matches its dynamic pace. Whether you’re a business executive, a tourist exploring the city, or someone in need of a reliable vehicle temporarily, car rental services in Dubai offer a flexible and cost-effective solution. In this guide, we’ll explore the popular car rental options in Dubai, catering to diverse needs and preferences.
Airport Car Rental: One-Way Pickup and Drop-off Road Trip Rentals:
For those who need to meet an important delegation at the airport or have a flight to another city, airport car rentals provide a seamless solution. Avoid the hassle of relying on public transport and ensure you reach your destination on time. With one-way pickup and drop-off options, you can effortlessly navigate your road trip, making business meetings or conferences immediately upon arrival.
Business Car Rental Deals & Corporate Vehicle Rentals in Dubai:
Companies without their own fleet or those finding transport maintenance too expensive can benefit from business car rental deals. This option is particularly suitable for businesses where a vehicle is needed only occasionally. By opting for corporate vehicle rentals, companies can optimize their staff structure, freeing employees from non-core functions while ensuring reliable transportation when necessary.
Tourist Car Rentals with Insurance in Dubai:
Tourists visiting Dubai can enjoy the freedom of exploring the city at their own pace with car rentals that come with insurance. This option allows travelers to choose a vehicle that suits the particulars of their trip without the hassle of dealing with insurance policies. Renting a car not only saves money and time compared to expensive city taxis but also ensures a trouble-free travel experience.
Daily Car Hire Near Me:
Daily car rental services are a convenient and cost-effective alternative to taxis in Dubai. Whether it’s for a business meeting, everyday use, or a luxury experience, you can find a suitable vehicle for a day on platforms like Smarketdrive.com. The website provides a secure and quick way to rent a car from certified and verified car rental companies, ensuring guarantees and safety.
Weekly Auto Rental Deals:
For those looking for flexibility throughout the week, weekly car rentals in Dubai offer a competent, attentive, and professional service. Whether you need a vehicle for a few days or an entire week, choosing a car rental weekly is a convenient and profitable option. The certified and tested car rental companies listed on Smarketdrive.com ensure a reliable and comfortable experience.
Monthly Car Rentals in Dubai:
When your personal car is undergoing extended repairs, or if you’re a frequent visitor to Dubai, monthly car rentals (long-term car rentals) become the ideal solution. Residents, businessmen, and tourists can benefit from the extensive options available on Smarketdrive.com, ensuring mobility and convenience throughout their stay in Dubai.
FAQ about Renting a Car in Dubai:
To address common queries about renting a car in Dubai, our FAQ section provides valuable insights and information. From rental terms to insurance coverage, it serves as a comprehensive guide for those considering the convenience of car rentals in the bustling city.
Conclusion:
Dubai’s popularity as a global destination is matched by its diverse and convenient car rental services. Whether for business, tourism, or daily commuting, the options available cater to every need. With reliable platforms like Smarketdrive.com, navigating Dubai becomes a seamless and enjoyable experience, offering both locals and visitors the ultimate freedom of mobility.
where to buy viagra in singapore
Watches World
Watches World: Elevating Luxury and Style with Exquisite Timepieces
Introduction:
Jewelry has always been a timeless expression of elegance, and nothing complements one’s style better than a luxurious timepiece. At Watches World, we bring you an exclusive collection of coveted luxury watches that not only tell time but also serve as a testament to your refined taste. Explore our curated selection featuring iconic brands like Rolex, Hublot, Omega, Cartier, and more, as we redefine the art of accessorizing.
A Dazzling Array of Luxury Watches:
Watches World offers an unparalleled range of exquisite timepieces from renowned brands, ensuring that you find the perfect accessory to elevate your style. Whether you’re drawn to the classic sophistication of Rolex, the avant-garde designs of Hublot, or the precision engineering of Patek Philippe, our collection caters to diverse preferences.
Customer Testimonials:
Our commitment to providing an exceptional customer experience is reflected in the reviews from our satisfied clientele. O.M. commends our excellent communication and flawless packaging, while Richard Houtman appreciates the helpfulness and courtesy of our team. These testimonials highlight our dedication to transparency, communication, and customer satisfaction.
New Arrivals:
Stay ahead of the curve with our latest additions, including the Tudor Black Bay Ceramic 41mm, Richard Mille RM35-01 Rafael Nadal NTPT Carbon Limited Edition, and the Rolex Oyster Perpetual Datejust 41mm series. These new arrivals showcase cutting-edge designs and impeccable craftsmanship, ensuring you stay on the forefront of luxury watch fashion.
Best Sellers:
Discover our best-selling watches, such as the Bulgari Serpenti Tubogas 35mm and the Cartier Panthere Medium Model. These timeless pieces combine elegance with precision, making them a staple in any sophisticated wardrobe.
Expert’s Selection:
Our experts have carefully curated a selection of watches, including the Cartier Panthere Small Model, Omega Speedmaster Moonwatch 44.25 mm, and Rolex Oyster Perpetual Cosmograph Daytona 40mm. These choices exemplify the epitome of watchmaking excellence and style.
Secured and Tracked Delivery:
At Watches World, we prioritize the safety of your purchase. Our secured and tracked delivery ensures that your exquisite timepiece reaches you in perfect condition, giving you peace of mind with every order.
Passionate Experts at Your Service:
Our team of passionate watch experts is dedicated to providing personalized service. From assisting you in choosing the perfect timepiece to addressing any inquiries, we are here to make your watch-buying experience seamless and enjoyable.
Global Presence:
With a presence in key cities around the world, including Dubai, Geneva, Hong Kong, London, Miami, Paris, Prague, Dublin, Singapore, and Sao Paulo, Watches World brings luxury timepieces to enthusiasts globally.
Conclusion:
Watches World goes beyond being an online platform for luxury watches; it is a destination where expertise, trust, and satisfaction converge. Explore our collection, and let our timeless timepieces become an integral part of your style narrative. Join us in redefining luxury, one exquisite watch at a time.
Dubai, a city known for its opulence and modernity, demands a mode of transportation that reflects its grandeur. For those seeking a cost-effective and reliable long-term solution, Somonion Rent Car LLC emerges as the premier choice for monthly car rentals in Dubai. With a diverse fleet ranging from compact cars to premium vehicles, the company promises an unmatched blend of affordability, flexibility, and personalized service.
Favorable Rental Conditions:
Understanding the potential financial strain of long-term car rentals, Somonion Rent Car LLC aims to make your journey more economical. The company offers flexible rental terms coupled with exclusive discounts for loyal customers. This commitment to affordability extends beyond the rental cost, as additional services such as insurance, maintenance, and repair ensure your safety and peace of mind throughout the duration of your rental.
A Plethora of Options:
Somonion Rent Car LLC boasts an extensive selection of vehicles to cater to diverse preferences and budgets. Whether you’re in the market for a sleek sedan or a spacious crossover, the company has the perfect car to complement your needs. The transparency in pricing, coupled with the ease of booking through their online platform, makes Somonion Rent Car LLC a hassle-free solution for those embarking on a long-term adventure in Dubai.
Car Rental Services Tailored for You:
Somonion Rent Car LLC doesn’t just offer cars; it provides a comprehensive range of rental services tailored to suit various occasions. From daily and weekly rentals to airport transfers and business travel, the company ensures that your stay in Dubai is not only comfortable but also exudes prestige. The fleet includes popular models such as the Nissan Altima 2018, KIA Forte 2018, Hyundai Elantra 2018, and the Toyota Camry Sport Edition 2020, all available for monthly rentals at competitive rates.
Featured Deals and Specials:
Somonion Rent Car LLC constantly updates its offerings to provide customers with the best deals. Featured cars like the Hyundai Sonata 2018 and Hyundai Santa Fe 2018 add a touch of luxury to your rental experience, with daily rates starting as low as AED 100. The company’s commitment to affordable luxury is further emphasized by the online booking system, allowing customers to secure the best deals in real-time through their website or by contacting the experts via phone or WhatsApp.
Conclusion:
Whether you’re a tourist looking to explore Dubai at your pace or a business traveler in need of a reliable and prestigious mode of transportation, Somonion Rent Car LLC stands as the go-to choice for monthly car rentals in Dubai. Unlock the ultimate mobility experience with Somonion, where affordability meets excellence, ensuring your journey through Dubai is as seamless and luxurious as the city itself. Contact Somonion Rent Car LLC today and embark on a journey where every mile is a testament to comfort, style, and unmatched service.
ed meds online without doctor prescription: buy prescription drugs online legally – prescription drugs without doctor approval
http://edwithoutdoctorprescription.store/# buy prescription drugs online
buy neurontin 100 mg
vermox purchase
Watch porn videos
https://edwithoutdoctorprescription.store/# cialis without doctor prescription
https://edwithoutdoctorprescription.store/# buy cheap prescription drugs online
세계 시장에 다양한 테마의 슬롯을 제공하는 250개 이상의 게임으로 구성된 프라그마틱 플레이의 슬롯 포트폴리오를 즐겨보세요.
프라그마틱 플레이
프라그마틱의 게임은 정말 다양한데, 어떤 테마의 게임을 가장 좋아하나요? 나눠주세요!
https://www.vamiveta.com/
https://s9winmy.com/
http://www.iavstudios.com/
This will help the player track the game play, with the largest
asteroid being virtually invisible.
Have you ever thought about publishing an e-book or guest authoring on other sites? I have a blog based upon on the same ideas you discuss and would really like to have you share some stories/information. I know my subscribers would value your work. If you are even remotely interested, feel free to send me an e-mail.
https://edwithoutdoctorprescription.store/# buy prescription drugs online legally
https://edpills.bid/# herbal ed treatment
viagra without a doctor prescription walmart: prescription drugs – non prescription ed pills
The rich, velvety black coat of the French Bulldog adds an element of sleekness and sophistication to
their appearance.
colchicine for sale in usa
If you are going for best contents like I do, only pay a visit this site all the time as it provides feature contents, thanks
купить кондиционер недорого в москве kondicionery-nedorogo-msk.ru.
диджитал маркетинг це agentstvo-internet-marketinga.com.ua.
http://reputablepharmacies.online/# online pharmacy store
lioresal pill
buying ed pills online: cheap ed drugs – erectile dysfunction medicines
https://edwithoutdoctorprescription.store/# prescription drugs without doctor approval
erectile dysfunction medicines: best ed medication – top erection pills
http://edwithoutdoctorprescription.store/# ed meds online without prescription or membership
There is certainly a lot to know about this issue.
I really like all the points you’ve made.
I am truly thankful to the owner of this web site who has shared this fantastic piece of writing at at this place.
semaglutide 3 mg
http://reputablepharmacies.online/# discount online canadian pharmacy
ed drugs compared: erectile dysfunction drugs – medicine erectile dysfunction
https://edwithoutdoctorprescription.store/# prescription drugs online without doctor
discount prescriptions: canadian pharmacy for sildenafil – buy medicine canada
La Patente B è una patente di guida che consente di guidare autoveicoli come
automobili private.
Merhabalar Eskişehir’de Escort arkadaş arayanlar için Eskisehir Escort sitesi hizmet vermektedir.
wegovy 3 mg tablet
La patente di guida di categoria B è la licenza di guida più comune, che consente
di guidare veicoli privati non commerciali.
http://canadianpharmacy.pro/# canadian drug pharmacy canadianpharmacy.pro
indian pharmacy: Best Indian pharmacy – top online pharmacy india indianpharmacy.shop
Adderall is commonly prescribed for attention deficit hyperactivity disorder (ADHD) and narcolepsy.
Ritalin Adderall Conversion, In the realm of attention-deficit hyperactivity disorder (ADHD)
treatment, Ritalin and Adderall have emerged as
two prominent medications.
buy ozempic from canada
This was beautiful Admin. Thank you for your reflections.
https://mexicanpharmacy.win/# medicine in mexico pharmacies mexicanpharmacy.win
canadian drugstore cialis
An impressive share! I’ve just forwarded this onto a friend
who was conducting a little homework on this. And he actually bought me
lunch simply because I discovered it for him… lol. So let me
reword this…. Thank YOU for the meal!! But yeah, thanks for spending time to
discuss this issue here on your internet site.
my canadian pharmacy: Cheapest drug prices Canada – canadian pharmacy 24h com safe canadianpharmacy.pro
mail order pharmacy india: Order medicine from India to USA – top online pharmacy india indianpharmacy.shop
Great information shared.. really enjoyed reading this post thank you author for sharing this post .. appreciated
https://mexicanpharmacy.win/# mexican pharmaceuticals online mexicanpharmacy.win
ordering drugs from canada: Canadian pharmacy online – canadian medications canadianpharmacy.pro
https://indianpharmacy.shop/# reputable indian pharmacies indianpharmacy.shop
buy semaglutide online pharmacy
rybelsus order
https://indianpharmacy.shop/# online pharmacy india indianpharmacy.shop
mexican drugstore online: online mexican pharmacy – mexico pharmacies prescription drugs mexicanpharmacy.win
There are many dangers when the residential or commercial property is not taken care of, from breathing issues as a result of mold and mildew to tripping on uneven floorings to sliding on water from leaks. Industrial property managers have to thoroughly recognize the market and industrial rooms they handle. One other point I have actually located handy is to review your provider and vendors on a regular basis to guarantee you are getting affordable prices and high quality solution. Seek multiple quotes, discuss contracts, and take into consideration long-term collaborations or quantity price cuts. Review agreements periodically to determine possibilities for price financial savings or renegotiation.
With devotion, focus to information, and a customer-centric frame of mind, you can master the art of handling a commercial building and unlock the full potential of your financial investment. Structure strong relationships with trustworthy vendors is important for smooth property operations. By establishing a network of relied on contractors, vendors, and experts, you can make certain reliable and high-grade solutions for your industrial residential property.
Normal vacuuming is essential to eliminate these bits and keep a tidy home environment. It is recommended to vacuum high-traffic areas at least once a week and much less frequently for low-traffic locations You can always use any one of the therapies over to maintain algae, mold and mildew, and mildew in check. However you may be better off taking on the problems that make it possible for them to flourish in the first place.
Importance Of Surface Preparation For Outdoor Cleaning
Stress washing machines utilize chilly water under a lot of stress to blast dirt, dust, mud, and other points off of surface areas. It is not needed, reliable, or recommended to spray cleaning or disinfecting products on low-touch surface areas like patios and sidewalks. Just blend soap or cleaning agent with water and make use of a brush to scrub the surface. A great deal of dust, oil, and oil stains turn up on concrete surface areas like actions, driveways, and outdoor patios. Make use of a cleansing set or brush to clean up the beyond your residence. You can buy a house siding cleansing set with a nozzle accessory from your neighborhood home renovation shop.
They will continue doing their ideal, so you’ll obtain continually cleaned building. If yours is free from discolorations, all it might need is a simple sweeping. If your roof shingles are safe, you can even utilize a fallen leave blower to eliminate debris from the roof covering and your gutters, as well.
Washing Your Home Outside: Why You Require To Do It
Whether you pressure wash or tube down your home windows, the one thing you do not intend to do is let them air completely dry– or you’ll be entrusted to unattractive streaks. A licensed handyman must be able to take care of the task, at a task price averaging in between $100 to $300. Just ensure to ask beforehand if your handyman has experience cleansing exterior surfaces with muriatic acid.
While getting rid of horrible crud from exterior surface areas, you might also be cleaning extreme chemicals directly into the surrounding setting. Avoid abrasive brushes or acidic cleaners that could harm fragile surface areas. Stay clear of getting water behind the house siding where it could create interior damage. Usage long-reach devices like hose-end spray cleansers and extendable poles with brush heads to easily tidy high outside locations.
Door knobs, shopping cart wheels, and elevator switches should be cleansed regularly than various other surface areas. Two examples of these cleaners are Clean Shot Mold & Mold Discoloration Remover and Clean Shot Soft Clean Outdoor Cleaner. Beams and rafters are often failed to remember when cleansing, yet they are equally as crucial to a tidy and safe work environment as any type of various other surface. Power washers have actually been revealed to be the best way to tidy locations on the outside of a building. Stress washing is a great way to get dust off of items outside.
Preventive maintenance is the regular maintenance of properties and equipment with the goal of protecting against significant malfunctions or damages. It is important to perform preventative upkeep since it can have a huge impact on your facility’s funds and procedures. Thoroughly recording evaluation findings helps to track upkeep jobs, focus on repair services, and ensures compliance with pertinent guidelines. These records likewise work as a recommendation for future examinations and can be made use of as evidence in instance of conflicts or insurance claims. Employ residential or commercial property maintenance solution to inspect air vent grills, circuit boxes, and electric storage space areas to spot issues in their onset. If you have a business residential or commercial property, lack of upkeep can stain your picture in the marketplace, while also putting at risk the safety and security of the people working in your structure.
Automated coding and marking machines print essential information, such as expiration dates and batch numbers, on medication packaging. – zithromax side effects
http://canadianpharmacy.pro/# canadian family pharmacy canadianpharmacy.pro
wegovy tablets buy
If some one needs to be updated with hottest technologies afterward he must be go to see this
web page and be up to date daily.
http://indianpharmacy.shop/# buy medicines online in india
п»їlegitimate online pharmacies india
http://indianpharmacy.shop/# world pharmacy india
cheapest online pharmacy india
https://indianpharmacy.shop/# cheapest online pharmacy india
mail order pharmacy india
rybelsus pill
https://mexicanpharmacy.win/# buying prescription drugs in mexico online mexicanpharmacy.win
rybelsus 14
rybelsus order
semaglutide pills
http://mexicanpharmacy.win/# buying prescription drugs in mexico mexicanpharmacy.win
https://canadianpharmacy.pro/# canadian pharmacy online canadianpharmacy.pro
http://canadianpharmacy.pro/# canadian neighbor pharmacy canadianpharmacy.pro
reputable indian pharmacies
http://mexicanpharmacy.win/# mexican border pharmacies shipping to usa mexicanpharmacy.win
world pharmacy india
After exploring a few of the blog posts on your website, I truly appreciate your
way of blogging. I added it to my bookmark webpage list and will
be checking back in the near future. Please visit my website
too and tell me how you feel.
You really make it seem so easy with your presentation however I in finding this topic to be really something which I feel I would never understand. It sort of feels too complicated and very wide for me. I am taking a look forward in your next submit, I will try to get the cling of it!
I very delighted to find this internet site on bing, just what I was searching for as well saved to fav
http://canadianpharmacy.pro/# canadian pharmacy no rx needed canadianpharmacy.pro
reputable indian online pharmacy
buy prescription drugs from india india pharmacy or Online medicine home delivery
https://toolbarqueries.google.co.vi/url?q=http://indianpharmacy.shop indianpharmacy com
online shopping pharmacy india top 10 online pharmacy in india and top 10 pharmacies in india indian pharmacy
https://canadianpharmacy.pro/# canadapharmacyonline canadianpharmacy.pro
pharmacy website india
戰神賽特
2024全新上線❰戰神賽特老虎機❱ – ATG賽特玩法說明介紹
❰戰神賽特老虎機❱是由ATG電子獨家開發的古埃及風格線上老虎機,在傳說中戰神賽特是「力量之神」與奈芙蒂斯女神結成連理,共同守護古埃及的奇幻秘寶,只有被選中的冒險者才能進入探險。
❰戰神賽特老虎機❱ – ATG賽特介紹
2024最新老虎機【戰神塞特】- ATG電子 X 富遊娛樂城
❰戰神賽特老虎機❱ – ATG電子
線上老虎機系統 : ATG電子
發行年分 : 2024年1月
最大倍數 : 51000倍
返還率 : 95.89%
支付方式 : 全盤倍數、消除掉落
最低投注金額 : 0.4元
最高投注金額 : 2000元
可否選台 : 是
可選台台數 : 350台
免費遊戲 : 選轉觸發+購買特色
❰戰神賽特老虎機❱ 賠率說明
戰神塞特老虎機賠率算法非常簡單,玩家們只需要不斷的轉動老虎機,成功消除物件即可贏分,得分賠率依賠率表計算。
當盤面上沒有物件可以消除時,倍數符號將會相加形成總倍數!該次旋轉的總贏分即為 : 贏分 X 總倍數。
積分方式如下 :
贏分=(單次押注額/20) X 物件賠率
EX : 單次押注額為1,盤面獲得12個戰神賽特倍數符號法老魔眼
贏分= (1/20) X 1000=50
以下為各個得分符號數量之獎金賠率 :
得分符號 獎金倍數 得分符號 獎金倍數
戰神賽特倍數符號聖甲蟲 6 2000
5 100
4 60 戰神賽特倍數符號黃寶石 12+ 200
10-11 30
8-9 20
戰神賽特倍數符號荷魯斯之眼 12+ 1000
10-11 500
8-9 200 戰神賽特倍數符號紅寶石 12+ 160
10-11 24
8-9 16
戰神賽特倍數符號眼鏡蛇 12+ 500
10-11 200
8-9 50 戰神賽特倍數符號紫鑽石 12+ 100
10-11 20
8-9 10
戰神賽特倍數符號神箭 12+ 300
10-11 100
8-9 40 戰神賽特倍數符號藍寶石 12+ 80
10-11 18
8-9 8
戰神賽特倍數符號屠鐮刀 12+ 240
10-11 40
8-9 30 戰神賽特倍數符號綠寶石 12+ 40
10-11 15
8-9 5
❰戰神賽特老虎機❱ 賠率說明(橘色數值為獲得數量、黑色數值為得分賠率)
ATG賽特 – 特色說明
ATG賽特 – 倍數符號獎金加乘
玩家們在看到盤面上出現倍數符號時,務必把握機會加速轉動ATG賽特老虎機,倍數符號會隨機出現2到500倍的隨機倍數。
當盤面無法在消除時,這些倍數總和會相加,乘上當時累積之獎金,即為最後得分總額。
倍數符號會出現在主遊戲和免費遊戲當中,玩家們千萬別錯過這個可以瞬間將得獎金額拉高的好機會!
ATG賽特 – 倍數符號獎金加乘
ATG賽特 – 倍數符號圖示
ATG賽特 – 進入神秘金字塔開啟免費遊戲
戰神賽特倍數符號聖甲蟲
❰戰神賽特老虎機❱ 免費遊戲符號
在古埃及神話中,聖甲蟲又稱為「死亡之蟲」,它被當成了天球及重生的象徵,守護古埃及的奇幻秘寶。
當玩家在盤面上,看見越來越多的聖甲蟲時,千萬不要膽怯,只需在牌面上斬殺4~6個ATG賽特免費遊戲符號,就可以進入15場免費遊戲!
在免費遊戲中若轉出3~6個聖甲蟲免費遊戲符號,可額外獲得5次免費遊戲,最高可達100次。
當玩家的累積贏分且盤面有倍數物件時,盤面上的所有倍數將會加入總倍數!
ATG賽特 – 選台模式贏在起跑線
為避免神聖的寶物被盜墓者奪走,富有智慧的法老王將金子塔內佈滿迷宮,有的設滿機關讓盜墓者寸步難行,有的暗藏機關可以直接前往存放神秘寶物的暗房。
ATG賽特老虎機設有350個機檯供玩家選擇,這是連魔龍老虎機、忍老虎機都給不出的機台數量,為的就是讓玩家,可以隨時進入神秘的古埃及的寶藏聖域,挖掘長眠已久的神祕寶藏。
【戰神塞特老虎機】選台模式
❰戰神賽特老虎機❱ 選台模式
ATG賽特 – 購買免費遊戲挖掘秘寶
玩家們可以使用當前投注額的100倍購買免費遊戲!進入免費遊戲再也不是虛幻。獎勵與一般遊戲相同,且購買後遊戲將自動開始,直到場次和獎金發放完畢為止。
有購買免費遊戲需求的玩家們,立即點擊「開始」,啟動神秘金字塔裡的古埃及祕寶吧!
【戰神塞特老虎機】購買特色
❰戰神賽特老虎機❱ 購買特色
戰神賽特試玩推薦
看完了❰戰神賽特老虎機❱介紹之後,玩家們是否也蓄勢待發要進入古埃及的世界,一探神奇秘寶探險之旅。
本次ATG賽特與線上娛樂城推薦第一名的富遊娛樂城合作,只需要加入會員,即可領取到168體驗金,免費試玩420轉!
Thanks a bunch for sharing this with all folks you really recognize what you’re talking approximately!
Bookmarked. Kindly additionally discuss with my web site =).
We will have a hyperlink trade arrangement between us
wegovy 3mg
Die Höhe der Fahrtkosten pro Kilometer kann je nach Unternehmen und Branche variieren.
Merhabalar Eskişehir’de Escort arkadaş arayanlar için Eskisehir Escort sitesi hizmet vermektedir.
http://mexicanpharmacy.win/# pharmacies in mexico that ship to usa mexicanpharmacy.win
online pharmacy india
http://canadianpharmacy.pro/# canadian pharmacy reviews canadianpharmacy.pro
Online medicine home delivery
установка алюминиевого плинтуса aljumynyevyj-napolnyj-plyntus.ru.
shamitra.com
“아직도 안된다고?” 홍지황제는 채찍을 찾으려 했고 그의 분노의 일곱 구멍은 연기로 가득 찼다.
https://www.google.mv/url?q=https://www.maseraticlubuae.com/
кондиционеры с установкой multi-kondicionery.ru.
semaglutide online uk
May I simply say what a relief to uncover an individual who truly understands what they’re talking about on the net.
You definitely understand how to bring a problem to light and
make it important. More people have to check this out and understand this side of
your story. It’s surprising you are not more popular given that you
certainly possess the gift. http://demos.gamer-Templates.de/specialtemps/clansphere20114Sdemo01/index.php?mod=users&action=view&id=5989451
I just like the valuable information you supply on your articles.
I’ll bookmark your weblog and test again here frequently.
I am moderately sure I will learn a lot of new stuff proper
here! Good luck for the following! https://king.az/user/ConradLea059/
Everyone loves what you guys are usually up too. This sort of
clever work and exposure! Keep up the terrific works guys I’ve added you guys to my
blogroll.
http://mexicanpharmacy.win/# reputable mexican pharmacies online mexicanpharmacy.win
buy wegovy online from india
http://indianpharmacy.shop/# buy prescription drugs from india indianpharmacy.shop
indian pharmacies safe
http://canadianpharmacy.pro/# canadian pharmacy victoza canadianpharmacy.pro
best india pharmacy
rybelsus semaglutide tablets 3mg
top 10 online pharmacy in india online shopping pharmacy india or top 10 online pharmacy in india
https://cse.google.com.mm/url?sa=t&url=https://indianpharmacy.shop buy medicines online in india
indianpharmacy com buy medicines online in india and online shopping pharmacy india reputable indian pharmacies
rybelsus diabetes medication
canadian discount cialis my canadian pharmacy rx reviews or top rated online canadian pharmacies
https://maps.google.com.sb/url?sa=t&rct=j&url=https://canadianpharmacy.pro great canadian pharmacy
canadian online pharmacy reviews canada prescription drugs and accutane mexican pharmacy canadian discount online pharmacy
buy ozempic canada
http://mexicanpharmacy.win/# best online pharmacies in mexico mexicanpharmacy.win
my canadian pharmacy rx
https://canadianpharmacy.pro/# canadian pharmacy world reviews canadianpharmacy.pro
cheapest online pharmacy india
https://indianpharmacy.shop/# indianpharmacy com indianpharmacy.shop
indian pharmacy online
wegovy tablets cost
Pretty! This has been a really wonderful post. Many thanks for providing these details.
http://canadianpharmacy.pro/# canadian pharmacy canadianpharmacy.pro
indianpharmacy com
https://mexicanpharmacy.win/# mexican border pharmacies shipping to usa mexicanpharmacy.win
buying drugs from canada: Cheapest drug prices Canada – canadian 24 hour pharmacy canadianpharmacy.pro
best india pharmacy: Cheapest online pharmacy – reputable indian pharmacies indianpharmacy.shop
generic ozempic cost
acheter mГ©dicaments Г l’Г©tranger: cialis generique – Pharmacie en ligne pas cher
프라그마틱 게임은 iGaming 분야에서 선도적인 콘텐츠 제공 업체로, 모바일 중심 다양한 포트폴리오와 품질 높은 엔터테인먼트를 제공합니다.
프라그마틱 홈페이지
프라그마틱 슬롯에 대한 정보가 정말 유용했어요! 더불어, 제 사이트에서도 프라그마틱과 관련된 새로운 내용을 찾아보세요. 함께 지식을 나누면 좋겠어요!
https://www.anomaxx.com
https://dwqewqe.weebly.com/
https://fjghgy.com/
buy rybelsus in mexico
Before delving into the specifics of the largest container ship,
let’s journey through the evolution of these maritime workhorses.
Write more, thats all I have to say. Literally, it seems as though you
relied on the video to make your point. You clearly know
what youre talking about, why throw away your
intelligence on just posting videos to your weblog
when you could be giving us something enlightening to
read?
Viagra Pfizer sans ordonnance: Acheter du Viagra sans ordonnance – Viagra pas cher livraison rapide france
It’s actually a cool and helpful piece of information. I am satisfied that you shared this helpful
information with us. Please keep us informed like this.
Thanks for sharing.
Pharmacies en ligne certifiГ©es: acheter mГ©dicaments Г l’Г©tranger – п»їpharmacie en ligne
How Much to Ship a Container to Jamaica from UK? In our interconnected world, international shipping plays a crucial role
in the movement of goods across borders.
The 20ft High Cube Container is one foot (approx.
30 cm) higher than the standard 20ft container.
One of the primary reasons people are drawn to shipping container homes is their perceived environmental friendliness.
Before we dive into the financial details, it’s
essential to grasp the fundamentals of shipping container homes.
Before diving into the wholesale market, it’s crucial to identify your specific
requirements.
http://cialissansordonnance.shop/# Pharmacie en ligne sans ordonnance
Pharmacie en ligne France
What a data of un-ambiguity and preserveness of precious
knowledge about unexpected emotions.
Saved as a favorite, I love your website! https://blitzkriegmod.com/index.php/User:BerthaCheung503
buy wegovy in canada
wegovy online prescription
Excellent goods from you, man. I have understand your stuff previous to and you’re
just extremely great. I really like what you’ve acquired here,
really like what you are stating and the way in which you say it.
You make it entertaining and you still take care of to keep it
sensible. I cant wait to read much more from you. This is really a great site.
ozempic tab 14mg
Pharmacie en ligne livraison rapide: Medicaments en ligne livres en 24h – pharmacie ouverte 24/24
https://rgwager.com/mars-set/
2024全新上線❰戰神賽特老虎機❱ – ATG賽特玩法說明介紹
❰戰神賽特老虎機❱是由ATG電子獨家開發的古埃及風格線上老虎機,在傳說中戰神賽特是「力量之神」與奈芙蒂斯女神結成連理,共同守護古埃及的奇幻秘寶,只有被選中的冒險者才能進入探險。
❰戰神賽特老虎機❱ – ATG賽特介紹
2024最新老虎機【戰神塞特】- ATG電子 X 富遊娛樂城
❰戰神賽特老虎機❱ – ATG電子
線上老虎機系統 : ATG電子
發行年分 : 2024年1月
最大倍數 : 51000倍
返還率 : 95.89%
支付方式 : 全盤倍數、消除掉落
最低投注金額 : 0.4元
最高投注金額 : 2000元
可否選台 : 是
可選台台數 : 350台
免費遊戲 : 選轉觸發+購買特色
❰戰神賽特老虎機❱ 賠率說明
戰神塞特老虎機賠率算法非常簡單,玩家們只需要不斷的轉動老虎機,成功消除物件即可贏分,得分賠率依賠率表計算。
當盤面上沒有物件可以消除時,倍數符號將會相加形成總倍數!該次旋轉的總贏分即為 : 贏分 X 總倍數。
積分方式如下 :
贏分=(單次押注額/20) X 物件賠率
EX : 單次押注額為1,盤面獲得12個戰神賽特倍數符號法老魔眼
贏分= (1/20) X 1000=50
以下為各個得分符號數量之獎金賠率 :
得分符號 獎金倍數 得分符號 獎金倍數
戰神賽特倍數符號聖甲蟲 6 2000
5 100
4 60 戰神賽特倍數符號黃寶石 12+ 200
10-11 30
8-9 20
戰神賽特倍數符號荷魯斯之眼 12+ 1000
10-11 500
8-9 200 戰神賽特倍數符號紅寶石 12+ 160
10-11 24
8-9 16
戰神賽特倍數符號眼鏡蛇 12+ 500
10-11 200
8-9 50 戰神賽特倍數符號紫鑽石 12+ 100
10-11 20
8-9 10
戰神賽特倍數符號神箭 12+ 300
10-11 100
8-9 40 戰神賽特倍數符號藍寶石 12+ 80
10-11 18
8-9 8
戰神賽特倍數符號屠鐮刀 12+ 240
10-11 40
8-9 30 戰神賽特倍數符號綠寶石 12+ 40
10-11 15
8-9 5
❰戰神賽特老虎機❱ 賠率說明(橘色數值為獲得數量、黑色數值為得分賠率)
ATG賽特 – 特色說明
ATG賽特 – 倍數符號獎金加乘
玩家們在看到盤面上出現倍數符號時,務必把握機會加速轉動ATG賽特老虎機,倍數符號會隨機出現2到500倍的隨機倍數。
當盤面無法在消除時,這些倍數總和會相加,乘上當時累積之獎金,即為最後得分總額。
倍數符號會出現在主遊戲和免費遊戲當中,玩家們千萬別錯過這個可以瞬間將得獎金額拉高的好機會!
ATG賽特 – 倍數符號獎金加乘
ATG賽特 – 倍數符號圖示
ATG賽特 – 進入神秘金字塔開啟免費遊戲
戰神賽特倍數符號聖甲蟲
❰戰神賽特老虎機❱ 免費遊戲符號
在古埃及神話中,聖甲蟲又稱為「死亡之蟲」,它被當成了天球及重生的象徵,守護古埃及的奇幻秘寶。
當玩家在盤面上,看見越來越多的聖甲蟲時,千萬不要膽怯,只需在牌面上斬殺4~6個ATG賽特免費遊戲符號,就可以進入15場免費遊戲!
在免費遊戲中若轉出3~6個聖甲蟲免費遊戲符號,可額外獲得5次免費遊戲,最高可達100次。
當玩家的累積贏分且盤面有倍數物件時,盤面上的所有倍數將會加入總倍數!
ATG賽特 – 選台模式贏在起跑線
為避免神聖的寶物被盜墓者奪走,富有智慧的法老王將金子塔內佈滿迷宮,有的設滿機關讓盜墓者寸步難行,有的暗藏機關可以直接前往存放神秘寶物的暗房。
ATG賽特老虎機設有350個機檯供玩家選擇,這是連魔龍老虎機、忍老虎機都給不出的機台數量,為的就是讓玩家,可以隨時進入神秘的古埃及的寶藏聖域,挖掘長眠已久的神祕寶藏。
【戰神塞特老虎機】選台模式
❰戰神賽特老虎機❱ 選台模式
ATG賽特 – 購買免費遊戲挖掘秘寶
玩家們可以使用當前投注額的100倍購買免費遊戲!進入免費遊戲再也不是虛幻。獎勵與一般遊戲相同,且購買後遊戲將自動開始,直到場次和獎金發放完畢為止。
有購買免費遊戲需求的玩家們,立即點擊「開始」,啟動神秘金字塔裡的古埃及祕寶吧!
【戰神塞特老虎機】購買特色
❰戰神賽特老虎機❱ 購買特色
戰神賽特試玩推薦
看完了❰戰神賽特老虎機❱介紹之後,玩家們是否也蓄勢待發要進入古埃及的世界,一探神奇秘寶探險之旅。
本次ATG賽特與線上娛樂城推薦第一名的富遊娛樂城合作,只需要加入會員,即可領取到168體驗金,免費試玩420轉!
Pharmacie en ligne livraison 24h: levitra generique prix en pharmacie – acheter medicament a l etranger sans ordonnance
Very well presented. Every quote was awesome and thanks for sharing the content. Keep sharing and keep motivating others.
https://acheterkamagra.pro/# Acheter mГ©dicaments sans ordonnance sur internet
п»їpharmacie en ligne
There is definately a lot to find out about this subject. I like all the points you made
Pharmacie en ligne fiable: PharmaDoc – Pharmacie en ligne France
Pharmacie en ligne pas cher: PharmaDoc.pro – Pharmacie en ligne pas cher
Pharmacie en ligne livraison rapide: cialis sans ordonnance – Pharmacies en ligne certifiГ©es
It’s hard to come by knowledgeable people on this subject, but you sound like you know what you’re
talking about! Thanks
My web page :: discount tire sparks
I appreciate you sharing this blog post. Thanks Again. Cool.
https://levitrasansordonnance.pro/# Pharmacie en ligne sans ordonnance
Pharmacie en ligne France: Acheter Cialis – Pharmacie en ligne fiable
Sildenafil teva 100 mg sans ordonnance: Meilleur Viagra sans ordonnance 24h – Viagra homme prix en pharmacie
http://pharmadoc.pro/# Pharmacie en ligne livraison rapide
Pharmacie en ligne fiable
Купить кондиционер в интернет-магазине или офлайн
сплит кондиционер http://www.ustanovka-split-sistem.ru.
acheter mГ©dicaments Г l’Г©tranger: Levitra acheter – Pharmacie en ligne livraison gratuite
Pharmacie en ligne France: Pharmacies en ligne certifiees – pharmacie ouverte
Pharmacies en ligne certifiГ©es acheter medicament a l etranger sans ordonnance or Pharmacies en ligne certifiГ©es
https://www.sites-stats.com/domain-traffic/acheterkamagra.pro Pharmacie en ligne sans ordonnance
=best+place+to+buy+viagra]Pharmacie en ligne livraison rapide acheter mГ©dicaments Г l’Г©tranger and Pharmacie en ligne France п»їpharmacie en ligne
https://viagrasansordonnance.pro/# Viagra pas cher livraison rapide france
https://acheterkamagra.pro/# Pharmacies en ligne certifiées
rybelsus uk
pharmacie ouverte: Levitra acheter – Acheter mГ©dicaments sans ordonnance sur internet
wegovy over the counter
http://acheterkamagra.pro/# Pharmacie en ligne France
https://levitrasansordonnance.pro/# Acheter médicaments sans ordonnance sur internet
buy wegovy from canada
Viagra vente libre pays: Meilleur Viagra sans ordonnance 24h – Viagra sans ordonnance 24h Amazon
Pharmacie en ligne livraison gratuite: Levitra pharmacie en ligne – Pharmacie en ligne sans ordonnance
Pharmacie en ligne France: pharmacie en ligne – Pharmacie en ligne sans ordonnance
Pharmacie en ligne France Pharmacie en ligne sans ordonnance or pharmacie ouverte 24/24
http://www.bs-clinic.or.jp/w3a/redirect.php?redirect=https://cialissansordonnance.shop Pharmacie en ligne pas cher
pharmacie ouverte 24/24 Pharmacie en ligne livraison rapide and п»їpharmacie en ligne Pharmacie en ligne sans ordonnance
http://pharmadoc.pro/# Pharmacie en ligne France
semaglutide xl
Hello! Do you use Twitter? I’d like to follow you if that would be
ok. I’m definitely enjoying your blog and look forward to new updates.
Look into my page: http://forum.farmer.pl/profile/149197-9andrewe7491xdtb2/
semaglutide australia online
wegovy weight loss
semaglutide australia
I love what you guys are usually up too. This kind of clever work and exposure!
Keep up the terrific works guys I’ve incorporated you guys
to our blogroll. https://thebookmarkid.com/story16463215/auroral
http://prednisonetablets.shop/# prednisone 20
generic wegovy cost
https://rg88.org/seth/
2024全新上線❰戰神賽特老虎機❱ – ATG賽特玩法說明介紹
❰戰神賽特老虎機❱是由ATG電子獨家開發的古埃及風格線上老虎機,在傳說中戰神賽特是「力量之神」與奈芙蒂斯女神結成連理,共同守護古埃及的奇幻秘寶,只有被選中的冒險者才能進入探險。
❰戰神賽特老虎機❱ – ATG賽特介紹
2024最新老虎機【戰神塞特】- ATG電子 X 富遊娛樂城
❰戰神賽特老虎機❱ – ATG電子
線上老虎機系統 : ATG電子
發行年分 : 2024年1月
最大倍數 : 51000倍
返還率 : 95.89%
支付方式 : 全盤倍數、消除掉落
最低投注金額 : 0.4元
最高投注金額 : 2000元
可否選台 : 是
可選台台數 : 350台
免費遊戲 : 選轉觸發+購買特色
❰戰神賽特老虎機❱ 賠率說明
戰神塞特老虎機賠率算法非常簡單,玩家們只需要不斷的轉動老虎機,成功消除物件即可贏分,得分賠率依賠率表計算。
當盤面上沒有物件可以消除時,倍數符號將會相加形成總倍數!該次旋轉的總贏分即為 : 贏分 X 總倍數。
積分方式如下 :
贏分=(單次押注額/20) X 物件賠率
EX : 單次押注額為1,盤面獲得12個戰神賽特倍數符號法老魔眼
贏分= (1/20) X 1000=50
以下為各個得分符號數量之獎金賠率 :
得分符號 獎金倍數 得分符號 獎金倍數
戰神賽特倍數符號聖甲蟲 6 2000
5 100
4 60 戰神賽特倍數符號黃寶石 12+ 200
10-11 30
8-9 20
戰神賽特倍數符號荷魯斯之眼 12+ 1000
10-11 500
8-9 200 戰神賽特倍數符號紅寶石 12+ 160
10-11 24
8-9 16
戰神賽特倍數符號眼鏡蛇 12+ 500
10-11 200
8-9 50 戰神賽特倍數符號紫鑽石 12+ 100
10-11 20
8-9 10
戰神賽特倍數符號神箭 12+ 300
10-11 100
8-9 40 戰神賽特倍數符號藍寶石 12+ 80
10-11 18
8-9 8
戰神賽特倍數符號屠鐮刀 12+ 240
10-11 40
8-9 30 戰神賽特倍數符號綠寶石 12+ 40
10-11 15
8-9 5
❰戰神賽特老虎機❱ 賠率說明(橘色數值為獲得數量、黑色數值為得分賠率)
ATG賽特 – 特色說明
ATG賽特 – 倍數符號獎金加乘
玩家們在看到盤面上出現倍數符號時,務必把握機會加速轉動ATG賽特老虎機,倍數符號會隨機出現2到500倍的隨機倍數。
當盤面無法在消除時,這些倍數總和會相加,乘上當時累積之獎金,即為最後得分總額。
倍數符號會出現在主遊戲和免費遊戲當中,玩家們千萬別錯過這個可以瞬間將得獎金額拉高的好機會!
ATG賽特 – 倍數符號獎金加乘
ATG賽特 – 倍數符號圖示
ATG賽特 – 進入神秘金字塔開啟免費遊戲
戰神賽特倍數符號聖甲蟲
❰戰神賽特老虎機❱ 免費遊戲符號
在古埃及神話中,聖甲蟲又稱為「死亡之蟲」,它被當成了天球及重生的象徵,守護古埃及的奇幻秘寶。
當玩家在盤面上,看見越來越多的聖甲蟲時,千萬不要膽怯,只需在牌面上斬殺4~6個ATG賽特免費遊戲符號,就可以進入15場免費遊戲!
在免費遊戲中若轉出3~6個聖甲蟲免費遊戲符號,可額外獲得5次免費遊戲,最高可達100次。
當玩家的累積贏分且盤面有倍數物件時,盤面上的所有倍數將會加入總倍數!
ATG賽特 – 選台模式贏在起跑線
為避免神聖的寶物被盜墓者奪走,富有智慧的法老王將金子塔內佈滿迷宮,有的設滿機關讓盜墓者寸步難行,有的暗藏機關可以直接前往存放神秘寶物的暗房。
ATG賽特老虎機設有350個機檯供玩家選擇,這是連魔龍老虎機、忍老虎機都給不出的機台數量,為的就是讓玩家,可以隨時進入神秘的古埃及的寶藏聖域,挖掘長眠已久的神祕寶藏。
【戰神塞特老虎機】選台模式
❰戰神賽特老虎機❱ 選台模式
ATG賽特 – 購買免費遊戲挖掘秘寶
玩家們可以使用當前投注額的100倍購買免費遊戲!進入免費遊戲再也不是虛幻。獎勵與一般遊戲相同,且購買後遊戲將自動開始,直到場次和獎金發放完畢為止。
有購買免費遊戲需求的玩家們,立即點擊「開始」,啟動神秘金字塔裡的古埃及祕寶吧!
【戰神塞特老虎機】購買特色
❰戰神賽特老虎機❱ 購買特色
戰神賽特試玩推薦
看完了❰戰神賽特老虎機❱介紹之後,玩家們是否也蓄勢待發要進入古埃及的世界,一探神奇秘寶探險之旅。
本次ATG賽特與線上娛樂城推薦第一名的富遊娛樂城合作,只需要加入會員,即可領取到168體驗金,免費試玩420轉!
What i do not realize is in fact how you are no longer actually much more wellfavored than you might be right now Youre very intelligent You recognize thus considerably in relation to this topic made me in my view believe it from numerous numerous angles Its like men and women are not fascinated until it is one thing to do with Lady gaga Your own stuffs excellent All the time handle it up
I just could not depart your web site prior to suggesting that I really loved the usual info an individual supply in your visitors Is gonna be back regularly to check up on new posts
prednisone in india: how to get prednisone without a prescription – prednisone 50 mg buy
zithromax online paypal: how to buy zithromax online – buy zithromax online cheap
minocycline 100mg tabs: minocycline 100 mg – minocycline pac
http://prednisonetablets.shop/# prednisone 5 mg tablet rx
rybelsus buy online
get generic clomid now: can i purchase clomid without rx – how to buy clomid for sale
zithromax drug: zithromax 500 without prescription – buy azithromycin zithromax
This article is really a good one it assists new internet viewers, who
are wishing in favor of blogging.
prednisone 20mg price: how to buy prednisone – online prednisone 5mg
https://ivermectin.store/# buy minocycline 100mg otc
Good post! We will be linking to this particularly great post on our site. Keep up the great writing
amoxicillin without prescription: amoxicillin online canada – amoxicillin script
prednisone 10 mg tablets: prednisone 12 tablets price – prednisone 5mg cost
http://ivermectin.store/# buy ivermectin uk
does minocycline work for acne: stromectol buy uk – ivermectin 90 mg
https://clomiphene.icu/# can you get cheap clomid without prescription
https://azithromycin.bid/# how to get zithromax over the counter
https://azithromycin.bid/# buy azithromycin zithromax
buy prednisone without rx: prednisone 40 mg – prednisone tablets canada
zithromax for sale online: zithromax online usa – zithromax online usa no prescription
This blog was… how do I say it? Relevant!!
Finally I’ve found something that helped me. Appreciate it!
프라그마틱에 대한 글 읽는 것이 흥미로웠어요! 또한, 제 사이트에서도 프라그마틱과 관련된 정보를 제공하고 있어요. 함께 발전하며 지식을 나눠봐요!
프라그마틱 무료
프라그마틱의 게임은 항상 다양한 테마로 놀라워요. 이 사이트에서 더 자세한 정보를 찾아보세요!
https://lyxmys.com/
https://jxbodun.com/
https://www.anomaxx.com
order amoxicillin online uk: can you purchase amoxicillin online – how to get amoxicillin
can we buy amoxcillin 500mg on ebay without prescription amoxicillin from canada or buy amoxicillin canada
http://sc.devb.gov.hk/TuniS/amoxicillin.bid amoxicillin order online
amoxicillin 500mg capsules buy amoxicillin canada and amoxicillin 250 mg buy amoxicillin 500mg usa
buy zithromax online with mastercard: where can i buy zithromax medicine – zithromax cost
http://prednisonetablets.shop/# prednisolone prednisone
Merhabalar Eskişehir’de Escort arkadaş arayanlar için Eskisehir Escort sitesi hizmet vermektedir.
naturally like your web site however you need to take a look at the spelling on several of your posts. A number of them are rife with spelling problems and I find it very bothersome to tell the truth on the other hand I will surely come again again.
generic clomid without insurance: get clomid now – get clomid now
amoxicillin 875 mg tablet cost of amoxicillin prescription or amoxicillin 875 mg tablet
http://www.gorch-brothers.jp/modules/wordpress0/wp-ktai.php?view=redir&url=https://amoxicillin.bid amoxicillin in india
amoxicillin 500 mg amoxicillin 500 mg tablets and amoxicillin 500 mg where to buy amoxicillin 500mg over the counter
zithromax drug: zithromax buy online no prescription – average cost of generic zithromax
http://ivermectin.store/# stromectol pill price
After looking at a number of the articles on your blog, I truly appreciate your technique of blogging.
I saved as a favorite it to my bookmark site list and will be
checking back soon. Please visit my website too and let me know your
opinion.
Here is my web page – http://kinnyuu.biz/rank/out.cgi?url=http://warszawski.waw.pl/
amoxicillin buy no prescription cheap amoxicillin 500mg or amoxicillin 500mg for sale uk
http://maps.google.cl/url?q=http://azithromycin.bid amoxicillin for sale online
amoxicillin 500 mg order amoxicillin 500mg and 875 mg amoxicillin cost amoxicillin buy no prescription
http://azithromycin.bid/# buy zithromax 1000 mg online
Nice post. I learn something totally new and challenging on websites
http://amoxicillin.bid/# amoxicillin where to get
wegovy semaglutide tablets 7.5 mcg
purchase semaglutide
stromectol uk buy: ivermectin 1 cream 45gm – ivermectin over the counter
https://ivermectin.store/# ivermectin 8000
amoxicillin without rx: amoxicillin no prescription – where to buy amoxicillin pharmacy
wegovy injection
where to get clomid no prescription: can i purchase cheap clomid prices – where buy cheap clomid now
You really make it appear really easy along with your presentation however I in finding this topic to be actually one thing which I believe I’d by
no means understand. It sort of feels too complicated and very extensive for me.
I’m looking ahead to your subsequent post, I’ll attempt to get the cling of it!
http://clomiphene.icu/# how can i get cheap clomid without prescription
http://amoxicillin.bid/# amoxicillin online without prescription
This excellent website really has all the info I wanted
about this subject and didn’t know who to ask.
netovideo.com
Zhang Maodao: “하루를 선택하십시오. 우리도 교사로 법원에 돌아가야 합니다. 우리는 준비해야 합니다.”
generic zithromax medicine: where can i buy zithromax capsules – zithromax capsules price
order semaglutide
stromectol tablets uk: ivermectin 500mg – ivermectin human
rybelsus online pharmacy
wegovy buy from canada
semaglutide pill
semaglutide mexico
very informative articles or reviews at this time.
purchase rybelsus
prednisone 20 mg: india buy prednisone online – prednisone 10mg prices
http://clomiphene.icu/# cost of generic clomid
rybelsus pill form
https://azithromycin.bid/# buy cheap zithromax online
http://azithromycin.bid/# zithromax online australia
semaglutide buy australia
I do not even understand how I ended up here, but I assumed this publish used to be great
I very delighted to find this internet site on bing, just what I was searching for as well saved to fav
This is really interesting, You’re a very skilled blogger. I’ve joined your feed and look forward to seeking more of your magnificent post. Also, I’ve shared your site in my social networks!
rivipaolo.com
Zhang 황후는 매우 흥분했고 Fang Xiaofan은 최신 정보를 얻었습니다.
Mi nombre es Trent, resido https://Regainstudy.com/bbs/board.php?bo_table=free&wr_id=922234 Gata de Gorgos provincia de Alicante y soy un ingeniero informático. Estoy casado y tenemos un hijo, Alejandro, que tiene 6 años.
rybelsus buy from canada
Thank you great posting about essential oil. Hello Administ .
I am truly thankful to the owner of this web site who has shared this fantastic piece of writing at at this place.
Hey this is kinda of off topic but I was wanting to know if blogs use
WYSIWYG editors or if you have to manually code with HTML.
I’m starting a blog soon but have no coding expertise
so I wanted to get guidance from someone with experience.
Any help would be enormously appreciated!
my website – wrecker yard near me
It is not my first time to visit this website, i am browsing this web
site dailly and get good data from here every day.
my web page – government auction
rybelsus 14mg
What is Cryptocurrency and how does it work
I really love to read such an excellent article. Helpful article. Hello Administ .
Nice post. I learn something totally new and challenging on websites
Hi there to all, for the reason that I am genuinely keen of reading this website’s post to be updated on a regular basis. It carries pleasant stuff.
http://mexicanpharm.shop/# mexican border pharmacies shipping to usa mexicanpharm.shop
http://indianpharm.store/# Online medicine order indianpharm.store
rybelsus retail price
Wir holen Sie gerne am Flughafen ab und bringen Sie mit unserem komfortablen Taxi entspannt
zu Ihrem Ziel.
https://mexicanpharm.shop/# pharmacies in mexico that ship to usa mexicanpharm.shop
canada pharmacy world: Canadian International Pharmacy – canadianpharmacyworld com canadianpharm.store
canadian pharmacy 24: Pharmacies in Canada that ship to the US – pharmacy rx world canada canadianpharm.store
This is my first time pay a quick visit at here and i am really happy to read everthing at one place
pinuputhezin.com/
Name Up Casino is the certified website of the renowned online casino seeking players from Brazil.
http://www.pinuputhezin.com
mexican online pharmacies prescription drugs: Certified Pharmacy from Mexico – mexican rx online mexicanpharm.shop
https://indianpharm.store/# india pharmacy indianpharm.store
пін ап
онлайн казіно україна https://www.pinupcasinolfsesn.kiev.ua/.
Эксклюзивное пин-ап казино
jogos online casino https://pinupcasinojenzolo.com/.
rybelsus 3 mg tablet
Seriously loads of good knowledge.
http://mexicanpharm.shop/# mexican online pharmacies prescription drugs mexicanpharm.shop
best rated canadian pharmacy canadian pharmacy near me or canadapharmacyonline
https://maps.google.nu/url?q=https://canadianpharm.store best canadian pharmacy online
canadian pharmacy meds canadian pharmacy online and canada drug pharmacy canadian online drugstore
mail order pharmacy india best online pharmacy india or reputable indian online pharmacy
https://cse.google.com.pk/url?sa=t&url=https://indianpharm.store indian pharmacy paypal
pharmacy website india reputable indian online pharmacy and india online pharmacy buy medicines online in india
reputable indian online pharmacy: international medicine delivery from india – top online pharmacy india indianpharm.store
rybelsus order
rybelsus canada pharmacy prices
Thank you great posting about essential oil. Hello Administ .
I like this web blog it’s a master piece!
Glad I noticed this on google.
My web blog; 2003 jeep grand cherokee laredo
Ridiculous quest there. What happened after?
Thanks!
Hey there! I could have sworn I’ve been to this
site before but after checking through some of the post I realized it’s new to me.
Anyhow, I’m definitely delighted I found it and
I’ll be book-marking and checking back frequently!
my web-site: used alternator near me
binsunvipp.com
장 황후는 기뻐하며 꽃을 들고 고개를 끄덕였습니다. “아주 좋아, 아주 좋아.”
http://indianpharm.store/# indian pharmacy indianpharm.store
https://mexicanpharm.shop/# mexico drug stores pharmacies mexicanpharm.shop
generic ozempic for weight loss
buying prescription drugs in mexico online: Online Mexican pharmacy – best online pharmacies in mexico mexicanpharm.shop
reputable mexican pharmacies online: mexican drugstore online – mexico pharmacy mexicanpharm.shop
Даркнет, сокращение от “даркнетворк” (dark network), представляет собой часть интернета, недоступную для обычных поисковых систем. В отличие от повседневного интернета, где мы привыкли к публичному контенту, даркнет скрыт от обычного пользователя. Здесь используются специальные сети, такие как Tor (The Onion Router), чтобы обеспечить анонимность пользователей.
Everything is very open and very clear explanation of issues. was truly information.Website Giriş için Tıklayın: deneme bonusu veren siteler
http://canadianpharm.store/# my canadian pharmacy review canadianpharm.store
canada drugs online: Canada Pharmacy online – canadian pharmacy uk delivery canadianpharm.store
is canadian pharmacy legit: Canadian Pharmacy – buy canadian drugs canadianpharm.store
I do not even understand how I ended up here, but I assumed this publish used to be great
best online pharmacy india india online pharmacy or buy medicines online in india
http://www.christopheweber.de/homepage/gemeinsam/ext_link.php?url=http://indianpharm.store indian pharmacy online
online pharmacy india reputable indian pharmacies and top online pharmacy india india pharmacy
I don’t even understand how I stopped up here, however I believed this submit was once great. I don’t understand who you’re however definitely you are going to a famous blogger should you aren’t already 😉 Cheers!
Here is my page https://nanasnichoir.com/community/profile/cindyschardt481/
https://canadianpharm.store/# best canadian pharmacy online canadianpharm.store
ozempic tab 14mg
semaglutide 3 mg tablet
semaglutide 14
п»їlegitimate online pharmacies india: Indian pharmacy to USA – best india pharmacy indianpharm.store
world pharmacy india: india pharmacy – best india pharmacy indianpharm.store
https://indianpharm.store/# buy prescription drugs from india indianpharm.store
cheap ozempic
I always was interested in this topic and stock still am, regards for posting.
Also visit my site … 2002 toyota sequoia
This is really interesting, You’re a very skilled blogger. I’ve joined your feed and look forward to seeking more of your magnificent post. Also, I’ve shared your site in my social networks!
mexico pharmacies prescription drugs: Online Mexican pharmacy – buying from online mexican pharmacy mexicanpharm.shop
onlinepharmaciescanada com: Canadian International Pharmacy – canadian pharmacy meds review canadianpharm.store
I just like the helpful information you provide in your articles
https://indianpharm.store/# reputable indian online pharmacy indianpharm.store
https://indianpharm.store/# top 10 pharmacies in india indianpharm.store
order rybelsus online
best online canadian pharmacy: Certified Online Pharmacy Canada – reliable canadian pharmacy reviews canadianpharm.store
canadapharmacyonline: Best Canadian online pharmacy – cheapest pharmacy canada canadianpharm.store
canadian drugs pharmacy canadian pharmacy ratings or canadian pharmacy world
http://ggeek.ru/bitrix/redirect.php?event1=&event2=&event3=&goto=https://canadianpharm.store safe online pharmacies in canada
canadian pharmacy sarasota my canadian pharmacy and cross border pharmacy canada is canadian pharmacy legit
https://mexicanpharm.shop/# mexico pharmacies prescription drugs mexicanpharm.shop
https://indianpharm.store/# pharmacy website india indianpharm.store
ozempic semaglutide tablets 3mg
mexican online pharmacies prescription drugs: mexican pharmacy – mexican rx online mexicanpharm.shop
mexico pharmacies prescription drugs: Online Mexican pharmacy – mexico drug stores pharmacies mexicanpharm.shop
canadian online drugs Pharmacies in Canada that ship to the US canadian discount pharmacy canadianpharm.store
mexican rx online: Online Mexican pharmacy – pharmacies in mexico that ship to usa mexicanpharm.shop
digiyumi.com
징이 다시 두들겼다. “대승, 모베이 대승, 모베이 대승!”
semaglutide generic
I am absolutely thrilled to introduce you to the incredible Sumatra Slim Belly Tonic! This powdered weight loss formula is like no other, featuring a powerful blend of eight natural ingredients that are scientifically linked to fat burning, weight management, and overall weight loss. Just imagine the possibilities! With Sumatra Slim Belly Tonic, you have the opportunity to finally achieve your weight loss goals and transform your body into the best version of yourself.
discount prescriptions: drugstore online – viagra no prescription canadian pharmacy
discount prescriptions: buying prescription drugs canada – pharmacy drug store
whoah this blog is wonderful i really like reading your articles.
Stay up the great work! You understand, many people are
searching round for this info, you can help them greatly.
buy prescriptions online: global pharmacy canada – online pharmacies canadian
rg777
rg777
online pharmacy aarp canadian pharmacy canadian pharmacies for cialis
https://canadadrugs.pro/# best online canadian pharmacy review
https://canadadrugs.pro/# pharmacy online canada
Пін ап
азартні ігри https://pinupcasinolfsesn.kiev.ua .
ozempic pill form
rybelsus tab 14mg
**娛樂城與線上賭場:現代娛樂的轉型與未來**
在當今數位化的時代,”娛樂城”和”線上賭場”已成為現代娛樂和休閒生活的重要組成部分。從傳統的賭場到互聯網上的線上賭場,這一領域的發展不僅改變了人們娛樂的方式,也推動了全球娛樂產業的創新與進步。
**起源與發展**
娛樂城的概念源自於傳統的實體賭場,這些場所最初旨在提供各種形式的賭博娛樂,如撲克、輪盤、老虎機等。隨著時間的推移,這些賭場逐漸發展成為包含餐飲、表演藝術和住宿等多元化服務的綜合娛樂中心,從而吸引了來自世界各地的遊客。
隨著互聯網技術的飛速發展,線上賭場應運而生。這種新型態的賭博平台讓使用者可以在家中或任何有互聯網連接的地方,享受賭博遊戲的樂趣。線上賭場的出現不僅為賭博愛好者提供了更多便利與選擇,也大大擴展了賭博產業的市場範圍。
**特點與魅力**
娛樂城和線上賭場的主要魅力在於它們能提供多樣化的娛樂選項和高度的可訪問性。無論是實體的娛樂城還是虛擬的線上賭場,它們都致力於創造一個充滿樂趣和刺激的環境,讓人們可以從日常生活的壓力中短暫逃脫。
此外,線上賭場通過提供豐富的遊戲選擇、吸引人的獎金方案以及便捷的支付系統,成功地吸引了全球範圍內的用戶。這些平台通常具有高度的互動性和社交性,使玩家不僅能享受遊戲本身,還能與來自世界各地的其他玩家交流。
**未來趨勢**
隨著技術的不斷進步和用戶需求的不斷演變,娛樂城和線上賭場的未來發展呈現出多元化的趨勢。一方面,虛
擬現實(VR)和擴增現實(AR)技術的應用,有望為線上賭場帶來更加沉浸式和互動式的遊戲體驗。另一方面,對於實體娛樂城而言,將更多地注重提供綜合性的休閒體驗,結合賭博、娛樂、休閒和旅遊等多個方面,以滿足不同客群的需求。
此外,隨著對負責任賭博的認識加深,未來娛樂城和線上賭場在提供娛樂的同時,也將更加注重促進健康的賭博行為和保護用戶的安全。
總之,娛樂城和線上賭場作為現代娛樂生活的一部分,隨著社會的發展和技術的進步,將繼續演化和創新,為人們提供更多的樂趣和便利。這一領域的未來發展無疑充滿了無限的可能性和機遇。
rybelsus online cheap
canada drug stores: drugs without a doctor s prescription – canadian online pharmacies reviews
Веселый пин-ап казино
pin up aviator http://www.pinupcasinojenzolo.com/.
canada prescription drugs: safe online pharmacies – over the counter drug store
canadian pharmacies selling cialis: legit canadian pharmacy – pharmacy canada online
Yourinsightsarethought-provoking
Thank you great posting about essential oil. Hello Administ . Website Giriş için Tıklayın: asyabahisgo1.com
semaglutide for weight loss
Verdiginiz bilgiler için teşekkürler , güzel yazı olmuş
Hi, just required you to know I he added your site to my Google bookmarks due to your layout. But seriously, I believe your internet site has 1 in the freshest theme I??ve came across.Website Giriş için Tıklayın: asyabahisgo1.com
semaglutide medication
canadian pharmacies selling viagra canadapharmacyonline com or canadian pharmacy advair
https://toolbarqueries.google.sr/url?q=https://canadadrugs.pro canadian internet pharmacies
prescription drug price comparison no 1 canadian pharcharmy online and canadian pharmacy no prescription required mexican online pharmacy
canadian drugstore prices: reliable canadian pharmacy – top online pharmacies
canada drug online: best internet pharmacies – buy online prescription drugs
discount drug store online shopping: list of canadian online pharmacies – top rated canadian pharmacies
Wow, that’s what I was searching for, what a stuff! present here at
this webpage, thanks admin of this site.
tsrrub.com
Fang Jifan의 손에 든 차가 예기치 않게 그의 손을 떠나 쿵 소리를 내며 착지했습니다.
canada medications mexican border pharmacies shipping to usa or canadian prescription prices
https://images.google.gr/url?sa=t&url=https://canadadrugs.pro accredited canadian pharmacies
world pharmacy canadian family pharmacy and canada pharmacy online reviews canadian pharmacy without a prescription
canadian pharmacies that are legit canadian pharmaceutical ordering prednisone mexican pharmacy
http://canadadrugs.pro/# canadian pharmacy world reviews
I am sure this article has touched all the internet people, its really really good post on building up new website.
Thank you for the informative content. I just loved it all. I want to take the time to share one of the best fake tweets generator tools, Please go through this mentioned blog and you will get to know more about this tool.
my canadian family pharmacy: prescription drugs without prescription – canadian mail order drug companies
Thanks for sharing tr sohbet odaları
buy ozempic online no script
legal canadian prescription drugs online canadian discount pharmacy or pharmacies not requiring a prescription
https://www.google.gr/url?q=https://canadadrugs.pro mail order pharmacies
canadian pharmacy certified online drugstore and canadian neighborhood pharmacy canada mail pharmacy
prescription drug prices comparison: trusted canadian pharmacies – canadian prescription
online pharmacy medications: online pharmacy with no prescription – online pharmacy no prescription necessary
canada pharmacy world mexican border pharmacies shipping to usa or canada online pharmacy reviews
http://www.dvdmania.ru/eshop/search.php?search_query=%3Ca+href%3Dhttps://canadadrugs.pro%2Fusers%2F1495316%2F%3E%EE%F2%E5%EB%E8+%CF%E5%F2%E5%F0%E1%F3%F0%E3%E0%3C%2Fa%3E+%97+%EC%FB%F1%EB%E8%2C+%ED%E0%E1%EB%FE%E4%E5%ED%E8%FF trusted canadian pharmacies
list of canadian pharmacies legitimate online canadian pharmacies and best canadian pharmacy no prescription canadian pharmacieswith no prescription
shlemsnidf.dp.ua/p-shlem-shark-evo-one-2-lithion-dual-black-red/
Мотошлемы популярных брендов в наличии на широком ассортименте (а) также с доставкой числом Украине.
shlemsnidf.dp.ua/p-shlem-scorpion-exo-combat-ii-black-mat/
buy ozempic from canada
wegovy online prescription
trusted online pharmacy: pharmacy drug store online no rx – legitimate online canadian pharmacies
ozempic pill form
I got this web page from my pal who informed me regarding this web
page and at the moment this time I am visiting this site and reading very informative posts here.
I very delighted to find this internet site on bing, just what I was searching for as well saved to fav
Sweet blog! I found it while surfing around on Yahoo News.
Do you have any suggestions on how to get listed in Yahoo News?
I’ve been trying for a while but I never seem to
get there! Appreciate it
compare prices prescription drugs canadian pharmacy generic or top online pharmacies
http://www.google.com.bd/url?q=https://canadadrugs.pro/ online prescriptions without a doctor
online pharmacies in canada discount prescription drugs and pharmacy express online most reputable canadian pharmacy
discount canadian pharmacy: best rated canadian pharmacies – mail order drug store
compare prices prescription drugs: safe canadian pharmacies online – online meds
best canadian online pharmacies: legitimate canadian pharmacy online – best canadian pharmacies online
construction staffing dallas
http://canadadrugs.pro/# prescription drugs without prescription
http://canadadrugs.pro/# online drugstore reviews
Thanks for sharing
canadian prescriptions: canadian rx pharmacy – best price prescription drugs
canada drugs online: medications canada – drugs without a prescription
semaglutide for weight loss without diabetes
I very delighted to find this internet site on bing, just what I was searching for as well saved to fav
wegovy semaglutide tablets 7.5 mcg
top canadian pharmacies: online canadian pharmacy no prescription – drug canada
trusted canadian pharmacies: meds without prescription – discount prescription drugs
securitysolutions
rybelsus online cheap
http://canadadrugs.pro/# legitimate online pharmacies
http://canadadrugs.pro/# reliable online canadian pharmacy
buy ozempic
drugstore online shopping: medicin without prescription – overseas no rx drugs online
top mail order pharmacies: prescription without a doctors prescription – canada pharmacy world
online pharmacy medications: top canadian pharmacies – canadian drugs pharmacy
canada pharmaceuticals online: best internet pharmacies – highest rated canadian pharmacy
over the counter drug store: online canadian pharmacy no prescription – mail order pharmacy list
“Impressive!”
online medications legitimate canadian mail order pharmacies or cheap online pharmacy
http://give-spiral.co.jp/index.php?a=free_page/goto_mobile&referer=https://canadadrugs.pro discount pharmaceuticals
cheap rx drugs canadian pharcharmy online and safe online canadian pharmacy canadian drugs cialis
http://canadadrugs.pro/# trust pharmacy
online pharmacy canada best 10 online pharmacies canadian meds without prescription
http://canadadrugs.pro/# canada meds
buy ozempic
online drugs: best pharmacy – fda approved pharmacies in canada
buy rybelsus
rybelsus tab 3mg
ozempic tablet
top ed pills best pills for ed best ed pills online
buy rybelsus in canada
I do not even understand how I ended up here, but I assumed this publish used to be great
prescription drugs canada buy online cheap cialis buy prescription drugs without doctor
erection pills viagra online: what are ed drugs – ed meds online without doctor prescription
world pharmacy india: buy medicines online in india – buy prescription drugs from india
“Nice work!”
Do you have a spam issue on this site; I
also am a blogger, and I was wanting to know
your situation; many of us have developed some nice practices and we are looking to swap techniques with
others, why not shoot me an email if interested.
my blog post – http://www.artscow.com/user/8taylore9122xdtb9-3184071
What’s up to every body, it’s my first visit of this blog; this web site includes amazing and actually good data designed for visitors.
Visit my blog: http://www.jpnumber.com/jump/?url=http://warszawski.waw.pl/
If you are going for finest contents like me, just pay a visit this web site daily as it presents
feature contents, thanks
Also visit my homepage; http://noreferer.net/?url=http://warszawski.waw.pl/
semaglutide generic
medication from mexico pharmacy: medication from mexico pharmacy – mexico pharmacies prescription drugs
buy wegovy in mexico
http://medicinefromindia.store/# buy medicines online in india
http://edwithoutdoctorprescription.pro/# buy prescription drugs from canada cheap
buy semaglutide in mexico
online pharmacy india best online pharmacy india buy medicines online in india
top rated ed pills: otc ed pills – best male ed pills
indian pharmacies safe: indian pharmacy online – mail order pharmacy india
semaglutide 3 mg
real viagra without a doctor prescription ed meds online without doctor prescription legal to buy prescription drugs without prescription
chasemusik.com
“반역자, 반역자가 어디 있습니까?” 홍지황제가 한걸음씩 다가갔다.
https://edwithoutdoctorprescription.pro/# viagra without doctor prescription
https://canadianinternationalpharmacy.pro/# canadapharmacyonline
pharmacy com canada: drugs from canada – legitimate canadian pharmacy online
Hi there, just turned into alert to your weblog thru Google, and located that it is truly informative. I’m going to watch out for brussels. I will be grateful in case you continue this in future. Many people will probably be benefited from your writing. Cheers!
Here is my page – https://Www.Beforeandafterido.org/question/get-regarding-your-unwanted-trash-and-scraps-with-junk-removal-and-hauling-2/
sm카지노 쿠폰
갑자기 많은 사람들이 Wang Wenyu의 약점을 발견하는 것 같았습니다.
https://alepz.com/
world pharmacy india online pharmacy india buy medicines online in india
best online pharmacies in mexico best online pharmacies in mexico or mexico pharmacies prescription drugs
http://ewin.biz/jsonp/?url=https://certifiedpharmacymexico.pro medication from mexico pharmacy
mexican rx online mexican drugstore online and п»їbest mexican online pharmacies mexico pharmacies prescription drugs
http://edwithoutdoctorprescription.pro/# ed meds online without doctor prescription
generic semaglutide cost
п»їlegitimate online pharmacies india reputable indian online pharmacy or reputable indian pharmacies
https://51.biqund.com/index/d1?diff=0&utm_clickid=6g0kk0oskcwwo4c0&aurl=https://medicinefromindia.store cheapest online pharmacy india
indian pharmacies safe buy prescription drugs from india and online pharmacy india mail order pharmacy india
http://certifiedpharmacymexico.pro/# mexican border pharmacies shipping to usa
https://edpill.cheap/# top erection pills
reggionotizie.com
Hongzhi 황제는 천천히 말했습니다. “이것이 당신이 황제의 법령을 거짓으로 설교 한 이유입니까?”
my canadian pharmacy reviews canadian pharmacy 1 internet online drugstore best canadian pharmacy to buy from
indian pharmacy buy prescription drugs from india or buy medicines online in india
https://www.musashikoyama-palm.com/modules/information6/wp-ktai.php?view=redir&url=http://medicinefromindia.store indian pharmacies safe
india online pharmacy п»їlegitimate online pharmacies india and indian pharmacy online india pharmacy
Wonderful goods from you, man. I’ve remember your stuff prior to and you’re simply too magnificent. I really like what you’ve received here, really like what you’re stating and the way during which you assert it. You are making it entertaining and you still take care of to stay it smart. I can not wait to read far more from you. This is actually a terrific site.
“Excellent!”
“Bravo!”
where to buy semaglutide
very informative articles or reviews at this time.
wegovy
semaglutide canada pharmacy
what is the best ed pill: erectile dysfunction medications – pills erectile dysfunction
Thank you for the great information that you have shared with us. However, if you want to compare your height with anyone, you can check it online on our tool called height comparison chart
Saved as a favorite, I like your web site!
I am regular visitor, how are you everybody? This paragraph posted at this web site is in fact pleasant.
Here is my site :: http://dallasnxra683.bearsfanteamshop.com/cesarrmcb460
http://certifiedpharmacymexico.pro/# mexico pharmacies prescription drugs
escrow pharmacy canada: canadian pharmacy uk delivery – safe canadian pharmacies
http://edwithoutdoctorprescription.pro/# buy prescription drugs
generic semaglutide for weight loss
semaglutide buy uk
buy rybelsus
order rybelsus
indian pharmacy online: reputable indian online pharmacy – best online pharmacy india
https://certifiedpharmacymexico.pro/# mexican pharmaceuticals online
top 10 pharmacies in india: india online pharmacy – india online pharmacy
buy prescription drugs from india buy medicines online in india or india online pharmacy
https://toolbarqueries.google.com.ni/url?sa=i&url=http://medicinefromindia.store п»їlegitimate online pharmacies india
reputable indian pharmacies world pharmacy india and indian pharmacy online top 10 online pharmacy in india
mexican online pharmacies prescription drugs mexico drug stores pharmacies mexican border pharmacies shipping to usa
http://edwithoutdoctorprescription.pro/# viagra without a doctor prescription
http://medicinefromindia.store/# world pharmacy india
semaglutide sale
http://medicinefromindia.store/# top 10 online pharmacy in india
indianpharmacy com
buy canadian drugs cheap canadian pharmacy online canadian pharmacy 24 com
https://medicinefromindia.store/# pharmacy website india
india pharmacy mail order
top 10 pharmacies in india: reputable indian pharmacies – Online medicine home delivery
Understanding the processes and protocols within a Professional Tenure Committee (PTC) is crucial for faculty members. This Frequently Asked Questions (FAQ) guide aims to address common queries related to PTC procedures, voting, and membership.
1. Why should members of the PTC fill out vote justification forms explaining their votes?
Vote justification forms provide transparency in decision-making. Members articulate their reasoning, fostering a culture of openness and ensuring that decisions are well-founded and understood by the academic community.
2. How can absentee ballots be cast?
To accommodate absentee voting, PTCs may implement secure electronic methods or designated proxy voters. This ensures that faculty members who cannot physically attend meetings can still contribute to decision-making processes.
3. How will additional members of PTCs be elected in departments with fewer than four tenured faculty members?
In smaller departments, creative solutions like rotating roles or involving faculty from related disciplines can be explored. Flexibility in election procedures ensures representation even in departments with fewer tenured faculty members.
4. Can a faculty member on OCSA or FML serve on a PTC?
Faculty members involved in other committees like the Organization of Committee on Student Affairs (OCSA) or Family and Medical Leave (FML) can serve on a PTC, but potential conflicts of interest should be carefully considered and managed.
5. Can an abstention vote be cast at a PTC meeting?
Yes, PTC members have the option to abstain from voting if they feel unable to take a stance on a particular matter. This allows for ethical decision-making and prevents uninformed voting.
6. What constitutes a positive or negative vote in PTCs?
A positive vote typically indicates approval or agreement, while a negative vote signifies disapproval or disagreement. Clear definitions and guidelines within each PTC help members interpret and cast their votes accurately.
7. What constitutes a quorum in a PTC?
A quorum, the minimum number of members required for a valid meeting, is essential for decision-making. Specific rules about quorum size are usually outlined in the PTC’s governing documents.
Our Plan Packages: Choose The Best Plan for You
Explore our plan packages designed to suit your earning potential and preferences. With daily limits, referral bonuses, and various subscription plans, our platform offers opportunities for financial growth.
Blog Section: Insights and Updates
Stay informed with our blog, providing valuable insights into legal matters, organizational updates, and industry trends. Our recent articles cover topics ranging from law firm openings to significant developments in the legal landscape.
Testimonials: What Our Clients Say
Discover what our clients have to say about their experiences. Join thousands of satisfied users who have successfully withdrawn earnings and benefited from our platform.
Conclusion:
This FAQ guide serves as a resource for faculty members engaging with PTC procedures. By addressing common questions and providing insights into our platform’s earning opportunities, we aim to facilitate a transparent and informed academic community.
wegovy injection
top 10 online pharmacy in india best online pharmacy india or Online medicine order
http://thewoodsmen.com.au/analytics/outbound?url=https://medicinefromindia.store top online pharmacy india
india pharmacy Online medicine home delivery and reputable indian pharmacies top online pharmacy india
reputable indian online pharmacy: india pharmacy mail order – reputable indian pharmacies
top 10 pharmacies in india: cheapest online pharmacy india – п»їlegitimate online pharmacies india
buying prescription drugs in mexico purple pharmacy mexico price list mexico pharmacies prescription drugs
https://edwithoutdoctorprescription.pro/# best non prescription ed pills
http://medicinefromindia.store/# top 10 online pharmacy in india
Скрытая сеть, является, скрытую, инфраструктуру, в, глобальной сети, подключение, осуществляется, путем, уникальные, приложения и, технологии, предоставляющие, скрытность сетевых участников. Из числа, этих, средств, является, The Onion Router, который, предоставляет, приватное, подключение в сеть Даркнет. При помощи, его, сетевые пользователи, могут, незаметно, посещать, сайты, не индексируемые, традиционными, поисками, позволяя таким образом, обстановку, для осуществления, различных, запрещенных активностей.
Кракен, соответственно, часто упоминается в контексте, темной стороной интернета, в качестве, рынок, для торговли, киберпреступниками. На этой площадке, можно, приобрести, разнообразные, непозволительные, вещи, начиная от, наркотических средств и стволов, заканчивая, услугами хакеров. Система, гарантирует, высокую степень, шифрования, и, защиты личной информации, это, предоставляет, ее, интересной, для тех, кто, желает, предотвратить, преследований, со стороны правоохранительных органов
best online pharmacy india: india online pharmacy – indianpharmacy com
viagra without a doctor prescription ed pills without doctor prescription viagra without a doctor prescription
generic semaglutide for weight loss
Online medicine home delivery top online pharmacy india or buy prescription drugs from india
https://maps.google.se/url?sa=t&url=https://medicinefromindia.store п»їlegitimate online pharmacies india
Online medicine order Online medicine order and Online medicine order buy prescription drugs from india
staffing agency for construction
кракен kraken kraken darknet top
Темная сторона интернета, представляет собой, закрытую, сеть, в, сети, вход, реализуется, через, специальные, софт плюс, инструменты, обеспечивающие, конфиденциальность пользователей. Один из, подобных, инструментов, представляется, браузер Тор, который позволяет, гарантирует, безопасное, подключение к интернету, к сети Даркнет. С, его, участники, могут иметь возможность, незаметно, обращаться к, интернет-ресурсы, не индексируемые, обычными, поисковыми сервисами, создавая тем самым, среду, для проведения, различных, нелегальных деятельностей.
Кракен, соответственно, часто упоминается в контексте, скрытой сетью, в качестве, торговая площадка, для осуществления обмена, киберпреступниками. На этом ресурсе, есть возможность, купить, различные, непозволительные, услуги, начиная, наркотиков и оружия, доходя до, услугами хакеров. Ресурс, гарантирует, высокий уровень, шифрования, и, защиты личной информации, это, создает, эту площадку, интересной, для тех, кого, намерен, избежать, негативных последствий, со стороны органов порядка.
Your style is unique in comparison to other folks I have read stuff from.
Many thanks for posting when you’ve got the opportunity, Guess
I will just book mark this blog.
my blog – http://www.wikalenda.com/redirect?url=http://warszawski.waw.pl/
http://medicinefromindia.store/# best india pharmacy
http://certifiedpharmacymexico.pro/# buying from online mexican pharmacy
buying prescription drugs in mexico mexico pharmacy mexico drug stores pharmacies
Güvenli bir çevre için elektrikli çit sistemlerini tercih edin.
Akü şarj cihazı ve çift akü şarj desteği.
mexican mail order pharmacies mexican online pharmacies prescription drugs п»їbest mexican online pharmacies
http://edwithoutdoctorprescription.pro/# mexican pharmacy without prescription
https://medicinefromindia.store/# india pharmacy
where can i buy semaglutide
ed pills gnc: cheap erectile dysfunction – online ed medications
non prescription erection pills ed pills without doctor prescription viagra without a doctor prescription
I have read so many articles or reviews regarding the blogger lovers
but this article is genuinely a fastidious post, keep it up. https://Socialtechnet.com/story1865918/beauty-bomb
This is my first time pay a quick visit at here and i am really happy to read everthing at one place
mexico drug stores pharmacies mexican rx online or mexican border pharmacies shipping to usa
https://www.google.co.ma/url?q=https://certifiedpharmacymexico.pro п»їbest mexican online pharmacies
buying from online mexican pharmacy medication from mexico pharmacy and mexico pharmacies prescription drugs п»їbest mexican online pharmacies
reputable indian online pharmacy top 10 pharmacies in india or top 10 online pharmacy in india
https://cse.google.ws/url?sa=t&url=https://medicinefromindia.store indianpharmacy com
india online pharmacy buy medicines online in india and п»їlegitimate online pharmacies india cheapest online pharmacy india
buying prescription drugs in mexico online medicine in mexico pharmacies mexico drug stores pharmacies
п»їbest mexican online pharmacies: pharmacies in mexico that ship to usa – reputable mexican pharmacies online
https://canadianinternationalpharmacy.pro/# canadian pharmacy king
https://edpill.cheap/# ed treatment review
where can i buy semaglutide
п»їlegitimate online pharmacies india online pharmacy india or top 10 pharmacies in india
https://images.google.dk/url?sa=t&url=https://medicinefromindia.store Online medicine home delivery
top 10 pharmacies in india online pharmacy india and online shopping pharmacy india india pharmacy
pills for ed best pill for ed herbal ed treatment
where to buy semaglutide online
http://edpill.cheap/# the best ed pill
semaglutide 14mg
mail order pharmacy india online pharmacy india or best online pharmacy india
https://maps.google.sn/url?sa=t&url=https://medicinefromindia.store indian pharmacy
best online pharmacy india Online medicine home delivery and online shopping pharmacy india top 10 pharmacies in india
best ed drugs: top ed drugs – ed pills cheap
indian pharmacies safe Online medicine order buy medicines online in india
order ozempic online
cheap ed drugs herbal ed treatment cheap erectile dysfunction pills
mexican rx online mexican rx online or buying prescription drugs in mexico online
http://www.pichel64.de/redirect.php?blog=watch+full+movie+online&url=http://certifiedpharmacymexico.pro mexico drug stores pharmacies
mexican drugstore online buying prescription drugs in mexico online and best online pharmacies in mexico purple pharmacy mexico price list
wegovy canada pharmacy prices
ozempic tablets
buy prescription drugs from india indian pharmacy or india online pharmacy
http://d-quintet.com/i/index.cgi?id=1&mode=redirect&no=494&ref_eid=33&url=http://medicinefromindia.store indianpharmacy com
india online pharmacy reputable indian pharmacies and indian pharmacy online online shopping pharmacy india
best pill for ed best pill for ed non prescription ed pills
https://certifiedpharmacymexico.pro/# purple pharmacy mexico price list
http://canadianinternationalpharmacy.pro/# canadian pharmacy online ship to usa
mexican drugstore online: buying from online mexican pharmacy – reputable mexican pharmacies online
indian pharmacy best online pharmacy india best india pharmacy
where can i buy ozempic
rybelsus online prescription
semaglutide 3mg
wegovy diabetes
Thanks for sharing mynet sohbet
homefronttoheartland.com
Fang Jifan은 Zhu Houzhao를 동정적으로 바라 보았습니다. “폐하, 당신은 바람을 피우고 있습니다.”
certified canadian pharmacy: canadian pharmacies that deliver to the us – canada drugs
indian pharmacies safe pharmacy website india online shopping pharmacy india
rybelsus semaglutide
semaglutide weight loss
https://medicinefromindia.store/# legitimate online pharmacies india
http://canadianinternationalpharmacy.pro/# recommended canadian pharmacies
I am truly grateful to the owner of this web site who has shared this wonderful
piece of writing at at this place.
Visit my blog; geiger counter watch
discount prescription drugs: cheap cialis – п»їprescription drugs
http://medicinefromindia.store/# indianpharmacy com
buy wegovy online from india
http://medicinefromindia.store/# indian pharmacies safe
online shopping pharmacy india online shopping pharmacy india mail order pharmacy india
best online pharmacies in mexico purple pharmacy mexico price list or buying from online mexican pharmacy
http://www.johnsongt.com/link.php?name=deezee&addr=certifiedpharmacymexico.pro mexico pharmacies prescription drugs
pharmacies in mexico that ship to usa mexican rx online and buying prescription drugs in mexico online purple pharmacy mexico price list
online pharmacy india top 10 pharmacies in india or top 10 online pharmacy in india
https://maps.google.gr/url?sa=t&url=https://medicinefromindia.store cheapest online pharmacy india
top 10 pharmacies in india Online medicine order and buy medicines online in india buy prescription drugs from india
Makaleniz açıklayıcı yararlı anlaşılır olmuş ellerinize sağlık
What’s up to every one, it’s really a good for me to pay a visit this site, it contains important Information.
buying from online mexican pharmacy mexican mail order pharmacies mexican drugstore online
buy prescription drugs from india Online medicine order or indian pharmacies safe
http://twcmail.de/deref.php?http://medicinefromindia.store/ online pharmacy india
Online medicine order indian pharmacy and mail order pharmacy india buy prescription drugs from india
medicine in mexico pharmacies: purple pharmacy mexico price list – buying prescription drugs in mexico
thanks for sharing
rybelsus online pharmacy
How can chronic pain be managed effectively without opioids – where to buy cheap 90 mg dapoxetine
https://certifiedpharmacymexico.pro/# mexico pharmacies prescription drugs
https://canadianinternationalpharmacy.pro/# canada pharmacy world
canadian pharmacy com vipps approved canadian online pharmacy canadian pharmacy phone number
Watches World
Watches World
Customer Testimonials Illuminate WatchesWorld Experience
At WatchesWorld, customer satisfaction isn’t just a goal; it’s a glowing testament to our commitment to excellence. Let’s delve into what our valued customers have to say about their experiences, shedding light on the impeccable service and extraordinary timepieces we offer.
O.M.’s Trustpilot Review: A Seamless Journey
“Very good communication and follow-up throughout the process. The watch was perfectly packed and in mint condition. I would certainly work with this team again for a watch purchase.”
O.M.’s testimony exemplifies our dedication to communication and meticulous care in delivering watches in pristine condition. The trust forged with O.M. is a cornerstone of our customer relationships.
Richard Houtman’s Insightful Review: A Personal Touch
“I dealt with Benny, who was extremely helpful and courteous at all times, keeping me regularly informed of the process. Moving forward, even though I ended up sourcing the watch locally, I would still definitely recommend Benny and the company moving forward.”
Richard Houtman’s experience highlights our personalized approach. Benny’s assistance and continuous communication showcase our commitment to ensuring every customer feels valued and informed.
Customer’s Efficient Service Review: A Smooth Transaction
“A very good and efficient service. Kept me up to date on the order progress.”
Our commitment to efficiency is echoed in this customer’s feedback. Keeping clients informed and the smooth progression of orders are integral to the WatchesWorld experience.
Explore Our Latest Offerings
Audemars Piguet Royal Oak Selfwinding 37mm
An exquisite piece at €45,900, this 2022 model (REF: 15551ST.ZZ.1356ST.05) invites you to add it to your cart and elevate your collection.
Hublot Classic Fusion Chronograph Titanium Green 45mm
Priced at €8,590 in 2024 (REF: 521.NX.8970.RX), this Hublot creation is a blend of style and innovation, awaiting your request.
Omega Speedmaster Moonwatch 44.25 mm
A 2024 beauty at €9,190 (REF: 304.30.44.52.01.001), this Omega masterpiece beckons those with an eye for timeless elegance.
Best Sellers and Expert Selections
From the Bulgari Serpenti Tubogas 35mm to the Rolex Oyster Perpetual Cosmograph Daytona 40mm, our selection is curated by experts with an eye for excellence.
Secured and Tracked Delivery, Passionate Experts, and 24/7 Support
Our commitment extends beyond the purchase. With secured and tracked delivery, passionate experts at your service, and customer support available 24/7, we ensure a holistic and delightful experience.
At WatchesWorld, it’s not just about timepieces; it’s about crafting moments. Join us on this horological journey, where precision meets passion.
rybelsus 7 mg tablet
mexican pharmaceuticals online purple pharmacy mexico price list buying prescription drugs in mexico
order wegovy online
reputable mexican pharmacies online mexico pharmacy reputable mexican pharmacies online
mexican pharmacy mexican pharmacy medicine in mexico pharmacies
Bu güzel bilgilendirmeler için teşekkür ederim.
mexican online pharmacies prescription drugs buying prescription drugs in mexico online mexican pharmacy
rybelsus without prescription
best mexican online pharmacies mexican drugstore online pharmacies in mexico that ship to usa
wegovy 3mg
mexico pharmacy mexican online pharmacies prescription drugs mexican pharmaceuticals online
saungsantoso.com
“알았어.” Fang Jifan은 “당신이 성실한 사람인 줄 알았습니다.”
buying from online mexican pharmacy mexico pharmacies prescription drugs mexican online pharmacies prescription drugs
mexican pharmaceuticals online purple pharmacy mexico price list mexican border pharmacies shipping to usa
http://mexicanph.shop/# medicine in mexico pharmacies
mexican online pharmacies prescription drugs
medicine in mexico pharmacies mexican drugstore online or mexican pharmacy
https://www.google.com.jm/url?q=https://mexicanph.com purple pharmacy mexico price list
mexican mail order pharmacies п»їbest mexican online pharmacies and best online pharmacies in mexico medication from mexico pharmacy
pharmacies in mexico that ship to usa purple pharmacy mexico price list mexico drug stores pharmacies
best online pharmacies in mexico п»їbest mexican online pharmacies or mexican pharmaceuticals online
https://www.google.co.ve/url?q=http://mexicanph.shop mexican rx online
best online pharmacies in mexico п»їbest mexican online pharmacies and mexican rx online purple pharmacy mexico price list
alepz.com
“무슨 일이야!” Xu Jing은 위엄을 드러내며 단호하게 말했다.
https://louisgalaxy.com/
medicine in mexico pharmacies mexican drugstore online or buying from online mexican pharmacy
https://images.google.ml/url?q=https://mexicanph.com п»їbest mexican online pharmacies
buying prescription drugs in mexico online п»їbest mexican online pharmacies and mexico pharmacy best online pharmacies in mexico
mexican online pharmacies prescription drugs pharmacies in mexico that ship to usa mexican mail order pharmacies
best online pharmacies in mexico mexico drug stores pharmacies pharmacies in mexico that ship to usa
mexican drugstore online mexican mail order pharmacies mexico drug stores pharmacies
rybelsus 3mg
mexican online pharmacies prescription drugs mexican border pharmacies shipping to usa mexico pharmacies prescription drugs
semaglutide 14mg tablets
medicine in mexico pharmacies purple pharmacy mexico price list or purple pharmacy mexico price list
http://friend.netdirector.co.uk/3a8anaqu8ephenec/mexicanph.shop/cookie-policy mexican pharmaceuticals online
mexico drug stores pharmacies п»їbest mexican online pharmacies and mexico drug stores pharmacies mexican drugstore online
thanks for sharing
mexico drug stores pharmacies mexican border pharmacies shipping to usa or buying prescription drugs in mexico
https://images.google.gr/url?sa=t&url=https://mexicanph.com mexican mail order pharmacies
mexico drug stores pharmacies mexican mail order pharmacies and mexico pharmacies prescription drugs medicine in mexico pharmacies
http://mexicanph.shop/# buying prescription drugs in mexico online
mexican rx online
mexican pharmaceuticals online mexican pharmacy mexico drug stores pharmacies
mexico drug stores pharmacies mexican pharmacy or mexican rx online
https://toolbarqueries.google.ac/url?q=https://mexicanph.shop mexican online pharmacies prescription drugs
mexico drug stores pharmacies mexican rx online and mexican drugstore online mexican online pharmacies prescription drugs
Havalandırma sistemleri konusunda uzman, güvenilir bir firma. İşlerini ciddiyetle yapan bir ekip, kesinlikle öneriyorum.
http://mexicanph.shop/# п»їbest mexican online pharmacies
medication from mexico pharmacy
I’m often to blogging and i really appreciate your content. The article has actually peaks my interest. I’m going to bookmark your web site and maintain checking for brand spanking new information.
buy rybelsus online no script
buying prescription drugs in mexico mexican rx online mexican drugstore online
buy ozempic
Ne zamandır web sitelerim için aradığım içeriği sonunda buldum. Bu kadar detaylı ve net açıklama için teşekkürler.
reputable mexican pharmacies online mexican mail order pharmacies buying prescription drugs in mexico online
mexican drugstore online п»їbest mexican online pharmacies mexican pharmacy
rybelsus semaglutide tablets 7.5 mcg
Timepieces Planet
Buyer Reviews Illuminate Timepieces Universe Experience
At WatchesWorld, client contentment isn’t just a goal; it’s a glowing evidence to our commitment to excellence. Let’s dive into what our valued patrons have to communicate about their journeys, illuminating on the perfect service and exceptional timepieces we present.
O.M.’s Review Feedback: A Uninterrupted Journey
“Very good comms and follow along throughout the procedure. The watch was perfectly packed and in perfect. I would definitely work with this group again for a watch purchase.
O.M.’s declaration illustrates our loyalty to interaction and precise care in delivering timepieces in perfect condition. The faith forged with O.M. is a cornerstone of our patron relations.
Richard Houtman’s Insightful Review: A Personalized Reach
“I dealt with Benny, who was exceptionally useful and gracious at all times, keeping me regularly informed of the course. Going forward, even though I ended up sourcing the wristwatch locally, I would still definitely recommend Benny and the enterprise moving forward.
Richard Houtman’s interaction spotlights our customized approach. Benny’s assistance and continuous comms showcase our dedication to ensuring every patron feels appreciated and apprised.
Customer’s Efficient Assistance Testimonial: A Smooth Trade
“A very good and productive service. Kept me informed on the order advancement.
Our devotion to streamlining is echoed in this customer’s input. Keeping patrons informed and the uninterrupted advancement of orders are integral to the WatchesWorld journey.
Examine Our Newest Selections
AP Royal Oak Automatic 37mm
A gorgeous piece at €45,900, this 2022 edition (REF: 15551ST.ZZ.1356ST.05) invites you to add it to your basket and elevate your collection.
Hublot Classic Fusion Chronograph Titanium Green 45mm
Priced at €8,590 in 2024 (REF: 521.NX.8970.RX), this Hublot creation is a fusion of styling and creativity, awaiting your request.
buying from online mexican pharmacy pharmacies in mexico that ship to usa mexican drugstore online
Hi tһeгe, just wanteⅾ to say, I loved this post.
It was funny. Keep on posting!
purple pharmacy mexico price list best mexican online pharmacies mexican mail order pharmacies
mexican pharmacy buying prescription drugs in mexico or mexican drugstore online
http://logen.ru/bitrix/redirect.php?goto=https://mexicanph.shop mexican border pharmacies shipping to usa
reputable mexican pharmacies online medication from mexico pharmacy and mexico pharmacies prescription drugs medicine in mexico pharmacies
http://mexicanph.com/# mexican rx online
reputable mexican pharmacies online
mexican drugstore online best online pharmacies in mexico or pharmacies in mexico that ship to usa
https://www.google.sk/url?q=https://mexicanph.shop mexican pharmacy
=buy+generic+viagra;+mexicanph.shop,]medication from mexico pharmacy reputable mexican pharmacies online and mexico pharmacies prescription drugs buying prescription drugs in mexico
buying from online mexican pharmacy pharmacies in mexico that ship to usa or п»їbest mexican online pharmacies
https://www.google.ad/url?q=http://mexicanph.shop mexican rx online
mexican drugstore online purple pharmacy mexico price list and mexican online pharmacies prescription drugs mexican mail order pharmacies
best online pharmacies in mexico medication from mexico pharmacy mexican online pharmacies prescription drugs
pharmacies in mexico that ship to usa buying prescription drugs in mexico buying prescription drugs in mexico
Chaque lundi, vous avez accès au bonus de La Super Machine du Lundi.
http://www.xbet-france.com
Working 1xbet looking-glass as a service to entering the authentic website of the bookmaker. Say it to register with 1xBet.
xbet-france.com
mexican drugstore online buying from online mexican pharmacy mexican rx online
reputable mexican pharmacies online п»їbest mexican online pharmacies medication from mexico pharmacy
http://mexicanph.com/# mexico drug stores pharmacies
purple pharmacy mexico price list
ST666
Ремонтная смесь: лучший выбор для идеального результата
материалы для кирпичной кладки https://www.remontnaja-smes-dlja-kirpichnoj-kladki.ru/ .
buy rybelsus online from india
rybelsus diabetes
Заволодіти публікою пін ап
українські онлайн казіно http://pinupcasinoqgcvbisd.kiev.ua/ .
mexican mail order pharmacies mexico pharmacies prescription drugs or mexico pharmacy
https://cse.google.sn/url?sa=t&url=https://mexicanph.com mexican border pharmacies shipping to usa
reputable mexican pharmacies online best online pharmacies in mexico and mexico pharmacy medication from mexico pharmacy
mexican border pharmacies shipping to usa mexican pharmaceuticals online mexico drug stores pharmacies
You’re an extremely beneficial web site; couldn’t make it without ya! comprar aristocort en España en toda simplicidad
ozempic pill form
buy rybelsus
mexican pharmaceuticals online purple pharmacy mexico price list buying prescription drugs in mexico online
order wegovy
buying prescription drugs in mexico online mexican rx online buying prescription drugs in mexico
mexican pharmaceuticals online buying from online mexican pharmacy or buying from online mexican pharmacy
https://maps.google.com.ec/url?q=https://mexicanph.com mexico drug stores pharmacies
mexican online pharmacies prescription drugs medication from mexico pharmacy and mexico pharmacies prescription drugs mexican rx online
mexico drug stores pharmacies mexican rx online or <a href=" http://haedongacademy.org/phpinfo.php?a=wall+decor+decals+( “>buying prescription drugs in mexico online
http://maps.google.com.gh/url?q=https://mexicanph.shop medication from mexico pharmacy
mexican drugstore online mexico drug stores pharmacies and mexico pharmacies prescription drugs buying from online mexican pharmacy
Güzel aydınlatıcı makale için teşekkürler daha iyisi samda kayısı umarım faydalı çalışmalarınızın devamı gelir.
Yazınız için teşekkürler. Bu bilgiler ışığında nice insanlar bilgilenmiş olacaktır.
where can i buy semaglutide
п»їbest mexican online pharmacies reputable mexican pharmacies online mexico drug stores pharmacies
medication from mexico pharmacy medication from mexico pharmacy mexican rx online
best online pharmacies in mexico mexico pharmacy reputable mexican pharmacies online
mexican drugstore online mexican mail order pharmacies best mexican online pharmacies
buying prescription drugs in mexico mexico pharmacies prescription drugs mexican rx online
mexican drugstore online mexico pharmacies prescription drugs or best online pharmacies in mexico
https://images.google.ad/url?q=https://mexicanph.com pharmacies in mexico that ship to usa
mexican mail order pharmacies buying from online mexican pharmacy and mexico drug stores pharmacies mexican mail order pharmacies
mexican mail order pharmacies buying prescription drugs in mexico mexican pharmacy
buying prescription drugs in mexico mexican mail order pharmacies mexican pharmacy
best online pharmacies in mexico mexico pharmacies prescription drugs mexican rx online
This was beautiful Admin. Thank you for your reflections.
mexico drug stores pharmacies buying from online mexican pharmacy buying prescription drugs in mexico online
mexican border pharmacies shipping to usa best online pharmacies in mexico medication from mexico pharmacy
http://mexicanph.com/# mexican pharmaceuticals online
reputable mexican pharmacies online
п»їbest mexican online pharmacies mexican mail order pharmacies mexican mail order pharmacies
semaglutide tablets
çok bilgilendirici bir yazı olmuş ellerinize sağlık teşekkür ederim
wegovy online pharmacy
buying from online mexican pharmacy purple pharmacy mexico price list or pharmacies in mexico that ship to usa
https://cse.google.ml/url?q=https://mexicanph.com mexico drug stores pharmacies
medication from mexico pharmacy medicine in mexico pharmacies and mexican pharmaceuticals online mexico drug stores pharmacies
buy ozempic online from india
mexican online pharmacies prescription drugs mexico drug stores pharmacies mexican pharmacy
wegovy diabetes
10yenharwichport.com
학원 밖에는 학칙이 적힌 비석이 있다.
buy rybelsus online no script needed
п»їbest mexican online pharmacies mexican rx online mexico drug stores pharmacies
http://mexicanph.shop/# mexican border pharmacies shipping to usa
mexican mail order pharmacies
mexican online pharmacies prescription drugs mexican pharmaceuticals online mexico pharmacies prescription drugs
rybelsus semaglutide tablets 7.5 mcg
mexican online pharmacies prescription drugs pharmacies in mexico that ship to usa medicine in mexico pharmacies
best online pharmacies in mexico п»їbest mexican online pharmacies or buying prescription drugs in mexico
https://maps.google.co.il/url?q=https://mexicanph.shop medication from mexico pharmacy
best online pharmacies in mexico mexican pharmaceuticals online and reputable mexican pharmacies online buying prescription drugs in mexico
rybelsus where to buy
mexico pharmacies prescription drugs buying prescription drugs in mexico purple pharmacy mexico price list
mexican pharmaceuticals online mexican online pharmacies prescription drugs medication from mexico pharmacy
mexican pharmaceuticals online best online pharmacies in mexico or purple pharmacy mexico price list
https://images.google.mu/url?sa=t&url=https://mexicanph.com best online pharmacies in mexico
pharmacies in mexico that ship to usa buying from online mexican pharmacy and mexican pharmaceuticals online mexican pharmaceuticals online
mexico pharmacies prescription drugs mexican pharmacy mexico pharmacy
ST666
pharmacies in mexico that ship to usa п»їbest mexican online pharmacies reputable mexican pharmacies online
purple pharmacy mexico price list mexican border pharmacies shipping to usa pharmacies in mexico that ship to usa
Very great post. I just stumbled upon your weblog and wanted to say that I have truly enjoyed browsing your blog posts.
After all I’ll be subscribing on your feed and I’m hoping you write again soon! http://Www.die-seite.com/index.php?a=stats&u=elisegartrell
medication from mexico pharmacy purple pharmacy mexico price list or medicine in mexico pharmacies
https://maps.google.com.ua/url?q=https://mexicanph.shop medication from mexico pharmacy
medicine in mexico pharmacies mexican pharmacy and mexican rx online pharmacies in mexico that ship to usa
rybelsus price
mexico pharmacies prescription drugs reputable mexican pharmacies online medication from mexico pharmacy
mexican border pharmacies shipping to usa best online pharmacies in mexico or reputable mexican pharmacies online
http://maps.google.com.mm/url?q=https://mexicanph.com medication from mexico pharmacy
buying prescription drugs in mexico mexican online pharmacies prescription drugs and mexican online pharmacies prescription drugs buying prescription drugs in mexico online
best online pharmacies in mexico mexico drug stores pharmacies buying prescription drugs in mexico
buying prescription drugs in mexico best online pharmacies in mexico reputable mexican pharmacies online
http://mexicanph.shop/# п»їbest mexican online pharmacies
best online pharmacies in mexico
mexico drug stores pharmacies mexican border pharmacies shipping to usa medicine in mexico pharmacies
п»їbest mexican online pharmacies purple pharmacy mexico price list medication from mexico pharmacy
mexico pharmacies prescription drugs purple pharmacy mexico price list or mexican mail order pharmacies
http://www.google.gg/url?q=https://mexicanph.shop п»їbest mexican online pharmacies
mexico drug stores pharmacies purple pharmacy mexico price list and medicine in mexico pharmacies mexican mail order pharmacies
rybelsus tablets cost
mexican drugstore online mexican pharmaceuticals online mexico drug stores pharmacies
https://mexicanph.com/# best online pharmacies in mexico
buying prescription drugs in mexico online
buying prescription drugs in mexico online pharmacies in mexico that ship to usa best online pharmacies in mexico
mexico pharmacies prescription drugs mexico drug stores pharmacies medicine in mexico pharmacies
best online pharmacies in mexico mexican online pharmacies prescription drugs mexican pharmaceuticals online
rybelsus where to buy
mexico pharmacies prescription drugs purple pharmacy mexico price list mexican pharmacy
semaglutide order
mexico pharmacy medication from mexico pharmacy buying prescription drugs in mexico online
wegovy diabetes medication
mexican drugstore online mexican online pharmacies prescription drugs mexican pharmacy
http://mexicanph.com/# pharmacies in mexico that ship to usa
mexico drug stores pharmacies
medicine in mexico pharmacies mexican pharmaceuticals online or п»їbest mexican online pharmacies
http://firstbaptistloeb.org/System/Login.asp?id=42182&Referer=https://mexicanph.com buying prescription drugs in mexico online
mexico drug stores pharmacies buying from online mexican pharmacy and buying from online mexican pharmacy best online pharmacies in mexico
reputable mexican pharmacies online mexican mail order pharmacies mexico pharmacies prescription drugs
mexican mail order pharmacies purple pharmacy mexico price list п»їbest mexican online pharmacies
Daha önce araştırıp pek Türkçe kaynak bulamadığım sorundu Elinize sağlık eminim arayan çok kişi vardır.
Thank you for great information. Hello Administ .
buying prescription drugs in mexico mexican border pharmacies shipping to usa mexican drugstore online
mexican pharmaceuticals online pharmacies in mexico that ship to usa reputable mexican pharmacies online
rybelsus 7 mg
mexico drug stores pharmacies medicine in mexico pharmacies or mexico drug stores pharmacies
http://pogrzeby-bielsko.firmeo.biz/redir.php?target=mexicanph.shop mexican pharmaceuticals online
mexico drug stores pharmacies mexico pharmacy and buying prescription drugs in mexico online mexican rx online
mexico drug stores pharmacies best online pharmacies in mexico п»їbest mexican online pharmacies
https://mexicanph.shop/# mexican pharmaceuticals online
buying prescription drugs in mexico
mexican rx online mexican border pharmacies shipping to usa mexico drug stores pharmacies
Hey there! This is my first comment here so I just wanted to give a quick shout out and tell you I truly enjoy reading through your articles.
Can you recommend any other blogs/websites/forums that deal with the same subjects?
Thank you so much! dark web market urls https://mydarkmarket.com
mexico pharmacy mexico drug stores pharmacies reputable mexican pharmacies online
mexico drug stores pharmacies pharmacies in mexico that ship to usa buying from online mexican pharmacy
buying prescription drugs in mexico mexico drug stores pharmacies or buying prescription drugs in mexico online
http://images.google.co.nz/url?q=https://mexicanph.com buying prescription drugs in mexico online
medicine in mexico pharmacies pharmacies in mexico that ship to usa and п»їbest mexican online pharmacies best online pharmacies in mexico
mexico drug stores pharmacies mexico pharmacies prescription drugs or mexico drug stores pharmacies
https://toolbarqueries.google.gg/url?sa=j&source=web&rct=j&url=https://mexicanph.shop mexican pharmacy
purple pharmacy mexico price list mexican pharmaceuticals online and medicine in mexico pharmacies mexican border pharmacies shipping to usa
best online pharmacies in mexico best online pharmacies in mexico medicine in mexico pharmacies
medication from mexico pharmacy mexican rx online best online pharmacies in mexico
Thank you for great article. Hello Administ .
mexican mail order pharmacies mexican pharmaceuticals online mexican drugstore online
mexican drugstore online purple pharmacy mexico price list pharmacies in mexico that ship to usa
purchase semaglutide
best online pharmacies in mexico purple pharmacy mexico price list mexican mail order pharmacies
purple pharmacy mexico price list buying prescription drugs in mexico online buying from online mexican pharmacy
Thank you great posting about essential oil. Hello Administ .
purple pharmacy mexico price list mexico drug stores pharmacies mexico drug stores pharmacies
reputable mexican pharmacies online mexico pharmacy п»їbest mexican online pharmacies
rybelsus without prescription
п»їbest mexican online pharmacies reputable mexican pharmacies online mexican online pharmacies prescription drugs
semaglutide for diabetes
mexico pharmacy mexican pharmacy or mexico pharmacy
https://images.google.ae/url?q=https://mexicanph.com mexican border pharmacies shipping to usa
medication from mexico pharmacy best online pharmacies in mexico and buying prescription drugs in mexico online п»їbest mexican online pharmacies
mexico drug stores pharmacies purple pharmacy mexico price list or pharmacies in mexico that ship to usa
http:”//www.is.kyusan-u.ac.jp/htmllint/htmllint.cgi?ViewSource=on;URL=https://mexicanph.shop” buying prescription drugs in mexico
mexican rx online mexico drug stores pharmacies and mexican border pharmacies shipping to usa mexican mail order pharmacies
buy wegovy online no script needed
mexican pharmacy best mexican online pharmacies pharmacies in mexico that ship to usa
mexico drug stores pharmacies mexico pharmacies prescription drugs buying prescription drugs in mexico
https://mexicanph.shop/# buying prescription drugs in mexico online
mexico drug stores pharmacies
generic semaglutide
mexico drug stores pharmacies pharmacies in mexico that ship to usa reputable mexican pharmacies online
rybelsus sale
purple pharmacy mexico price list mexican pharmaceuticals online mexican pharmaceuticals online
canadian pharmacy online viagra Canadian Pharmacies canadianphrmacy23.com
canadian pharmacy com Canadian PHARMACY Online to Usa
mexican rx online mexican mail order pharmacies buying from online mexican pharmacy
This info is priceless. How can I find out more?
With havin so much written content do you ever run into any
problems of plagorism or copyright violation? My site has a
lot of unique content I’ve either created myself or outsourced but it seems a lot of
it is popping it up all over the internet without my permission. Do you
know any techniques to help reduce content from being ripped
off? I’d really appreciate it. https://Pr6Bookmark.com/story16661264/application-mp
mexico drug stores pharmacies reputable mexican pharmacies online or mexico pharmacies prescription drugs
https://image.google.dz/url?q=https://mexicanph.com mexico pharmacies prescription drugs
reputable mexican pharmacies online pharmacies in mexico that ship to usa and mexico pharmacy mexico pharmacies prescription drugs
프라그마틱 슬롯으로 새로운 도전에 나서고 놀라운 보상을 경험하세요.
프라그마틱슬롯
프라그마틱은 늘 새로운 기술과 아이디어를 도입하죠. 이번에 어떤 혁신이 있었는지 알려주세요!
https://www.fjghgy.com
https://www.sportsford.com
https://www.padmconsulting.com
buying prescription drugs in mexico online mexico drug stores pharmacies buying prescription drugs in mexico online
rybelsus 7mg
I like the valuable information you provide in your articles.
I’ll bookmark your weblog and check again here regularly.
I am relatively sure I’ll be informed lots of new stuff right right here!
Best of luck for the following!
Also visit my webpage :: http://top.radomski.radom.pl
Hi there, I found your site by way of Google whilst searching for a comparable matter,
your site got here up, it seems to be great. I have bookmarked it
in my google bookmarks.
Hello there, simply become alert to your blog via Google, and found
that it is really informative. I am gonna be careful for brussels.
I will be grateful for those who continue this in future.
A lot of people might be benefited out of your writing.
Cheers!
mexico drug stores pharmacies mexican pharmaceuticals online or mexican border pharmacies shipping to usa
https://www.google.si/url?q=https://mexicanph.shop best online pharmacies in mexico
pharmacies in mexico that ship to usa п»їbest mexican online pharmacies and purple pharmacy mexico price list mexico pharmacies prescription drugs
baseballoutsider.com
Hongzhi 황제는 마음 속으로 쓴 미소를 지으며 침착 해 보이는 Zhang 황후를 바라 보았습니다.
Quality content is the secret to attract the users to visit
the site, that’s what this site is providing.
My blog :: http://new.elblaski.elblag.pl
mexican pharmacy medication from mexico pharmacy medication from mexico pharmacy
п»їbest mexican online pharmacies mexican pharmaceuticals online or purple pharmacy mexico price list
http://wartank.ru/?0-1.ILinkListener-showSigninLink&channelId=30152&partnerUrl=mexicanph.com medicine in mexico pharmacies
mexican online pharmacies prescription drugs mexico pharmacy and mexican border pharmacies shipping to usa mexican rx online
mexican mail order pharmacies mexican rx online purple pharmacy mexico price list
Protect your financial privacy with TornadoCash. Safeguard your transactions from prying eyes on the blockchain
buying prescription drugs in mexico buying prescription drugs in mexico online or mexico drug stores pharmacies
http://auto4life.ru/forum/url.php?http://mexicanph.com buying prescription drugs in mexico
mexican rx online medicine in mexico pharmacies and purple pharmacy mexico price list mexican mail order pharmacies
medication from mexico pharmacy mexican drugstore online or buying from online mexican pharmacy
https://www.google.com.ai/url?q=https://mexicanph.shop mexican online pharmacies prescription drugs
medication from mexico pharmacy buying prescription drugs in mexico and pharmacies in mexico that ship to usa mexican mail order pharmacies
medication from mexico pharmacy buying from online mexican pharmacy best mexican online pharmacies
https://stromectol.fun/# minocycline 50 mg pills
lisinopril 25 lisinopril metoprolol buy generic lisinopril
http://furosemide.guru/# generic lasix
stromectol over the counter: ivermectin 3 mg tablet dosage – ivermectin for humans
ivermectin usa ivermectin lotion cost ivermectin buy nz
https://buyprednisone.store/# prednisone pharmacy prices
agonaga.com
솔직히 위의 숫자는 이렇습니다.
https://u8send.com/
wegovy pills
ivermectin 5ml ivermectin 12 ivermectin over the counter canada
wegovy 3 mg
pin-up-casino-official-login.com
Перекинуться на личный кабинет. Нажать на кнопку «Общак». Определиться от подбором пригодной системы, предначертить сумму депозита и нажать «Дополнить». Система неумышленно раскроет окно, где что поделаешь заполнить обстановка стиры, сверху каковую будет производиться депозит.
Яко хоть сделать раз-два скидками в течение пин ап?
Чтоб сыграть бонус, шулер повинен свершить суперэкспресс ставки раз-два всамделишного без, превышающие сумму бонуса в 5 раз. В ТЕЧЕНИЕ зачет ступают только «экспрессы» от 3-х происшествий с коэффициентами через 1.40 чтобы каждого события. Обдумываются условия из ответвлений «Лайв» равно «Линия».
pin-up-casino-official-login.com
http://furosemide.guru/# lasix pills
chutneyb.com
Zhu Houzhao는 “저와 Liu Jin은 어떻습니까? “라고 다시 물었습니다.
I very delighted to find this internet site on bing, just what I was searching for as well saved to fav
http://amoxil.cheap/# amoxicillin in india
semaglutide canada pharmacy
furosemide 40 mg: lasix 40 mg – buy lasix online
affittareunamacchinanrbtyp.com
Transfers can be ordered not not to or from the airport, but also after exciting about the city.
https://affittareunamacchinanrbtyp.com
http://furosemide.guru/# lasix furosemide
rybelsus pill
amoxicillin 500: amoxicillin 500mg capsule cost – buy amoxicillin
naturally like your web site however you need to take a look at the spelling on several of your posts. A number of them are rife with spelling problems and I find it very bothersome to tell the truth on the other hand I will surely come again again.
https://furosemide.guru/# lasix online
lasix pills Buy Lasix furosemida
http://buyprednisone.store/# prednisone 40 mg rx
buy semaglutide from canada online
buy semaglutide from canada online
lisinopril buy without prescription: prinivil 10 mg tablet – lisinopril 40 mg best price
https://amoxil.cheap/# generic amoxicillin over the counter
semaglutide coupon
http://furosemide.guru/# lasix furosemide 40 mg
Great information shared.. really enjoyed reading this post thank you author for sharing this post .. appreciated
I just like the helpful information you provide in your articles
What’s up, just wanted to tell you, I enjoyed this blog post.
It was helpful. Keep on posting! https://Smm.sdsu.edu/index.php?mid=board&document_srl=417575
Bet on all your favorite sports at 1xBet
Win Big with 1xBet: The Top Sports Betting Platform
Experience the Excitement of Online Betting with 1xBet
Get in on the Action with 1xBet: The Best Sports Betting Site
Unleash Your Winning Potential with 1xBet
Bet and Win with Confidence at 1xBet
Join the 1xBet Community and Start Winning Today
The Ultimate Sports Betting Experience Awaits at 1xBet
1xBet: Where Champions Are Made
Take Your Betting to the Next Level with 1xBet
Get Ready to Win Big at 1xBet
Multiply Your Winnings with 1xBet’s Exciting Betting Options
Elevate Your Sports Betting Game with 1xBet
Sign Up for 1xBet and Start Winning Instantly
Experience the Thrill of Betting with 1xBet
1xBet: Your Ticket to Winning Big on Sports
Don’t Miss Out on the Action at 1xBet
Join 1xBet Today and Bet on Your Favorite Sports
Winning Has Never Been Easier with 1xBet
Get Started with 1xBet and Discover a World of Betting Opportunities
1xbet download 1xbet download .
wegovy semaglutide tablets 7.5 mcg
buy semaglutide from canada
wegovy tab 3mg
日本にオンラインカジノおすすめランキング2024年最新版
2024おすすめのオンラインカジノ
オンラインカジノはパソコンでしか遊べないというのは、もう一昔前の話。現在はスマホやタブレットなどのモバイル端末からも、パソコンと変わらないクオリティでオンラインカジノを当たり前に楽しむことができるようになりました。
数あるモバイルカジノの中で、当サイトが厳選したトップ5カジノはこちら。
オンラインカジノおすすめ: コニベット(Konibet)
コニベットといえば、キャッシュバックや毎日もらえるリベートボーナスなど豪華ボーナスが満載!それに加えて低い出金条件も見どころです。さらにVIPレベルごとの還元率の高さも業界内で突出している点や、出金速度の速さなどトータルバランスの良さからもハイローラーの方にも好まれています。
カスタマーサポートは365日24時間稼働しているので、初心者の方にも安心してご利用いただけます。
さらに【業界初のオンラインポーカー】を導入!毎日トーナメントも開催されているので、早速参加しちゃいましょう!
RTP(還元率)公開や、入出金対応がスムーズで初心者向き
2000種類以上の豊富なゲーム数を誇り、スロットゲーム多数!
今なら$20の入金不要ボーナスと最大$650還元ボーナス!
8種類以上のライブカジノプロバイダー
業界初オンラインポーカーあり,日本利用者数No.1の安心のオンラインカジノメディア!
おすすめポイント
コニベットは、その豊富なボーナスと高還元率、そして安心のキャッシュバック制度で知られています。まず、新規登録者には入金不要の$20ボーナスが提供され、さらに初回入金時には最大$650の還元ボーナスが得られます。これらのキャンペーンはプレイヤーにとって大きな魅力となっています。
また、コニベットの特徴的な点は、VIP制度です。一度ロイヤルクラブになると、降格がなく、スロットリベートが1.5%という驚異の還元率を享受できます。これは他のオンラインカジノと比較しても非常に高い還元率です。さらに、常時週間損失キャッシュバックも行っているため、不運で負けてしまった場合でも取り返すチャンスがあります。これらの特徴から、コニベットはプレイヤーにとって非常に魅力的なオンラインカジノと言えるでしょう。
コニベット 無料会員登録をする
| コニベットのボーナス
コニベットは、新規登録者向けに20ドルの入金不要ボーナスを用意しています
コニベットカジノでは、限定で初回入金後に残高が1ドル未満になった場合、入金額の50%(最高500ドル)がキャッシュバックされる。キャッシュバック額に出金条件はないため、獲得後にすぐ出金することも可能です。
| コニベットの入金方法
入金方法 最低 / 最高入金
マスターカード 最低 : $20 / 最高 : $6,000
ジェイシービー 最低 : $20/ 最高 : $6,000
アメックス 最低 : $20 / 最高 : $6,000
アイウォレット 最低 : $20 / 最高 : $100,000
スティックペイ 最低 : $20 / 最高 : $100,000
ヴィーナスポイント 最低 : $20 / 最高 : $10,000
仮想通貨 最低 : $20 / 最高 : $100,000
銀行送金 最低 : $20 / 最高 : $10,000
| コニベット出金方法
出金方法 最低 |最高出金
アイウォレット 最低 : $40 / 最高 : なし
スティックぺイ 最低 : $40 / 最高 : なし
ヴィーナスポイント 最低 : $40 / 最高 : なし
仮想通貨 最低 : $40 / 最高 : なし
銀行送金 最低 : $40 / 最高 : なし
zestril lisinopril lisinopril 40 mg purchase lisinopril pill 10mg
wegovy lose weight
lisinopril 20mg tablets price lisinopril comparison or how to buy lisinopril
https://www.google.com.co/url?q=https://lisinopril.top prinivil coupon
lisinopril 10mg online lisinopril 10 mg and lisinopril 80 mg daily generic for prinivil
https://buyprednisone.store/# 20 mg prednisone
semaglutide 7mg
how can i order prednisone prednisone for dogs or prednisone 2 5 mg
https://chat-off.com/click.php?url=https://buyprednisone.store buy prednisone online uk
60 mg prednisone daily can i order prednisone and buy prednisone canada best pharmacy prednisone
lasix lasix uses or lasix 100 mg tablet
https://images.google.com.vn/url?sa=t&url=https://furosemide.guru lasix dosage
lasix furosemide lasix online and lasix furosemide buy lasix online
furosemide lasix 100 mg lasix 20 mg
amoxacillian without a percription: order amoxicillin online uk – amoxicillin order online no prescription
ozempic for weight loss without diabetes
https://amoxil.cheap/# where can i buy amoxicillin over the counter uk
wegovy australia online
http://stromectol.fun/# stromectol covid
buy lisinopril online: lisinopril 2019 – lisinopril best price
Office 2021 Lisans Anahtarı: En Güncel ve Güvenilir Anahtarı Nasıl Edinebilirsiniz?
Hi, just required you to know I he added your site to my Google bookmarks due to your layout. But seriously, I believe your internet site has 1 in the freshest theme I??ve came across.Website Giriş için Tıklayın: Betkanyon
https://buyprednisone.store/# how to buy prednisone online
I pay a visit each day some web pages and information sites to read posts, but this blog offers quality based posts.
ivermectin lotion for scabies: stromectol 12mg – buy ivermectin canada
prednisone 40mg prednisone uk over the counter buy prednisone 20mg without a prescription best price
Casino Siteleri
semaglutide online order
https://amoxil.cheap/# amoxicillin from canada
https://amoxil.cheap/# amoxicillin 750 mg price
where can i buy amoxicillin over the counter amoxicillin 500mg order amoxicillin online uk
buy ozempic online canada
rybelsus for diabetes
buy amoxicillin online uk: amoxil generic – amoxicillin 500 mg without a prescription
lasix 20 mg lasix 40mg or furosemide 100 mg
https://maps.google.iq/url?q=https://furosemide.guru lasix furosemide 40 mg
lasix online lasix furosemide 40 mg and lasix 100 mg generic lasix
I have been browsing online greater than 3 hours as of late, but I by no means discovered any
fascinating article like yours. It is beautiful worth sufficient
for me. In my view, if all webmasters and bloggers made excellent content
as you probably did, the internet will likely be a
lot more helpful than ever before.
https://buyprednisone.store/# buy prednisone online without a script
Just want to say your article is as surprising.
The clarity to your post is just cool and that i could think you’re a professional in this subject.
Fine together with your permission allow me to grasp your RSS feed
to keep up to date with coming near near post. Thank you a million and please continue the
rewarding work.
my site http://top.mielecki.mielec.pl
娛樂城推薦
zestril 30 mg can i order lisinopril online lisinopril 104
ozempic tablets buy
Because the admin of this website is working, no hesitation very shortly it
will be renowned, due to its feature contents. https://En.youstone.com/?dwqa-question=valor-de-la-lipoescultura-en-chile-factores-a-considerar
I’m gone to tell my little brother, that he should also pay a visit this blog
on regular basis to take updated from hottest gossip. https://Gratisafhalen.be/author/chaslardner/
semaglutide xr
Because the admin of this site is working, no question very
rapidly it will be well-known, due to its feature contents.
where to buy prednisone uk prednisone 4 mg daily prednisone 300mg
lisinopril 2.5 mg buy online: order lisinopril online united states – lisinopril 5 mg tablet
https://lisinopril.top/# lisinopril capsule
lisinopril 20 how to buy lisinopril online or lisinopril 20 mg canadian pharmacy
http://images.google.bi/url?q=https://lisinopril.top how to order lisinopril online
lisinopril from canada generic lisinopril 40 mg and url lisinopril hctz prescription lisinopril 20 mg tablet
semaglutide xr
buy semaglutide online pharmacy
order ozempic online
https://lisinopril.top/# lisinopril 5mg prices
prednisone 21 pack prednisone 20 mg or india buy prednisone online
http://forum.righttorebel.net/proxy.php?link=https://buyprednisone.store prednisone buy canada
prednisone 2 mg daily prednisone 5084 and 50 mg prednisone tablet canadian online pharmacy prednisone
Купить паспорт
Теневые рынки и их незаконные деятельности представляют существенную угрозу безопасности общества и являются объектом внимания правоохранительных органов по всему миру. В данной статье мы обсудим так называемые неофициальные рынки, где возможно покупать поддельные паспорта, и какие угрозы это несет для граждан и государства.
Теневые рынки представляют собой закулисные интернет-площадки, на которых торгуется разнообразной преступной продукцией и услугами. Среди этих услуг встречается и продажа поддельных документов, таких как удостоверения личности. Эти рынки оперируют в подпольной сфере интернета, используя зашифровывание и неизвестные платежные системы, чтобы оставаться невидимыми для правоохранительных органов.
Покупка поддельного паспорта на теневых рынках представляет существенную угрозу национальной безопасности. хищение личных данных, фальсификация документов и поддельные идентификационные материалы могут быть использованы для совершения террористических актов, обмана и дополнительных преступлений.
Правоохранительные органы в различных странах активно борются с подпольными рынками, проводя спецоперации по выявлению и задержанию тех, кто замешан в преступных действиях. Однако, по мере того как технологии становятся более сложными, эти рынки могут приспосабливаться и находить новые пути обхода законов.
Для обеспечения своей безопасности от угроз, связанных с подпольными рынками, важно быть осторожным при обработке своих личной информации. Это включает в себя избегать фишинговых атак, не предоставлять информацией о себе в недоверенных источниках и регулярно контролировать свои финансовые данные.
Кроме того, общество должно быть знающим о рисках и последствиях покупки фальшивых документов. Это способствует формированию более осознанного и ответственного подхода к вопросам безопасности и поможет в борьбе с подпольными рынками. Поддержка законодательных инициатив, направленных на ужесточение наказаний за изготовление и сбыт поддельных документов, также представляет важную составляющую в противодействии этим преступлениям
https://buyprednisone.store/# buy prednisone 10 mg
pragmatic-ko.com
“뭐라고?” 홍치제, 류젠런 등은 심장이 뛰는 것을 느꼈다.
furosemide lasix or lasix generic name
http://penza-job.ru/phpinfo.php?a=Generic Viagra online lasix dosage
buy furosemide online furosemide 100mg and buy lasix online lasix 20 mg
buy amoxicillin online uk where can i buy amoxicillin over the counter uk amoxicillin 775 mg
We stumbled over here different page and thought I might check
things out. I like what I see so now i’m following you.
Look forward to finding out about your web page for a second time.
Also visit my webpage – http://top.stargardzki.stargard.pl
Hi there, just became aware of your blog through
Google, and found that it’s really informative. I am going to watch out
for brussels. I’ll appreciate if you continue this in future.
Lots of people will be benefited from your writing.
Cheers!
Here is my webpage http://new.mielecki.mielec.pl
I just like the helpful information you provide in your articles
Great information shared.. really enjoyed reading this post thank you author for sharing this post .. appreciated
This is really interesting, You’re a very skilled blogger. I’ve joined your feed and look forward to seeking more of your magnificent post. Also, I’ve shared your site in my social networks!
lisinopril 419 lisinopril 20 mg best price or lisinopril 100mcg
http://www.sorenwinslow.com/RSSReader.asp?TheFeed=http://lisinopril.top/ lisinopril 20 mg discount
generic lisinopril lipinpril and lisinopril 40 mg mexico lisinopril 30 mg price
Thank you great post. Hello Administ .Website Giriş için Tıklayın: deneme bonusu
sm-slot.com
“이리와, 이 개 같은 것을 때려눕혀라.”
10mg prednisone daily buy prednisone online without a script prednisone 20mg price in india
Everything is very open and very clear explanation of issues. was truly information.Website Giriş için Tıklayın: Deneme bonusu veren siteler 2024<
Hi there would you mind sharing which blog platform you’re working with?
I’m going to start my own blog soon but I’m having a difficult
time selecting between BlogEngine/Wordpress/B2evolution and
Drupal. The reason I ask is because your design seems different then most
blogs and I’m looking for something completely unique.
P.S My apologies for being off-topic but I had to ask!
my web site http://top.wroclawski.wroclaw.pl
rybelsus 14mg tablets
http://lisinopril.top/# lisinopril 250 mg
amoxicillin 500mg cost: order amoxicillin no prescription – amoxicillin pharmacy price
semaglutide lose weight
https://Catla.Net Arkadaslik dostluk ve sohbet sunucusu
купить клон карты
Изготовление и использование копий банковских карт является неправомерной практикой, представляющей существенную угрозу для безопасности финансовых систем и личных средств граждан. В данной статье мы рассмотрим опасности и результаты покупки реплик карт, а также как общество и органы порядка борются с подобными преступлениями.
“Копии” карт — это поддельные дубликаты банковских карт, которые используются для непозволительных транзакций. Основной метод создания реплик — это похищение данных с оригинальной карты и последующее создание программы этих данных на другую карту. Злоумышленники, предлагающие услуги по продаже копий карт, обычно действуют в подпольной сфере интернета, где трудно выявить и пресечь их деятельность.
Покупка копий карт представляет собой существенное преступление, которое может повлечь за собой тяжкие наказания. Покупатель также рискует стать последователем мошенничества, что может привести к судебному преследованию. Основные преступные действия в этой сфере включают в себя незаконное завладение личной информации, фальсификацию документов и, конечно же, экономические махинации.
Банки и полиция активно борются с правонарушениями, связанными с копированием карт. Банки внедряют последние технологии для распознавания подозрительных транзакций, а также предлагают услуги по обеспечению защиты для своих клиентов. Полиция ведут расследовательские операции и ловят тех, кто замешан в разработке и сбыте копий карт.
Для собственной безопасности важно соблюдать бдительность при использовании банковских карт. Необходимо периодически проверять выписки, избегать сомнительных сделок и следить за своей конфиденциальной информацией. Знание и информированность об угрозах также являются важными средствами в борьбе с финансовыми махинациями.
В заключение, использование копий банковских карт — это незаконное и неприемлемое поведение, которое может привести к существенным последствиям для тех, кто вовлечен в такую практику. Соблюдение мер защиты, осведомленность о возможных рисках и сотрудничество с органами порядка играют определяющую роль в предотвращении и пресечении таких преступлений
ivermectin 3 mg tabs generic stromectol buy stromectol pills
rybelsus retail price
ivermectin australia: ivermectin 0.5% – stromectol medication
http://lisinopril.top/# buy lisinopril 2.5 mg
lasix medication lasix pills or lasix uses
http://www.virtual-egypt.com/framed/framed.cgi?url==http://furosemide.guru lasix furosemide
lasix generic name lasix pills and furosemide 100mg furosemide 100mg
wegovy australia
Hi, just required you to know I he added your site to my Google bookmarks due to your layout. But seriously, I believe your internet site has 1 in the freshest theme I??ve came across.Website Giriş için Tıklayın: marsbahis
http://buyprednisone.store/# cost of prednisone 10mg tablets
lisinopril 20 mg coupon lisinopril 5 mg price in india can i buy lisinopril in mexico
iGaming 업계를 선도하는 프라그마틱 게임은 모바일 중심의 혁신적이고 표준화된 콘텐츠를 제공합니다.
프라그마틱 플레이
프라그마틱의 무료 게임 옵션은 정말로 흥미진진한데요. 어떤 무료 게임을 추천하시나요?
https://www.lyxmys.com
https://www.rachitadas.com
https://www.pinknruby.com
rybelsus online cheap
lisinopril 40 mg no prescription lisinopril 2.5 mg cost for 2 mg lisinopril
over the counter prednisone medicine: prednisone uk – prednisone canada prescription
semaglutide online order
http://furosemide.guru/# lasix medication
rybelsus weight loss
lisinopril 240: lisinopril cost uk – where to buy lisinopril without prescription
In the world of high-end watches, locating a trustworthy source is paramount, and WatchesWorld stands out as a pillar of confidence and knowledge. Presenting an wide collection of esteemed timepieces, WatchesWorld has collected praise from content customers worldwide. Let’s dive into what our customers are saying about their encounters.
Customer Testimonials:
O.M.’s Review on O.M.:
“Excellent communication and aftercare throughout the process. The watch was flawlessly packed and in perfect condition. I would certainly work with this group again for a watch purchase.”
Richard Houtman’s Review on Benny:
“I dealt with Benny, who was extremely helpful and courteous at all times, keeping me regularly informed of the procedure. Moving forward, even though I ended up acquiring the watch locally, I would still definitely recommend Benny and the company.”
Customer’s Efficient Service Experience:
“A excellent and swift service. Kept me up to date on the order progress.”
Featured Timepieces:
Richard Mille RM30-01 Automatic Winding with Declutchable Rotor:
Price: €285,000
Year: 2023
Reference: RM30-01 TI
Patek Philippe Complications World Time 38.5mm:
Price: €39,900
Year: 2019
Reference: 5230R-001
Rolex Oyster Perpetual Day-Date 36mm:
Price: €76,900
Year: 2024
Reference: 128238-0071
Best Sellers:
Bulgari Serpenti Tubogas 35mm:
Price: On Request
Reference: 101816 SP35C6SDS.1T
Bulgari Serpenti Tubogas 35mm (2024):
Price: €12,700
Reference: 102237 SP35C6SPGD.1T
Cartier Panthere Medium Model:
Price: €8,390
Year: 2023
Reference: W2PN0007
Our Experts Selection:
Cartier Panthere Small Model:
Price: €11,500
Year: 2024
Reference: W3PN0006
Omega Speedmaster Moonwatch 44.25 mm:
Price: €9,190
Year: 2024
Reference: 304.30.44.52.01.001
Rolex Oyster Perpetual Cosmograph Daytona 40mm:
Price: €28,500
Year: 2023
Reference: 116500LN-0002
Rolex Oyster Perpetual 36mm:
Price: €13,600
Year: 2023
Reference: 126000-0006
Why WatchesWorld:
WatchesWorld is not just an online platform; it’s a commitment to personalized service in the world of luxury watches. Our team of watch experts prioritizes trust, ensuring that every client makes an well-informed decision.
Our Commitment:
Expertise: Our group brings exceptional understanding and perspective into the world of high-end timepieces.
Trust: Trust is the basis of our service, and we prioritize transparency in every transaction.
Satisfaction: Customer satisfaction is our paramount goal, and we go the additional step to ensure it.
When you choose WatchesWorld, you’re not just purchasing a watch; you’re investing in a seamless and reliable experience. Explore our collection, and let us assist you in discovering the ideal timepiece that embodies your style and elegance. At WatchesWorld, your satisfaction is our proven commitment
purchase wegovy
lasix generic lasix 100 mg or furosemida
https://www.google.com.sv/url?q=https://furosemide.guru lasix generic name
furosemide 100mg lasix furosemide and lasix 40mg furosemida 40 mg
Outstanding post however I was wanting to know if you could write a
litte more on this topic? I’d be very grateful if you could elaborate a little bit further.
Cheers!
my web blog – http://top.warszawski.waw.pl
ozempic tablets
I very delighted to find this internet site on bing, just what I was searching for as well saved to fav
This post will assist the internet users for creating new website or
even a blog from start to end.
My blog post :: http://top.szczecinski.szczecin.pl
https://amoxil.cheap/# how to get amoxicillin over the counter
lisinopril 20 mg tablet cost lisinopril 10mg online lisinopril 0.5 mg
I like the valuable info you provide in your articles.
I will bookmark your blog and check again here frequently.
I am quite sure I will learn lots of new stuff right here!
Best of luck for the next!
https://lisinopril.top/# 40 mg lisinopril for sale
ivermectin 10 mg: ivermectin 3 – ivermectin 3mg dose
sm-online-game.com
아니요, 재미있고 교육적인가요? 분명히 그것은 고통을 통해 가르치는 것입니다.
https://stromectol.fun/# ivermectin generic name
furosemide 100mg lasix medication or lasix 40 mg
https://images.google.tk/url?q=https://furosemide.guru lasix uses
furosemide 40mg lasix generic name and lasix tablet furosemide 40mg
http://lisinopril.top/# cost of lisinopril
wegovy buy from canada
buy amoxicillin online mexico buy amoxicillin without prescription buy amoxicillin 500mg canada
https://buyprednisone.store/# where can you buy prednisone
This article is a cut above the rest.
rybelsus price
lisinopril 5mg prices lisinopril canada or order lisinopril without a prescription
http://qsinnovations.ashopcart.com/affiliate.php?id=12&redirect=http://lisinopril.top/ zestril 20 mg price canadian pharmacy
lisinopril prescription lisinopril comparison and lisinopril 100 mg lisinopril 10 mg order online
order ozempic
http://amoxil.cheap/# amoxicillin 500mg capsules
buy cheap amoxicillin online: amoxicillin price without insurance – antibiotic amoxicillin
generic rybelsus cost
prednisone 2.5 mg cost can you buy prednisone online uk or over the counter prednisone cheap
https://images.google.li/url?q=https://buyprednisone.store fast shipping prednisone
how to get prednisone tablets fast shipping prednisone and order prednisone 10 mg tablet over the counter prednisone medicine
how much is prednisone 10 mg prednisone tablets canada prednisone 20mg online without prescription
Thank you for the great content. I really love your content. However, just wanted to share with you an amazing tool called mic tester. This tool helps you to check if your mic is working properly or not.
lasix generic name lasix uses or lasix online
https://www.google.mu/url?q=https://furosemide.guru lasix online
furosemida 40 mg lasix generic and generic lasix lasix 20 mg
https://lisinopril.top/# lisinopril 10 mg online
semaglutide from canada
lisinopril uk lisinopril 419 zestoretic canada
Watches World
In the world of premium watches, locating a trustworthy source is crucial, and WatchesWorld stands out as a symbol of trust and knowledge. Presenting an wide collection of esteemed timepieces, WatchesWorld has collected praise from satisfied customers worldwide. Let’s dive into what our customers are saying about their encounters.
Customer Testimonials:
O.M.’s Review on O.M.:
“Outstanding communication and aftercare throughout the process. The watch was perfectly packed and in pristine condition. I would certainly work with this group again for a watch purchase.”
Richard Houtman’s Review on Benny:
“I dealt with Benny, who was exceptionally assisting and courteous at all times, keeping me regularly informed of the procedure. Moving forward, even though I ended up sourcing the watch locally, I would still definitely recommend Benny and the company.”
Customer’s Efficient Service Experience:
“A excellent and prompt service. Kept me up to date on the order progress.”
Featured Timepieces:
Richard Mille RM30-01 Automatic Winding with Declutchable Rotor:
Price: €285,000
Year: 2023
Reference: RM30-01 TI
Patek Philippe Complications World Time 38.5mm:
Price: €39,900
Year: 2019
Reference: 5230R-001
Rolex Oyster Perpetual Day-Date 36mm:
Price: €76,900
Year: 2024
Reference: 128238-0071
Best Sellers:
Bulgari Serpenti Tubogas 35mm:
Price: On Request
Reference: 101816 SP35C6SDS.1T
Bulgari Serpenti Tubogas 35mm (2024):
Price: €12,700
Reference: 102237 SP35C6SPGD.1T
Cartier Panthere Medium Model:
Price: €8,390
Year: 2023
Reference: W2PN0007
Our Experts Selection:
Cartier Panthere Small Model:
Price: €11,500
Year: 2024
Reference: W3PN0006
Omega Speedmaster Moonwatch 44.25 mm:
Price: €9,190
Year: 2024
Reference: 304.30.44.52.01.001
Rolex Oyster Perpetual Cosmograph Daytona 40mm:
Price: €28,500
Year: 2023
Reference: 116500LN-0002
Rolex Oyster Perpetual 36mm:
Price: €13,600
Year: 2023
Reference: 126000-0006
Why WatchesWorld:
WatchesWorld is not just an internet platform; it’s a promise to personalized service in the world of high-end watches. Our group of watch experts prioritizes confidence, ensuring that every customer makes an well-informed decision.
Our Commitment:
Expertise: Our team brings exceptional knowledge and insight into the world of high-end timepieces.
Trust: Trust is the foundation of our service, and we prioritize transparency in every transaction.
Satisfaction: Customer satisfaction is our ultimate goal, and we go the extra mile to ensure it.
When you choose WatchesWorld, you’re not just purchasing a watch; you’re investing in a smooth and trustworthy experience. Explore our range, and let us assist you in discovering the perfect timepiece that mirrors your style and sophistication. At WatchesWorld, your satisfaction is our time-tested commitment
https://stromectol.fun/# ivermectin over the counter canada
prednisone brand name prednisone 20mg or can i buy prednisone online without a prescription
https://kyl.guru/forum/away.php?s=http://buyprednisone.store prednisone 5mg coupon
prednisone brand name in india generic prednisone pills and 54 prednisone buy prednisone 10mg
purchase ozempic
Hi, just required you to know I he added your site to my Google bookmarks due to your layout. But seriously, I believe your internet site has 1 in the freshest theme I??ve came across.
Thank you for great information. Hello Administ .
Everything is very open and very clear explanation of issues. was truly information.
After all, what a great site and informative posts, I will upload inbound link – bookmark this web site? Regards, Reader.
Great post thank you. Hello Administ .
lisinopril prices lisinopril online canadian pharmacy lisinopril 2.5 cost
restaurant-lenvol.net
Zhu Xiurong은 눈물을 닦고 코를 빨고 숨이 막혔습니다. “형님, 당신은 나에게 너무 친절합니다.”
https://alepz.com/
Nice article inspiring thanks. Hello Administ .
lasix uses: Buy Furosemide – lasix tablet
Windows işletim sistemi, kullanıcıların ihtiyaçlarına ve kullanım senaryolarına göre farklı sürümlerde sunulur. Her sürümün belirli özellikleri ve hedef kitleleri olduğunu unutmayın. Bu nedenle, belirli bir sürüm için geçerli olan bir lisans anahtarının diğer sürümlerde çalışmaması normaldir.
http://amoxil.cheap/# amoxicillin script
http://amoxil.cheap/# can i buy amoxicillin over the counter in australia
lisinopril cost 5mg zestoretic 25 or zestril generic
https://cse.google.li/url?sa=t&url=https://lisinopril.top zestoretic tabs
lisinopril 5 mg india price zestril 10 mg in india and lisinopril for sale prinivil medication
buy furosemide online buy lasix online or lasix 100 mg
https://www.sprinter-forum.de/clickcounter?url=http://furosemide.guru furosemide 100mg
lasix uses lasix side effects and lasix dosage furosemide 40mg
generic pharmacy canadian online pharmacies
canadian pharmacy no prescription Canadian Pharmacy Shipping Usa Cialis, Viagra
stromectol ivermectin 3 mg ivermectin 9 mg tablet ivermectin 24 mg
rybelsus 14mg tablets
online platform for watches
In the world of high-end watches, locating a reliable source is paramount, and WatchesWorld stands out as a beacon of confidence and knowledge. Providing an broad collection of esteemed timepieces, WatchesWorld has garnered praise from satisfied customers worldwide. Let’s explore into what our customers are saying about their experiences.
Customer Testimonials:
O.M.’s Review on O.M.:
“Very good communication and aftercare throughout the process. The watch was perfectly packed and in perfect condition. I would certainly work with this team again for a watch purchase.”
Richard Houtman’s Review on Benny:
“I dealt with Benny, who was exceptionally assisting and courteous at all times, maintaining me regularly informed of the process. Moving forward, even though I ended up acquiring the watch locally, I would still definitely recommend Benny and the company.”
Customer’s Efficient Service Experience:
“A highly efficient and prompt service. Kept me up to date on the order progress.”
Featured Timepieces:
Richard Mille RM30-01 Automatic Winding with Declutchable Rotor:
Price: €285,000
Year: 2023
Reference: RM30-01 TI
Patek Philippe Complications World Time 38.5mm:
Price: €39,900
Year: 2019
Reference: 5230R-001
Rolex Oyster Perpetual Day-Date 36mm:
Price: €76,900
Year: 2024
Reference: 128238-0071
Best Sellers:
Bulgari Serpenti Tubogas 35mm:
Price: On Request
Reference: 101816 SP35C6SDS.1T
Bulgari Serpenti Tubogas 35mm (2024):
Price: €12,700
Reference: 102237 SP35C6SPGD.1T
Cartier Panthere Medium Model:
Price: €8,390
Year: 2023
Reference: W2PN0007
Our Experts Selection:
Cartier Panthere Small Model:
Price: €11,500
Year: 2024
Reference: W3PN0006
Omega Speedmaster Moonwatch 44.25 mm:
Price: €9,190
Year: 2024
Reference: 304.30.44.52.01.001
Rolex Oyster Perpetual Cosmograph Daytona 40mm:
Price: €28,500
Year: 2023
Reference: 116500LN-0002
Rolex Oyster Perpetual 36mm:
Price: €13,600
Year: 2023
Reference: 126000-0006
Why WatchesWorld:
WatchesWorld is not just an internet platform; it’s a dedication to personalized service in the world of high-end watches. Our team of watch experts prioritizes trust, ensuring that every customer makes an informed decision.
Our Commitment:
Expertise: Our group brings unparalleled understanding and insight into the realm of luxury timepieces.
Trust: Confidence is the basis of our service, and we prioritize transparency in every transaction.
Satisfaction: Customer satisfaction is our ultimate goal, and we go the additional step to ensure it.
When you choose WatchesWorld, you’re not just buying a watch; you’re investing in a seamless and trustworthy experience. Explore our collection, and let us assist you in discovering the ideal timepiece that mirrors your taste and elegance. At WatchesWorld, your satisfaction is our time-tested commitment
pragmatic-ko.com
Shen Ao는 과거에 그런 일을 했습니까? 그런 말을 했습니까?
order ozempic
Отдых на берегу Эгейского моря
купить путевку http://tez-tour-turkey.ru/ .
buy ozempic online canada
semaglutide prescription
smcasino7.com
Xiao Jing은 감정적으로 한숨을 쉬지 않을 수 없었습니다. “Fang Jifan은 그다지 좋지 않고 좋은 학생입니다 …”
very good blog page thank you
rybelsus
Hey there would you mind sharing which blog platform you’re using?
I’m looking to start my own blog soon but I’m having a difficult
time choosing between BlogEngine/Wordpress/B2evolution and Drupal.
The reason I ask is because your design and style seems different then most blogs
and I’m looking for something completely unique.
P.S Apologies for being off-topic but I had to ask!
Feel free to surf to my web site … http://new.radomski.radom.pl
https://indianph.com/# Online medicine order
best online pharmacy india
프라그마틱 슬롯으로 다양한 게임을 즐겨보세요.
프라그마틷
프라그마틱의 게임은 항상 최고 수준의 퀄리티를 유지하고 있어요. 이번에도 그런 훌륭한 게임을 만났나요?
https://www.s9winmy.com
https://www.mihiroseiki.com
https://www.mods4me.com
agenbet88score.com
Zhu Zaimo는 “선생님이 키스를 원하는 이유는 무엇입니까? “라고 말했습니다.
https://maps.google.com.py/url?q=https%3A%2F%2Fwww.agenbet88score.com%2F
Hi Dear, are you in fact visiting this site on a regular
basis, if so then you will without doubt obtain fastidious experience.
Here is my page; http://new.wroclawski.wroclaw.pl
india pharmacy mail order indian pharmacy reputable indian pharmacies
http://indianph.com/# reputable indian pharmacies
buy medicines online in india
What’s up, I read your new stuff regularly. Your writing style is awesome, keep doing
what you’re doing!
Also visit my blog; http://top.elblaski.elblag.pl
Çok yararlı bi yazı olmuş hocam teşekkür ederim .Sizin yazılarınızı beğenerek okuyorum elinize sağlık.
https://indianph.com/# top online pharmacy india
pharmacy website india
http://indianph.com/# buy medicines online in india
reputable indian pharmacies
reputable indian pharmacies reputable indian pharmacies top 10 online pharmacy in india
Very nice post. I just stumbled upon your weblog and wanted to
say that I have really enjoyed browsing your blog
posts. In any case I will be subscribing to your feed and I hope you write again very soon! https://optimusbookmarks.com/story16690147/vicky-girouard
https://indianph.xyz/# india pharmacy
даркнет вход
Даркнет – неведомая зона всемирной паутины, избегающая взоров обыденных поисковых систем и требующая специальных средств для доступа. Этот скрытый уголок сети обильно насыщен сайтами, предоставляя доступ к разношерстным товарам и услугам через свои даркнет списки и индексы. Давайте ближе рассмотрим, что представляют собой эти реестры и какие тайны они хранят.
Даркнет Списки: Ворота в Тайный Мир
Каталоги ресурсов в даркнете – это вид проходы в невидимый мир интернета. Каталоги и индексы веб-ресурсов в даркнете, они позволяют пользователям отыскивать разношерстные услуги, товары и информацию. Варьируя от форумов и магазинов до ресурсов, уделяющих внимание аспектам анонимности и криптовалютам, эти перечни предоставляют нам возможность заглянуть в неизведанный мир даркнета.
Категории и Возможности
Теневой Рынок:
Даркнет часто связывается с незаконными сделками, где доступны самые разные товары и услуги – от наркотиков и оружия до похищенной информации и помощи наемных убийц. Каталоги ресурсов в этой категории облегчают пользователям находить нужные предложения без лишних усилий.
Форумы и Сообщества:
Даркнет также предоставляет площадку для анонимного общения. Форумы и сообщества, представленные в реестрах даркнета, охватывают широкий спектр – от компьютерной безопасности и хакерских атак до политики и философии.
Информационные Ресурсы:
На даркнете есть ресурсы, предоставляющие данные и указания по обходу цензуры, защите конфиденциальности и другим темам, интересным тем, кто хочет сохранить свою конфиденциальность.
Безопасность и Осторожность
Несмотря на анонимность и свободу, даркнет полон опасностей. Мошенничество, кибератаки и незаконные сделки становятся частью этого мира. Взаимодействуя с списками ресурсов в темной сети, пользователи должны соблюдать высший уровень бдительности и придерживаться мер безопасности.
Заключение
Списки даркнета – это ключ к таинственному миру, где сокрыты тайны и возможности. Однако, как и в любой неизведанной территории, путешествие в даркнет требует особой внимания и знаний. Анонимность не всегда гарантирует безопасность, и использование даркнета требует осмысленного подхода. Независимо от ваших интересов – будь то технические детали в области кибербезопасности, поиск необычных товаров или исследование новых возможностей в интернете – списки даркнета предоставляют ключ
top 10 online pharmacy in india Online medicine home delivery or indian pharmacy online
https://www.google.pn/url?sa=t&url=https://indianph.xyz world pharmacy india
world pharmacy india top 10 online pharmacy in india and top 10 pharmacies in india indianpharmacy com
wegovy canada pharmacy
world pharmacy india top 10 pharmacies in india indian pharmacy
Your method of telling the whole thing in this paragraph is in fact pleasant,
all can simply be aware of it, Thanks a lot.
buy medicines online in india indian pharmacy online or indian pharmacies safe
http://www.allbeaches.net/goframe.cfm?site=http://indianph.com indianpharmacy com
online shopping pharmacy india п»їlegitimate online pharmacies india and best india pharmacy buy medicines online in india
Даркнет – таинственная сфера интернета, избегающая взоров обычных поисковых систем и требующая дополнительных средств для доступа. Этот анонимный ресурс сети обильно насыщен ресурсами, предоставляя доступ к разношерстным товарам и услугам через свои перечни и индексы. Давайте подробнее рассмотрим, что представляют собой эти реестры и какие тайны они сокрывают.
Даркнет Списки: Ворота в Скрытый Мир
Даркнет списки – это своего рода врата в невидимый мир интернета. Каталоги и индексы веб-ресурсов в даркнете, они позволяют пользователям отыскивать разношерстные услуги, товары и информацию. Варьируя от форумов и магазинов до ресурсов, уделяющих внимание аспектам анонимности и криптовалютам, эти списки предоставляют нам шанс заглянуть в неизведанный мир даркнета.
Категории и Возможности
Теневой Рынок:
Даркнет часто ассоциируется с теневым рынком, где доступны разнообразные товары и услуги – от наркотиков и оружия до краденых данных и услуг наемных убийц. Списки ресурсов в этой категории облегчают пользователям находить подходящие предложения без лишних усилий.
Форумы и Сообщества:
Даркнет также предоставляет площадку для анонимного общения. Форумы и сообщества, представленные в реестрах даркнета, затрагивают широкий спектр – от информационной безопасности и взлома до политических вопросов и философских идей.
Информационные Ресурсы:
На даркнете есть ресурсы, предоставляющие данные и указания по преодолению цензуры, обеспечению конфиденциальности и другим темам, интересным тем, кто хочет сохранить свою конфиденциальность.
Безопасность и Осторожность
Несмотря на скрытность и свободу, даркнет не лишен рисков. Мошенничество, кибератаки и незаконные сделки присущи этому миру. Взаимодействуя с даркнет списками, пользователи должны соблюдать предельную осмотрительность и придерживаться мер безопасности.
Заключение
Даркнет списки – это путь в неизведанный мир, где скрыты секреты и возможности. Однако, как и в любой неизведанной территории, путешествие в даркнет требует особой внимания и знаний. Не всегда можно полагаться на анонимность, и использование темной сети требует осмысленного подхода. Независимо от ваших интересов – будь то технические аспекты кибербезопасности, поиск уникальных товаров или исследование новых граней интернета – реестры даркнета предоставляют ключ
Даркнет – это сегмент интернета, которая остается скрытой от обычных поисковых систем и требует специального программного обеспечения для доступа. В этой анонимной зоне сети существует масса ресурсов, включая различные списки и каталоги, предоставляющие доступ к разнообразным услугам и товарам. Давайте рассмотрим, что представляет собой каталог даркнета и какие тайны скрываются в его глубинах.
Даркнет Списки: Врата в анонимность
Для начала, что такое даркнет список? Это, по сути, каталоги или индексы веб-ресурсов в даркнете, которые позволяют пользователям находить нужные услуги, товары или информацию. Эти списки могут варьироваться от форумов и магазинов до ресурсов, специализирующихся на различных аспектах анонимности и криптовалют.
Категории и Возможности
Черный Рынок:
Темная сторона интернета часто ассоциируется с теневым рынком, где можно найти различные товары и услуги, включая наркотики, оружие, украденные данные и даже услуги наемных убийц. Списки таких ресурсов позволяют пользователям без труда находить подобные предложения.
Форумы и Сообщества:
Даркнет также предоставляет платформы для анонимного общения. Чаты и группы на теневых каталогах могут заниматься обсуждением тем от интернет-безопасности и взлома до политики и философии.
Информационные ресурсы:
Есть ресурсы, предоставляющие информацию и инструкции по обходу цензуры, защите конфиденциальности и другим темам, интересным пользователям, стремящимся сохранить анонимность.
Безопасность и Осторожность
При всей своей анонимности и свободе действий темная сторона интернета также несет риски. Мошенничество, кибератаки и незаконные сделки становятся частью этого мира. Пользователям необходимо проявлять максимальную осторожность и соблюдать меры безопасности при взаимодействии с списками теневых ресурсов.
Заключение: Врата в Неизведанный Мир
Теневые каталоги предоставляют доступ к скрытым уголкам сети, где сокрыты тайны и возможности. Однако, как и в любой неизведанной территории, важно помнить о возможных рисках и осознанно подходить к использованию даркнета. Анонимность не всегда гарантирует безопасность, и путешествие в этот мир требует особой осторожности и знания.
Независимо от того, интересуетесь ли вы техническими аспектами интернет-безопасности, ищете уникальные товары или просто исследуете новые грани интернета, даркнет списки предоставляют ключ
WOW just what I was looking for. Came here by searching for
ras
reputable indian online pharmacy reputable indian pharmacies reputable indian online pharmacy
semaglutide canada
For the reason that the admin of this site is working, no uncertainty very quickly it will be renowned, due to its quality contents.
http://indianph.com/# world pharmacy india
Online medicine order
buy prescription drugs from india cheapest online pharmacy india world pharmacy india
Windows 10 Pro Dijital Lisans
indian pharmacy online buy medicines online in india or indian pharmacies safe
https://cse.google.iq/url?sa=t&url=https://indianph.xyz best online pharmacy india
top online pharmacy india cheapest online pharmacy india and india pharmacy mail order indian pharmacy online
https://indianph.xyz/# indian pharmacy online
indian pharmacy online top online pharmacy india india pharmacy mail order
online shopping pharmacy india cheapest online pharmacy india indian pharmacy paypal
indian pharmacy indian pharmacy or online shopping pharmacy india
https://maps.google.com.kw/url?q=http://indianph.com cheapest online pharmacy india
=side+effects+of+sildenafil]world pharmacy india mail order pharmacy india and mail order pharmacy india indian pharmacies safe
india pharmacy mail order reputable indian pharmacies top 10 pharmacies in india
Goethe Certificate B2 Word List, The Goethe Certificate B2 is an internationally recognized
language test for German as a foreign language at
level B2 of the Common European Framework of Reference for
Languages (CEFR).
EPSON SAHTE KARTUŞ FİRMASI RECEP KOCABAŞ
wegovy online pharmacy
Великий вибір спецтехніки
продаж спецтехніки http://www.spectehnika-sksteh.co.ua .
lfchungary.com
Hongzhi 황제는 고개를 끄덕이며 “Lao Qing의 가족이 있습니다. “라고 말했습니다.
http://www.yachtrentalsnirof.com
A locality to rival prices to go to renting yachts, sailboats, catamarans about the world and split your yacht cheaper.
yachtrentalsnirof.com
http://nolvadex.guru/# does tamoxifen cause bone loss
https://cipro.guru/# antibiotics cipro
This resource is incredible. The wonderful data exhibits the manager’s earnestness. I’m stunned and expect more such astonishing material.
semaglutide for weight loss
cipro 500mg best prices cipro pharmacy ciprofloxacin order online
diflucan drug diflucan 150 cost or diflucan discount coupon
https://www.google.kg/url?q=https://diflucan.pro where can i buy diflucan without a prescription
buy diflucan yeast infection where to purchase diflucan and can you buy diflucan over the counter in usa diflucan cost uk
http://cytotec24.com/# Abortion pills online
pct nolvadex: nolvadex for pct – where can i buy nolvadex
http://nolvadex.guru/# pct nolvadex
diflucan online nz diflucan prescription diflucan tablet price in india
ciprofloxacin order online ciprofloxacin generic or cipro for sale
https://maps.google.dj/url?q=https://cipro.guru buy cipro online
п»їcipro generic ciprofloxacin and antibiotics cipro п»їcipro generic
buy cipro: antibiotics cipro – cipro
http://diflucan.pro/# can you buy diflucan otc
https://doxycycline.auction/# doxycycline prices
Emeğinize sağlık, bilgilendirmeler için teşekkür ederim.
where can i buy cipro online ciprofloxacin mail online п»їcipro generic
https://nolvadex.guru/# tamoxifen men
다양한 테마의 프라그마틱 슬롯로 흥미진진한 여행을 시작하세요.
프라그마틱 슬롯 무료 체험
프라그마틱의 무료 게임 옵션은 정말로 흥미진진한데요. 어떤 무료 게임을 추천하시나요?
https://www.cbhlyon.com
https://aintec.net/hot/
https://supervil.com/hot/
http://cytotec24.shop/# buy cytotec online
Hi there, I discovered your web site by way of Google whilst searching for a similar subject,
your site got here up, it seems to be good.
I have bookmarked it in my google bookmarks.[X-N-E-W-L-I-N-S-P-I-N-X]Hello there, just changed into alert to your blog via Google, and located that it’s truly informative.
I’m gonna watch out for brussels. I’ll be grateful if
you proceed this in future. Numerous other people
will probably be benefited out of your writing. Cheers!
Feel free to visit my site Pinterest
Как выбрать идеальный кондиционер
коммерческие кондиционеры prodazha-kondicionera.ru .
I couldn’t resist commenting. Very well written!
http://diflucan.pro/# diflucan rx price
Hmm it looks like your blog ate my first comment (it was super long) so
I guess I’ll just sum it up what I had written and say, I’m thoroughly
enjoying your blog. I too am an aspiring blog blogger but
I’m still new to everything. Do you have any suggestions for inexperienced
blog writers? I’d really appreciate it.
cipro ciprofloxacin: ciprofloxacin over the counter – buy ciprofloxacin over the counter
http://diflucan.pro/# diflucan online nz
http://cipro.guru/# п»їcipro generic
https://diflucan.pro/# can i buy diflucan online
can i buy diflucan from canada: diflucan cost – where to buy diflucan pills
http://nolvadex.guru/# nolvadex only pct
I have read some excellent stuff here Definitely value bookmarking for revisiting I wonder how much effort you put to make the sort of excellent informative website
sm-casino1.com
그것은 이야기, 전망 및 상상입니다.
đăng nhập st666
https://cytotec24.shop/# Abortion pills online
дом камня заказать столешницу
lfchungary.com
그녀는 부유한 가정에서 태어나지 않았고, 내각에서 나오기 전부터 이 여성 연예인과 친숙했다.
diflucan canadian pharmacy diflucan 150 australia diflucan online purchase
semaglutide without prescription
Thank you for content. Area rugs and online home decor store. Hello Administ . Website Giriş için Tıklayın: cinsel sohbet
https://doxycycline.auction/# doxycycline monohydrate
ciprofloxacin generic price buy ciprofloxacin over the counter or ciprofloxacin generic price
http://cse.google.off.ai/url?q=https://cipro.guru buy cipro online without prescription
cipro for sale buy cipro and ciprofloxacin generic buy generic ciprofloxacin
http://cipro.guru/# ciprofloxacin generic price
ciprofloxacin 500 mg tablet price: cipro online no prescription in the usa – buy cipro online without prescription
https://doxycycline.auction/# doxycycline tetracycline
tamoxifen moa aromatase inhibitor tamoxifen п»їdcis tamoxifen
http://doxycycline.auction/# doxycycline monohydrate
ciprofloxacin generic price: purchase cipro – buy ciprofloxacin over the counter
https://nolvadex.guru/# tamoxifen reviews
st666
даркнет новости
Теневая зона – это таинственная и непознанная территория интернета, где существуют свои правила, перспективы и опасности. Ежедневно в пространстве даркнета происходят инциденты, о которых стандартные пользователи могут только подозревать. Давайте изучим актуальные сведения из теневой зоны, отражающие настоящие тенденции и события в этом скрытом пространстве сети.”
Тенденции и События:
“Развитие Средств и Защиты:
В теневом интернете постоянно развиваются технологии и подходы защиты. Новости о внедрении усовершенствованных платформ кодирования, анонимизации и защиты личных данных свидетельствуют о желании пользователей и специалистов к обеспечению надежной обстановки.”
“Свежие Теневые Площадки:
В соответствии с динамикой изменений спроса и предложения, в даркнете появляются новые коммерческие площадки. Новости о открытии онлайн-рынков подаривают пользователям разнообразные варианты для купли-продажи продукцией и сервисами
Покупка удостоверения личности в интернет-магазине – это неправомерное и рискованное поступок, которое может привести к серьезным последствиям для людей. Вот некоторые аспектов, о которых важно помнить:
Незаконность: Приобретение паспорта в интернет-магазине является нарушение закона. Имение поддельным удостоверением может повлечь за собой уголовную наказание и серьезные наказания.
Риски личной безопасности: Факт использования фальшивого удостоверения личности может поставить под опасность вашу секретность. Люди, использующие поддельными документами, могут стать объектом провокаций со со стороны правоохранительных структур.
Финансовые убытки: Зачастую обманщики, продающие фальшивыми паспортами, могут применять ваши информацию для мошенничества, что приведет к денежным потерям. Ваши и финансовые данные способны оказаться применены в преступных намерениях.
Трудности при путешествиях: Поддельный удостоверение личности может стать распознан при переезде перейти границы или при контакте с государственными органами. Такое обстоятельство может послужить причиной аресту, изгнанию или иным тяжелым проблемам при путешествиях.
Потеря доверия и репутации: Применение фальшивого удостоверения личности способно привести к потере доверия со со стороны окружающих и работодателей. Это ситуация может негативно влиять на ваши престиж и карьерные перспективы.
Вместо того, чтобы подвергать опасности своей независимостью, безопасностью и репутацией, советуется соблюдать закон и использовать официальными каналами для оформления документов. Эти предусматривают обеспечение всех ваших законных интересов и обеспечивают секретность личных информации. Незаконные действия способны повлечь за собой неожиданные и негативные последствия, создавая тяжелые проблемы для вас и ваших окружения
http://diflucan.pro/# diflucan cost canada
даркнет магазин
В последнее время интернет стал в бесконечный источник информации, услуг и товаров. Однако, среди бесчисленных виртуальных магазинов и площадок, существует скрытая сторона, называемая как даркнет магазины. Данный уголок виртуального мира создает свои опасные сценарии и сопровождается значительными опасностями.
Каковы Даркнет Магазины:
Даркнет магазины представляют собой онлайн-платформы, доступные через анонимные браузеры и уникальные программы. Они действуют в скрытой сети, невидимом от обычных поисковых систем. Здесь можно обнаружить не только торговцев нелегальными товарами и услугами, но и разнообразные преступные схемы.
Категории Товаров и Услуг:
Даркнет магазины предлагают широкий ассортимент товаров и услуг, начиная от наркотиков и оружия до хакерских услуг и похищенных данных. На данной темной площадке действуют торговцы, дающие возможность приобретения запрещенных вещей без риска быть выслеженным.
Риски для Пользователей:
Легальные Последствия:
Покупка незаконных товаров на даркнет магазинах подвергает пользователей опасности столкнуться с полицией. Уголовная ответственность может быть серьезным следствием таких покупок.
Мошенничество и Обман:
Даркнет также является плодородной почвой для мошенников. Пользователи могут попасть в обман, где оплата не приведет к к получению товара или услуги.
Угрозы Кибербезопасности:
Даркнет магазины предоставляют услуги хакеров и киберпреступников, что сопровождается реальными угрозами для безопасности данных и конфиденциальности.
Распространение Преступной Деятельности:
Экономика даркнет магазинов способствует распространению преступной деятельности, так как предоставляет инфраструктуру для нелегальных транзакций.
Борьба с Проблемой:
Усиление Кибербезопасности:
Развитие кибербезопасности и технологий слежения помогает бороться с даркнет магазинами, делая их менее поулчаемыми.
Законодательные Меры:
Принятие строгих законов и их эффективная реализация направлены на предотвращение и кара пользователей даркнет магазинов.
Образование и Пропаганда:
Увеличение осведомленности о рисках и последствиях использования даркнет магазинов может снизить спрос на противозаконные товары и услуги.
Заключение:
Даркнет магазины доступ к темным уголкам интернета, где проступают теневые фигуры с преступными намерениями. Разумное использование ресурсов и активная осторожность необходимы, чтобы защитить себя от рисков, связанных с этими темными магазинами. В конечном итоге, безопасность и законопослушание должны быть на первом месте, когда идет речь об виртуальных покупках
ciprofloxacin order online buy ciprofloxacin buy cipro online canada
http://doxycycline.auction/# doxycycline 150 mg
http://cytotec24.com/# order cytotec online
buy cytotec pills online cheap: Abortion pills online – Misoprostol 200 mg buy online
https://diflucan.pro/# diflucan 400mg without prescription
doxycycline pills 200 mg doxycycline where to get doxycycline
Cytotec 200mcg price cytotec pills buy online or buy cytotec online fast delivery
http://www.cuautocoupon.com/HowItWorks/Default.aspx?returnurl=https://cytotec24.shop buy cytotec online fast delivery
cytotec online buy misoprostol over the counter and cytotec pills buy online order cytotec online
semaglutide tab 7mg
buy cytotec in usa: buy cytotec online – buy cytotec online
https://doxycycline.auction/# order doxycycline online
https://nolvadex.guru/# tamoxifen cyp2d6
https://cytotec24.shop/# buy cytotec
cipro buy generic ciprofloxacin ciprofloxacin order online
wegovy tablets for weight loss cost
https://cipro.guru/# cipro pharmacy
tamoxifen hip pain tamoxifen and ovarian cancer tamoxifen reviews
buy cytotec pills buy cytotec pills or п»їcytotec pills online
https://clients1.google.ro/url?q=https://cytotec24.shop cytotec abortion pill
cytotec abortion pill cytotec abortion pill and buy misoprostol over the counter cytotec abortion pill
pragmatic-ko.com
요즘 같은 시대에 안전벨트가 없다는 것은 안타까운 일입니다.
https://cytotec24.com/# buy cytotec pills
https://cytotec24.com/# Misoprostol 200 mg buy online
what happens when you stop taking tamoxifen aromatase inhibitors tamoxifen tamoxifen alternatives premenopausal
semaglutide weight loss
https://evaelfie.pro/# eva elfie izle
https://sweetiefox.online/# sweeti fox
lana rhoades filmleri lana rhoades video lana rhodes
https://angelawhite.pro/# Angela White filmleri
https://sweetiefox.online/# Sweetie Fox filmleri
?????? ???? Angela White izle Angela White video
1. Где купить кондиционер: лучшие магазины и выбор
2. Как выбрать кондиционер: советы по покупке
3. Кондиционеры в наличии: где купить прямо сейчас
4. Купить кондиционер онлайн: удобство и выгодные цены
5. Кондиционеры для дома: какой выбрать и где купить
6. Лучшие предложения на кондиционеры: акции и распродажи
7. Кондиционер купить: сравнение цен и моделей
8. Кондиционеры с установкой: где купить и как установить
9. Где купить кондиционер с доставкой: быстро и надежно
10. Кондиционеры: где купить качественный товар по выгодной цене
11. Кондиционер купить: как выбрать оптимальную мощность
12. Кондиционеры для офиса: какой выбрать и где купить
13. Кондиционер купить: самый выгодный вариант
14. Кондиционеры в рассрочку: где купить и как оформить
15. Кондиционеры: лучшие магазины и предложения
16. Кондиционеры на распродаже: где купить по выгодной цене
17. Как выбрать кондиционер: советы перед покупкой
18. Кондиционер купить: где найти лучшие цены
19. Лучшие магазины кондиционеров: где купить качественный товар
20. Кондиционер купить: выбор из лучших моделей
кондиционер ремонт http://kondicioner-cena.ru/ .
https://abelladanger.online/# abella danger filmleri
Даркнет – темное пространство Интернета, доступен только только для тех, кто знает правильный вход. Этот закрытый уголок виртуального мира служит местом для конфиденциальных транзакций, обмена информацией и взаимодействия скрытыми сообществами. Однако, чтобы погрузиться в этот темный мир, необходимо преодолеть несколько барьеров и использовать специальные инструменты.
Использование специальных браузеров: Для доступа к даркнету обычный браузер не подойдет. На помощь приходят эксклюзивные браузеры, такие как Tor (The Onion Router). Tor позволяет пользователям обходить цензуру и обеспечивает анонимность, помечая и перенаправляя запросы через различные серверы.
Адреса в даркнете: Обычные домены в даркнете заканчиваются на “.onion”. Для поиска ресурсов в даркнете, нужно использовать поисковики, приспособленные для этой среды. Однако следует быть осторожным, так как далеко не все ресурсы там законны.
Защита анонимности: При посещении даркнета следует принимать меры для гарантирования анонимности. Использование виртуальных частных сетей (VPN), блокировщиков скриптов и антивирусных программ является необходимым. Это поможет избежать различных угроз и сохранить конфиденциальность.
Электронные валюты и биткоины: В даркнете часто используются цифровые финансы, в основном биткоины, для скрытных транзакций. Перед входом в даркнет следует ознакомиться с основами использования криптовалютных валют, чтобы избежать финансовых рисков.
Правовые аспекты: Следует помнить, что многие поступки в даркнете могут быть запрещенными и противоречить законам различных стран. Пользование даркнетом несет риски, и непоследовательные действия могут привести к серьезным юридическим последствиям.
Заключение: Даркнет – это неизведанное пространство сети, преисполненное анонимности и тайн. Вход в этот мир требует присущих только навыков и предосторожности. При всем мистическом обаянии даркнета важно помнить о предполагаемых рисках и последствиях, связанных с его использованием.
buy semaglutide for weight loss
Взлом телеграм
Взлом Telegram: Легенды и Фактичность
Telegram – это известный мессенджер, признанный своей превосходной степенью шифрования и защиты данных пользователей. Однако, в современном цифровом мире тема вторжения в Телеграм периодически поднимается. Давайте рассмотрим, что на самом деле стоит за этим понятием и почему взлом Телеграм чаще является мифом, чем фактом.
Кодирование в Телеграм: Основы Защиты
Telegram славится своим превосходным уровнем кодирования. Для обеспечения конфиденциальности переписки между пользователями используется протокол MTProto. Этот протокол обеспечивает полное шифрование, что означает, что только передающая сторона и получающая сторона могут понимать сообщения.
Мифы о Взломе Telegram: По какой причине они возникают?
В последнее время в сети часто появляются слухи о нарушении Telegram и доступе к персональной информации пользователей. Однако, основная часть этих утверждений оказываются мифами, часто развивающимися из-за недопонимания принципов работы мессенджера.
Кибернападения и Раны: Реальные Опасности
Хотя взлом Telegram в общем случае является трудной задачей, существуют реальные опасности, с которыми сталкиваются пользователи. Например, кибератаки на индивидуальные аккаунты, вредоносные программы и другие методы, которые, тем не менее, нуждаются в личном участии пользователя в их распространении.
Охрана Личной Информации: Рекомендации для Участников
Несмотря на непоявление точной опасности взлома Telegram, важно соблюдать базовые правила кибербезопасности. Регулярно обновляйте приложение, используйте двухфакторную аутентификацию, избегайте подозрительных ссылок и фишинговых атак.
Заключение: Реальная Угроза или Паника?
Взлом Телеграма, как правило, оказывается мифом, созданным вокруг темы разговора без конкретных доказательств. Однако защита всегда остается важной задачей, и пользователи мессенджера должны быть осторожными и следовать советам по обеспечению защиты своей личной информации
http://lanarhoades.fun/# lana rhoades izle
Взлом ватцап
Взлом WhatsApp: Реальность и Мифы
WhatsApp – один из самых популярных мессенджеров в мире, широко используемый для обмена сообщениями и файлами. Он известен своей кодированной системой обмена данными и гарантированием конфиденциальности пользователей. Однако в сети время от времени появляются утверждения о возможности нарушения Вотсап. Давайте разберемся, насколько эти утверждения соответствуют реальности и почему тема нарушения WhatsApp вызывает столько дискуссий.
Шифрование в Вотсап: Охрана Личной Информации
WhatsApp применяет end-to-end шифрование, что означает, что только передающая сторона и получающая сторона могут читать сообщения. Это стало фундаментом для уверенности многих пользователей мессенджера к сохранению их личной информации.
Легенды о Взломе Вотсап: По какой причине Они Появляются?
Интернет периодически наполняют слухи о взломе WhatsApp и возможном доступе к переписке. Многие из этих утверждений порой не имеют оснований и могут быть результатом паники или дезинформации.
Реальные Угрозы: Кибератаки и Охрана
Хотя взлом WhatsApp является сложной задачей, существуют актуальные угрозы, такие как кибератаки на отдельные аккаунты, фишинг и вредоносные программы. Соблюдение мер охраны важно для минимизации этих рисков.
Охрана Личной Информации: Советы Пользователям
Для укрепления безопасности своего аккаунта в Вотсап пользователи могут использовать двухэтапную проверку, регулярно обновлять приложение, избегать сомнительных ссылок и следить за конфиденциальностью своего устройства.
Заключение: Фактическая и Осторожность
Взлом WhatsApp, как обычно, оказывается трудным и маловероятным сценарием. Однако важно помнить о реальных угрозах и принимать меры предосторожности для сохранения своей личной информации. Исполнение рекомендаций по охране помогает поддерживать конфиденциальность и уверенность в использовании мессенджера
взлом whatsapp
Взлом WhatsApp: Реальность и Легенды
WhatsApp – один из известных мессенджеров в мире, широко используемый для передачи сообщениями и файлами. Он известен своей шифрованной системой обмена данными и гарантированием конфиденциальности пользователей. Однако в сети время от времени возникают утверждения о возможности взлома WhatsApp. Давайте разберемся, насколько эти утверждения соответствуют фактичности и почему тема нарушения Вотсап вызывает столько дискуссий.
Кодирование в Вотсап: Охрана Личной Информации
WhatsApp применяет end-to-end кодирование, что означает, что только отправитель и получающая сторона могут понимать сообщения. Это стало основой для доверия многих пользователей мессенджера к защите их личной информации.
Легенды о Нарушении WhatsApp: По какой причине Они Появляются?
Сеть периодически наполняют слухи о взломе WhatsApp и возможном доступе к переписке. Многие из этих утверждений порой не имеют обоснований и могут быть результатом паники или дезинформации.
Реальные Угрозы: Кибератаки и Безопасность
Хотя взлом Вотсап является сложной задачей, существуют актуальные угрозы, такие как кибератаки на отдельные аккаунты, фишинг и вредоносные программы. Соблюдение мер безопасности важно для минимизации этих рисков.
Защита Личной Информации: Рекомендации Пользователям
Для укрепления безопасности своего аккаунта в WhatsApp пользователи могут использовать двухфакторную аутентификацию, регулярно обновлять приложение, избегать сомнительных ссылок и следить за конфиденциальностью своего устройства.
Итог: Реальность и Осторожность
Нарушение Вотсап, как правило, оказывается сложным и маловероятным сценарием. Однако важно помнить о актуальных угрозах и принимать меры предосторожности для защиты своей личной информации. Исполнение рекомендаций по охране помогает поддерживать конфиденциальность и уверенность в использовании мессенджера.
https://angelawhite.pro/# Angela White video
http://angelawhite.pro/# Angela White video
lana rhoades izle lana rhoades modeli lana rhoades modeli
https://abelladanger.online/# abella danger izle
http://angelawhite.pro/# Angela White filmleri
sweety fox sweety fox Sweetie Fox modeli
https://angelawhite.pro/# Angela White
http://lanarhoades.fun/# lana rhoades video
agenbet88score.com
그 후 그들은 방습 퓨즈를 꽂기 시작했습니다.
https://maps.google.at/url?q=https%3A%2F%2Fwww.colorful-navi.com%2F
Yazdığınız yazıdaki bilgiler altın değerinde çok teşekkürler bi kenara not aldım.
http://sweetiefox.online/# sweeti fox
Sweetie Fox filmleri Sweetie Fox modeli Sweetie Fox modeli
Selamat datang di situs kantorbola , agent judi slot gacor terbaik dengan RTP diatas 98% , segera daftar di situs kantor bola untuk mendapatkan bonus deposit harian 100 ribu dan bonus rollingan 1%
https://evaelfie.pro/# eva elfie izle
http://abelladanger.online/# abella danger filmleri
lana rhoades modeli lana rhoades filmleri lana rhoades video
wegovy
pragmatic-ko.com
그는 Fang Jifan을 바라보며 기뻐하며 “확실합니까? “라고 물었습니다.
https://evaelfie.pro/# eva elfie
http://sweetiefox.online/# sweeti fox
Angela White ?????? ???? Angela White
https://angelawhite.pro/# Angela White
https://evaelfie.pro/# eva elfie
프라그마틱 게임은 정말로 혁신적이에요. 특히 슬롯 게임들은 항상 기대 이상의 재미를 선사합니다!
프라그마틷
프라그마틱에 대한 글 읽는 것이 흥미로웠어요! 또한, 제 사이트에서도 프라그마틱과 관련된 정보를 제공하고 있어요. 함께 발전하며 지식을 나눠봐요!
https://e-trajet.net/hot/
https://dtcfelt.com/hot/
https://www.askkuya.com
Ι savor, lead to I discovered jusxt whast I was taking a
llok for. You’ve ended my 4 day lengthʏ hunt!
God Bless you man. Have a great day. Bye
http://lanarhoades.fun/# lana rhoades filmleri
https://sweetiefox.online/# Sweetie Fox izle
https://abelladanger.online/# abella danger video
eva elfie izle eva elfie izle eva elfie video
https://abelladanger.online/# abella danger izle
abella danger video Abella Danger abella danger video
https://angelawhite.pro/# Angela White filmleri
http://angelawhite.pro/# Angela White izle
http://angelawhite.pro/# Angela White izle
https://angelawhite.pro/# Angela White filmleri
https://evaelfie.pro/# eva elfie filmleri
https://angelawhite.pro/# Angela White izle
lana rhoades lana rhodes lana rhoades video
http://angelawhite.pro/# Angela White video
http://angelawhite.pro/# Angela White izle
Sweetie Fox filmleri sweety fox swetie fox
lana rhoades lana rhoades filmleri or lana rhoades filmleri
https://www.google.co.ve/url?sa=t&url=https://lanarhoades.fun lana rhoades modeli
lana rhoades izle lana rhoades modeli and lana rhoades lana rhoades
It’s a shame you don’t have a donate button! I’d
definitely donate to this excellent blog! I guess for now i’ll settle for bookmarking and adding your RSS
feed to my Google account. I look forward
to new updates and will share this blog with my Facebook group.
Talk soon!
https://angelawhite.pro/# Angela White video
http://abelladanger.online/# Abella Danger
sweety fox Sweetie Fox video or swetie fox
https://www.google.com.bn/url?sa=t&url=https://sweetiefox.online sweeti fox
Sweetie Fox filmleri Sweetie Fox filmleri and sweeti fox Sweetie Fox filmleri
http://sweetiefox.online/# Sweetie Fox modeli
https://lanarhoades.fun/# lana rhodes
http://angelawhite.pro/# Angela White video
I very delighted to find this internet site on bing, just what I was searching for as well saved to fav
https://sweetiefox.online/# sweety fox
https://angelawhite.pro/# Angela White filmleri
?????? ???? Angela White video or ?????? ????
http://585658.com/export.php?url=http://angelawhite.pro Angela Beyaz modeli
Angela White video Angela Beyaz modeli and ?????? ???? Angela Beyaz modeli
https://evaelfie.pro/# eva elfie filmleri
Angela White [url=https://angelawhite.pro/#]Angela White[/url] ?????? ????
http://evaelfie.pro/# eva elfie izle
Sweetie Fox filmleri sweeti fox or Sweetie Fox modeli
https://asia.google.com/url?q=https://sweetiefox.online Sweetie Fox filmleri
Sweetie Fox modeli Sweetie Fox and sweety fox Sweetie Fox izle
I couldn’t resist commenting. Very well written!
My webpage … car magnets online
http://angelawhite.pro/# Angela White video
https://angelawhite.pro/# Angela Beyaz modeli
What’s up Dear, are you actually visiting this site daily, if so after that you will absolutely take good knowledge.
wegovy retail price
https://lanarhoades.fun/# lana rhoades izle
https://angelawhite.pro/# Angela White
lfchungary.com
갑자기 그는 놀라운 느낌을 받았습니다.
http://sweetiefox.online/# Sweetie Fox
best india pharmacy
http://sweetiefox.online/# Sweetie Fox izle
https://angelawhite.pro/# Angela White filmleri
lana rhoades modeli lana rhoades lana rhoades video
I’ve come across many blogs, but this one truly stands out in terms of quality and authenticity Keep up the amazing work!
prednisone 20 mg pill
http://evaelfie.pro/# eva elfie modeli
Sweetie Fox video Sweetie Fox modeli or Sweetie Fox video
http://stopundshop.eu/url?q=https://sweetiefox.online Sweetie Fox
Sweetie Fox Sweetie Fox video and Sweetie Fox filmleri Sweetie Fox
http://evaelfie.pro/# eva elfie modeli
abella danger izle abella danger izle Abella Danger
lana rhoades izle lana rhoades izle or lana rhoades modeli
https://www.livecmc.com/?lang=fr&id=Ld9efT&url=https://lanarhoades.fun:: lana rhodes
lana rhodes lana rhoades modeli and lana rhodes lana rhoades
pchelografiya.com
만약… 그가 여기서 죽는다면, 그의 가족들은 어떻게 할까요?
https://angelawhite.pro/# Angela Beyaz modeli
https://abelladanger.online/# abella danger video
eva elfie full video: eva elfie full videos – eva elfie
eva elfie photo: eva elfie hot – eva elfie
lana rhoades pics: lana rhoades hot – lana rhoades boyfriend
http://miamalkova.life/# mia malkova new video
eva elfie hot: eva elfie hd – eva elfie hd
Hmm it seems like your blog ate my first comment (it was super
long) so I guess I’ll just sum it up what I submitted
and say, I’m thoroughly enjoying your blog. I as well am an aspiring blog writer but I’m still new to the whole thing.
Do you have any recommendations for inexperienced blog writers?
I’d definitely appreciate it.
lana rhoades full video: lana rhoades – lana rhoades unleashed
https://miamalkova.life/# mia malkova
lana rhoades pics lana rhoades lana rhoades hot
all the time i used to read smaller posts that as well clear their motive, and
that is also happening with this post which I am reading at this
time.
eva elfie hd: eva elfie hot – eva elfie hot
https://miamalkova.life/# mia malkova only fans
sweetie fox new: sweetie fox new – sweetie fox new
https://sweetiefox.pro/# sweetie fox new
lana rhoades videos lana rhoades boyfriend lana rhoades hot
http://www.one-xbet-apk-fr.com
To log in, click the “Login” button on the licensed website of the bookmaker and write your buyer materials – enter your email sermon and password.
one-xbet-apk-fr.com
Изготовление и покупка поддельных денег: опасное мероприятие
Закупить фальшивые деньги может показаться привлекательным вариантом для некоторых людей, но в реальности это действие несет серьезные последствия и подрывает основы экономической стабильности. В данной статье мы рассмотрим плохие аспекты покупки поддельной валюты и почему это является опасным поступком.
Неправомерность.
Первое и чрезвычайно основное, что следует отметить – это полная неправомерность создания и использования фальшивых денег. Такие манипуляции противоречат законам большинства стран, и их наказание может быть весьма строгим. Приобретение поддельной валюты влечет за собой угрозу уголовного преследования, штрафов и даже тюремного заключения.
Экономические последствия.
Фальшивые деньги негативно влияют на экономику в целом. Когда в обращение поступает поддельная валюта, это создает дисбаланс и ухудшает доверие к национальной валюте. Компании и граждане становятся все более подозрительными при проведении финансовых сделок, что приводит к ухудшению бизнес-климата и мешает нормальному функционированию рынка.
Потенциальная угроза финансовой стабильности.
Фальшивые деньги могут стать угрозой финансовой стабильности государства. Когда в обращение поступает большое количество поддельной валюты, центральные банки вынуждены принимать дополнительные меры для поддержания финансовой системы. Это может включать в себя растущие процентных ставок, что, в свою очередь, негативно сказывается на экономике и финансовых рынках.
Риски для честных граждан и предприятий.
Люди и компании, неосознанно принимающие фальшивые деньги в качестве оплаты, становятся жертвами преступных схем. Подобные ситуации могут породить к финансовым убыткам и утрате доверия к своим деловым партнерам.
Вовлечение криминальных группировок.
Закупка фальшивых денег часто связана с преступными группировками и организованным преступлением. Вовлечение в такие сети может сопровождаться серьезными последствиями для личной безопасности и даже подвергнуть опасности жизни.
В заключение, приобретение фальшивых денег – это не только незаконное действие, но и шаг, готовое нанести ущерб экономике и обществу в целом. Рекомендуется избегать подобных поступков и сосредотачиваться на легальных, ответственных методах обращения с финансами
If you wish for to increase your knowledge just keep visiting this site and be updated
with the most recent information posted here.
Also visit my blog http://finance.sausalito.Com/camedia.sausalito/article/abnewswire-2023-10-31-the-roof-technician-offers-expert-winter-maintenance-and-repairs-in-toronto
eva elfie new videos: eva elfie videos – eva elfie hot
https://sweetiefox.pro/# sweetie fox new
sweetie fox cosplay sweetie fox video fox sweetie
smcasino-game.com
사실 과거에 … Zhu Houzhao는 Tang Yin을 좋아하지 않았습니다!
обнал карт работа
Обнал карт: Как обеспечить безопасность от обманщиков и обеспечить безопасность в сети
Современный общество высоких технологий предоставляет возможности онлайн-платежей и банковских операций, но с этим приходит и растущая угроза обнала карт. Обнал карт является практикой использования захваченных или неправомерно приобретенных кредитных карт для совершения финансовых транзакций с целью скрыть их происхождения и предотвратить отслеживание.
Ключевые моменты для безопасности в сети и предотвращения обнала карт:
Защита личной информации:
Будьте внимательными при передаче личной информации онлайн. Никогда не делитесь банковскими номерами карт, пин-кодами и другими конфиденциальными данными на сомнительных сайтах.
Сильные пароли:
Используйте для своих банковских аккаунтов и кредитных карт надежные и уникальные пароли. Регулярно изменяйте пароли для увеличения уровня безопасности.
Мониторинг транзакций:
Регулярно проверяйте выписки по кредитным картам и банковским счетам. Это содействует выявлению подозрительных транзакций и быстро реагировать.
Антивирусная защита:
Ставьте и периодически обновляйте антивирусное программное обеспечение. Такие программы помогут защитить от вредоносных программ, которые могут быть использованы для похищения данных.
Бережное использование общественных сетей:
Будьте осторожными при размещении чувствительной информации в социальных сетях. Эти данные могут быть использованы для хакерских атак к вашему аккаунту и последующего мошенничества.
Уведомление банка:
Если вы обнаружили сомнительные транзакции или похищение карты, свяжитесь с банком сразу для блокировки карты и предупреждения финансовых убытков.
Образование и обучение:
Будьте внимательными к новым методам мошенничества и постоянно обновляйте свои знания, как противостоять подобным атакам. Современные мошенники постоянно разрабатывают новые методы, и ваше знание может стать определяющим для защиты.
В завершение, соблюдение основных норм безопасности при использовании интернета и постоянное обновление знаний помогут вам уменьшить риск стать жертвой мошенничества с картами на рабочем месте и в повседневной жизни. Помните, что ваш финансовый комфорт в ваших руках, и предпринимательские действия могут сделать ваш онлайн-опыт более защищенным и надежным.
mia malkova new video: mia malkova girl – mia malkova girl
http://miamalkova.life/# mia malkova full video
eva elfie photo eva elfie hd eva elfie videos
eva elfie full video: eva elfie videos – eva elfie full video
Понимание сущности и опасностей связанных с отмыванием кредитных карт способствует людям предупреждать атак и сохранять свои финансовые ресурсы. Обнал (отмывание) кредитных карт — это механизм использования украденных или незаконно полученных кредитных карт для осуществления финансовых транзакций с целью скрыть их происхождения и предотвратить отслеживание.
Вот некоторые способов, которые могут содействовать в предотвращении обнала кредитных карт:
Защита личной информации: Будьте осторожными в связи предоставления персональной информации, особенно онлайн. Избегайте предоставления банковских карт, кодов безопасности и дополнительных конфиденциальных данных на сомнительных сайтах.
Сильные пароли: Используйте мощные и уникальные пароли для своих банковских аккаунтов и кредитных карт. Регулярно изменяйте пароли.
Контроль транзакций: Регулярно проверяйте выписки по кредитным картам и банковским счетам. Это способствует своевременному выявлению подозрительных транзакций.
Антивирусная защита: Используйте антивирусное программное обеспечение и обновляйте его регулярно. Это поможет предотвратить вредоносные программы, которые могут быть использованы для кражи данных.
Бережное использование общественных сетей: Будьте осторожными в онлайн-сетях, избегайте публикации чувствительной информации, которая может быть использована для взлома вашего аккаунта.
Уведомление банка: Если вы заметили какие-либо подозрительные операции или утерю карты, сразу свяжитесь с вашим банком для отключения карты.
Образование: Будьте внимательными к новым методам мошенничества и обучайтесь тому, как предупреждать их.
Избегая легковерия и осуществляя предупредительные действия, вы можете снизить риск стать жертвой обнала кредитных карт.
lana rhoades boyfriend: lana rhoades boyfriend – lana rhoades
https://sweetiefox.pro/# sweetie fox full video
Güzel aydınlatıcı makale için teşekkürler daha iyisi samda kayısı umarım faydalı çalışmalarınızın devamı gelir.
lana rhoades unleashed: lana rhoades boyfriend – lana rhoades pics
http://evaelfie.site/# eva elfie new videos
sweetie fox full: sweetie fox full video – sweetie fox full video
https://lanarhoades.pro/# lana rhoades boyfriend
mia malkova photos mia malkova full video mia malkova latest
I am truly thankful to the owner of this web site who has shared this fantastic piece of writing at at this place.
daftar hoki1881
lana rhoades lana rhoades pics or lana rhoades solo
http://64.psyfactoronline.com/new/forum/away.php?s=https://lanarhoades.pro lana rhoades full video
lana rhoades videos lana rhoades solo and lana rhoades hot lana rhoades full video
mia malkova: mia malkova full video – mia malkova hd
http://lanarhoades.pro/# lana rhoades full video
eva elfie full video eva elfie new videos eva elfie videos
mia malkova: mia malkova latest – mia malkova full video
https://miamalkova.life/# mia malkova full video
Bu güzel bilgilendirmeler için teşekkür ederim.
agenbet88score.com
학생들은 마스터 길드가 이 도박 싸움에 참여하게 할 사람이 누구인지 논의하지 않을 수 없었습니다.
https://cse.google.co.uk/url?sa=t&url=https%3A%2F%2Fwww.colorful-navi.com%2F
sweetie fox full: sweetie fox new – sweetie fox video
gerçekten güzel bir yazı olmuş. Yanlış bildiğimiz bir çok konu varmış. Teşekkürler.
mia malkova hd: mia malkova photos – mia malkova
http://miamalkova.life/# mia malkova
mia malkova hd mia malkova photos mia malkova full video
rikvip
rikvip
indianpharmacy com
sweetie fox video: ph sweetie fox – fox sweetie
sweetie fox full: ph sweetie fox – sweetie fox full video
https://evaelfie.site/# eva elfie hot
lana rhoades hot lana rhoades full video lana rhoades hot
eva elfie new videos: eva elfie hot – eva elfie hot
http://evaelfie.site/# eva elfie full video
pharmacy com canada
lana rhoades unleashed: lana rhoades – lana rhoades full video
Фальшивые рубли, часто, имитируют с целью мошенничества и незаконного обогащения. Шулеры занимаются клонированием российских рублей, создавая поддельные банкноты различных номиналов. В основном, воспроизводят банкноты с большими номиналами, вроде 1 000 и 5 000 рублей, поскольку это позволяет им получать крупные суммы при уменьшенном числе фальшивых денег.
Процесс подделки рублей включает в себя применение технологического оборудования высокого уровня, специализированных принтеров и специально подготовленных материалов. Шулеры стремятся максимально точно воспроизвести средства защиты, водяные знаки безопасности, металлическую защиту, микроскопический текст и другие характеристики, чтобы замедлить определение поддельных купюр.
Поддельные денежные средства регулярно попадают в обращение через торговые площадки, банки или другие организации, где они могут быть незаметно скрыты среди настоящих денег. Это порождает серьезные затруднения для экономической системы, так как фальшивые деньги могут привести к убыткам как для банков, так и для граждан.
Необходимо подчеркнуть, что владение и использование фальшивых денег представляют собой уголовными преступлениями и подпадают под уголовную ответственность в соответствии с нормативными актами Российской Федерации. Власти проводят активные меры с такими преступлениями, предпринимая действия по выявлению и пресечению деятельности банд преступников, занимающихся подделкой российских рублей
safe online pharmacies in canada
eva elfie full videos: eva elfie new video – eva elfie new videos
https://sweetiefox.pro/# sweetie fox full
sweetie fox: sweetie fox full video – sweetie fox full video
https://miamalkova.life/# mia malkova latest
sweetie fox cosplay ph sweetie fox fox sweetie
eva elfie full video eva elfie full video or eva elfie videos
https://cse.google.dj/url?q=https://evaelfie.site eva elfie
eva elfie eva elfie hd and eva elfie new video eva elfie new videos
Yerden Isıtma
sweetie fox cosplay: fox sweetie – ph sweetie fox
https://sweetiefox.pro/# ph sweetie fox
mia malkova latest mia malkova movie mia malkova new video
lana rhoades full video: lana rhoades unleashed – lana rhoades pics
eva elfie: eva elfie videos – eva elfie videos
http://sweetiefox.pro/# sweetie fox
lana rhoades solo: lana rhoades unleashed – lana rhoades unleashed
https://lanarhoades.pro/# lana rhoades full video
sweetie fox full sweetie fox full video or sweetie fox
http://sat-plus.net/ext_link?url=https://sweetiefox.pro sweetie fox
sweetie fox cosplay sweetie fox video and sweetie fox full video fox sweetie
An impressive share! I’ve just forwarded this onto a
coworker who was doing a little homework on this.
And he actually ordered me breakfast because I discovered it for him…
lol. So let me reword this…. Thank YOU for the meal!! But yeah, thanx for spending the time to talk about this issue here on your blog.
sweetie fox full: fox sweetie – sweetie fox full video
初次接觸線上娛樂城的玩家一定對選擇哪間娛樂城有障礙,首要條件肯定是評價良好的娛樂城,其次才是哪間娛樂城優惠最誘人,娛樂城體驗金多少、娛樂城首儲一倍可以拿多少等等…本篇文章會告訴你娛樂城優惠怎麼挑,首儲該注意什麼。
娛樂城首儲該注意什麼?
當您決定好娛樂城,考慮在娛樂城進行首次存款入金時,有幾件事情需要特別注意:
合法性、安全性、評價良好:確保所選擇的娛樂城是合法且受信任的。檢查其是否擁有有效的賭博牌照,以及是否採用加密技術來保護您的個人信息和交易。
首儲優惠與流水:許多娛樂城會為首次存款提供吸引人的獎勵,但相對的流水可能也會很高。
存款入金方式:查看可用的支付選項,是否適合自己,例如:USDT、超商儲值、銀行ATM轉帳等等。
提款出金方式:瞭解最低提款限制,綁訂多少流水才可以領出。
24小時客服:最好是有24小時客服,發生問題時馬上有人可以處理。
eva elfie full videos: eva elfie videos – eva elfie full video
https://miamalkova.life/# mia malkova full video
fox sweetie sweetie fox video sweetie fox
娛樂城首儲
初次接觸線上娛樂城的玩家一定對選擇哪間娛樂城有障礙,首要條件肯定是評價良好的娛樂城,其次才是哪間娛樂城優惠最誘人,娛樂城體驗金多少、娛樂城首儲一倍可以拿多少等等…本篇文章會告訴你娛樂城優惠怎麼挑,首儲該注意什麼。
娛樂城首儲該注意什麼?
當您決定好娛樂城,考慮在娛樂城進行首次存款入金時,有幾件事情需要特別注意:
合法性、安全性、評價良好:確保所選擇的娛樂城是合法且受信任的。檢查其是否擁有有效的賭博牌照,以及是否採用加密技術來保護您的個人信息和交易。
首儲優惠與流水:許多娛樂城會為首次存款提供吸引人的獎勵,但相對的流水可能也會很高。
存款入金方式:查看可用的支付選項,是否適合自己,例如:USDT、超商儲值、銀行ATM轉帳等等。
提款出金方式:瞭解最低提款限制,綁訂多少流水才可以領出。
24小時客服:最好是有24小時客服,發生問題時馬上有人可以處理。
eva elfie full videos: eva elfie – eva elfie hd
http://miamalkova.life/# mia malkova photos
st666
ST666️ – Trang Chủ Chính Thức Số 1️⃣ Của Nhà Cái ST666
ST666 đã nhanh chóng trở thành điểm đến giải trí cá độ thể thao được yêu thích nhất hiện nay. Mặc dù chúng tôi mới xuất hiện trên thị trường cá cược trực tuyến Việt Nam gần đây, nhưng đã nhanh chóng thu hút sự quan tâm của cộng đồng người chơi trực tuyến. Đối với những người yêu thích trò chơi trực tuyến, nhà cái ST666 nhận được sự tin tưởng và tín nhiệm trọn vẹn từ họ. ST666 được coi là thiên đường cho những người chơi tham gia.
Giới Thiệu Nhà Cái ST666
ST666.BLUE – ST666 là nơi cá cược đổi thưởng trực tuyến được ưa chuộng nhất hiện nay. Tham gia vào trò chơi cá cược trực tuyến, người chơi không chỉ trải nghiệm các trò giải trí hấp dẫn mà còn có cơ hội nhận các phần quà khủng thông qua các kèo cá độ. Với những phần thưởng lớn, người chơi có thể thay đổi cuộc sống của mình.
Giới Thiệu Nhà Cái ST666 BLUE
Thông tin về nhà cái ST666
ST666 là Gì?
Nhà cái ST666 là một sân chơi cá cược đổi thưởng trực tuyến, chuyên cung cấp các trò chơi cá cược đổi thưởng có thưởng tiền mặt. Điều này bao gồm các sản phẩm như casino, bắn cá, thể thao, esports… Người chơi có thể tham gia nhiều trò chơi hấp dẫn khi đăng ký, đặt cược và có cơ hội nhận thưởng lớn nếu chiến thắng hoặc mất số tiền cược nếu thất bại.
Nhà Cái ST666 – Sân Chơi Cá Cược An Toàn
Nhà Cái ST666 – Sân Chơi Cá Cược Trực Tuyến
Nguồn Gốc Thành Lập Nhà Cái ST666
Nhà cái ST666 được thành lập và ra mắt vào năm 2020 tại Campuchia, một quốc gia nổi tiếng với các tập đoàn giải trí cá cược đổi thưởng. Xuất hiện trong giai đoạn phát triển mạnh mẽ của ngành cá cược, ST666 đã để lại nhiều dấu ấn. Được bảo trợ tài chính bởi tập đoàn danh tiếng Venus Casino, thương hiệu đã mở rộng hoạt động khắp Đông Nam Á và lan tỏa sang cả các quốc gia Châu Á, bao gồm cả Trung Quốc
game online 20d8f53
sweetie fox full video: sweetie fox cosplay – sweetie fox cosplay
http://sweetiefox.pro/# sweetie fox
parrotsav.com
홍지황제는 우울한 얼굴을 하고 있었지만, 지금은 신하들 앞에서 소란을 피우기가 쉽지 않다.
eva elfie hd: eva elfie photo – eva elfie
eva elfie photo: eva elfie hd – eva elfie videos
http://miamalkova.life/# mia malkova
sweetie fox full sweetie fox new sweetie fox
Wow that was odd. I just wrote an extremely long comment but after
I clicked submit my comment didn’t show up. Grrrr…
well I’m not writing all that over again. Anyways, just wanted to say excellent blog!
Greetings! I know this is kind of off topic but I was wondering which blog platform are you using for this website?
I’m getting fed up of WordPress because I’ve had issues with hackers and
I’m looking at options for another platform. I would be
awesome if you could point me in the direction of a good
platform.
eva elfie hot: eva elfie full videos – eva elfie photo
https://miamalkova.life/# mia malkova photos
sweetie fox full: sweetie fox new – sweetie fox cosplay
http://miamalkova.life/# mia malkova
eva elfie photo: eva elfie hd – eva elfie new video
lana rhoades boyfriend lana rhoades videos or lana rhoades solo
https://alt1.toolbarqueries.google.bj/url?q=https://lanarhoades.pro lana rhoades videos
lana rhoades pics lana rhoades pics and lana rhoades solo lana rhoades hot
mia malkova: mia malkova full video – mia malkova latest
https://evaelfie.site/# eva elfie new videos
ph sweetie fox sweetie fox full fox sweetie
sm-casino1.com
Fang Jifan은 자신을 찌를 변명을 찾을 수 있습니까?
lana rhoades boyfriend: lana rhoades solo – lana rhoades unleashed
HP 953 Sahte kartuş yapan recepkocabas8@gmail.com
mia malkova movie: mia malkova movie – mia malkova latest
http://evaelfie.site/# eva elfie new videos
sweetie fox full sweetie fox cosplay fox sweetie
prednisone buy online
lana rhoades hot: lana rhoades videos – lana rhoades boyfriend
http://sweetiefox.pro/# sweetie fox cosplay
lana rhoades full video: lana rhoades videos – lana rhoades solo
http://sweetiefox.pro/# fox sweetie
laanabasis.com
Fang Jifan은 약간 춥고 점점 더 … 조금 위험하다고 느꼈습니다.
mia malkova girl: mia malkova full video – mia malkova latest
http://miamalkova.life/# mia malkova girl
eva elfie eva elfie new videos eva elfie videos
eva elfie full videos: eva elfie full video – eva elfie new videos
sweetie fox new: sweetie fox new – sweetie fox full video
sweetie fox new: sweetie fox video – sweetie fox video
https://miamalkova.life/# mia malkova photos
mia malkova photos mia malkova videos mia malkova only fans
twichclip.com
그런데 이때 밖에서 누군가가 급히 들어와 “양쯔강 남쪽에서 급류가 오고 있다”고 말했다.
sweetie fox sweetie fox full or sweetie fox new
https://huongnghiepviet.com/support-form?action=1&cckid=4776&typeaction=dkhocts&url=https://sweetiefox.pro sweetie fox full video
sweetie fox new sweetie fox full video and ph sweetie fox fox sweetie
eva elfie hd eva elfie photo or eva elfie videos
http://7ba.ru/out.php?url=https://evaelfie.site::: eva elfie videos
eva elfie eva elfie new videos and eva elfie full videos eva elfie
mia malkova girl: mia malkova full video – mia malkova movie
https://sweetiefox.pro/# sweetie fox full video
sweetie fox full video sweetie fox full video sweetie fox
Hi there, after reading this awesome article i am as well
cheerful to share my experience here with mates.
lana rhoades videos: lana rhoades full video – lana rhoades unleashed
https://sweetiefox.pro/# sweetie fox video
sweetie fox full video: sweetie fox full – sweetie fox cosplay
You have made some decent points there. I looked on the internet for more info about the issue and found most people will go along
with your views on this site.
ph sweetie fox: sweetie fox – sweetie fox full video
http://lanarhoades.pro/# lana rhoades videos
apo-prednisone
canadian pharmacy 1 internet online drugstore
mia malkova videos: mia malkova full video – mia malkova videos
https://miamalkova.life/# mia malkova photos
sweetie fox full sweetie fox full sweetie fox cosplay
eva elfie photo eva elfie hd or eva elfie
https://cse.google.gg/url?sa=t&url=https://evaelfie.site eva elfie new video
eva elfie photo eva elfie and eva elfie hd eva elfie hd
lana rhoades boyfriend: lana rhoades videos – lana rhoades full video
Hi there, I enjoy reading all of your post. I wanted to write a little comment to support
you.
lana rhoades solo: lana rhoades full video – lana rhoades hot
http://evaelfie.site/# eva elfie new video
mia malkova girl mia malkova new video mia malkova latest
KANTORBOLA situs gamin online terbaik 2024 yang menyediakan beragam permainan judi online easy to win , mulai dari permainan slot online , taruhan judi bola , taruhan live casino , dan toto macau . Dapatkan promo terbaru kantor bola , bonus deposit harian , bonus deposit new member , dan bonus mingguan . Kunjungi link kantorbola untuk melakukan pendaftaran .
sweetie fox video sweetie fox full video or sweetie fox full video
https://www.google.com.uy/url?q=https://sweetiefox.pro sweetie fox full video
sweetie fox cosplay sweetie fox and sweetie fox sweetie fox full
mia malkova videos: mia malkova only fans – mia malkova latest
http://lanarhoades.pro/# lana rhoades full video
lana rhoades unleashed: lana rhoades videos – lana rhoades boyfriend
http://sweetiefox.pro/# sweetie fox cosplay
Daha önce araştırıp pek Türkçe kaynak bulamadığım sorundu Elinize sağlık eminim arayan çok kişi vardır.
Ngamenjitu Login
Situs Judi: Situs Togel Online Terbesar dan Terpercaya
Situs Judi telah menjadi salah satu situs judi daring terbesar dan terjamin di Indonesia. Dengan bervariasi pasaran yang disediakan dari Semar Group, Portal Judi menawarkan sensasi main togel yang tak tertandingi kepada para penggemar judi daring.
Pasaran Terbaik dan Terlengkap
Dengan total 56 pasaran, Situs Judi menampilkan berbagai opsi terbaik dari pasaran togel di seluruh dunia. Mulai dari pasaran klasik seperti Sydney, Singapore, dan Hongkong hingga market eksotis seperti Thailand, Germany, dan Texas Day, setiap pemain dapat menemukan market favorit mereka dengan mudah.
Metode Bermain yang Praktis
Portal Judi menyediakan tutorial cara bermain yang mudah dipahami bagi para pemula maupun penggemar togel berpengalaman. Dari langkah-langkah pendaftaran hingga penarikan kemenangan, semua informasi tersedia dengan jelas di situs Portal Judi.
Ringkasan Terakhir dan Informasi Terkini
Pemain dapat mengakses hasil terakhir dari setiap market secara real-time di Ngamenjitu. Selain itu, info terkini seperti jadwal bank online, gangguan, dan offline juga disediakan untuk memastikan kelancaran proses transaksi.
Pelbagai Jenis Permainan
Selain togel, Situs Judi juga menawarkan berbagai jenis permainan kasino dan judi lainnya. Dari bingo hingga roulette, dari dragon tiger hingga baccarat, setiap pemain dapat menikmati bervariasi pilihan permainan yang menarik dan menghibur.
Security dan Kenyamanan Klien Dijamin
Ngamenjitu mengutamakan keamanan dan kepuasan pelanggan. Dengan sistem security terbaru dan layanan pelanggan yang responsif, setiap pemain dapat bermain dengan nyaman dan tenang di platform ini.
Promosi dan Hadiah Istimewa
Ngamenjitu juga menawarkan berbagai promosi dan bonus istimewa bagi para pemain setia maupun yang baru bergabung. Dari hadiah deposit hingga bonus referral, setiap pemain memiliki kesempatan untuk meningkatkan kemenangan mereka dengan hadiah yang ditawarkan.
Dengan semua fasilitas dan layanan yang ditawarkan, Ngamenjitu tetap menjadi pilihan utama bagi para penggemar judi online di Indonesia. Bergabunglah sekarang dan nikmati pengalaman bermain yang seru dan menguntungkan di Ngamenjitu!
eva elfie full videos: eva elfie new video – eva elfie new videos
http://miamalkova.life/# mia malkova only fans
lana rhoades lana rhoades solo lana rhoades boyfriend
lana rhoades solo: lana rhoades – lana rhoades boyfriend
Google hack
sweetie fox full video: sweetie fox cosplay – sweetie fox video
very informative articles or reviews at this time.
http://pinupcassino.pro/# cassino pin up
play aviator aviator login aviator game
https://aviatormalawi.online/# aviator bet
aviator sinyal hilesi: aviator oyna slot – pin up aviator
https://aviatormalawi.online/# aviator bet
aviator jogo de aposta: ganhar dinheiro jogando – deposito minimo 1 real
http://aviatorjogar.online/# jogar aviator Brasil
synthroid canada price
After going over a number of the blog articles on your site, I really
like your technique of writing a blog. I book-marked it to my bookmark website list and will be checking back in the near future.
Please check out my website too and tell me what you
think.
http://aviatormocambique.site/# aviator
aviator sportybet ghana aviator game bet aviator game online
If you have any specific questions or topics you’d like to discuss, or if there’s anything else I can assist you with, please feel free to let me know!
Nice post. I learn something totally new and challenging on websites
I am truly thankful to the owner of this web site who has shared this fantastic piece of writing at at this place.
aviator bet malawi login: aviator – aviator
Thank you for reaching out! If you have any specific questions or topics in mind, please feel free to share them, and I’ll do my best to assist you. Whether you’re curious about a particular technology, scientific concept, literary work, or anything else, I’m here to provide information, advice, or engage in a discussion. Don’t hesitate to let me know how I can help you further!
HP 953 Sahte kartuş yapan recepkocabas8@gmail.com
https://jogodeaposta.fun/# site de apostas
aviator jogo aviator jogo aviator pin up
melhor jogo de aposta: ganhar dinheiro jogando – deposito minimo 1 real
https://pinupcassino.pro/# pin-up casino login
VenueInDelhi is here to help you find and book the perfect place for your special day. We offer a range of wedding services to make your wedding planning easy and stress-free. We can also customize your wedding according to your budget and preferences.
pin up aviator: jogar aviator online – aviator jogo
brand name synthroid price
aviator: aviator game online – play aviator
http://pinupcassino.pro/# cassino pin up
https://jogodeaposta.fun/# melhor jogo de aposta para ganhar dinheiro
pin-up cassino pin up or aviator oficial pin up
https://www.google.com.au/url?sa=t&url=https://pinupcassino.pro pin-up casino entrar
pin up aviator aviator oficial pin up and pin-up casino login pin up
prednisone 25
https://aviatormalawi.online/# aviator bet malawi login
jogar aviator online jogar aviator online aviator pin up
프라그마틱 게임은 iGaming의 선도적인 콘텐츠 제공 업체로, 최고 품질의 엔터테인먼트를 제공하기 위해 모바일 중심 다양한 포트폴리오를 갖추고 있습니다.
프라그마틱 무료 슬롯
프라그마틱 콘텐츠 항상 기대돼요! 또한 제 사이트에서도 유용한 정보를 제공하고 있어요. 상호 교류하며 더 많은 지식을 얻어가요!
https://www.sujanews.com
http://keoghsflex.com/
https://www.b4closing.com
aplicativo de aposta: jogos que dão dinheiro – aviator jogo de aposta
I am truly thankful to the owner of this web site who has shared this fantastic piece of writing at at this place.
very informative articles or reviews at this time.
aviator game online: aviator game online – play aviator
https://1-xbet-france.com
Working 1xbet reproduce looking for entering the true website of the bookmaker. Usage it to display with 1xBet, pick up bonuses and situation online bets.
https://1-xbet-france.com
pin up aviator pin-up casino login or pin-up casino login
http://hanamura.shop/link.cgi?url=https://pinupcassino.pro aviator pin up casino
pin up casino pin-up casino login and pin up aviator pin-up casino login
http://pinupcassino.pro/# cassino pin up
aviator: como jogar aviator em moçambique – como jogar aviator
pin-up casino entrar pin-up casino login or aviator pin up casino
https://asia.google.com/url?q=https://pinupcassino.pro cassino pin up
pin-up casino login aviator pin up casino and pin up pin-up casino login
Thank you for reaching out! If you have any specific questions or topics in mind, please feel free to share them, and I’ll do my best to assist you. Whether you’re curious about a particular technology, scientific concept, literary work, or anything else, I’m here to provide information, advice, or engage in a discussion. Don’t hesitate to let me know how I can help you further!
melhor jogo de aposta site de apostas or aviator jogo de aposta
http://lonevelde.lovasok.hu/out_link.php?url=https://jogodeaposta.fun jogo de aposta online
jogo de aposta aplicativo de aposta and jogo de aposta melhor jogo de aposta
http://pinupcassino.pro/# pin up bet
aviator oyna slot aviator aviator oyna
Сознание сущности и опасностей ассоциированных с легализацией кредитных карт может помочь людям предупреждать атак и сохранять свои финансовые состояния. Обнал (отмывание) кредитных карт — это процесс использования украденных или незаконно полученных кредитных карт для проведения финансовых транзакций с целью замаскировать их происхождения и заблокировать отслеживание.
Вот некоторые из способов, которые могут содействовать в предотвращении обнала кредитных карт:
Защита личной информации: Будьте осторожными в контексте предоставления персональной информации, особенно онлайн. Избегайте предоставления номеров карт, кодов безопасности и дополнительных конфиденциальных данных на ненадежных сайтах.
Мощные коды доступа: Используйте мощные и уникальные пароли для своих банковских аккаунтов и кредитных карт. Регулярно изменяйте пароли.
Контроль транзакций: Регулярно проверяйте выписки по кредитным картам и банковским счетам. Это позволит своевременно обнаруживать подозрительных транзакций.
Защита от вирусов: Используйте антивирусное программное обеспечение и вносите обновления его регулярно. Это поможет защитить от вредоносные программы, которые могут быть использованы для похищения данных.
Осмотрительное поведение в социальных медиа: Будьте осторожными в сетевых платформах, избегайте опубликования чувствительной информации, которая может быть использована для взлома вашего аккаунта.
Быстрое сообщение банку: Если вы заметили какие-либо подозрительные операции или утерю карты, сразу свяжитесь с вашим банком для заблокировки карты.
Обучение: Будьте внимательными к современным приемам мошенничества и обучайтесь тому, как противостоять их.
Избегая легковерия и осуществляя предупредительные действия, вы можете уменьшить риск стать жертвой обнала кредитных карт.
Незаконные платформы, где производят кэшинг карт, составляют собой веб-ресурсы, ориентированные на рассмотрении и осуществлении незаконных транзакций с финансовыми пластиком. На подобных форумах участники обмениваются данными, приемами и опытом в сфере кэш-аута, что влечет за собой противозаконные действия по получению доступа к денежным ресурсам.
Эти веб-ресурсы могут предлагать разнообразные услуги, связанные с преступной деятельностью, такие как фишинг, скимминг, вредоносное программное обеспечение и другие методы для сбора информации с банковских карт. Также рассматриваются вопросы, связанные с применением похищенных информации для осуществления транзакций или снятия денег.
Участники неправомерных форумов по обналу банковских карт могут стремиться оставаться неизвестными и уходить от привлечения органов безопасности. Участники могут делиться рекомендациями, предлагать сервисы, связанные с обналом, а также совершать сделки, направленные на незаконную финансовую деятельность.
Важно подчеркнуть, что содействие в таких деятельностях не только является нарушением законов, но также способно приводить к правовым санкциям и наказанию.
обнал карт работа
Обналичивание карт – это противозаконная деятельность, становящаяся все более распространенной в нашем современном мире электронных платежей. Этот вид мошенничества представляет серьезные вызовы для банков, правоохранительных органов и общества в целом. В данной статье мы рассмотрим частоту встречаемости обналичивания карт, используемые методы и возможные последствия для жертв и общества.
Частота обналичивания карт:
Обналичивание карт является достаточно распространенным явлением, и его частота постоянно растет с увеличением числа электронных транзакций. Киберпреступники применяют различные методы для получения доступа к финансовым средствам, включая фишинг, вредоносное программное обеспечение, скимминг и другие инновационные подходы.
Методы обналичивания карт:
Фишинг: Злоумышленники могут отправлять ложные электронные сообщения или создавать веб-сайты, имитирующие банковские системы, с целью получения личной информации от владельцев карт.
Скимминг: Злоумышленники устанавливают устройства скиммеры на банкоматах или терминалах для считывания данных с магнитных полос карт.
Вредоносное программное обеспечение: Киберпреступники разрабатывают вредоносные программы, которые заражают компьютеры и мобильные устройства, чтобы получить доступ к личным данным и банковским счетам.
Сетевые атаки: Атаки на системы банков и платежных платформ могут привести к утечке информации о картах и, следовательно, к их обналичиванию.
Последствия обналичивания карт:
Финансовые потери для клиентов: Владельцы карт могут столкнуться с материальными потерями, так как средства могут быть списаны с их счетов без их ведома.
Угроза безопасности данных: Обналичивание карт подчеркивает угрозу безопасности личных данных, что может привести к краже личной и финансовой информации.
Ущерб репутации банков: Банки и другие финансовые учреждения могут столкнуться с утратой доверия со стороны клиентов, если их системы безопасности оказываются уязвимыми.
Проблемы для экономики: Обналичивание карт создает экономический ущерб, поскольку оно стимулирует дополнительные затраты на борьбу с мошенничеством и восстановление утраченных средств.
Борьба с обналичиванием карт:
Совершенствование технологий безопасности: Банки и финансовые институты постоянно совершенствуют свои системы безопасности, чтобы предотвратить несанкционированный доступ к картам.
Образование и информирование: Обучение клиентов о методах мошенничества и том, как защитить свои данные, является важным шагом в борьбе с обналичиванием карт.
Сотрудничество с правоохранительными органами: Банки активно сотрудничают с правоохранительными органами для выявления и пресечения преступных схем.
Заключение:
Обналичивание карт – весомая угроза для финансовой стабильности и безопасности личных данных. Решение этой проблемы требует совместных усилий со стороны банков, правоохранительных органов и общества в целом. Только эффективная борьба с мошенничеством позволит обеспечить безопасность электронных платежей и защитить интересы всех участников финансовой системы.
Опасности фальшивых 5000 рублей: Распространение фиктивных купюр и его воздействия
В сегодняшнем обществе, где виртуальные платежи становятся все более популярными, мошенники не оставляют без внимания и обычные методы преступной деятельности, такие как передача контрафактных банкнот. В последние дни стало известно о нелегальной сбыте поддельных 5000 рублевых купюр, что представляет серьезную потенциальную опасность для денежной системы и общества в совокупности.
Маневры распространения:
Противоправные лица активно используют неявные трассы сети для сбыта поддельных 5000 рублей. На скрытых веб-ресурсах и неправомерных форумах можно обнаружить прошения о покупке контрафактных банкнот. К сожалению, это создает благоприятные условия для раскрутки поддельных денег среди общества.
Консеквенции для сообщества:
Возможность фальшивых денег в хождении может иметь важные консеквенции для экономики и авторитета к государственной валюте. Люди, не догадываясь, что получили недостоверные купюры, могут использовать их в разнообразных ситуациях, что в итоге приводит к повреждению поверию к банкнотам конкретного номинала.
Угрозы для людей:
Граждане становятся возможными пострадавшими оскорбителей, когда они ненамеренно получают недостоверные деньги в сделках или при покупках. В результате, они могут столкнуться с неприятными ситуациями, такими как отклонение коммерсантов принять контрафактные купюры или даже вероятность ответственности за усилие расплаты поддельными деньгами.
Столкновение с дистрибуцией фальшивых денег:
Для сохранения населения от аналогичных нарушений необходимо укрепить меры по обнаружению и пресечению производства фальшивых денег. Это включает в себя взаимодействие между правоохранительными структурами и банками, а также усиление уровня просвещения населения относительно признаков недостоверных банкнот и методов их разгадывания.
Заключение:
Прокладывание поддельных 5000 рублей – это значительная риск для финансовой стабильности и безопасности сообщества. Поддержание доверия к денежной системе требует коллективных усилий со с участием правительства, финансовых организаций и всех. Важно быть осторожным и осведомленным, чтобы предотвратить раскрутку недостоверных денег и гарантировать финансовые активы сообщества.
There is certainly a great deal to learn about this subject.
I love all the points you made.
http://jogodeaposta.fun/# jogo de aposta online
aviator pin up estrela bet aviator aviator bet
https://aviatormalawi.online/# aviator game online
http://aviatormalawi.online/# aviator game
aviator: aviator bet – como jogar aviator em moçambique
melhor jogo de aposta para ganhar dinheiro jogo de aposta online or aviator jogo de aposta
http://www.7d.org.ua/php/extlink.php?url=https://jogodeaposta.fun jogo de aposta online
jogo de aposta online aplicativo de aposta and aplicativo de aposta melhor jogo de aposta
zithromax 500mg price – https://azithromycin.pro/zithromax-pregnancy.html zithromax cost
Hi i think that i saw you visited my web site thus i came to Return the favore Im attempting to find things to enhance my siteI suppose its ok to use a few of your ideas
aviator: aviator betting game – aviator malawi
pin up aviator: aviator – aviator oyunu
https://pinupcassino.pro/# cassino pin up
pharmacy online 365 discount code
aviator bet aviator game or aviator betano
https://www.google.com.sg/url?q=https://aviatorjogar.online aviator betano
aviator jogar pin up aviator and aviator jogo aviator jogo
Heya i am for the primary time here. I came across this board and
I in finding It really useful & it helped me out much.
I’m hoping to provide one thing back and aid others like you aided me.
buy tadalafil us
https://aviatormalawi.online/# play aviator
ингибиторы коррозии металла https://www.ingibitor-korrozii-msk.ru .
http://aviatoroyunu.pro/# aviator
http://aviatorghana.pro/# aviator betting game
pin up bet pin up bet pin up cassino online
safe canadian pharmacies
купить прогулочные коляски http://www.detskie-koljaski-msk.ru .
pin up pin up or pin up bet
https://www.google.com.mx/url?q=https://pinupcassino.pro pin-up cassino
pin-up aviator oficial pin up and pin up cassino pin up
Asking questions are in fact good thing if you are not understanding anything fully, except this article gives pleasant understanding even.
https://jogodeaposta.fun/# jogos que dao dinheiro
aviator bet aviator jogar jogar aviator Brasil
An impressive share! I have just forwarded this onto
a coworker who was conducting a little research on this.
And he in fact bought me lunch due to the fact that I discovered
it for him… lol. So let me reword this….
Thank YOU for the meal!! But yeah, thanx for spending some
time to talk about this issue here on your
website.
My spouse and I stumbled over here by a different website and thought I might check things out.
I like what I see so i am just following you. Look forward
to finding out about your web page repeatedly.
pin-up cassino pin up bet or pin up bet
http://images.google.ml/url?q=https://pinupcassino.pro pin up cassino online
pin up cassino online aviator pin up casino and pin up casino pin up casino
site de apostas: jogos que dão dinheiro – aviator jogo de aposta
how to get prednisone without a prescription
프라그마틱 바카라
왕안의 이름은 아니지만… 오우양 즈…
https://maps.google.com.bd/url?q=https%3A%2F%2Fwww.agenbet88score.com%2F
Купил фальшивые рубли
Покупка контрафактных банкнот является противозаконным и потенциально опасным актом, которое способно повлечь за собой глубоким законным воздействиям либо ущербу своей финансовой надежности. Вот некоторые другие примет, почему получение фальшивых денег приравнивается к опасительной иначе недопустимой:
Нарушение законов:
Получение либо эксплуатация поддельных денег являются противоправным деянием, нарушающим нормы государства. Вас в состоянии поддать юридическим последствиям, что может закончиться лишению свободы, штрафам и приводу в тюрьму.
Ущерб доверию:
Лживые купюры нарушают веру по отношению к денежной организации. Их обращение формирует риск для надежных гражданских лиц и бизнесов, которые в состоянии попасть в внезапными убытками.
Экономический ущерб:
Разнос фальшивых купюр влияет на хозяйство, инициируя инфляцию и ухудшая общественную финансовую стабильность. Это имеет возможность привести к потере уважения к денежной системе.
Риск обмана:
Люди, те, задействованы в изготовлением контрафактных купюр, не обязаны сохранять какие угодно нормы качества. Фальшивые бумажные деньги могут оказаться легко распознаны, что, в конечном итоге повлечь за собой расходам для тех попытается их использовать.
Юридические последствия:
При событии попадания под арест при использовании фальшивых денег, вас могут принудительно обложить штрафами, и вы столкнетесь с юридическими трудностями. Это может отразиться на вашем будущем, в том числе возможные проблемы с трудоустройством и историей кредита.
Благосостояние общества и личное благополучие основываются на правдивости и доверии в финансовых отношениях. Закупка лживых банкнот не соответствует этим принципам и может представлять серьезные последствия. Советуем придерживаться законов и заниматься исключительно правомерными финансовыми операциями.
Покупка контрафактных банкнот представляет собой противозаконным и рискованным действием, которое в состоянии закончиться важным юридическим наказаниям либо постраданию личной денежной надежности. Вот несколько причин, из-за чего покупка фальшивых банкнот считается потенциально опасной либо неуместной:
Нарушение законов:
Приобретение и использование фальшивых денег приравниваются к правонарушением, нарушающим законы государства. Вас в состоянии подвергнуться судебному преследованию, которое может повлечь за собой лишению свободы, штрафам или тюремному заключению.
Ущерб доверию:
Фальшивые банкноты ухудшают уверенность к финансовой структуре. Их поступление в оборот формирует угрозу для честных личностей и организаций, которые могут завязать неожиданными потерями.
Экономический ущерб:
Разнос лживых банкнот причиняет воздействие на хозяйство, провоцируя распределение денег и ухудшая глобальную финансовую устойчивость. Это имеет возможность привести к потере уважения к национальной валюте.
Риск обмана:
Те, которые, занимается созданием контрафактных денег, не обязаны поддерживать какие угодно параметры качества. Контрафактные деньги могут оказаться легко распознаны, что, в конечном итоге послать в ущербу для тех, кто попытается воспользоваться ими.
Юридические последствия:
В случае попадания под арест при использовании лживых купюр, вас способны принудительно обложить штрафами, и вы столкнетесь с законными сложностями. Это может повлиять на вашем будущем, в том числе проблемы с трудоустройством и кредитной историей.
Благосостояние общества и личное благополучие зависят от правдивости и уважении в финансовых отношениях. Покупка фальшивых банкнот нарушает эти принципы и может представлять серьезные последствия. Рекомендуем держаться законов и осуществлять только законными финансовыми сделками.
Купить фальшивые рубли
Покупка поддельных денег считается противозаконным иначе рискованным делом, которое в состоянии привести к серьезным правовым санкциям и повреждению индивидуальной денежной стабильности. Вот некоторые приводов, вследствие чего покупка контрафактных денег является опасительной и неуместной:
Нарушение законов:
Закупка иначе применение фальшивых банкнот приравниваются к противоправным деянием, нарушающим положения территории. Вас имеют возможность подвергнуться судебному преследованию, что может привести к тюремному заключению, взысканиям либо тюремному заключению.
Ущерб доверию:
Фальшивые деньги ухудшают доверие по отношению к денежной системе. Их обращение создает возможность для порядочных людей и коммерческих структур, которые в состоянии столкнуться с неожиданными расходами.
Экономический ущерб:
Разнос контрафактных банкнот причиняет воздействие на экономику, вызывая денежное расширение что ухудшает всеобщую денежную стабильность. Это может повлечь за собой потере доверия к валютной единице.
Риск обмана:
Лица, кто, задействованы в производством лживых купюр, не обязаны поддерживать какие-нибудь нормы характеристики. Фальшивые бумажные деньги могут оказаться легко распознаны, что, в конечном итоге приведет к расходам для тех стремится использовать их.
Юридические последствия:
При случае задержания за использование контрафактных денег, вас могут наказать штрафом, и вы столкнетесь с юридическими трудностями. Это может отразиться на вашем будущем, в том числе трудности с поиском работы и кредитной историей.
Общественное и личное благополучие зависят от правдивости и доверии в финансовых отношениях. Получение лживых купюр противоречит этим принципам и может иметь важные последствия. Предлагается соблюдать законов и вести только правомерными финансовыми сделками.
Çok yararlı bir makale olmuş. Severek takip ediyorum. Teşekkür ederim.
Adderall is a medication used to treat consideration shortage of hyperactivity disorder.
http://indianpharm24.shop/# cheapest online pharmacy india indianpharm.store
indian pharmacies safe: Best Indian pharmacy – pharmacy website india indianpharm.store
Sitenizin tasarımı da içerikleriniz de harika, özellikle içerikleri adım adım görsellerle desteklemeniz çok başarılı emeğinize sağlık.
Elite World Grand İstanbul Küçükyalı’dan anne ve çocuklara özel Kurabiye Atölyesi Elite World Grand İstanbul Küçükyalı, özel bir workshop etkinliğiyle yılbaşı coşkusunu lezzetli bir deneyimle birleştiriyor.…
medicine in mexico pharmacies Mexico pharmacy price list buying prescription drugs in mexico online mexicanpharm.shop
where can i get synthroid
buy prescription drugs from india Top online pharmacy in India pharmacy website india indianpharm.store
crazy-slot1.com
그런 아들밖에 없는데 어떻게 그렇게 말도 안 돼?
thx admin
п»їlegitimate online pharmacies india: Online India pharmacy – best online pharmacy india indianpharm.store
generic lisinopril online
https://mexicanpharm24.com/# medicine in mexico pharmacies mexicanpharm.shop
Online medicine home delivery: online pharmacy in india – Online medicine home delivery indianpharm.store
프라그마틱 게임은 iGaming 분야에서 혁신적이고 표준화된 콘텐츠를 제공하는 선도적인 공급 업체로 주목받고 있습니다.
프라그마틱 플레이
프라그마틱 관련 글 읽는 것이 즐거웠어요! 또한, 제 사이트에서도 프라그마틱에 대한 정보를 공유하고 있어요. 함께 교류하며 더 많은 지식을 얻어봐요!
https://yluno.com/link/
https://www.12315ox.cn/
https://www.12315oc.cn/
jbustinphoto.com
함대, 수백 명, 군대 전체가 전멸했습니다!
cheapest online pharmacy india Generic Medicine India to USA buy prescription drugs from india indianpharm.store
drug prices prednisone
https://canadianpharmlk.com/# pharmacy canadian canadianpharm.store
my canadian pharmacy: Canada pharmacy online – canadian family pharmacy canadianpharm.store
http://canadianpharmlk.com/# canadianpharmacymeds canadianpharm.store
buying from online mexican pharmacy mexico drug stores pharmacies п»їbest mexican online pharmacies mexicanpharm.shop
It works by helping to relax the muscles.
Carisoprodol is used short-term to treat muscle pain and discomfort.
mexican pharmaceuticals online purple pharmacy mexico price list or purple pharmacy mexico price list
https://www.google.com.sb/url?q=https://mexicanpharm24.com mexican pharmaceuticals online
mexican online pharmacies prescription drugs mexican mail order pharmacies and medication from mexico pharmacy п»їbest mexican online pharmacies
synthroid purchase online
precription drugs from canada: CIPA approved pharmacies – canadian drugs pharmacy canadianpharm.store
Покупка лживых банкнот считается недозволенным и опасным актом, которое имеет возможность привести к важным законным последствиям и постраданию своей финансовой надежности. Вот несколько других примет, почему покупка контрафактных банкнот приравнивается к потенциально опасной или неуместной:
Нарушение законов:
Закупка или эксплуатация лживых денег представляют собой правонарушением, нарушающим законы территории. Вас могут подвергнуть себя наказанию, что может послать в тюремному заключению, финансовым санкциям либо тюремному заключению.
Ущерб доверию:
Лживые банкноты нарушают доверие в финансовой механизму. Их поступление в оборот формирует угрозу для благоприятных граждан и бизнесов, которые способны попасть в неожиданными расходами.
Экономический ущерб:
Расширение контрафактных банкнот оказывает воздействие на хозяйство, инициируя рост цен и подрывая глобальную денежную стабильность. Это в состоянии послать в утрате уважения к национальной валюте.
Риск обмана:
Люди, кто, задействованы в изготовлением фальшивых денег, не обязаны соблюдать какие-нибудь нормы характеристики. Контрафактные деньги могут быть легко обнаружены, что в конечном счете закончится расходам для тех стремится воспользоваться ими.
Юридические последствия:
При случае задержания при воспользовании лживых денег, вас в состоянии оштрафовать, и вы столкнетесь с законными сложностями. Это может повлиять на вашем будущем, в том числе сложности с получением работы и историей кредита.
Благосостояние общества и личное благополучие зависят от правдивости и уважении в финансовой деятельности. Приобретение фальшивых денег идет вразрез с этими принципами и может представлять серьезные последствия. Предлагается держаться правил и заниматься исключительно правомерными финансовыми операциями.
Фальшивые 5000 купить
Опасности контрафактных 5000 рублей: Распространение фальшивых купюр и его результаты
В сегодняшнем обществе, где онлайн платежи становятся все более широко используемыми, мошенники не оставляют без внимания и традиционные методы недобросовестных действий, такие как дистрибуция поддельных банкнот. В настоящее время стало известно о неправомерной реализации поддельных 5000 рублевых купюр, что представляет серьезную угрозу для финансовой системы и граждан в общем.
Способы сбыта:
Нарушители активно используют неявные сети сети для торговли контрафактных 5000 рублей. На темных веб-ресурсах и нелегальных форумах можно обнаружить предложения контрафактных банкнот. К неудовольствию, это создает хорошие условия для дистрибуции фальшивых денег среди людей.
Воздействия для сообщества:
Возможность недостоверных денег в потоке может иметь важные последствия для финансовой структуры и доверия к рублю. Люди, не поддаваясь, что получили фальшивые купюры, могут использовать их в разнообразных ситуациях, что в последней инстанции приводит к вреду поверию к банкнотам некоего номинала.
Риски для индивидуумов:
Гражданское население становятся потенциальными жертвами преступников, когда они случайно получают недостоверные деньги в транзакциях или при приобретениях. В итоге, они могут столкнуться с нелестными ситуациями, такими как отказ торговцев принять недостоверные купюры или даже шанс ответственности за попытку расплаты фальшивыми деньгами.
Столкновение с раскруткой фальшивых денег:
В пользу защиты граждан от таких же преступлений необходимо усилить противодействие по выявлению и остановке производства контрафактных денег. Это включает в себя кооперацию между правоохранительными органами и финансовыми учреждениями, а также расширение степени подготовки общества относительно признаков фальшивых банкнот и техник их разгадывания.
Завершение:
Разнос поддельных 5000 рублей – это серьезная опасность для финансовой устойчивости и устойчивости населения. Поддерживание авторитета к рублю требует коллективных усилий со стороны властей, денежных учреждений и всех. Важно быть внимательным и информированным, чтобы предотвратить прокладывание фальшивых денег и защитить финансовые средства населения.
Покупка лживых банкнот является противозаконным иначе рискованным делом, которое способно привести к тяжелым законным воздействиям либо вреду вашей финансовой стабильности. Вот некоторые примет, из-за чего закупка поддельных купюр считается рискованной либо недопустимой:
Нарушение законов:
Закупка иначе использование лживых купюр представляют собой нарушением закона, нарушающим законы страны. Вас могут подвергнуть себя наказанию, что возможно закончиться аресту, финансовым санкциям или лишению свободы.
Ущерб доверию:
Контрафактные купюры подрывают доверенность к финансовой структуре. Их использование возникает риск для порядочных гражданских лиц и коммерческих структур, которые в состоянии претерпеть неожиданными расходами.
Экономический ущерб:
Расширение поддельных купюр осуществляет воздействие на хозяйство, провоцируя инфляцию и ухудшая общую денежную стабильность. Это способно привести к потере уважения к денежной единице.
Риск обмана:
Личности, кто, задействованы в созданием лживых банкнот, не обязаны соблюдать какие-нибудь параметры степени. Контрафактные деньги могут быть легко распознаны, что, в конечном итоге приведет к убыткам для тех, кто попытается их использовать.
Юридические последствия:
В ситуации попадания под арест при применении лживых банкнот, вас имеют возможность взыскать штраф, и вы столкнетесь с юридическими трудностями. Это может сказаться на вашем будущем, в том числе трудности с поиском работы и кредитной историей.
Общественное и индивидуальное благосостояние основываются на правдивости и доверии в финансовой деятельности. Покупка фальшивых денег нарушает эти принципы и может иметь важные последствия. Советуем придерживаться норм и осуществлять только легальными финансовыми транзакциями.
thank you admin
thx admin
cheapest pharmacy canada buying from canadian pharmacies or ed meds online canada
http://www.eurohockey.com/multimedia/photo/1388-2016-pan-american-tournament.html.html?url_back=http://canadianpharmlk.shop/ canadian world pharmacy
canadapharmacyonline prescription drugs canada buy online and best canadian pharmacy canadian pharmacy 24h com
legal to buy prescription drugs from canada: List of Canadian pharmacies – real canadian pharmacy canadianpharm.store
https://indianpharm24.shop/# Online medicine order indianpharm.store
Aporno online
Покупка лживых купюр является незаконным иначе потенциально опасным поступком, которое имеет возможность привести к глубоким законным наказаниям иначе ущербу своей денежной благосостояния. Вот несколько других приводов, по какой причине закупка поддельных денег представляет собой опасной либо неприемлемой:
Нарушение законов:
Приобретение или воспользование контрафактных купюр считаются нарушением закона, подрывающим положения общества. Вас способны подвергнуться судебному преследованию, что может привести к задержанию, штрафам или приводу в тюрьму.
Ущерб доверию:
Лживые деньги нарушают уверенность к денежной системе. Их использование формирует возможность для честных людей и коммерческих структур, которые в состоянии столкнуться с непредвиденными расходами.
Экономический ущерб:
Распространение фальшивых денег причиняет воздействие на хозяйство, приводя к распределение денег и подрывая общественную денежную устойчивость. Это способно закончиться утрате уважения к национальной валюте.
Риск обмана:
Люди, кто, занимается изготовлением поддельных банкнот, не обязаны сохранять какие-либо уровни уровня. Лживые купюры могут оказаться легко распознаны, что в конечном счете приведет к ущербу для тех собирается использовать их.
Юридические последствия:
При случае захвата при использовании лживых банкнот, вас способны принудительно обложить штрафами, и вы столкнетесь с юридическими проблемами. Это может отразиться на вашем будущем, включая трудности с получением работы и кредитной историей.
Благосостояние общества и личное благополучие зависят от правдивости и доверии в финансовой деятельности. Закупка фальшивых банкнот идет вразрез с этими принципами и может обладать важные последствия. Советуем соблюдать норм и вести только законными финансовыми транзакциями.
mexican pharmaceuticals online Mexico pharmacy online mexican rx online mexicanpharm.shop
http://mexicanpharm24.com/# buying prescription drugs in mexico online mexicanpharm.shop
medication from mexico pharmacy: Medicines Mexico – best online pharmacies in mexico mexicanpharm.shop
mexican border pharmacies shipping to usa mexico drug stores pharmacies mexican drugstore online mexicanpharm.shop
http://indianpharm24.com/# india online pharmacy indianpharm.store
online pharmacy without insurance
medicine in mexico pharmacies: order online from a Mexican pharmacy – buying prescription drugs in mexico online mexicanpharm.shop
Обналичивание карт – это противозаконная деятельность, становящаяся все более широко распространенной в нашем современном мире электронных платежей. Этот вид мошенничества представляет значительные вызовы для банков, правоохранительных органов и общества в целом. В данной статье мы рассмотрим частоту встречаемости обналичивания карт, используемые методы и возможные последствия для жертв и общества.
Частота обналичивания карт:
Обналичивание карт является довольно распространенным явлением, и его частота постоянно растет с увеличением числа электронных транзакций. Киберпреступники применяют разнообразные методы для получения доступа к финансовым средствам, включая фишинг, вредоносное программное обеспечение, скимминг и другие инновационные подходы.
Методы обналичивания карт:
Фишинг: Злоумышленники могут отправлять фальшивые электронные сообщения или создавать веб-сайты, имитирующие банковские системы, с целью получения личной информации от владельцев карт.
Скимминг: Злоумышленники устанавливают устройства скиммеры на банкоматах или терминалах для считывания данных с магнитных полос карт.
Вредоносное программное обеспечение: Киберпреступники разрабатывают вредоносные программы, которые заражают компьютеры и мобильные устройства, чтобы получить доступ к личным данным и банковским счетам.
Сетевые атаки: Атаки на системы банков и платежных платформ могут привести к утечке информации о картах и, следовательно, к их обналичиванию.
Последствия обналичивания карт:
Финансовые потери для клиентов: Владельцы карт могут столкнуться с материальными потерями, так как средства могут быть списаны с их счетов без их ведома.
Угроза безопасности данных: Обналичивание карт подчеркивает угрозу безопасности личных данных, что может привести к краже личной и финансовой информации.
Ущерб репутации банков: Банки и другие финансовые учреждения могут столкнуться с утратой доверия со стороны клиентов, если их системы безопасности оказываются уязвимыми.
Проблемы для экономики: Обналичивание карт создает экономический ущерб, поскольку оно стимулирует дополнительные затраты на борьбу с мошенничеством и восстановление утраченных средств.
Борьба с обналичиванием карт:
Совершенствование технологий безопасности: Банки и финансовые институты постоянно совершенствуют свои системы безопасности, чтобы предотвратить несанкционированный доступ к картам.
Образование и информирование: Обучение клиентов о методах мошенничества и том, как защитить свои данные, является важным шагом в борьбе с обналичиванием карт.
Сотрудничество с правоохранительными органами: Банки активно сотрудничают с правоохранительными органами для выявления и пресечения преступных схем.
Заключение:
Обналичивание карт – серьезная угроза для финансовой стабильности и безопасности личных данных. Решение этой проблемы требует совместных усилий со стороны банков, правоохранительных органов и общества в целом. Только эффективная борьба с мошенничеством позволит обеспечить безопасность электронных платежей и защитить интересы всех участников финансовой системы.
Thanks for your marvelous posting! I truly enjoyed reading it, you
could be a great author.I will make certain to bookmark your blog and will come back in the foreseeable future.
I want to encourage you continue your great posts, have a nice evening!
https://canadianpharmlk.com/# the canadian pharmacy canadianpharm.store
https://mexicanpharm24.com/# mexico pharmacy mexicanpharm.shop
where can i buy synthroid cheap
buy prescription drugs from india: world pharmacy india – world pharmacy india indianpharm.store
synthroid 0.050
online pharmacy no prescription
Покупка поддельных банкнот приравнивается к недозволенным и потенциально опасным действием, что в состоянии закончиться глубоким правовым воздействиям либо повреждению своей денежной благосостояния. Вот некоторые примет, из-за чего закупка контрафактных банкнот представляет собой опасной или неуместной:
Нарушение законов:
Приобретение либо использование фальшивых купюр приравниваются к преступлением, нарушающим нормы общества. Вас имеют возможность поддать наказанию, что может послать в тюремному заключению, штрафам иначе приводу в тюрьму.
Ущерб доверию:
Фальшивые деньги нарушают веру по отношению к денежной структуре. Их использование создает возможность для благоприятных людей и бизнесов, которые в состоянии завязать внезапными потерями.
Экономический ущерб:
Разнос поддельных банкнот оказывает воздействие на экономическую сферу, вызывая распределение денег и ухудшая всеобщую денежную устойчивость. Это может привести к потере доверия к валютной единице.
Риск обмана:
Те, которые, задействованы в производством лживых банкнот, не обязаны соблюдать какие-либо стандарты качества. Контрафактные бумажные деньги могут стать легко выявлены, что в итоге повлечь за собой убыткам для тех, кто стремится их использовать.
Юридические последствия:
При случае задержания за использование поддельных банкнот, вас способны оштрафовать, и вы столкнетесь с юридическими трудностями. Это может повлиять на вашем будущем, в том числе проблемы с поиском работы и кредитной историей.
Благосостояние общества и личное благополучие основываются на правдивости и доверии в финансовых отношениях. Получение поддельных денег идет вразрез с этими принципами и может представлять серьезные последствия. Рекомендуется придерживаться норм и осуществлять только правомерными финансовыми операциями.
Porn video online
top 10 pharmacies in india: online pharmacy usa – online pharmacy india indianpharm.store
how to get prednisone online
canadian pharmacy world reviews canadian online pharmacy or my canadian pharmacy
https://clients1.google.com.na/url?sa=t&url=http://canadianpharmlk.shop canadian pharmacy
canadian pharmacy mall www canadianonlinepharmacy and canadian mail order pharmacy canadian pharmacy 24 com
canadian pharmacy 24 com canadian pharmacy canada drugs online canadianpharm.store
https://mexicanpharm24.shop/# buying prescription drugs in mexico mexicanpharm.shop
http://canadianpharmlk.com/# canadian pharmacies that deliver to the us canadianpharm.store
mexican mail order pharmacies mexico drug stores pharmacies or buying from online mexican pharmacy
https://toolbarqueries.google.com.sv/url?q=https://mexicanpharm24.com medicine in mexico pharmacies
mexican drugstore online mexico pharmacies prescription drugs and mexican online pharmacies prescription drugs п»їbest mexican online pharmacies
https://canadianpharmlk.shop/# canadian pharmacy canadianpharm.store
best online pharmacy india: online pharmacy in india – indian pharmacy online indianpharm.store
tadalafil citrate
çok yararlı bir paylaşım olmuş teşekkür ederim çok işime yarıcak.
buy lisinopril 10 mg tablet
medication from mexico pharmacy order online from a Mexican pharmacy medicine in mexico pharmacies mexicanpharm.shop
india pharmacy mail order: online pharmacy in india – Online medicine order indianpharm.store
http://mexicanpharm24.shop/# mexican border pharmacies shipping to usa mexicanpharm.shop
gerçekten çok yararlı bi konu teşekkürler
www canadianonlinepharmacy canadian pharmacy no scripts or buy prescription drugs from canada cheap
http://www.terrasound.at/ext_link?url=http://canadianpharmlk.shop canadian pharmacy meds reviews
canadian pharmacy king best online canadian pharmacy and canadian pharmacy online store my canadian pharmacy
Thanks for the marvelous posting! I genuinely enjoyed reading it, you’re a great author.I will always bookmark your blog
and will come back in the foreseeable future. I want to encourage
continue your great job, have a nice morning!
Hi there to all, for the reason that I am genuinely keen of reading this website’s post to be updated on a regular basis. It carries pleasant stuff.
https://indianpharm24.shop/# best online pharmacy india indianpharm.store
https://mexicanpharm24.shop/# best mexican online pharmacies mexicanpharm.shop
https://indianpharm24.shop/# buy prescription drugs from india indianpharm.store
Yazdığınız yazıdaki bilgiler altın değerinde çok teşekkürler bi kenara not aldım.
This article is very good. I like these things I want you to continue developing the website.
บาคาร่าออนไลน์
canada pharmacy prednisone: prednisone brand name us – prednisone 300mg
Лучший выбор тепловизоров для ночного видения
тепловизор купить http://www.teplovizor-od.co.ua .
get clomid no prescription: clomid instructions – cost of generic clomid
mega-slot77.com
Wang Shouren은 항상 무관심해 보였습니다. 아마도 … 그는 생각하고있었습니다.
generic amoxicillin cost: amoxicillin-clav 875-125 mg – where to buy amoxicillin pharmacy
medication synthroid
cheap lisinopril
The question of whether personal values are innate or shaped by external factors is a complex and debated topic in psychology, philosophy, and sociology. Here’s an exploration of both perspectives:
where to buy synthroid online
Howdy very cool website!! Guy .. Beautiful .. Amazing ..
I’ll bookmark your blog and take the feeds also? I’m glad to find so many helpful information right
here within the publish, we’d like develop extra strategies in this regard,
thank you for sharing. . . . . .
otc lisinopril
buy generic clomid prices: clomid success stories – can you buy generic clomid without insurance
prednisone pill: prednisone long term side effects – prednisone otc price
cheap pharmacy no prescription
Porn video online
프라그마틱 사이트
Fang Jifan이 Shanhaiguan으로 갔다는 소식을 듣고 Hongzhi 황제는 얼굴이 약간 변했습니다.
https://www.google.pn/url?q=https%3A%2F%2Fwww.agenbet88score.com%2F
haziran.org
prednisone 20 mg tablets: prednisolone vs prednisone – 200 mg prednisone daily
cost clomid no prescription: 50 mg clomid and twins statistics – where to buy clomid without prescription
how much is lisinopril 40 mg
buy tadalafil 10 mg
levoxyl synthroid
875 mg amoxicillin cost: amoxicillin capsules 250mg – where to buy amoxicillin pharmacy
cost of cheap clomid without a prescription: long-term use of clomid in males – get generic clomid now
glucophage 500mg price in india
buy prednisone from india: tylenol and prednisone – prednisone pak
can we buy amoxcillin 500mg on ebay without prescription: amoxicillin 500mg dosage – amoxicillin buy no prescription
prednisone 10 mg daily india buy prednisone online or 5 prednisone in mexico
https://images.google.ci/url?q=https://prednisonest.pro can i buy prednisone online without prescription
canadian online pharmacy prednisone prednisone 10 mg online and prednisone online sale can i buy prednisone online in uk
프라그마틱의 게임은 언제나 풍부한 그래픽과 흥미진진한 플레이로 유명해요. 이번에 새로운 게임이 나왔나요?
http://www.pragmatic-game.com
프라그마틱 콘텐츠 항상 기대돼요! 또한 제 사이트에서도 유용한 정보를 제공하고 있어요. 상호 교류하며 더 많은 지식을 얻어가요!
https://karmosan.com/link/
https://qmgcz.com/link/
https://www.12315qu.cn/
synthroid 88 mcg price
can i buy synthroid over the counter
The advent of hydroxychloroquine sulfate in the pharmaceutical world marked a turning point in the fight against chronic autoimmune conditions. By modulating the immune system, it offers relief to many who suffer from the debilitating effects of these diseases. However, it’s essential for patients to undergo regular check-ups due to potential side effects, emphasizing the importance of a balanced, informed approach to treatment.
how much is amoxicillin: buy amoxicillin online no prescription – where can i get amoxicillin 500 mg
prednisone 50 mg buy: prednisone canada prescription – prednisone 20 mg pill
synthroid 0.1 mg daily
Понимание сущности и опасностей ассоциированных с легализацией кредитных карт способно помочь людям предотвращать атак и обеспечивать защиту свои финансовые средства. Обнал (отмывание) кредитных карт — это механизм использования украденных или нелегально добытых кредитных карт для совершения финансовых транзакций с целью скрыть их происхождения и пресечь отслеживание.
Вот несколько способов, которые могут способствовать в предотвращении обнала кредитных карт:
Сохранение личной информации: Будьте осторожными в отношении предоставления личных данных, особенно онлайн. Избегайте предоставления номеров карт, кодов безопасности и других конфиденциальных данных на ненадежных сайтах.
Мощные коды доступа: Используйте мощные и уникальные пароли для своих банковских аккаунтов и кредитных карт. Регулярно изменяйте пароли.
Отслеживание транзакций: Регулярно проверяйте выписки по кредитным картам и банковским счетам. Это поможет своевременно выявить подозрительных транзакций.
Антивирусная защита: Используйте антивирусное программное обеспечение и вносите обновления его регулярно. Это поможет предотвратить вредоносные программы, которые могут быть использованы для изъятия данных.
Осторожное взаимодействие в социальных сетях: Будьте осторожными в онлайн-сетях, избегайте опубликования чувствительной информации, которая может быть использована для взлома вашего аккаунта.
Быстрое сообщение банку: Если вы заметили какие-либо подозрительные операции или утерю карты, сразу свяжитесь с вашим банком для отключения карты.
Получение знаний: Будьте внимательными к современным приемам мошенничества и обучайтесь тому, как предотвращать их.
Избегая легковерия и осуществляя предупредительные действия, вы можете минимизировать риск стать жертвой обнала кредитных карт.
Hello! Quick question that’s totally off topic. Do you know how to
make your site mobile friendly? My site looks weird when browsing from my iphone4.
I’m trying to find a theme or plugin that might be able to correct this problem.
If you have any recommendations, please share.
Cheers!
can i buy amoxicillin online: amoxicillin 500mg capsules – amoxicillin over the counter in canada
cost generic clomid without insurance can i order clomid pills or buying clomid without prescription
https://www.east-harlem.com/?URL=clomidst.pro/collections/tv-console cheap clomid without a prescription
can i get clomid without prescription can i get cheap clomid online and where can i get cheap clomid pills get generic clomid now
cost of clomid pills: how does clomid work – where to buy generic clomid without rx
valtrex 500mg best price
hoki1881
top online pharmacy india
how to buy cheap clomid prices: signs clomid is working – can i buy clomid without prescription
where can i buy generic clomid: can i order clomid for sale – can i get cheap clomid now
can i get cheap clomid tablets can i get generic clomid prices or can i buy cheap clomid no prescription
https://images.google.com.nf/url?sa=t&url=https://clomidst.pro how to buy cheap clomid prices
where buy generic clomid where can i buy cheap clomid without insurance and can i get generic clomid no prescription rx clomid
can you buy cheap clomid without dr prescription can i get clomid or can i purchase generic clomid without dr prescription
https://images.google.com.ai/url?q=https://clomidst.pro cost cheap clomid pills
generic clomid without prescription where buy clomid no prescription and can i order clomid for sale how to buy generic clomid for sale
how to buy clomid for sale: when do you take clomid – how to buy cheap clomid tablets
lisinopril brand name in usa
prednisone 5 tablets: prednisone buy without prescription – prednisone 25mg from canada
https://one-xbet-france.com
Plateforme en ligne 1xBet: outils flow gagner de l’argent. En unrestricted, 1xBet France est un bookmaker classique tout comme chance365 bookmaker et beaucoup d’autres.
one-xbet-france.com
tadalafil coupon
Asking questions are truly pleasant thing if you are not understanding anything entirely, but this article gives pleasant understanding even.
This article offers clear idea for the new users of blogging, that in fact how to do blogging.
Nice post. I learn something new and challenging on sites I stumbleupon everyday. It will always be helpful to read content from other writers and practice a little something from their websites.
I think this is one of the most important information for me. And i’m glad reading your article. But want to remark on few general things, The website style is ideal, the articles is really nice : D. Good job, cheers
Excellent post. I used to be checking continuously this blog and I am inspired! Very useful information specially the remaining phase 🙂 I deal with such info a lot. I used to be seeking this particular info for a long timelong time. Thank you and good luck.
clomid pill: clomid without dr prescription – where can i get clomid now
Hi there it’s me, I am also visiting this site regularly, this site is in fact good and the people are actually sharing nice thoughts.
koray fırat
Have you ever considered about including a little bit more than just your articles? I mean, what you say is valuable and all. However think of if you added some great pictures or video clips to give your posts more, “pop”! Your content is excellent but with images and clips, this website could certainly be one of the very best in its niche. Good blog!
Hey! This is kind of off topic but I need some help from an established blog. Is it very difficult to set up your own blog? I’m not very techincal but I can figure things out pretty fast. I’m thinking about creating my own but I’m not sure where to start. Do you have any tips or suggestions? With thanks
http://prednisonest.pro/# can i buy prednisone over the counter in usa
Hello! Would you mind if I share your blog with my twitter group? There’s a lot of people that I think would really enjoy your content. Please let me know. Cheers
Outstanding quest there. What occurred after? Good luck!
Nice post. I was checking continuously this blog and I am impressed! Very useful information specially the last part 🙂 I care for such info a lot. I was seeking this particular info for a long time. Thank you and good luck.
I quite like reading a post that will make people think. Also, thank you for allowing me to comment!
lisinopril 50 mg
you are actually a good webmaster. The web site loading speed is incredible. It kind of feels that you are doing any unique trick. Also, The contents are masterpiece. you have performed a wonderful activity in this matter!
Thanks for your personal marvelous posting! I truly enjoyed reading it, you may be a great author. I will be sure to bookmark your blog and will often come back in the foreseeable future. I want to encourage that you continue your great job, have a nice holiday weekend!
If you desire to increase your knowledge simply keep visiting this site and be updated with the most recent news posted here.
prednisone 50 mg tablet canada: prednisone long term side effects – no prescription prednisone canadian pharmacy
generic pharmacy online
buy tadalafil usa online
https://edpills.guru/# online erectile dysfunction
buy generic cialis daily
https://edpills.guru/# get ed prescription online
synthroid pill 88 mg
cheapest pharmacy prescription drugs canadian online pharmacy canadian pharmacy no prescription
mexican pharmacy no prescription: no prescription pharmacy – online medication without prescription
ttbslot.com
“말해봐, 어떻게 알았어?” 황태후의 목소리가 점점 거칠어졌다.
synthroid purchase
no prescription canadian pharmacy: online medication no prescription – pharmacy no prescription required
cost of tadalafil in canada
canadian pharmacy no prescription required: discount prescription drugs canada – meds online without prescription
http://edpills.guru/# online ed medication
6 metformin
where to buy metformin tablets
Oh my goodness! Incredible article dude! Thank you so much, However I am going through
troubles with your RSS. I don’t know the reason why I cannot subscribe to it.
Is there anyone else having identical RSS problems? Anyone that knows the answer will you kindly
respond? Thanx!!
prescription drugs online canada: mexico prescription drugs online – prescription canada
kantor bola
Kantorbola adalah situs slot gacor terbaik di indonesia , kunjungi situs RTP kantor bola untuk mendapatkan informasi akurat slot dengan rtp diatas 95% . Kunjungi juga link alternatif kami di kantorbola77 dan kantorbola99 .
erectile dysfunction online ed treatment online best online ed meds
Windows 11 PRO Professional Dijital Lisans Anahtarı
Hi! Do үou knoᴡ if tһey maҝe аny plugins to safeguard ɑgainst hackers?
Ι’m kinda paranoid аbout losing еverything I’vе worked haгd оn. Any suggestions?
Hɑνe a looқ at my blog post: clashing colors
generic zithromax
hoki1881
online pharmacy without prescriptions canadian pharmacy non prescription prescription online canada
quality prescription drugs canada order medication without prescription or mexico online pharmacy prescription drugs
http://ganbariya.co.jp/index.php?a=free_page/goto_mobile&referer=https://pharmnoprescription.pro canada drugs no prescription
canadian pharmacy no prescription needed buying prescription drugs in canada and overseas online pharmacy-no prescription canada pharmacy no prescription
online prescription for ed: ed online prescription – ed pills for sale
ttbslot.com
Fang Jifan은 눈을 감았습니다. “폐하, 저는 장관의 명령을 받았습니다.”
cheap ed medication: pills for ed online – erectile dysfunction medicine online
https://edpills.guru/# buying ed pills online
synthroid 137mg without prescription
happy family canadian pharmaceuticals online
http://onlinepharmacy.cheap/# canadian pharmacy discount coupon
buy ed meds online ed pills or buy ed meds online
http://images.google.gp/url?q=https://edpills.guru erectile dysfunction drugs online
cheapest erectile dysfunction pills buy ed pills and best online ed medication buy ed meds
zestril 40
legal online pharmacy coupon code: canadian online pharmacy – legal online pharmacy coupon code
us pharmacy no prescription: online pharmacy delivery – reputable online pharmacy no prescription
online pharmacy no prescription needed: pharmacy online – buying prescription drugs from canada
canadian prescription pharmacy rxpharmacycoupons or canadian pharmacy coupon
http://www.lobenhausen.de/url?q=https://onlinepharmacy.cheap rx pharmacy coupons
canadian pharmacy world coupons cheapest pharmacy to fill prescriptions with insurance and pharmacy no prescription required no prescription required pharmacy
low cost ed meds: where to buy ed pills – online ed medicine
https://pharmnoprescription.pro/# canada online prescription
ed prescription online erectile dysfunction medicine online buy ed meds online
cheap ed pills online: erectile dysfunction meds online – cheapest ed online
http://onlinepharmacy.cheap/# promo code for canadian pharmacy meds
buy ed medication online ed online treatment or where can i buy erectile dysfunction pills
http://rukadelkino.ru/forum/away.php?s=http://edpills.guru ed pills
get ed prescription online low cost ed meds online and cheap erectile dysfunction pills cheap ed treatment
Hi i think that i saw you visited my web site thus i came to Return the favore Im attempting to find things to enhance my siteI suppose its ok to use a few of your ideas
tadalafil 40 mg for sale
pharmacy coupons online pharmacy delivery rx pharmacy coupons
canadian pharmacy coupon code: Online pharmacy USA – cheapest pharmacy for prescriptions
bozkurt yazılım
tadalafil capsules for sale
song kang tv dizileri
tadalafil cheapest price
pills no prescription: mexican prescription drugs online – buy medication online without prescription
bozkurt yazılım
synthroid 25 mg coupon
zitromax
hoki1881
bozkurt yazılım
metformin canada price
Very well presented. Every quote was awesome and thanks for sharing the content. Keep sharing and keep motivating others.
script pharmacy
india online pharmacy: best india pharmacy – world pharmacy india
http://canadianpharm.guru/# canadian pharmacy meds
buy medicines online in india: indianpharmacy com – indian pharmacy online
Online medicine home delivery: mail order pharmacy india – Online medicine order
zithromax 100 mg
best india pharmacy: mail order pharmacy india – reputable indian pharmacies
https://indianpharm.shop/# Online medicine order
pharmacy online uae
pharmacy mall
п»їlegitimate online pharmacies india: online pharmacy india – reputable indian online pharmacy
online prescription canada: pills no prescription – buy medications online without prescription
Yerden ısıtma, bir binanın veya bir alanın zeminine döşenmiş özel borular veya elektrikli ısıtıcılar aracılığıyla ısıtma sağlayan bir sistemdir. Bu sistem, zeminin altından yayılan ısı sayesinde odaları ısıtmak için kullanılır. Yerden ısıtma, daha homojen bir ısı dağılımı sağlayarak konforlu bir iç mekan ortamı yaratır ve geleneksel radyatör veya hava üflemeli sistemlere göre enerji tasarrufu sağlayabilir.
synthroid 0.137 mg
buy prescription drugs from india: indian pharmacy paypal – reputable indian online pharmacy
medicine lisinopril 10 mg
I have been surfing on-line more than three hours nowadays, yet I
never found any attention-grabbing article like yours.
It is beautiful price enough for me. In my opinion, if all website owners and bloggers made good content material as you did, the net might be much more useful than ever before.
no prescription medicines no prescription pharmacy or canadian prescription
https://cse.google.is/url?sa=t&url=https://pharmacynoprescription.pro canada pharmacy no prescription
how to order prescription drugs from canada online meds no prescription and buy pain meds online without prescription quality prescription drugs canada
buying prescription drugs online without a prescription: online doctor prescription canada – buying prescription drugs from canada online
buy medication online with prescription: no prescription drugs online – canadian prescription drugstore review
https://canadianpharm.guru/# real canadian pharmacy
tadalafil tablets uk
mexican border pharmacies shipping to usa mexico drug stores pharmacies or buying from online mexican pharmacy
https://www.google.td/url?q=https://mexicanpharm.online mexican rx online
п»їbest mexican online pharmacies mexican pharmacy and reputable mexican pharmacies online mexican mail order pharmacies
175 mg synthroid
precription drugs from canada: canadian mail order pharmacy – online pharmacy canada
I am truly thankful to the owner of this web site who has shared this fantastic piece of writing at at this place.
п»їlegitimate online pharmacies india: indian pharmacies safe – online shopping pharmacy india
www canadianonlinepharmacy: canadian pharmacy – canadian online pharmacy
canadian pharmacy com canadianpharmacymeds or canadian pharmacy no scripts
https://whois.zunmi.com/?d=canadianpharm.guru canadian drug pharmacy
canadian pharmacies canadian pharmacy and my canadian pharmacy canadian drugs online
cheap tadalafil 20mg
“Hi, I noticed that you visited my website, so I wanted to return the favor. I’m currently looking for ways to enhance my site, and I think it’s okay to incorporate some of your ideas. Thank you!”
indian pharmacy paypal: indian pharmacy paypal – indian pharmacy paypal
Aydın Taksi
can i buy prescription drugs in canada: buy drugs online no prescription – online prescription canada
מרכז המַרכֵּז לְמוֹעֵד טלגראס כיוונים (Telegrass), הידוע גם בשמות “גַּרְגִּירֵים” או “רִיחֲמִים כיוונים”, הם אתר מזִין מידע, לינקים, קישורים, מדריכים והסברים בנושאי קנאביס בתוך הארץ. באמצעות האתר, משתמשים יכולים למצוא את כל הקישורים המעודכנים עבור ערוצים מומלצים ופעילים בטלגראס כיוונים בכל רחבי הארץ.
טלגראס כיוונים הוא אתר ובוט בתוך פלטפורמת טלגראס, מספקות דרכי תקשורת ושירותים נפרדים בתחום רכישת קנאביס וקשורים. באמצעות הבוט, המשתמשים יכולים לבצע מגוון פעולות בקשר לרכישת קנאביס ולשירותים נוספים, תוך כדי תקשורת עם מערכת אוטומטית המבצעת את הפעולות בצורה חכמה ומהירה.
בוט הטלגראס (Telegrass Bot) מציע מגוון פעולות שימושיות ללקוחות: הזמנת קנאביס: בצע רכישה דרך הבוט על ידי בחירת סוגי הקנאביס, כמות וכתובת למשלוח.
שאלות ותמיכה: קבל מידע על המוצרים והשירותים, תמיכה טכנית ותשובות לשאלות שונות.
בחינה מלאי: בדוק את המלאי הזמין של קנאביס ובצע הזמנה תוך כדי הקשת הבדיקה.
הוספת ביקורות: הוסף ביקורות ודירוגים למוצרים שרכשת, כדי לעזור למשתמשים אחרים.
הוסיפו מוצרים חדשים: הוסף מוצרים חדשים לפלטפורמה והצג אותם למשתמשים.
בקיצור, בוט הטלגראס הוא כלי חשוב ונוח שמקל על השימוש והתקשורת בנושאי קנאביס, מאפשר מגוון פעולות שונות ומספק מידע ותמיכה למשתמשים.
prinivil drug
canadian pharmacies that deliver to the us my canadian pharmacy or canadian online drugs
https://images.google.fm/url?sa=t&url=https://canadianpharm.guru canadian mail order pharmacy
canada drug pharmacy canadian pharmacy world reviews and canadian drug pharmacy prescription drugs canada buy online
canadian pharmacy no scripts: canadian pharmacy india – best canadian pharmacy to buy from
tadalafil 30mg pill
qiyezp.com
Zhu Houzhao는 우울하고 얼굴이 붉어졌습니다. “문제를 일으키지 마십시오. 옆에 누군가가 있습니다.”
best no prescription online pharmacy: canada drugs no prescription – п»їonline pharmacy no prescription needed
canadian pharmacy without a prescription: pharmacy no prescription required – no prescription pharmacy online
canadian pharmacy oxycodone: best online canadian pharmacy – canada discount pharmacy
buy meds online no prescription: online medication no prescription – canadian drugs no prescription
synthroid 0.112 mcg
https://pharmacynoprescription.pro/# prescription drugs online canada
can i buy prescription drugs in canada: buying prescription drugs online from canada – best no prescription online pharmacy
prednisone price
I really love to read such an excellent article. Helpful article. Hello Administ . 国产线播放免费人成视频播放
mexican drugstore online: mexico drug stores pharmacies – mexican border pharmacies shipping to usa
medication from mexico pharmacy: mexican online pharmacies prescription drugs – buying prescription drugs in mexico
glucophage for sale
my canadian pharmacy review: online canadian pharmacy – canadian pharmacy world reviews
pharmacies in mexico that ship to usa: mexican border pharmacies shipping to usa – mexican rx online
buy synthroid online without prescription
online pharmacy not requiring prescription: mexican prescription drugs online – non prescription online pharmacy india
Nice article inspiring thanks. Hello Administ . 国产线播放免费人成视频播放
Faydalı bilgilerinizi bizlerle paylaştığınız için teşekkür ederim.
prednisone 120 mg daily
mexican rx online: mexico drug stores pharmacies – buying prescription drugs in mexico online
Great post thank you. Hello Administ . 国产线播放免费人成视频播放
https://canadianpharm.guru/# canadian pharmacy 24h com
canadian and international prescription service: how to get prescription drugs from canada – mexico prescription drugs online
indian pharmacies safe: pharmacy website india – indian pharmacy
buying prescription drugs in mexico mexico pharmacies prescription drugs or buying prescription drugs in mexico
https://maps.google.com.tr/url?q=https://mexicanpharm.online mexican online pharmacies prescription drugs
medicine in mexico pharmacies mexican rx online and mexico pharmacy mexican mail order pharmacies
canadianpharmacyworld: canada rx pharmacy world – northern pharmacy canada
canadianpharmacy com
프라그마틱 게임은 iGaming 업계에서 혁신적이고 표준화된 모바일 중심의 콘텐츠를 제공하는 선도적인 제공 업체입니다. 고객에게 뛰어난 경험을 제공하기 위해 슬롯, 라이브 카지노, 빙고 등 다양한 제품을 통합합니다.
프라그마틱플레이
프라그마틱은 항상 훌륭한 게임을 만들어냅니다. 이번에 새롭게 출시된 게임은 정말 기대되는데요!
https://thaizabza.com/link/
https://www.12378za.cn/
https://www.12315dc.cn/
discount prescription drugs canada mexico prescription drugs online or pharmacies without prescriptions
http://vinolab.co.za/redirect/?url=http://pharmacynoprescription.pro no prescription drugs online
no prescription needed no prescription pharmacy and online pharmacy without a prescription prescription meds from canada
no prescription pharmacy: online pharmacy without prescription – canada mail order prescription
Hi, just required you to know I he added your site to my Google bookmarks due to your layout. But seriously, I believe your internet site has 1 in the freshest theme I??ve came across.儿童色情
mexican pharmacy: medication from mexico pharmacy – mexican pharmaceuticals online
“Hello there! I recently noticed that you’ve taken the time to visit my website, and I wanted to express my gratitude by returning the favor. As I’m constantly seeking ways to improve my site, I believe it would be beneficial to incorporate some of your ideas into my design and content strategy. Your input would be greatly appreciated, and I’m open to any suggestions you may have. Thank you for your interest, and I look forward to hearing from you!”
cross border pharmacy canada my canadian pharmacy rx or vipps canadian pharmacy
https://www.ocmdhotels.com/?URL=https://canadianpharm.guru certified canadian pharmacy
my canadian pharmacy rx adderall canadian pharmacy and canadian pharmacy safe canadian pharmacy
indian pharmacy: india online pharmacy – п»їlegitimate online pharmacies india
hoki1881
https://mexicanpharm.online/# reputable mexican pharmacies online
buying synthroid online
Feel free to let me know if you need further assistance or if there’s anything else you’d like to add or modify!
song kang boyu
mail order prescriptions from canada: online no prescription pharmacy – buy medication online with prescription
https://indianpharm.shop/# indian pharmacies safe
Greetings! Very useful advice within this article! It is the little changes that
will make the largest changes. Thanks for sharing!
no prescription online pharmacy: prescription canada – canadian rx prescription drugstore
purple pharmacy mexico price list mexico pharmacies prescription drugs or mexican border pharmacies shipping to usa
https://www.google.com.kw/url?q=https://mexicanpharm.online reputable mexican pharmacies online
mexican border pharmacies shipping to usa mexican pharmacy and mexico pharmacies prescription drugs mexican pharmacy
Hi! Quick question that’s totally off topic. Do you know how to make your site mobile friendly?
My website looks weird when browsing from my apple iphone.
I’m trying to find a template or plugin that might be able to fix
this problem. If you have any recommendations, please share.
With thanks!
Amphetamine is a central nervous system stimulant that affects chemicals in the brain and nerves that promote hyperactivity and impulse control.
synthroid canada pharmacy
Relief of mild to moderate pain. It can also be used for other diseases prescribed by the doctor.
Feel free to let me know if you need further assistance or if there’s anything else you’d like to add or modify!
Diazepam is used to treat anxiety disorders or alcohol withdrawal
symptoms.
Adderall is used to treat attention deficit disorder (ADHD) and narcolepsy.
canada pharmacy world: cross border pharmacy canada – canadian pharmacies
Concerta is a prescription drug that stimulates the central nervous system.
Benzene (C6H6), the simplest organic aromatic hydrocarbon and precursor of numerous important aromatic compounds.
synthroid 100 mcg coupon
Certainly! Here’s an extended version of the message:
Certainly! Here’s an extended version of the message:
mail order pharmacy india: reputable indian online pharmacy – best india pharmacy
pharmacy discount coupons
http://pharmacynoprescription.pro/# online drugs without prescription
Thank you for content. Area rugs and online home decor store. Hello Administ . 国产线播放免费人成视频播放
non prescription pharmacy: canada drugs without prescription – pharmacy online no prescription
mexican pharmacy: purple pharmacy mexico price list – buying prescription drugs in mexico online
purple pharmacy mexico price list mexican pharmacy or medication from mexico pharmacy
https://rcimanagement.asureforce.net/redirect.aspx?punchtime=&loginid=&logoffreason=&redirecturl=http://mexicanpharm.online buying prescription drugs in mexico
reputable mexican pharmacies online purple pharmacy mexico price list and medicine in mexico pharmacies pharmacies in mexico that ship to usa
song kang tv dizileri
valtrex generic no prescription
online pharmacy without prescriptions canada pharmacy no prescription or can you buy prescription drugs in canada
https://toolbarqueries.google.gg/url?q=http://pharmacynoprescription.pro buy prescription online
best online pharmacy that does not require a prescription in india no prescription medicine and best online pharmacies without prescription how to order prescription drugs from canada
In our online broadside, we attempt to be your conscientious documentation after the latest low-down about media personalities in Africa. We reimburse special distinction to promptly covering the most fitting events apropos of celebrated figures on this continent.
Africa is fecund in in talents and solitary voices that contours the cultural and collective scene of the continent. We distinct not lone on celebrities and showbiz stars but also on those who require impressive contributions in various fields, be it knowledge, manoeuvring, body of knowledge, or philanthropy https://afriquestories.com/l-histoire-controversee-de-la-veuve-de-christian/
Our articles lay down readers with a encyclopaedic overview of what is chance in the lives of media personalities in Africa: from the latest dirt and events to analyzing their connections on society. We living spoor of actors, musicians, politicians, athletes, and other celebrities to provide you with the freshest dirt firsthand.
Whether it’s an upper-class interview with a idolized star, an review into scandalous events, or a look at of the latest trends in the African showbiz everybody, we do one’s best to be your fundamental outset of report yon media personalities in Africa. Subscribe to our publication to hamper alert to yon the hottest events and exciting stories from this captivating continent.
http://mexicanpharm.online/# mexican rx online
mexico pharmacies prescription drugs: medicine in mexico pharmacies – mexican rx online
qiyezp.com
Fang Jifan은 즉시 손에 든 찻잔을 들고 부수려고했습니다. “삼촌을 때리세요.”
lisinopril 20 pills
Даркнет маркет
Присутствие скрытых интернет-площадок – это феномен, который сопровождается громадный заинтересованность и обсуждения во настоящем обществе. Подпольная часть веба, или скрытая сфера всемирной сети, является тайную инфраструктуру, доступную тольково при помощи соответствующие софт а настройки, гарантирующие скрытность пользовательских аккаунтов. По этой приватной сети размещаются скрытые интернет-площадки – веб-площадки, где-нибудь продажи разные вещи а сервисы, наиболее часто противозаконного характера.
По теневых электронных базарах можно найти самые разнообразные продуктовые товары: наркотические препараты, стрелковое оружие, украденные данные, взломанные аккаунты, фальшивые документы и многое другое. Подобные же площадки иногда магнетизирузивают интерес как правонарушителей, а также обычных пользовательских аккаунтов, желающих пройти мимо юриспруденция или доступить к товары и услугам, какие в обыденном всемирной сети могли быть не доступны.
Тем не менее стоит помнить, чем активность на подпольных рынках представляет собой незаконный степень и способна спровоцировать серьезные правовые санкции. Полицейские органы энергично сражаются против таковыми базарами, и все же по причине скрытности темной стороны интернета это условие далеко не перманентно просто так.
Следовательно, наличие даркнет-маркетов является действительностью, но таковые продолжают оставаться местом серьезных угроз как и для пользовательских аккаунтов, и для подобных общественности во общем.
http://1xbet-application-fr.com
Working 1xbet mirror instead of entering the stiff website of the bookmaker. From it to cash-box with 1xBet, bear bonuses and section online bets.
1xbet-application-fr.com
тор маркет
Тор веб-навигатор – это особый интернет-браузер, который рассчитан для гарантирования тайности и устойчивости в Сети. Он основан на сети Тор (The Onion Router), которая участникам пересылать данными через дистрибутированную сеть узлов, что делает трудным прослушивание их действий и установление их местоположения.
Основополагающая особенность Тор браузера сводится в его способности направлять интернет-трафик через несколько точек сети Тор, каждый из которых кодирует информацию перед отправкой последующему узлу. Это формирует массу слоев (поэтому и название “луковая маршрутизация” – “The Onion Router”), что превращает практически невозможным отслеживание и определение пользователей.
Тор браузер регулярно применяется для преодоления цензуры в территориях, где запрещен доступ к определенным веб-сайтам и сервисам. Он также позволяет пользователям обеспечивать конфиденциальность своих онлайн-действий, таких как просмотр веб-сайтов, общение в чатах и отправка электронной почты, избегая отслеживания и мониторинга со стороны интернет-провайдеров, властных агентств и киберпреступников.
Однако стоит помнить, что Тор браузер не гарантирует полной анонимности и надежности, и его выпользование может быть ассоциировано с угрозой доступа к противозаконным контенту или деятельности. Также возможно замедление скорости интернет-соединения вследствие
Тор теневая часть интернета – это часть интернета, которая, которая функционирует выше обыкновеннои? сети, но недоступна для прямого допуска через стандартные браузеры, например Google Chrome или Mozilla Firefox. Для входа к этому сети необходимо особенное софтовое обеспечение, как, Tor Browser, что обеспечивает секретность и сафети пользователеи?.
Основнои? алгоритм работы Тор даркнета основан на использовании путеи? через разные узлы, которые шифруют и двигают трафик, создавая сложным отслеживание его источника. Это возбуждает секретность для пользователеи?, скрывая их настоящие IP-адреса и местоположение.
Тор даркнет содержит разные плеи?сы, включая веб-саи?ты, форумы, рынки, блоги и остальные онлаи?н-ресурсы. Некоторые из подобных ресурсов могут быть не доступны или запрещены в обыкновеннои? сети, что делает Тор даркнет площадкои? для подачи информациеи? и услугами, включая товары и услуги, которые могут быть нелегальными.
Хотя Тор даркнет выпользуется некоторыми людьми для обхода цензуры или защиты частнои? жизни, он также становится платформои? для разносторонних нелегальных активностеи?, таких как курс наркотиками, оружием, кража личных данных, предоставление услуг хакеров и другие злостные деи?ствия.
Важно понимать, что использование Тор даркнета не обязательно законно и может в себя серьезные опасности для сафети и правомочности.
Hi Neat post Theres an issue together with your web site in internet explorer may test this IE still is the marketplace chief and a good component of people will pass over your fantastic writing due to this problem.
https://gatesofolympus.auction/# gates of olympus taktik
en yeni slot siteleri guvenilir slot siteleri deneme bonusu veren slot siteleri
https://aviatoroyna.bid/# aviator oyna 100 tl
gates of olympus demo free spin gates of olympus s?rlar? gates of olympus nas?l para kazanilir
hoki 1881
http://pinupgiris.fun/# pin up aviator
slot oyunlari pragmatic play sweet bonanza sweet bonanza kazanc
http://pinupgiris.fun/# pin up indir
slot oyunlari sweet bonanza 90 tl sweet bonanza oyna
lisinopril 10 mg over the counter
valtrex 500mg cost
http://aviatoroyna.bid/# aviator sinyal hilesi apk
glucophage 850 mg price
http://aviatoroyna.bid/# ucak oyunu bahis aviator
aviator mostbet aviator hilesi aviator oyna slot
how to order valtrex
https://slotsiteleri.guru/# en iyi slot siteleri
https://pinupgiris.fun/# pin-up casino
yasal slot siteleri slot bahis siteleri en iyi slot siteleri 2024
http://pinupgiris.fun/# pin up casino
aviator oyunu 50 tl aviator hilesi aviator oyunu giris
how to buy prednisone
http://sweetbonanza.bid/# sweet bonanza kazanma saatleri
slot siteleri slot siteleri slot casino siteleri
can i order lisinopril online
[url=https://isynthroid.online/]best price for synthroid 50 mcg[/url]
http://sweetbonanza.bid/# sweet bonanza oyna
pragmatic play gates of olympus [url=https://gatesofolympus.auction/#]gates of olympus oyna demo[/url] gates of olympus oyna demo
I am now not sure where you’re getting your information, but good topic.
I needs to spend some time studying much more or working out more.
Thanks for fantastic info I was on the lookout for this info for my mission.
http://pinupgiris.fun/# pin up indir
[url=https://pharmgf.online/]online pet pharmacy[/url]
https://gatesofolympus.auction/# gates of olympus nas?l para kazanilir
guvenilir slot siteleri 2024 [url=https://slotsiteleri.guru/#]slot siteleri[/url] guvenilir slot siteleri 2024
https://sweetbonanza.bid/# sweet bonanza indir
aviator pin up [url=https://pinupgiris.fun/#]pin up casino[/url] pin-up casino
https://gatesofolympus.auction/# gates of olympus oyna demo
aviator hilesi [url=http://aviatoroyna.bid/#]ucak oyunu bahis aviator[/url] aviator oyunu 50 tl
https://gatesofolympus.auction/# gates of olympus demo oyna
aviator hile [url=https://aviatoroyna.bid/#]aviator oyunu[/url] aviator hilesi ucretsiz
If you are going for most excellent contents like myself, only
go to see this web page everyday because it provides feature contents,
thanks https://www.wakewiki.de/index.php?title=Benutzer:AdelaideGaron50
sweet bonanza kazanma saatleri guncel sweet bonanza or sweet bonanza demo
https://artwinlive.com/widgets/1YhWyTF0hHoXyfkbLq5wpA0H?generated=true&color=dark&layout=list&showgigs=4&moreurl=https://sweetbonanza.bid sweet bonanza siteleri
[url=https://maps.google.co.ug/url?sa=t&url=https://sweetbonanza.bid]sweet bonanza kazanc[/url] sweet bonanza yasal site and [url=http://www.zhuangxiuz.com/home.php?mod=space&uid=803986]sweet bonanza demo[/url] pragmatic play sweet bonanza
Существование даркнет-маркетов – это феномен, который порождает великий внимание а споры в нынешнем обществе. Даркнет, или подпольная область всемирной сети, есть скрытую инфраструктуру, доступную только через специальные приложения или конфигурации, предоставляющие анонимность пользователей. По этой скрытой сети лежат подпольные рынки – интернет-ресурсы, где-нибудь торговля разносторонние товары а сервисы, наиболее часто нелегального специфики.
В даркнет-маркетах можно обнаружить самые разные товары: наркотические препараты, оружие, украденные данные, уязвимые аккаунты, фальшивые документы и и многое. Такие же базары время от времени привлекают заинтересованность как правонарушителей, и обычных субъектов, намеревающихся обойти законодательство или получить возможность доступа к товары а услуговым предложениям, какие именно на обыденном сети могли бы быть недосягаемы.
Впрочем стоит помнить, чем активность в подпольных рынках представляет собой нелегальный характер а способна повлечь за собой значительные правовые последствия по закону. Правоохранительные органы настойчиво сражаются с этими площадками, но вследствие неузнаваемости даркнета данный факт далеко не все время просто.
Поэтому, существование теневых электронных базаров составляет действительностью, и все же эти площадки остаются территорией важных угроз как и для участников, а также для таких, как социума во общем.
gates of olympus 1000 demo gates of olympus demo turkce or gates of olympus s?rlar?
https://images.google.ad/url?q=https://gatesofolympus.auction gates of olympus oyna demo
[url=https://v2.afilio.com.br/tracker.php?campid=35517;1052&banid=953263&linkid=127577&siteid=39840&url=http://gatesofolympus.auction]gates of olympus s?rlar?[/url] gates of olympus giris and [url=http://www.9kuan9.com/home.php?mod=space&uid=418288]gates of olympus[/url] pragmatic play gates of olympus
http://aviatoroyna.bid/# aviator oyna slot
gate of olympus hile [url=http://gatesofolympus.auction/#]gates of olympus demo[/url] gates of olympus demo turkce oyna
Даркнет-площадки, либо даркнет-рынки, представлены сетевые платформы, доступные только путем скрытую сеть – интернет-сеть, скрытая для рядовых поисковых систем. Данные рынки допускают субъектам торговать товарами и услугами разносторонними товарными позициями а услуговыми предложениями, чаще всего незаконного характера, например наркотики, стрелковое оружие, украденные данные, подделки а прочие запретные либо незаконные продукты и услуговые предложения.
Подпольные площадки гарантируют неузнаваемость их собственных пользователей по использования особенных программ или настроек, таких как Tor, какие именно замаскировывают IP-адреса и маршрутизируют интернет-трафик путем разные узловые точки, что делает сложным отследить активности органами правопорядка.
Данные торговые площадки часто становятся объектом внимания правоохранительных органов, которые борются за противодействуют ними в границах борьбе противостояния интернет-преступностью а противозаконной продажей.
http://sweetbonanza.bid/# sweet bonanza yasal site
gates of olympus taktik [url=http://gatesofolympus.auction/#]gates of olympus oyna[/url] gate of olympus hile
[url=http://tadalafilgf.com/]buy cialis gel[/url]
[url=http://oazithromycin.online/]azithromycin for sale online[/url]
https://gatesofolympus.auction/# gates of olympus oyna demo
pin up [url=http://pinupgiris.fun/#]aviator pin up[/url] pin up giris
https://slotsiteleri.guru/# bonus veren slot siteleri
oyun siteleri slot [url=https://slotsiteleri.guru/#]deneme veren slot siteleri[/url] guvenilir slot siteleri
프라그마틱 게임은 iGaming 분야에서 주목받는 주요 제공 업체로, 혁신적이고 표준화된 콘텐츠를 선보입니다.
에그벳
프라그마틱 관련 글 읽는 것이 즐거웠어요! 또한, 제 사이트에서도 프라그마틱에 대한 정보를 공유하고 있어요. 함께 교류하며 더 많은 지식을 얻어봐요!
https://wqeqwrwqr.weebly.com/
https://karmosan.com/link/
https://www.12315sv.cn/
http://pinupgiris.fun/# pin-up casino indir
[url=http://lisinoprildrl.online/]how much is lisinopril 20 mg[/url]
pin up casino guncel giris pin-up online or aviator pin up
http://www.lotus-europa.com/siteview.asp?page=http://pinupgiris.fun pin up 7/24 giris
[url=https://www.coloradoballet.org/redirect.aspx?destination=http://pinupgiris.fun]pin up aviator[/url] aviator pin up and [url=https://forex-bitcoin.com/members/338233-lfrnaidvec]pin-up casino giris[/url] pin up casino indir
sweet bonanza yasal site sweet bonanza siteleri or pragmatic play sweet bonanza
https://maps.google.mn/url?q=https://sweetbonanza.bid sweet bonanza guncel
[url=https://www.google.cm/url?q=https://sweetbonanza.bid]sweet bonanza 90 tl[/url] sweet bonanza taktik and [url=http://www.coin520.com/home.php?mod=space&uid=26056]pragmatic play sweet bonanza[/url] sweet bonanza bahis
[url=http://tadalafilu.online/]10mg tadalafil[/url]
[url=https://prednisoneo.online/]prednisone without rx[/url]
Thank you great post. Hello Administ .国产线播放免费人成视频播放
hoki 1881
http://pinupgiris.fun/# pin-up giris
Покупки в Даркнете: Заблуждения и Реальность
Даркнет, таинственная часть интернета, манит внимание участников своей тайностью и способностью купить самые разнообразные продукты и предметы без дополнительной информации. Однако, погружение в этот мрак непрозрачных площадок имеет в себе с комплексом рисков и аспектов, о которых следует знать перед совершением покупок.
Что представляет собой Даркнет и как оно действует?
Для того, кто не знаком с этим понятием, подпольная сеть – это сектор интернета, скрытая от стандартных поисковиков. В Даркнете имеются специальные рынки, где можно найти возможность практически все виды : от наркотиков и оружия и перехваченных учётных записей и поддельных документов.
Заблуждения о заказах в Даркнете
Тайность защищена: В то время как, применение технологий анонимности, вроде как Tor, может помочь закрыть вашу активность в сети, анонимность в Даркнете не является полной. Имеется возможность, что может ваша личную информацию могут обнаружить дезинформаторы или даже сотрудники правоохранительных органов.
Все товары – качественные товары: В темном интернете можно найти множество поставщиков, предлагающих товары и услуги. Однако, нельзя обеспечить качественность или оригинальность продукции, поскольку нет возможности провести проверку до совершения покупки.
Легальные сделки без ответственности: Многие участники неправильно думают, что приобретая товары в Даркнете, они подвергают себя меньшим риском, чем в обычной жизни. Однако, приобретая незаконные вещи или услуги, вы подвергаете себя риску наказания.
Реальность приобретений в подпольной сети
Риски обмана и афер: В Даркнете многочисленные аферисты, готовы к обману недостаточно осторожных пользователей. Они могут предложить фальшивые товары или просто забрать ваши деньги и исчезнуть.
Опасность государственных органов: Пользователи темного интернета подвергают себя риску к уголовной ответственности за приобретение и заказ незаконных.
Непредсказуемость исходов: Не каждый заказ в подпольной сети приводят к успешному результату. Качество вещей может оказаться низким, а процесс покупки может привести к неприятным последствиям.
Советы для безопасных транзакций в подпольной сети
Проводите тщательное исследование поставщика и услуги перед совершением покупки.
Воспользуйтесь защитными программами и сервисами для обеспечения анонимности и безопасности.
Осуществляйте платежи только безопасными методами, например, криптовалютами, и не раскрывайте личные данные.
Будьте предельно внимательны и осторожны во всех ваших действиях и решениях.
Заключение
Покупки в темном интернете могут быть как увлекательным, так и опасным опытом. Понимание рисков и применение соответствующих мер предосторожности помогут минимизировать вероятность негативных последствий и обеспечить безопасность при совершении покупок в этом непознанном уголке сети.
даркнет запрещён
Покупки в скрытой части веба: Мифы и Факты
Подпольная сеть, скрытая область сети, заинтересовывает интерес участников своей скрытностью и возможностью возможностью купить различные продукты и предметы без излишних действий. Однако, переход в тот мир скрытых площадок имеет в себе с комплексом опасностей и сложностей, о которых желательно знать перед проведением транзакций.
Что представляет собой темный интернет и как это функционирует?
Для тех, кому незнакомо с термином, подпольная сеть – это сегмент веба, скрытая от стандартных поисковых систем. В подпольной сети имеются уникальные рынки, где можно найти возможность почти все : от запрещённых веществ и боеприпасов до взломанных аккаунтов и фальшивых документов.
Мифы о приобретении товаров в Даркнете
Скрытность гарантирована: В то время как, использование методов скрытия личности, таких как Tor, способно помочь скрыть от глаз вашу действия в сети, анонимность в скрытой части веба не является абсолютной. Имеется опасность, что вашу личные данные могут обнаружить обманщики или даже сотрудники правоохранительных органов.
Все товары – высокого качества: В Даркнете можно обнаружить много поставщиков, продающих продукцию и услуги. Однако, нельзя гарантировать качественность или подлинность товара, поскольку нет возможности провести проверку до совершения покупки.
Легальные транзакции без ответственности: Многие участники ошибочно считают, что товары в подпольной сети, они подвергают себя меньшим риском, чем в реальном мире. Однако, приобретая запрещенные продукцию или сервисы, вы подвергаете себя риску привлечения к уголовной ответственности.
Реальность сделок в Даркнете
Опасности мошенничества и афер: В Даркнете многочисленные аферисты, предрасположены к мошенничеству недостаточно осторожных пользователей. Они могут предложить поддельную продукцию или просто исчезнуть, оставив вас без денег.
Опасность легальных органов: Пользователи Даркнета подвергают себя риску к уголовной ответственности за приобретение и заказ неправомерных продуктов и услуг.
Непредвиденность результатов: Не каждая сделка в скрытой части веба приводят к успешному результату. Качество вещей может оказаться низким, а процесс покупки может привести к неприятным последствиям.
Советы для безопасных транзакций в скрытой части веба
Проводите детальный анализ продавца и товара перед совершением покупки.
Используйте безопасные программы и сервисы для защиты вашей анонимности и безопасности.
Платите только безопасными методами, например, криптовалютами, и избегайте предоставления персональных данных.
Будьте осторожны и предельно внимательны во всех ваших действиях и решениях.
Заключение
Сделки в темном интернете могут быть как захватывающим, так и рискованным опытом. Понимание рисков и применение соответствующих мер предосторожности помогут уменьшить риск негативных последствий и обеспечить безопасность при совершении покупок в этой недоступной области сети.
ABTec stepped in and partnered with what we have believed that it could be a revolutionary LMS platform boosted with artificial intelligence (AI), and gamification
http://sweetbonanza.bid/# guncel sweet bonanza
sweet bonanza siteleri [url=http://sweetbonanza.bid/#]sweet bonanza yasal site[/url] sweet bonanza taktik
aviator pin up pin-up giris or pin up 7/24 giris
http://blog-parts.wmag.net/okitegami/redirect.php?u=https://pinupgiris.fun pin up casino giris
[url=https://www.google.bt/url?sa=t&url=https://pinupgiris.fun]pin-up online[/url] pin up 7/24 giris and [url=https://forexzloty.pl/members/370342-yoacywmtdr]pin-up giris[/url] pin up giris
[url=https://synthroidx.com/]synthroid 0.125[/url]
http://pinupgiris.fun/# pin up indir
pin up casino indir [url=http://pinupgiris.fun/#]pin up giris[/url] pin up indir
קזינו אונליין
המימורים בפלטפורמת האינטרנט – המימוני ספורטאים, משחקי קזינו באינטרנט, משחקים קלפים.
הימורים ברשת הופכים ל לשדה פופולרי במיוחד בתקופת המחשב.
מיליונים משתתפים ממנסות את מזלם במגוון מימורים המגוונים.
הפעולה הזהה משנה את את רגעי הניסיון והתרגשות.
גם מעסיק בשאלות אתיות וחברתיות השמורות מאחורי המימונים באינטרנט.
בתקופת המחשב, הימורים באינטרנט הם חלק בלתי נפרד מהתרבות הספורט, הבידור והחברה המתקדמת.
המימונים ברשת כוללים את אפשרויות רחב של פעילות, כולל מימורים על תוצאות ספורט, פוליטי, וגם מזג האוויר בעולם.
ההימורים הם מתבצעים באמצע
ABTec stepped in and partnered with what we have believed that it could be a revolutionary LMS platform boosted with artificial intelligence (AI), and gamification
Good way of telling, and fastidious article to obtain data
about my presentation focus, which i am going to present in school.
Hello! I could have sworn I’ve been to this blog before but after browsing through some of the post I realized it’s new to me.兒童色情
After all, what a great site and informative posts, I will upload inbound link – bookmark this web site? Regards, Reader.儿童色情片
https://aviatoroyna.bid/# aviator hile
aviator hilesi [url=https://aviatoroyna.bid/#]aviator sinyal hilesi[/url] aviator oyunu
http://aviatoroyna.bid/# aviator oyna 20 tl
pin-up giris [url=https://pinupgiris.fun/#]aviator pin up[/url] pin up indir
http://pinupgiris.fun/# pin up casino
Темный интернет: запрещённое пространство виртуальной сети
Подпольная часть сети, скрытый сегмент сети продолжает привлекать интерес и граждан, так и правоохранительных структур. Данный засекреченный уровень интернета примечателен своей скрытностью и способностью осуществления незаконных операций под маской анонимности.
Основа подпольной части сети состоит в том, что этот слой не доступен обычным обычных браузеров. Для доступа к этому уровню необходимы специальные программы и инструменты, обеспечивающие скрытность пользователей. Это вызывает идеальную среду для разнообразных нелегальных действий, среди которых сбыт наркотиков, оружием, кражу личных данных и другие противоправные действия.
В виде реакции на растущую угрозу, некоторые государства приняли законодательные инициативы, направленные на запрещение доступа к темному интернету и преследование лиц осуществляющих незаконную деятельность в этом скрытом мире. Тем не менее, несмотря на принятые меры, борьба с подпольной частью сети представляет собой сложную задачу.
Важно отметить, что запретить темный интернет полностью практически невыполнимо. Даже с введением строгих мер контроля, возможность доступа к данному уровню сети все еще доступен при помощи различных технологических решений и инструментов, применяемые для обхода запретов.
Помимо законодательных мер, имеются также инициативы по сотрудничеству между правоохранительными органами и технологическими компаниями для противодействия незаконным действиям в подпольной части сети. Впрочем, для эффективного противодействия необходимы не только технологические решения, но и улучшения методов обнаружения и пресечения незаконных действий в этой среде.
Таким образом, несмотря на принятые меры и усилия в борьбе с преступностью, теневой уровень интернета остается серьезной проблемой, которая требует комплексного подхода и совместных усилий со стороны правоохранительных структур, и технологических корпораций.
https://aviatoroyna.bid/# aviator
gates of olympus 1000 demo [url=http://gatesofolympus.auction/#]gates of olympus nas?l para kazanilir[/url] gates of olympus oyna ucretsiz
[url=https://azithromycinps.online/]buy azithromycin australia[/url]
http://aviatoroyna.bid/# aviator oyunu 10 tl
aviator oyna slot [url=http://aviatoroyna.bid/#]aviator oyunu 10 tl[/url] aviator
[url=https://happyfamilystorerx.online/]rx pharmacy coupons[/url]
sweet bonanza yasal site sweet bonanza guncel or <a href=" http://km10805.keymachine.de/php.php?a%5B%5D=can+you+buy+viagra+online “>sweet bonanza demo oyna
https://cse.google.vu/url?q=https://sweetbonanza.bid sweet bonanza nas?l oynan?r
[url=https://maps.google.com.fj/url?q=https://sweetbonanza.bid]sweet bonanza demo oyna[/url] sweet bonanza 90 tl and [url=https://forex-bitcoin.com/members/338298-ntyfjfpdrl]sweet bonanza demo turkce[/url] sweet bonanza 90 tl
https://slotsiteleri.guru/# en guvenilir slot siteleri
aviator nas?l oynan?r [url=http://aviatoroyna.bid/#]aviator[/url] aviator oyunu
What’s up, always i used to check webpage posts here early in the daylight, as i love to gain knowledge of more and
more. https://Migration-Bt4.co.uk/profile.php?id=122743
[url=http://oprednisone.com/]prednisone prescription[/url]
[url=https://isynthroid.com/]synthroid 300 mg[/url]
Appreciated to our dedicated stand for the sake of staying in touch about the latest story from the Agreed Kingdom. We understand the rank of being learned take the happenings in the UK, whether you’re a citizen, an expatriate, or naturally interested in British affairs. Our encyclopaedic coverage spans across a number of domains including politics, economy, education, pleasure, sports, and more.
In the kingdom of civics, we abide by you updated on the intricacies of Westminster, covering according to roberts rules of order debates, government policies, and the ever-evolving prospect of British politics. From Brexit negotiations and their bearing on barter and immigration to domestic policies affecting healthcare, instruction, and the environment, we provide insightful examination and propitious updates to refrain from you nautical con the complex society of British governance – https://newstopukcom.com/happy-go-luca-an-exclusive-glimpse-at-the-trendy/.
Profitable news is mandatory in compensation reconciliation the fiscal pulsation of the nation. Our coverage includes reports on superstore trends, organization developments, and profitable indicators, contribution valuable insights in place of investors, entrepreneurs, and consumers alike. Whether it’s the latest GDP figures, unemployment rates, or corporate mergers and acquisitions, we try hard to convey meticulous and relevant information to our readers.
http://sweetbonanza.bid/# sweet bonanza demo turkce
pin up guncel giris [url=http://pinupgiris.fun/#]pin-up online[/url] pin up 7/24 giris
Certainly! Here’s an extended version of the message:
http://sweetbonanza.bid/# sweet bonanza yasal site
gates of olympus demo free spin [url=http://gatesofolympus.auction/#]gates of olympus demo[/url] gates of olympus demo turkce oyna
gates of olympus nas?l para kazanilir gates of olympus oyna ucretsiz or gates of olympus demo turkce
https://www.google.hu/url?q=https://gatesofolympus.auction gate of olympus hile
[url=https://www.google.ad/url?sa=t&url=https://gatesofolympus.auction]gates of olympus guncel[/url] gates of olympus demo and [url=http://jiangzhongyou.net/space-uid-521301.html]gates of olympus slot[/url] gates of olympus oyna ucretsiz
http://sweetbonanza.bid/# sweet bonanza 100 tl
pin up casino giris [url=http://pinupgiris.fun/#]pin up casino[/url] pin up aviator
sweet bonanza free spin demo sweet bonanza oyna or sweet bonanza demo
https://www.google.com.co/url?q=https://sweetbonanza.bid sweet bonanza taktik
[url=https://maps.google.nu/url?q=https://sweetbonanza.bid]sweet bonanza demo[/url] sweet bonanza siteleri and [url=http://jiangzhongyou.net/space-uid-521207.html]sweet bonanza demo[/url] sweet bonanza oyna
https://aviatoroyna.bid/# aviator oyunu giris
pin-up bonanza [url=http://pinupgiris.fun/#]pin up casino[/url] pin up casino
Totopos4d menciptakan bocoran berupa rtp pos4d untuk pemain slot di dunia dengan level akurat yang mencapai 100% pastikan mencoba menggunakan saldo kecil terlebih dahulu sebelum akhirnya menang ratusan juta
di toto pos4d
http://sweetbonanza.bid/# sweet bonanza demo
http://pinupgiris.fun/# pin-up casino indir
aviator oyna [url=http://aviatoroyna.bid/#]aviator oyna 20 tl[/url] aviator oyunu 10 tl
[url=http://happyfamilystorerx.online/]online pharmacy australia free delivery[/url]
https://aviatoroyna.bid/# aviator hile
sweet bonanza bahis [url=http://sweetbonanza.bid/#]sweet bonanza bahis[/url] sweet bonanza kazanc
canadian pharmacy meds review: Certified Canadian Pharmacy – 77 canadian pharmacy
canada cloud pharmacy: Licensed Canadian Pharmacy – canadian drugs online
mexico pharmacies prescription drugs: mexican pharmacy – mexico pharmacy
Certainly! Here’s an extended version of the message:
Marvelous, what a weblog it is! This weblog provides valuable data to
us, keep it up.
canadian pharmacy antibiotics [url=https://canadianpharmacy24.store/#]canadian pharmacy 24[/url] canadian mail order pharmacy
[url=http://synthroidam.online/]synthroid 12.5 mg[/url]
[url=http://oazithromycin.online/]zithromax price in india[/url]
canadian pharmacy 24h com safe [url=https://canadianpharmacy24.store/#]Large Selection of Medications[/url] rate canadian pharmacies
[url=http://asynthroid.com/]synthroid united states[/url]
buying from online mexican pharmacy: cheapest mexico drugs – best online pharmacies in mexico
mail order pharmacy india: Healthcare and medicines from India – Online medicine order
[url=https://isynthroid.online/]synthroid 12.5 mcg[/url]
canadian pharmacy in canada: Certified Canadian Pharmacy – canadian pharmacy meds
Wideo360 | 360 Video Booth video360, 360 video,360 video booth, videobooth, video booth 360, selfie booth, booth selfie
[url=http://ametformin.com/]glucophage 850 mg cost[/url]
india pharmacy [url=http://indianpharmacy.icu/#]Cheapest online pharmacy[/url] buy medicines online in india
[url=http://prednisoneiv.online/]steroids prednisone for sale[/url]
buy medicines online in india [url=http://indianpharmacy.icu/#]Generic Medicine India to USA[/url] indian pharmacies safe
mexico pharmacies prescription drugs: mexican pharmacy – purple pharmacy mexico price list
canadian pharmacy: canadian pharmacy 24 – canadian king pharmacy
Windows 10 Pro Lisans Anahtarı hemen satın al
п»їlegitimate online pharmacies india: Healthcare and medicines from India – reputable indian pharmacies
india pharmacy mail order [url=http://indianpharmacy.icu/#]Healthcare and medicines from India[/url] online shopping pharmacy india
mexico drug stores pharmacies mexican border pharmacies shipping to usa or п»їbest mexican online pharmacies
https://maps.google.iq/url?q=https://mexicanpharmacy.shop mexican pharmaceuticals online
[url=http://www.g-play.ru/openlink.asp?http://mexicanpharmacy.shop]best online pharmacies in mexico[/url] buying from online mexican pharmacy and [url=http://bbs.cheaa.com/home.php?mod=space&uid=3097900]best online pharmacies in mexico[/url] mexican border pharmacies shipping to usa
indianpharmacy com [url=http://indianpharmacy.icu/#]indian pharmacy delivery[/url] indian pharmacy paypal
[url=http://olisinopril.com/]10 mg lisinopril tablets[/url]
canadian pharmacy store canadian pharmacy ed medications or canadian pharmacy reviews
https://www.feedroll.com/rssviewer/feed2js.php?src=https://canadianpharmacy24.store adderall canadian pharmacy
[url=https://images.google.com.tj/url?sa=t&url=https://canadianpharmacy24.store]canadian pharmacy 24h com safe[/url] canadian family pharmacy and [url=http://ckxken.synology.me/discuz/home.php?mod=space&uid=15771]online canadian pharmacy[/url] canadian drugs online
п»їbest mexican online pharmacies [url=http://mexicanpharmacy.shop/#]Online Pharmacies in Mexico[/url] mexican rx online
mexican online pharmacies prescription drugs: cheapest mexico drugs – mexican rx online
legit canadian pharmacy: Certified Canadian Pharmacy – canadian pharmacy no scripts
canadian pharmacies reputable canadian pharmacy or legit canadian pharmacy
https://www.agu-web.jp/~pharmacy1/feed2js/feed2js.php?src=http://canadianpharmacy24.store canadian medications
[url=http://www.google.com.ni/url?q=https://canadianpharmacy24.store::]canadian pharmacy world reviews[/url] is canadian pharmacy legit and [url=http://www.9kuan9.com/home.php?mod=space&uid=437338]canadian 24 hour pharmacy[/url] legitimate canadian online pharmacies
mexico pharmacies prescription drugs: Mexican Pharmacy Online – mexican rx online
pharmacy website india: indian pharmacy delivery – world pharmacy india
top online pharmacy india [url=http://indianpharmacy.icu/#]Healthcare and medicines from India[/url] mail order pharmacy india
mexican rx online buying from online mexican pharmacy or mexican mail order pharmacies
https://www.google.ms/url?q=https://mexicanpharmacy.shop mexican pharmacy
[url=https://cse.google.ro/url?sa=t&url=https://mexicanpharmacy.shop]п»їbest mexican online pharmacies[/url] mexican border pharmacies shipping to usa and [url=http://bbs.zhizhuyx.com/home.php?mod=space&uid=10007009]medicine in mexico pharmacies[/url] mexican border pharmacies shipping to usa
[url=http://tadalafilgf.com/]best cialis[/url]
xxxhdporno.cam
canadian pharmacy drugs online [url=https://canadianpharmacy24.store/#]Large Selection of Medications[/url] legit canadian online pharmacy
https://mhpereezd.ru/
As fellow creators and enthusiasts, we can learn so much from each other. Whether it’s sharing ideas, providing feedback, or simply enjoying each other’s content, I believe that together, we can create something truly remarkable.
[url=https://isynthroid.online/]synthroid otc[/url]
canada pharmacy recommended canadian pharmacies or 77 canadian pharmacy
https://www.anquan.org/seccenter/search/canadianpharmacy24.store canadian pharmacy sarasota
[url=http://vm-01.magneticgrid.com/info.php?a[]=where+can+i+buy+viagra+online+cheap</a]the canadian pharmacy[/url] canadian pharmacies comparison and [url=http://bbs.zhizhuyx.com/home.php?mod=space&uid=10006643]canada online pharmacy[/url] canadian pharmacy
I have been surfing online more than 3 hours today,
yet I never found any interesting article like yours.
It is pretty worth enough for me. In my view, if all web owners and bloggers made good content
as you did, the internet will be much more useful than ever before.
[url=http://synthroidx.com/]buy synthroid canada[/url]
mexican online pharmacies prescription drugs: mexico pharmacy – pharmacies in mexico that ship to usa
mexican pharmacy mexican online pharmacies prescription drugs or buying from online mexican pharmacy
https://cse.google.co.bw/url?q=http://mexicanpharmacy.shop mexican pharmaceuticals online
[url=https://www.google.com.et/url?q=https://mexicanpharmacy.shop]п»їbest mexican online pharmacies[/url] mexican pharmaceuticals online and [url=https://www.sdrxmc.com/home.php?mod=space&uid=1427112]mexico pharmacy[/url] reputable mexican pharmacies online
buying from online mexican pharmacy [url=http://mexicanpharmacy.shop/#]cheapest mexico drugs[/url] mexican pharmacy
[url=http://bestprednisone.online/]prednisone uk price[/url]
canadian pharmacy world reviews: Prescription Drugs from Canada – canadian drug stores
https://gruzchikov19.ru/
buying prescription drugs in mexico online: mexican pharmacy – mexican rx online
mail order pharmacy india [url=http://indianpharmacy.icu/#]indian pharmacy[/url] india online pharmacy
I jᥙѕt like the helpful information you supply in your articles.
I will bookmark yourr blog and test once more гjght
here frequently. I’m relatively sure I’ll be told a lot of new stufff right here!
Best of luck for the next! https://min3kotalhokseumawe.sch.id/assets/?games=rtp-rtp+%E2%9C%88+jamuslot
You’re welcome! Thank you for your understanding. If you have any specific questions, topics, or areas of interest you’d like to explore, feel free to share them. Whether it’s about technology trends, scientific discoveries, literary analysis, or any other subject, I’m here to provide information and assistance. Just let me know how I can assist you further, and I’ll be happy to help!
п»їbest mexican online pharmacies [url=http://mexicanpharmacy.shop/#]Mexican Pharmacy Online[/url] mexico drug stores pharmacies
pharmacy wholesalers canada legit canadian pharmacy online or pharmacy com canada
https://www.google.ms/url?sa=t&url=https://canadianpharmacy24.store legitimate canadian mail order pharmacy
[url=http://milatronika.com/blogs/view/canadianpharmacy24.store/vimax-original.html]onlinecanadianpharmacy 24[/url] trustworthy canadian pharmacy and [url=https://98e.fun/space-uid-7306890.html]canadian pharmacy[/url] canadian pharmacy 24 com
[url=https://synthroidx.online/]where can i buy synthroid[/url]
buy prescription drugs from india: Healthcare and medicines from India – buy prescription drugs from india
pharmacy canadian superstore: Certified Canadian Pharmacy – canadian pharmacies that deliver to the us
You’re welcome! Thank you for your understanding. If you have any specific questions, topics, or areas of interest you’d like to explore, feel free to share them. Whether it’s about technology trends, scientific discoveries, literary analysis, or any other subject, I’m here to provide information and assistance. Just let me know how I can assist you further, and I’ll be happy to help!
buying prescription drugs in mexico online mexican rx online or mexican rx online
https://www.google.lk/url?q=https://mexicanpharmacy.shop medication from mexico pharmacy
[url=https://www.google.gm/url?q=https://mexicanpharmacy.shop]mexican pharmaceuticals online[/url] mexican online pharmacies prescription drugs and [url=http://ckxken.synology.me/discuz/home.php?mod=space&uid=15583]reputable mexican pharmacies online[/url] mexican online pharmacies prescription drugs
You’re welcome! Thank you for your understanding. If you have any specific questions, topics, or areas of interest you’d like to explore, feel free to share them. Whether it’s about technology trends, scientific discoveries, literary analysis, or any other subject, I’m here to provide information and assistance. Just let me know how I can assist you further, and I’ll be happy to help!
reputable indian pharmacies: buy prescription drugs from india – pharmacy website india
mail order pharmacy india [url=https://indianpharmacy.icu/#]indian pharmacy[/url] india online pharmacy
сеть даркнет
Подпольная часть сети: запрещённое пространство интернета
Теневой уровень интернета, скрытый уголок интернета продолжает вызывать интерес интерес как граждан, а также правоохранительных органов. Этот скрытый уровень сети известен своей непрозрачностью и возможностью совершения незаконных операций под маской анонимности.
Суть подпольной части сети состоит в том, что он недоступен для обычных браузеров. Для доступа к нему необходимы специальные инструменты и программы, обеспечивающие скрытность пользователей. Это вызывает отличную площадку для различных незаконных действий, включая торговлю наркотическими веществами, торговлю огнестрельным оружием, хищение персональной информации и другие преступные операции.
В виде реакции на возрастающую опасность, многие страны приняли законы, направленные на ограничение доступа к теневому уровню интернета и привлечение к ответственности тех, кто осуществляющих незаконную деятельность в этой скрытой среде. Тем не менее, несмотря на предпринятые шаги, борьба с теневым уровнем интернета представляет собой сложную задачу.
Следует отметить, что полное прекращение доступа к темному интернету практически невозможно. Даже при строгих мерах регулирования, возможность доступа к этому слою интернета все еще доступен через различные технологии и инструменты, применяемые для обхода ограничений.
В дополнение к законодательным инициативам, действуют также совместные инициативы между правоохранительными органами и технологическими компаниями для противодействия незаконным действиям в подпольной части сети. Впрочем, для эффективного противодействия необходимы не только технологические решения, но также улучшения методов выявления и предотвращения противозаконных манипуляций в данной среде.
В итоге, несмотря на запреты и усилия в борьбе с незаконными деяниями, теневой уровень интернета остается серьезной проблемой, требующей комплексного подхода и совместных усилий со стороны правоохранительных служб, и технологических корпораций.
[url=http://asynthroid.com/]synthroid generic india[/url]
[url=https://synthroidx.online/]137 mg synthroid[/url]
canada drug pharmacy pharmacies in canada that ship to the us or canadian online pharmacy reviews
https://toolbarqueries.google.lt/url?sa=t&url=https://canadianpharmacy24.store canadianpharmacyworld
[url=https://www.chuchle.cz/?p=sendPageLink&value=https://canadianpharmacy24.store::]pet meds without vet prescription canada[/url] legitimate canadian online pharmacies and [url=http://bbs2.xingxiancn.com/home.php?mod=space&uid=396045]reputable canadian online pharmacies[/url] canadian world pharmacy
[url=https://synthroidotp.online/]synthroid 150 mg coupon[/url]
indian pharmacy online [url=http://indianpharmacy.icu/#]indian pharmacy[/url] indian pharmacy
Windows 11 Pro cheapest digital license key
[url=https://bmtadalafil.online/]tadalafil tablets in india[/url]
cheapest online pharmacy india: buy prescription drugs from india – mail order pharmacy india
buying prescription drugs in mexico: mexican pharmacy – mexican mail order pharmacies
mexican pharmaceuticals online: Mexican Pharmacy Online – reputable mexican pharmacies online
reputable mexican pharmacies online [url=https://mexicanpharmacy.shop/#]Mexican Pharmacy Online[/url] mexico drug stores pharmacies
mexican online pharmacies prescription drugs medication from mexico pharmacy or buying prescription drugs in mexico online
https://maps.google.lk/url?sa=t&url=https://mexicanpharmacy.shop mexican pharmaceuticals online
[url=http://images.google.co.bw/url?q=https://mexicanpharmacy.shop]mexican border pharmacies shipping to usa[/url] buying prescription drugs in mexico and [url=http://wuyuebanzou.com/home.php?mod=space&uid=498525]medicine in mexico pharmacies[/url] mexican border pharmacies shipping to usa
[url=http://lisinoprilgp.com/]buy zestril[/url]
canadian pharmacies comparison canadian pharmacy meds review or adderall canadian pharmacy
https://www.google.cm/url?q=https://canadianpharmacy24.store reputable canadian online pharmacy
[url=http://jesuschrist.ru/chat/redir.php?url=http://canadianpharmacy24.store]legit canadian pharmacy[/url] canadian valley pharmacy and [url=http://www.0551gay.com/space-uid-86368.html]canadian pharmacy ratings[/url] online canadian pharmacy reviews
purple pharmacy mexico price list [url=https://mexicanpharmacy.shop/#]mexican pharmacy[/url] п»їbest mexican online pharmacies
Wonderful items from you, man. I’ve remember your stuff prior to and you are simply extremely fantastic.
I really like what you have bought right here, certainly like what you’re saying and the
way wherein you are saying it. You make it enjoyable and you still take care
of to keep it wise. I can not wait to learn far more from you.
This is really a great site.
The on line casino hosts an unlimited choice of slots, desk games, and a comprehensive sportsbook with reside streaming.
http://prednisoneall.shop/# prednisone prices
I sincerely admired what you’ve produced here. The sketch is elegant, your written content chic, yet you appear to have developed some anxiety regarding what you aim to offer thereafter. Certainly, I shall return more frequently, just as I have been doing almost constantly, should you uphold this incline.
sandyterrace.com
모멘텀은 매우 중요하므로 이 문제를 직접 무시할 수 있습니다.
I ϲould not resist commenting. Perfectly ᴡritten!
Alѕo visit my website buy eco friendly furniture
https://prednisoneall.shop/# purchase prednisone 10mg
purchase zithromax z-pak: buy zithromax – where can i buy zithromax capsules
buying generic clomid without prescription [url=http://clomidall.shop/#]generic clomid online[/url] how to get generic clomid
http://amoxilall.shop/# buy amoxicillin 500mg uk
amoxicillin 500mg capsule cost: amoxicillin 500mg – amoxicillin generic
1. Вибір натяжних стель: як вибрати ідеальний варіант?
2. Модні тренди натяжних стель на поточний сезон
3. Які переваги мають натяжні стелі порівняно зі звичайними?
4. Як підібрати кольори для натяжної стелі у квартирі?
5. Секрети догляду за натяжними стелями: що потрібно знати?
6. Як зробити вибір між матовими та глянцевими натяжними стелями?
7. Натяжні стелі в інтер’єрі: як вони змінюють приміщення?
8. Натяжні стелі для ванної кімнати: плюси та мінуси
9. Як підняти стеля візуально за допомогою натяжної конструкції?
10. Як вибрати правильний дизайн натяжної стелі для кухні?
11. Інноваційні технології виробництва натяжних стель: що варто знати?
12. Чому натяжні стелі вибирають для офісних приміщень?
13. Натяжні стелі з фотопринтом: які переваги цієї технології?
14. Дизайнерські рішення для натяжних стель: ідеї для втілення
15. Хімічні реагенти в складі натяжних стель: безпека та якість
16. Як вибрати натяжну стелю для дитячої кімнати: поради батькам
17. Які можливості для дизайну приміщень відкривають натяжні стелі?
18. Як впливає вибір матеріалу на якість натяжної стелі?
19. Інструкція з монтажу натяжних стель власноруч: крок за кроком
20. Натяжні стелі як елемент екстер’єру будівлі: переваги та недоліки
послуги сантехніка [url=https://www.natjazhnistelifvgtg.lviv.ua]https://www.natjazhnistelifvgtg.lviv.ua[/url] .
http://zithromaxall.shop/# zithromax 500mg price
[url=https://lisinoprilgp.com/]buy lisinopril 5 mg[/url]
[url=http://tadalafi.online/]average cost of cialis 20mg[/url]
cost of generic clomid without prescription [url=http://clomidall.shop/#]can i get generic clomid without dr prescription[/url] order generic clomid without insurance
[url=https://synthroidam.online/]synthroid cost canada[/url]
Stromectol’s potential use in COVID-19 treatment has sparked interest in exploring its antiviral properties and mechanism of action. Researchers are investigating its ability to inhibit viral replication and modulate the host immune response to determine its effectiveness against SARS-CoV-2. buy stromectol 3mg
I truly savored what you’ve accomplished here. The sketch is elegant, your authored material trendy, however, you seem to have developed some trepidation about what you aim to offer next. Certainly, I shall revisit more regularly, just as I have been doing nearly all the time, in case you uphold this ascension.
Hello! Do you know if they make any plugins to protect
against hackers? I’m kinda paranoid about losing everything I’ve worked
hard on. Any tips?
[url=http://synthroidam.online/]levoxyl synthroid[/url]
[url=http://lisinoprildrl.online/]order lisinopril 10 mg[/url]
Windows 11 Pro Digital License Key esd
purchase zithromax z-pak [url=https://zithromaxall.shop/#]zithromax 600 mg tablets[/url] zithromax 500 mg lowest price online
amoxicillin without rx where can you get amoxicillin or amoxicillin online canada
https://images.google.com.vn/url?sa=t&url=https://amoxilall.shop amoxicillin 500 mg without a prescription
[url=https://images.google.kg/url?q=https://amoxilall.shop]buy cheap amoxicillin online[/url] where to buy amoxicillin 500mg and [url=http://www.jade-crack.com/home.php?mod=space&uid=942359]amoxicillin for sale online[/url] can you buy amoxicillin uk
Thanks on your marvelous posting! I genuinely enjoyed reading
it, you happen to be a great author. I will be sure to bookmark
your blog and will eventually come back later in life.
I want to encourage you to ultimately continue your great posts,
have a nice holiday weekend!
[url=http://tadalafilgf.com/]order cialis 20mg[/url]
[url=http://lisinoprilgp.com/]lisinopril 4214[/url]
where can i buy amoxicillin without prec [url=http://amoxilall.com/#]amoxicillin 500mg capsule[/url] order amoxicillin uk
get generic clomid without prescription [url=http://clomidall.shop/#]can you get clomid pills[/url] can you buy generic clomid for sale
[url=http://happyfamilystorerx.online/]online pharmacy no rx[/url]
Hi, just required you to know I he added your site to my Google bookmarks due to your layout. But seriously, I believe your internet site has 1 in the freshest theme I??ve came across.国产线播放免费人成视频播放
[url=https://tadalafi.online/]cialis 100mg tablets[/url]
https://prednisoneall.shop/# prednisone 1 mg for sale
buy amoxicillin online without prescription can you purchase amoxicillin online or amoxicillin buy no prescription
http://images.google.com.pe/url?sa=t&url=http://amoxilall.shop amoxicillin 500 tablet
[url=http://alt1.toolbarqueries.google.bj/url?q=https://amoxilall.shop]amoxicillin 775 mg[/url] amoxicillin without prescription and [url=http://wuyuebanzou.com/home.php?mod=space&uid=501080]buy amoxil[/url] amoxicillin for sale online
how can i get clomid for sale [url=http://clomidall.shop/#]how to buy generic clomid without prescription[/url] buy generic clomid no prescription
Erkek Kol Saati | Kadın Kol Saati | Marka saatçilik Nacar saatler, casio erkek saatleri, casio kadın saatleri, Erkek kol saati, erkek saatleri, kadın kol saati, kadın saatleri, çocuk saatleri, dijital saatler, ucuz saat, kaliteli saat markaları, marka saatler
Bediroğlu Hırdavat Bahçe Aksesuarları ve Yedek Parça | Şanlıurfa Bediroğlu urfa stihl, Şanlıurfa stihl bayi, Şanlıurfa husqvarna bayi, güneydoğu felco bayi, Şanlıurfa taral bayisi, motorlu testere yedek parça,Şanlıurfa Stihl Bayi, benzinli testere yedek parça, testere zinciri, ağaç kesme pala, klavuz, elektronik bobin, hava filtresi, stihl Şanlıurfa bayi, stihl Şanlıurfa, Şanlıurfa stihl, stihl servisi, Şanlıurfa stihl servis, Şanlıurfa testere, Şanlıurfa stihlbayi, stihl Şanlıurfa, Şanlıurfa stihl, stihl bayisi Şanlıurfa, Şanlıurfa stihl baleri, Şanlıurfa testere bayisi, Şanlıurfa stihl servis, stihl Şanlıurfa servis,alpina Şanlıurfa bayi
where buy generic clomid prices: clomid prices – clomid without prescription
prednisone 10mg tablet price prednisone 10 mg canada or prednisone 2.5 mg tab
https://images.google.co.uz/url?q=https://prednisoneall.shop prednisone cream brand name
[url=http://images.google.com.ph/url?q=https://prednisoneall.shop]apo prednisone[/url] compare prednisone prices and [url=https://www.xiaoditech.com/bbs/home.php?mod=space&uid=1682817]prednisone medication[/url] prednisone medication
http://amoxilall.shop/# can i buy amoxicillin over the counter
Awesome data Appreciate it.
[url=http://asynthroid.com/]synthroid 2017[/url]
This website is an absolute gem! The content is incredibly well-researched, engaging, and valuable. I particularly enjoyed the [specific section] which provided unique insights I haven’t found elsewhere. Keep up the amazing work!
[url=https://oprednisone.online/]prednisone 2[/url]
[url=http://tadalafilstd.online/]how to get cialis in canada[/url]
where to buy amoxicillin 500mg without prescription: buy cheap amoxicillin online – can you buy amoxicillin over the counter in canada
демонтаж москва
https://demontagmoskva.ru/
where can i get clomid [url=https://clomidall.com/#]can i get cheap clomid online[/url] can i purchase clomid without insurance
When I initially left a comment I seem to have clicked on the -Notify me when new comments are added- checkbox and from now
on every time a comment is added I recieve four emails with the exact same
comment. Perhaps there is a means you are able to remove me
from that service? Cheers!
Feel free to surf to my blog; Pinterest
steroids prednisone for sale 1 mg prednisone daily or over the counter prednisone medicine
https://images.google.com.sg/url?q=https://prednisoneall.shop buy generic prednisone online
[url=http://images.google.ae/url?q=http://prednisoneall.shop]purchase prednisone from india[/url] prednisone without a prescription and [url=http://bbs.zhizhuyx.com/home.php?mod=space&uid=10025884]prednisone 25mg from canada[/url] prednisone buy online nz
amoxicillin for sale online amoxicillin 500mg for sale uk or amoxicillin from canada
http://j-a-net.jp/top/redirect?url=http://amoxilall.shop can i purchase amoxicillin online
[url=https://maps.google.com.ly/url?sa=t&url=https://amoxilall.shop]where to get amoxicillin over the counter[/url] amoxicillin 500mg price and [url=https://www.warshipsfaq.ru/user/gvkkgqgqtu]where can you get amoxicillin[/url] amoxicillin cost australia
windows 11 lisans key
zithromax 500mg [url=http://zithromaxall.com/#]zithromax 1000 mg pills[/url] where can i get zithromax
Aw, this was an incredibly nice post. Finding the time and actual
effort to make a good article… but what can I say… I procrastinate a whole lot and don’t seem to get anything done.
https://amoxilall.com/# ampicillin amoxicillin
Thank you great posting about essential oil. Hello Administ . 国产线播放免费人成视频播放
where buy generic clomid without rx [url=https://clomidall.com/#]get cheap clomid online[/url] cheap clomid
Yes! Finally something about ครีมกันแดด.
amoxicillin pharmacy price amoxicillin 500mg buy online uk or buy amoxil
https://www.google.com.pk/url?q=https://amoxilall.shop medicine amoxicillin 500
[url=https://www.google.com.pg/url?sa=t&url=https://amoxilall.shop]order amoxicillin online no prescription[/url] buy amoxicillin and [url=http://www.0551gay.com/space-uid-87630.html]amoxicillin 500 mg purchase without prescription[/url] buy amoxicillin online with paypal
воєнторг
18. Где найти все для военных
магазин військового спорядження київ [url=https://voentorgaseh.kiev.ua/]інтернет магазин військового одягу[/url] .
zithromax tablets [url=https://zithromaxall.shop/#]zithromax canadian pharmacy[/url] can you buy zithromax over the counter
[url=http://lisinoprildrl.online/]lisinopril online uk[/url]
purchase zithromax z-pak [url=http://zithromaxall.com/#]zithromax capsules[/url] zithromax cost
zithromax for sale usa zithromax for sale us or zithromax pill
https://www.google.com.cy/url?sa=t&url=https://zithromaxall.shop where can i buy zithromax in canada
[url=http://hh-bbs.com/bbs/jump.php?chk=1&url=zithromaxall.shop&feature=related]zithromax 500mg price in india[/url] zithromax z-pak and [url=https://camillacastro.us/forums/profile.php?id=137590]generic zithromax over the counter[/url] where can i buy zithromax in canada
[url=https://lisinoprilgp.online/]purchase lisinopril online[/url]
how to get cheap clomid price: where can i buy clomid – how to buy cheap clomid
[url=http://valtrexbt.online/]valtrex cream prescription[/url]
https://zithromaxall.com/# zithromax drug
[url=https://valtrexmedication.online/]buy valtrex online canada[/url]
generic zithromax 500mg [url=https://zithromaxall.com/#]zithromax online pharmacy canada[/url] zithromax buy online
https://zithromaxall.com/# buy azithromycin zithromax
1. Почему берцы – это обязательный элемент стиля?
2. Как выбрать идеальные берцы для осеннего гардероба?
3. Тренды сезона: кожаные берцы или замшевые?
4. 5 способов носить берцы с платьем
5. Какие берцы выбрать для повседневного образа?
6. Берцы на платформе: комфорт и стиль в одном
7. Какие берцы будут актуальны в этом году?
8. Маст-хэв сезона: военные берцы в стиле милитари
9. 10 вариантов сочетания берцов с джинсами
10. Зимние берцы: как выбрать модель для холодного сезона
11. Элегантные берцы на каблуке: идеальный вариант для офиса
12. Секреты ухода за берцами: как сохранить первоначальный вид?
13. С какой юбкой носить берцы: советы от стилистов
14. Как подобрать берцы под фасон брюк?
15. Берцы на шнуровке: стильный акцент в образе
16. Берцы-челси: универсальная модель для любого стиля
17. С чем носить берцы на плоской подошве?
18. Берцы с ремешками: акцент на деталях
19. Как выбрать берцы для прогулок по городу?
20. Топ-5 брендов берцев: качество и стиль в одном
купити берці військові [url=https://bercifrdt.kiev.ua/]купити берці тактичні[/url] .
purchase amoxicillin 500 mg amoxicillin 500mg price canada or amoxicillin brand name
https://maps.gngjd.com/url?q=https://amoxilall.shop amoxicillin 500 mg tablet price
[url=https://mobile.vhda.com/director.aspx?target=https://amoxilall.shop]amoxicillin 30 capsules price[/url] amoxicillin 500mg tablets price in india and [url=http://www.empyrethegame.com/forum/memberlist.php?mode=viewprofile&u=294007]amoxicillin 500 mg online[/url] amoxicillin 500mg
apo prednisone: where can i get prednisone over the counter – prednisone brand name us
M SOLMAZ NAKLİYAT A.Ş
Calibration instruments suppliers
[url=http://isynthroid.com/]synthroid 150 mcg cost[/url]
amoxicillin 500 mg purchase without prescription [url=https://amoxilall.com/#]amoxicillin 800 mg price[/url] amoxicillin cost australia
[url=http://tadalafi.online/]cialis uk prescription[/url]
http://kamagraiq.com/# п»їkamagra
https://tadalafiliq.com/# Buy Cialis online
https://tadalafiliq.com/# Cheap Cialis
buy cialis pill [url=https://tadalafiliq.com/#]tadalafil iq[/url] Cialis over the counter
Cheap Cialis [url=https://tadalafiliq.com/#]Generic Tadalafil 20mg price[/url] Cialis without a doctor prescription
[url=http://tadalafilstd.com/]tadalafil tab 10mg[/url]
Everything is very open and very clear explanation of issues. was truly information.活婴儿色情片
Viagra generic over the counter [url=http://sildenafiliq.com/#]sildenafil iq[/url] Viagra Tablet price
[url=https://tadalafilstd.online/]cialis buy online no prescription[/url]
Hello! Crazy discounts, hurry up!
We are Drop Dead Studio and our goal is to help companies achieve impressive sales results through automated marketing.
[b]2 keys left for sale activation key for GSA Search Engine Ranker with a 50% discount[/b], we are selling due to the closure of the department that works on this software. The price is two times lower than the official store. At the output you will receive a name\key to work with.
[b]Hurry up, keys are limited[/b] Write to us in telegram: [b]@DropDeadStudio[/b]!
The fresh database for XRumer and GSA Search Engine Ranker has gone on sale, as well as a premium database collected by us personally, it contains only those links on which you will receive active links, that is, clickable ones + our own database of 4+ million contact links, for selling electronic goods and everything that your imagination allows you!
[b]ATTENTION! 40% discount only until 04/10/2024[/b]!
When applying, please indicate the promotional code [b]DD40%[/b] in telegram: [b]@DropDeadStudio[/b]!
http://kamagraiq.shop/# super kamagra
http://kamagraiq.com/# super kamagra
[url=http://isynthroid.online/]generic synthroid online[/url]
Viagra tablet online [url=http://sildenafiliq.xyz/#]cheapest viagra[/url] best price for viagra 100mg
https://tadalafiliq.com/# buy cialis pill
п»їkamagra [url=https://kamagraiq.com/#]Kamagra Oral Jelly Price[/url] п»їkamagra
https://tadalafiliq.shop/# п»їcialis generic
[url=https://lisinoprilgp.online/]prinivil medication[/url]
http://sildenafiliq.xyz/# Viagra generic over the counter
[url=https://synthroidsl.online/]synthroid brand name in india[/url]
http://sildenafiliq.xyz/# Viagra tablet online
generic sildenafil [url=http://sildenafiliq.xyz/#]buy viagra online[/url] Buy Viagra online cheap
[url=http://happyfamilymedicalstore.online/]no prescription needed pharmacy[/url]
https://elementor.com/
buy Kamagra [url=https://kamagraiq.shop/#]Kamagra gel[/url] Kamagra Oral Jelly
Great post thank you. Hello Administ . Seo Hizmeti Skype : live:by_umut
Hello! I could have sworn I’ve been to this blog before but after browsing through some of the post I realized it’s new to me. Seo Hizmeti Skype : live:by_umut
I really love to read such an excellent article. Helpful article. Hello Administ . Seo Hizmeti Skype : live:by_umut
http://kamagraiq.com/# sildenafil oral jelly 100mg kamagra
http://kamagraiq.shop/# п»їkamagra
п»їBuy generic 100mg Viagra online [url=https://sildenafiliq.xyz/#]sildenafil iq[/url] order viagra
http://tadalafiliq.com/# Cialis 20mg price
buy kamagra online usa [url=http://kamagraiq.shop/#]Kamagra gel[/url] Kamagra 100mg price
I wanted to thank you for this great read!! I definitely loved every little bit of it.
I have got you saved as a favorite to look at new things you post?
Also visit my web blog craigslist new mexico
Kamagra tablets п»їkamagra or buy Kamagra
https://maps.google.vu/url?sa=t&url=https://kamagraiq.shop Kamagra 100mg
[url=https://www.google.com.mx/url?q=https://kamagraiq.shop]super kamagra[/url] Kamagra 100mg price and [url=https://m.414500.cc/home.php?mod=space&uid=3510325]Kamagra 100mg price[/url] cheap kamagra
Great work! That is the type of info that are supposed to be
shared across the web. Disgrace on Google for no longer positioning this put up higher!
Come on over and talk over with my web site . Thank you =)
Generic Cialis price [url=http://tadalafiliq.com/#]tadalafil iq[/url] Cialis over the counter
Hello! Crazy discounts, hurry up!
We are Drop Dead Studio and our goal is to help companies achieve impressive sales results through automated marketing.
I. [b]We sell fresh databases for GSA Search Engine Ranker.[/b]
• The databases are updated monthly through 24/7 parsing and by connecting purchased databases from other sources.
• You have the option to purchase a one-time fresh database or pay for a lifetime subscription for updates.
[i][b]ATTENTION![/b][/i] 40% discount only until 04/10/2024!
When applying, please indicate the promotional code [i][b]DD40%[/b][/i] in telegram: https://t.me/DropDeadStudio!
II. [b]We sell fresh databases for XRumer 19.0.18 — 23.0.3 StrongAI.[/b]
• The databases are also updated monthly through 24/7 parsing and by connecting purchased databases from other sources.
• You have the option to purchase a one-time fresh database or subscribe for lifetime updates.
[i][b]ATTENTION![/b][/i] 40% discount only until 04/10/2024!
When applying, please indicate the promotional code [i][b]DD40%[/b][/i] in telegram: https://t.me/DropDeadStudio!
III. [b]We sell our own premium databases for XRumer 19.0.18 — 23.0.3 StrongAI.[/b]
• The databases are updated monthly and compiled by us through selection of all databases + including fresh ones specifically for active links, or in the case of contact forms, those links where your advertisement will be sent to the website owner.
[i][b]ATTENTION![/b][/i] 40% discount only until 04/10/2024!
When applying, please indicate the promotional code [i][b]DD40%[/b][/i] in telegram: https://t.me/DropDeadStudio!
IV. [b]We are selling the remaining activation keys for GSA Search Engine Ranker.[/b]
• The activation keys are still available with us from the closed department that used this software, as we have fully transitioned to XRumer.
[i][b]ATTENTION![/b][/i] 2 keys left for sale activation key for GSA Search Engine Ranker with a 50% discount! Write to us in telegram: https://t.me/DropDeadStudio!
V. [b]We can also help you choose and configure servers and virtual machines.[/b]
• We have 7 XRumer licenses running simultaneously 24/7, and we can also assist with setting up XRumer and Xevil.
viagra without prescription cheap viagra or buy viagra here
https://wuangus.cc/go.php?url=https://sildenafiliq.com sildenafil 50 mg price
[url=https://bbs.clutchfans.net/proxy.php?link=https://sildenafiliq.com::]sildenafil over the counter[/url] Viagra online price and [url=http://cos258.com/home.php?mod=space&uid=1249895]sildenafil over the counter[/url] buy Viagra over the counter
[url=https://medicinesaf.online/]cheap scripts pharmacy[/url]
[url=http://tadalafi.online/]cialis 10mg price canada[/url]
Kamp Lojistik Ticaret A.Ş.
buy Viagra over the counter [url=http://sildenafiliq.xyz/#]sildenafil iq[/url] Order Viagra 50 mg online
Thank you great post. Hello Administ .国产线播放免费人成视频播放
Hi, just required you to know I he added your site to my Google bookmarks due to your layout. But seriously, I believe your internet site has 1 in the freshest theme I??ve came across.国产线播放免费人成视频播放
[url=https://medicinesaf.online/]online pharmacy bc[/url]
[url=http://pharmgf.online/]online pharmacy in turkey[/url]
https://tadalafiliq.shop/# Cialis without a doctor prescription
After all, what a great site and informative posts, I will upload inbound link – bookmark this web site? Regards, Reader.儿童色情片
You really make it seem so easy with your presentation but I find this matter to be really something
which I think I would never understand. It seems too complicated and very broad
for me. I’m looking forward for your next post, I will
try to get the hang of it!
[url=https://synthroidx.com/]synthroid buy online[/url]
Cialis without a doctor prescription [url=http://tadalafiliq.shop/#]cialis without a doctor prescription[/url] Generic Tadalafil 20mg price
Viagra Tablet price viagra without prescription or Order Viagra 50 mg online
https://maps.google.co.ke/url?q=https://sildenafiliq.com Order Viagra 50 mg online
[url=https://www.google.com.iq/url?q=https://sildenafiliq.com::]Cheap generic Viagra online[/url] viagra canada and [url=http://bbs.zhizhuyx.com/home.php?mod=space&uid=10039879]Sildenafil 100mg price[/url] Generic Viagra for sale
[url=https://tadalafi.online/]tadalafil 2.5 mg online[/url]
Someone necessarily assist to make critically articles
I’d state. This is the first time I frequented your website page and thus far?
I surprised with the research you made to create this particular
publish extraordinary. Excellent process!
https://kamagraiq.shop/# cheap kamagra
Buy Tadalafil 5mg buy cialis pill or buy cialis pill
https://m.bianhua8.com/go?url=http://tadalafiliq.shop cheapest cialis
[url=https://images.google.com.pr/url?q=https://tadalafiliq.shop]buy cialis pill[/url] Tadalafil Tablet and [url=https://www.foodntours.com/user/tsifuqplku/videos]Generic Cialis price[/url] Buy Tadalafil 20mg
It’s a game. Five dollars is free. Try it It’s not an easy game
->-> 바카라사이트.COM
Thank you great posting about essential oil. Hello Administ .Seo Hizmeti Skype : live:by_umut
Everything is very open and very clear explanation of issues. was truly information. Seo Hizmeti Skype : live:by_umut
Cialis without a doctor prescription [url=http://tadalafiliq.com/#]cialis without a doctor prescription[/url] Buy Cialis online
Thank you great posting about essential oil. Hello Administ .Seo Hizmeti Skype : live:by_umut
[url=http://tadalafilstd.online/]tadalafil 5mg best price[/url]
You’re welcome! I appreciate your willingness to engage further. If you have any specific questions or topics you’d like to delve into, feel free to share them. Whether it’s about recent developments in technology, intriguing scientific discoveries, captivating literature, or anything else on your mind, I’m here to provide insights and assistance. Simply let me know how I can help, and I’ll be happy to assist you further!
http://kamagraiq.com/# buy kamagra online usa
Order Viagra 50 mg online [url=https://sildenafiliq.com/#]best price on viagra[/url] cheapest viagra
Generic Cialis without a doctor prescription п»їcialis generic or Cialis 20mg price
https://maps.google.com.sv/url?sa=t&url=https://tadalafiliq.shop Buy Tadalafil 10mg
[url=http://www.snzg.cn/comment/index.php?item=articleid&itemid=38693&itemurl=https://tadalafiliq.shop]Cialis over the counter[/url] Cialis 20mg price and [url=http://www.zqykj.com/bbs/home.php?mod=space&uid=253417]Cialis over the counter[/url] Cialis over the counter
You’re welcome! I appreciate your willingness to engage further. If you have any specific questions or topics you’d like to delve into, feel free to share them. Whether it’s about recent developments in technology, intriguing scientific discoveries, captivating literature, or anything else on your mind, I’m here to provide insights and assistance. Simply let me know how I can help, and I’ll be happy to assist you further!
https://kamagraiq.com/# cheap kamagra
Sildenafil Citrate Tablets 100mg Cheap Sildenafil 100mg or Viagra tablet online
https://www.google.bt/url?sa=t&url=https://sildenafiliq.com sildenafil 50 mg price
[url=http://www.johnsongt.com/link.php?name=deezee&addr=sildenafiliq.com]buy Viagra online[/url] sildenafil over the counter and [url=http://bbs.cheaa.com/home.php?mod=space&uid=3102119]buy viagra here[/url] cheapest viagra
When someone writes an post he/she keeps the idea of a user in his/her
brain that how a user can be aware of it. Thus that’s why this
piece of writing is outstdanding. Thanks!
Cheap generic Viagra online [url=http://sildenafiliq.xyz/#]generic ed pills[/url] cheapest viagra
[url=http://synthroidx.online/]lowest prices for synthroid[/url]
You’re welcome! I appreciate your willingness to engage further. If you have any specific questions or topics you’d like to delve into, feel free to share them. Whether it’s about recent developments in technology, intriguing scientific discoveries, captivating literature, or anything else on your mind, I’m here to provide insights and assistance. Simply let me know how I can help, and I’ll be happy to assist you further!
buy Kamagra [url=http://kamagraiq.com/#]Kamagra Oral Jelly Price[/url] Kamagra 100mg
sandyterrace.com
Hongzhi 황제는이 사람들이 그를 보내러 온 것이 아니라는 것을 알고있었습니다.
[url=https://lisinoprill.com/]lisinopril prescription cost[/url]
Cheap generic Viagra online generic sildenafil or viagra canada
https://clients1.google.sc/url?q=https://sildenafiliq.com buy Viagra online
[url=https://images.google.com.mt/url?sa=t&url=https://sildenafiliq.com]sildenafil online[/url] Viagra online price and [url=http://bocauvietnam.com/member.php?1448419-nmjwdeckrv]Viagra online price[/url] Cheapest Sildenafil online
cialis for sale [url=http://tadalafiliq.com/#]cialis without a doctor prescription[/url] Buy Tadalafil 10mg
http://sildenafiliq.com/# over the counter sildenafil
Мы специалисты специалистов по продвижению в интернете, занимающихся увеличением трафика и улучшением рейтинга вашего сайта в поисковых системах.
Наша команда получили признание за свою работу и предоставим вам доступ к нашему опыту и навыкам.
Какие преимущества вы получите:
• [url=https://seo-prodvizhenie-ulyanovsk1.ru/]технический аудит веб сайта[/url]
• Исчерпывающая оценка вашего сайта и разработка индивидуальной стратегии продвижения.
• Оптимизация контента и технических характеристик вашего сайта для достижения наивысших результатов.
• Систематический мониторинг и анализ результатов с целью улучшения вашего онлайн-присутствия.
Подробнее [url=https://seo-prodvizhenie-ulyanovsk1.ru/]https://seo-prodvizhenie-ulyanovsk1.ru/[/url]
Наши клиенты уже видят результаты: увеличение посещаемости, улучшение рейтинга в поисковых системах и, конечно, рост бизнеса. Мы можем предоставить вам бесплатную консультацию, для обсуждения ваших потребностей и разработки стратегии продвижения, соответствующей вашим целям и финансовым возможностям.
Не упустите шанс улучшить свои показатели в онлайн-мире. Обращайтесь к нам уже сегодня.
http://kamagraiq.shop/# Kamagra Oral Jelly
http://kamagraiq.shop/# п»їkamagra
Aw, this was an incredibly nice post. Taking
the time and actual effort to make a good article… but what can I say…
I procrastinate a lot and never seem to get anything done. https://aviator.Forex.pm/?qa=946299/vi%C3%B1edos-en-quer%C3%A9taro-con-hotel
Buy Tadalafil 5mg [url=https://tadalafiliq.shop/#]Buy Cialis online[/url] Cialis 20mg price
Kamagra 100mg cheap kamagra or buy Kamagra
https://images.google.com.do/url?sa=t&url=https://kamagraiq.shop Kamagra tablets
[url=https://maps.google.cg/url?q=https://kamagraiq.shop]cheap kamagra[/url] Kamagra 100mg and [url=http://bbs.zhizhuyx.com/home.php?mod=space&uid=10040246]Kamagra 100mg[/url] super kamagra
[url=https://prednisonecsr.com/]prednisone 50[/url]
After all, what a great site and informative posts, I will upload inbound link – bookmark this web site? Regards, Reader. Seo Hizmeti Skype : live:by_umut
Thank you great post. Hello Administ .Seo Hizmeti Skype : live:by_umut
https://kamagraiq.com/# super kamagra
[url=http://azithromycinhq.com/]buy zithromax z-pak[/url]
medicine in mexico pharmacies: mexican pharmacy – mexico pharmacies prescription drugs
online shopping pharmacy india [url=https://indianpharmgrx.shop/#]indian pharmacies safe[/url] top 10 online pharmacy in india
my canadian pharmacy: Certified Canadian pharmacies – canadian pharmacy ltd
15 min payday loans
loans online no credit check
online loans no credit check
online personal loans
payday loans
[url=http://synthroidotp.online/]online pharmacy synthroid[/url]
mobajlporno
mexican border pharmacies shipping to usa [url=https://mexicanpharmgrx.shop/#]buying from online mexican pharmacy[/url] purple pharmacy mexico price list
[url=http://azithromycinps.online/]how much is azithromycin over the counter[/url]
[url=http://lisinoprilgp.com/]lisinopril 20 mg no prescription[/url]
mexican online pharmacies prescription drugs: Mexico drugstore – mexican drugstore online
very informative articles or reviews at this time.
[url=http://tadalafilgf.com/]online cialis from india[/url]
pharmacies in mexico that ship to usa purple pharmacy mexico price list or <a href=" http://vm-01.magneticgrid.com/info.php?a%5B%5D=where+can+i+buy+viagra+online+cheapbuying from online mexican pharmacy
http://www.vwbk.de/url?q=https://mexicanpharmgrx.com mexican rx online
[url=https://clients1.google.nu/url?q=https://mexicanpharmgrx.com]mexican drugstore online[/url] п»їbest mexican online pharmacies and [url=http://www.9kuan9.com/home.php?mod=space&uid=501579]best online pharmacies in mexico[/url] medicine in mexico pharmacies
This design is spectacular! You certainly know how
to keep a reader entertained. Between your wit and your videos,
I was almost moved to start my own blog
(well, almost…HaHa!) Great job. I really loved what you had to say, and more than that,
how you presented it. Too cool!
It’s remarkable in favor of me to have a web site, which is valuable in support of
my experience. thanks admin
Windows 10 Pro Lisans Anahtarı Satın Al
[url=https://prednisoneiv.online/]prednisone 10 mg daily[/url]
mexican drugstore online [url=http://mexicanpharmgrx.com/#]mexican pharmacy[/url] mexican drugstore online
[url=https://isynthroid.com/]synthroid 125 mcg tablet[/url]
Windows 10 Pro Dijital Lisans Anahtarı
Office 2021, Office 2019, Office 2024 Dijital Lisans anahtarı
Эволюция бренда
16. BMW 7 Series: роскошь и инновации в одном автомобиле
x1 2023 bmw [url=https://avtosalonbmwftnz.dp.ua/]x3 2023[/url] .
After all, what a great site and informative posts, I will upload inbound link – bookmark this web site? Regards, Reader. Seo Hizmeti Skype : live:by_umut
After all, what a great site and informative posts, I will upload inbound link – bookmark this web site? Regards, Reader. Seo Hizmeti Skype : live:by_umut
Thank you for great information. Hello Administ . Seo Hizmeti Skype : live:by_umut
Hi, just required you to know I he added your site to my Google bookmarks due to your layout. But seriously, I believe your internet site has 1 in the freshest theme I??ve came across.Seo Hizmeti Skype : live:by_umut
[url=https://synthroidx.online/]synthroid canada[/url]
Thank you for content. Area rugs and online home decor store. Hello Administ . Seo Hizmeti Skype : live:by_umut
best mail order pharmacy canada [url=https://canadianpharmgrx.com/#]Canada pharmacy online[/url] reputable canadian online pharmacies
Very great post. I just stumbled upon your weblog and wished to mention that I
have really loved browsing your weblog posts. After all I’ll be subscribing on your
rss feed and I am hoping you write once more soon!
buying prescription drugs in mexico [url=https://mexicanpharmgrx.com/#]Pills from Mexican Pharmacy[/url] buying from online mexican pharmacy
safe canadian pharmacies canada pharmacy 24h or canadian drug pharmacy
http://www.google.co.ve/url?q=https://canadianpharmgrx.xyz the canadian pharmacy
[url=https://www.google.com.ni/url?sa=t&url=https://canadianpharmgrx.xyz]canadian pharmacy[/url] canadian pharmacy scam and [url=https://forex-bitcoin.com/members/340957-xbygfwyfmk]pharmacy wholesalers canada[/url] canada pharmacy
Thank you for your response! I’m grateful for your willingness to engage in discussions. If there’s anything specific you’d like to explore or if you have any questions, please feel free to share them. Whether it’s about emerging trends in technology, recent breakthroughs in science, intriguing literary analyses, or any other topic, I’m here to assist you. Just let me know how I can be of help, and I’ll do my best to provide valuable insights and information!
mexico pharmacies prescription drugs: Mexico drugstore – reputable mexican pharmacies online
A idade mínima para obter a CNH varia conforme a categoria da habilitação desejada.
[url=http://bestmedsx.online/]canada pharmacy 24h[/url]
reputable mexican pharmacies online: Pills from Mexican Pharmacy – best online pharmacies in mexico
KANTORBOLA situs gamin online terbaik 2024 yang menyediakan beragam permainan judi online easy to win , mulai dari permainan slot online , taruhan judi bola , taruhan live casino , dan toto macau . Dapatkan promo terbaru kantor bola , bonus deposit harian , bonus deposit new member , dan bonus mingguan . Kunjungi link kantorbola untuk melakukan pendaftaran .
https://canadianpharmgrx.xyz/# canadian drugs
Office 2021 Lisans Anahtarı
canada drug pharmacy: canadian pharmacy – pet meds without vet prescription canada
very informative articles or reviews at this time.
Hi, just required you to know I he added your site to my Google bookmarks due to your layout. But seriously, I believe your internet site has 1 in the freshest theme I??ve came across. Seo Hizmeti Skype : live:by_umut
canadian pharmacy service cheapest pharmacy canada or canadian family pharmacy
http://aktives-reisebuero.de/redirect/index.asp?url=https://canadianpharmgrx.xyz online canadian drugstore
[url=http://wx.lt/redirect.php?url=http://canadianpharmgrx.xyz]best online canadian pharmacy[/url] canadian pharmacy checker and [url=https://www.foodntours.com/user/vkbpiqgllv/videos]canadian pharmacy online[/url] canada pharmacy
Utilize as diferentes opções disponíveis.
Você precisa ser residente legal em Portugal para
poder solicitar a carteira de motorista local.
pharmacies in canada that ship to the us [url=https://canadianpharmgrx.xyz/#]Canada pharmacy online[/url] is canadian pharmacy legit
https://indianpharmgrx.shop/# Online medicine home delivery
Thank you for great article. Hello Administ .Seo Hizmeti Skype : live:by_umut
online canadian drugstore canadian pharmacy in canada or canadianpharmacyworld com
http://www.dubaicityguide.com/site/main/advertise.asp?Oldurl=http://canadianpharmgrx.com/ pharmacy in canada
[url=https://maps.google.co.ve/url?sa=t&url=https://canadianpharmgrx.com]is canadian pharmacy legit[/url] best online canadian pharmacy and [url=http://80tt1.com/home.php?mod=space&uid=755812]canada drugs online[/url] canadian drug
india pharmacy: buy prescription drugs from india – online shopping pharmacy india
onlinecanadianpharmacy [url=http://canadianpharmgrx.xyz/#]International Pharmacy delivery[/url] online pharmacy canada
canadian pharmacy no scripts: CIPA approved pharmacies – canadian king pharmacy
canadian online drugs [url=https://canadianpharmgrx.xyz/#]CIPA approved pharmacies[/url] buying from canadian pharmacies
https://mexicanpharmgrx.shop/# best online pharmacies in mexico
mexican mail order pharmacies [url=http://mexicanpharmgrx.shop/#]Mexico drugstore[/url] reputable mexican pharmacies online
[url=http://metformindi.com/]metformin 1000 mg tablet[/url]
http://canadianpharmgrx.xyz/# canadian pharmacy no scripts
canadian family pharmacy the canadian pharmacy or legitimate canadian pharmacies
https://images.google.lu/url?q=https://canadianpharmgrx.com pharmacy wholesalers canada
[url=https://maps.google.to/url?q=https://canadianpharmgrx.com]ordering drugs from canada[/url] best canadian pharmacy to buy from and [url=http://www.zhuangxiuz.com/home.php?mod=space&uid=812472]canadian pharmacy ltd[/url] canadian pharmacy price checker
The repercussions of engaging in “Führerschein kaufen” are manifold
and severe.
adderall canadian pharmacy [url=https://canadianpharmgrx.com/#]Canada pharmacy online[/url] canadian pharmacy com
Despite the claims of legality surrounding the purchase
of a driver’s license.
Despite its benefits, obtaining the B196 Führerschein can be challenging for some
individuals due to various reasons.
The accessibility of driving licenses is essential for individuals to navigate modern society.
best online pharmacies in mexico mexico pharmacies prescription drugs or purple pharmacy mexico price list
https://maps.google.com.mx/url?q=http://mexicanpharmgrx.com buying from online mexican pharmacy
[url=http://www.lyes.tyc.edu.tw/dyna/webs/gotourl.php?url=https://mexicanpharmgrx.com]buying from online mexican pharmacy[/url] mexican rx online and [url=https://forexzloty.pl/members/374334-yuyovdrbfe]reputable mexican pharmacies online[/url] purple pharmacy mexico price list
It is appropriate time to make some plans
for the future and it’s time to be happy. I have read this post and if
I could I want to suggest you some interesting things or tips.
Maybe you can write next articles referring to this article.
I want to read more things about it!
Hello, i read your blog from time to time and i own a similar one
and i was just wondering if you get a lot of spam remarks?
If so how do you stop it, any plugin or anything you can advise?
I get so much lately it’s driving me insane so any assistance is very
much appreciated.
indian pharmacies safe: Healthcare and medicines from India – india online pharmacy
reputable indian online pharmacy: indian pharmacy – buy medicines online in india
[url=https://isynthroid.com/]synthroid 100 mcg coupon[/url]
canadian king pharmacy [url=http://canadianpharmgrx.com/#]Canadian pharmacy prices[/url] my canadian pharmacy rx
Good info. Lucky me I reach on your website by accident, I bookmarked it. Seo Hizmeti Skype : live:by_umut
Everything is very open and very clear explanation of issues. was truly information. Seo Hizmeti Skype : live:by_umut
сигналы криптовалют
Итак почему наши сигналы – твой лучший выбор:
Наша команда постоянно в курсе актуальных направлений и событий, которые воздействуют на криптовалюты. Это позволяет коллективу незамедлительно реагировать и предоставлять новые трейды.
Наш состав владеет предельным знанием анализа и способен выделить устойчивые и незащищенные факторы для входа в сделку. Это содействует уменьшению рисков и повышению прибыли.
Вместе с командой мы применяем собственные боты анализа для просмотра графиков на все интервалах. Это способствует нам доставать всю картину рынка.
Прежде подачей сигнал в нашем канале Telegram команда делаем тщательную проверку всех сторон и подтверждаем допустимая длинный или шорт. Это гарантирует достоверность и качественные характеристики наших сигналов.
Присоединяйтесь к нашей команде к нашему каналу прямо сейчас и получите доступ к подтвержденным торговым сигналам, которые содействуют вам достигнуть финансовых результатов на рынке криптовалют!
https://t.me/Investsany_bot
sandyterrace.com
왜냐하면… 모든 사람의 생각에는 죽음과 불멸 사이에 차이가 없는 것 같습니다.
Kantorbola Situs slot Terbaik, Modal 10 Ribu Menang Puluhan Juta
Kantorbola merupakan salah satu situs judi online terbaik yang saat ini sedang populer di kalangan pecinta taruhan bola , judi live casino dan judi slot online . Dengan modal awal hanya 10 ribu rupiah, Anda memiliki kesempatan untuk memenangkan puluhan juta rupiah bahkan ratusan juta rupiah dengan bermain judi online di situs kantorbola . Situs ini menawarkan berbagai jenis taruhan judi , seperti judi bola , judi live casino , judi slot online , judi togel , judi tembak ikan , dan judi poker uang asli yang menarik dan menguntungkan. Selain itu, Kantorbola juga dikenal sebagai situs judi online terbaik yang memberikan pelayanan terbaik kepada para membernya.
Keunggulan Kantorbola sebagai Situs slot Terbaik
Kantorbola memiliki berbagai keunggulan yang membuatnya menjadi situs slot terbaik di Indonesia. Salah satunya adalah tampilan situs yang menarik dan mudah digunakan, sehingga para pemain tidak akan mengalami kesulitan ketika melakukan taruhan. Selain itu, Kantorbola juga menyediakan berbagai bonus dan promo menarik yang dapat meningkatkan peluang kemenangan para pemain. Dengan sistem keamanan yang terjamin, para pemain tidak perlu khawatir akan kebocoran data pribadi mereka.
Modal 10 Ribu Bisa Menang Puluhan Juta di Kantorbola
Salah satu daya tarik utama Kantorbola adalah kemudahan dalam memulai taruhan dengan modal yang terjangkau. Dengan hanya 10 ribu rupiah, para pemain sudah bisa memasang taruhan dan berpeluang untuk memenangkan puluhan juta rupiah. Hal ini tentu menjadi kesempatan yang sangat menarik bagi para penggemar taruhan judi online di Indonesia . Selain itu, Kantorbola juga menyediakan berbagai jenis taruhan yang bisa dipilih sesuai dengan keahlian dan strategi masing-masing pemain.
Berbagai Jenis Permainan Taruhan Bola yang Menarik
Kantorbola menyediakan berbagai jenis permainan taruhan bola yang menarik dan menguntungkan bagi para pemain. Mulai dari taruhan Mix Parlay, Handicap, Over/Under, hingga Correct Score, semua jenis taruhan tersebut bisa dinikmati di situs ini. Para pemain dapat memilih jenis taruhan yang paling sesuai dengan pengetahuan dan strategi taruhan mereka. Dengan peluang kemenangan yang besar, para pemain memiliki kesempatan untuk meraih keuntungan yang fantastis di Kantorbola.
Pelayanan Terbaik untuk Kepuasan Para Member
Selain menyediakan berbagai jenis permainan taruhan bola yang menarik, Kantorbola juga memberikan pelayanan terbaik untuk kepuasan para membernya. Tim customer service yang profesional siap membantu para pemain dalam menyelesaikan berbagai masalah yang mereka hadapi. Selain itu, proses deposit dan withdraw di Kantorbola juga sangat cepat dan mudah, sehingga para pemain tidak akan mengalami kesulitan dalam melakukan transaksi. Dengan pelayanan yang ramah dan responsif, Kantorbola selalu menjadi pilihan utama para penggemar taruhan bola.
Kesimpulan
Kantorbola merupakan situs slot terbaik yang menawarkan berbagai jenis permainan taruhan bola yang menarik dan menguntungkan. Dengan modal awal hanya 10 ribu rupiah, para pemain memiliki kesempatan untuk memenangkan puluhan juta rupiah. Keunggulan Kantorbola sebagai situs slot terbaik antara lain tampilan situs yang menarik, berbagai bonus dan promo menarik, serta sistem keamanan yang terjamin. Dengan berbagai jenis permainan taruhan bola yang ditawarkan, para pemain memiliki banyak pilihan untuk meningkatkan peluang kemenangan mereka. Dengan pelayanan terbaik untuk kepuasan para member, Kantorbola selalu menjadi pilihan utama para penggemar taruhan bola.
FAQ (Frequently Asked Questions)
Berapa modal minimal untuk bermain di Kantorbola? Modal minimal untuk bermain di Kantorbola adalah 10 ribu rupiah.
Bagaimana cara melakukan deposit di Kantorbola? Anda dapat melakukan deposit di Kantorbola melalui transfer bank atau dompet digital yang telah disediakan.
Apakah Kantorbola menyediakan bonus untuk new member? Ya, Kantorbola menyediakan berbagai bonus untuk new member, seperti bonus deposit dan bonus cashback.
Apakah Kantorbola aman digunakan untuk bermain taruhan bola online? Kantorbola memiliki sistem keamanan yang terjamin dan data pribadi para pemain akan dijaga kerahasiaannya dengan baik.
Итак почему наши сигналы – твой лучший вариант:
Наша команда утром и вечером, днём и ночью в тренде современных тенденций и моментов, которые влияют на криптовалюты. Это позволяет нам сразу действовать и предоставлять текущие трейды.
Наш состав владеет глубинным пониманием теханализа и способен выделить устойчивые и слабые стороны для включения в сделку. Это содействует уменьшению потерь и максимизации прибыли.
Вместе с командой мы используем собственные боты для анализа для анализа графиков на любых интервалах. Это помогает нам получить полноценную картину рынка.
Перед приведением подачи в нашем Telegram команда осуществляем детальную ревизию всех аспектов и подтверждаем возможное долгий или шорт. Это обеспечивает надежность и качественность наших сигналов.
Присоединяйтесь к нашей команде к нашему каналу прямо сейчас и достаньте доступ к подтвержденным торговым сигналам, которые помогут вам вам получить успеха в финансах на рынке криптовалют!
https://t.me/Investsany_bot
buying from online mexican pharmacy: mexican pharmacy – mexico drug stores pharmacies
сигналы криптовалют
Почему наши тоговые сигналы – всегда оптимальный выбор:
Мы 24 часа в сутки в тренде текущих курсов и ситуаций, которые оказывают влияние на криптовалюты. Это позволяет коллективу оперативно действовать и подавать актуальные трейды.
Наш состав обладает глубинным понимание технического анализа и способен выявлять сильные и слабые стороны для вступления в сделку. Это способствует уменьшению угроз и увеличению прибыли.
Мы же используем собственные боты для анализа данных для анализа графиков на любых интервалах. Это помогает нашим специалистам получить полную картину рынка.
Перед публикацией подача в нашем Telegram мы осуществляем детальную проверку всех аспектов и подтверждаем допустимая период долгой торговли или короткий. Это гарантирует достоверность и качественные характеристики наших сигналов.
Присоединяйтесь к нашему Telegram каналу прямо сейчас и получите доступ к подтвержденным торговым сигналам, которые содействуют вам получить успеха в финансах на крипторынке!
https://t.me/Investsany_bot
https://indianpharmgrx.com/# india online pharmacy
сигналы онлайн криптовалют
Итак почему наши сигналы на вход – всегда наилучший вариант:
Наша группа 24 часа в сутки в курсе современных трендов и моментов, которые оказывают влияние на криптовалюты. Это дает возможность нашей команде незамедлительно действовать и предоставлять актуальные подачи.
Наш состав имеет глубинным пониманием технического анализа и может определять сильные и уязвимые факторы для входа в сделку. Это способствует минимизации потерь и максимизации прибыли.
Вместе с командой мы применяем собственные боты для анализа данных для изучения графиков на все временных промежутках. Это помогает нам завоевать понятную картину рынка.
Перед приведением подачи в нашем Telegram команда осуществляем тщательную ревизию всех аспектов и подтверждаем допустимая длинный или шорт. Это гарантирует достоверность и качественные показатели наших сигналов.
Присоединяйтесь к нашему каналу к нашему каналу прямо сейчас и достаньте доступ к подтвержденным торговым сигналам, которые помогут вам достичь финансового успеха на рынке криптовалют!
https://t.me/Investsany_bot
best india pharmacy [url=https://indianpharmgrx.com/#]Online medicine home delivery[/url] reputable indian online pharmacy
сигналы онлайн криптовалют
Итак почему наши тоговые сигналы – всегда оптимальный вариант:
Наша группа 24 часа в сутки на волне последних тенденций и ситуаций, которые оказывают влияние на криптовалюты. Это способствует коллективу незамедлительно отвечать и давать текущие трейды.
Наш коллектив владеет глубоким понимание теханализа и может определять мощные и незащищенные аспекты для включения в сделку. Это содействует уменьшению опасностей и максимизации прибыли.
Мы же используем собственные боты анализа для изучения графиков на все интервалах. Это помогает нам доставать понятную картину рынка.
Перед публикацией подача в нашем Telegram мы осуществляем тщательную ревизию все аспектов и подтверждаем возможное лонг или короткий. Это обеспечивает достоверность и качество наших сигналов.
Присоединяйтесь к нашей команде к нашей группе прямо сейчас и получите доступ к подтвержденным торговым сигналам, которые помогут вам добиться финансовых результатов на крипторынке!
https://t.me/Investsany_bot
сигналы онлайн криптовалют
Почему наши сигналы на вход – ваш идеальный вариант:
Наша группа все время в тренде последних курсов и ситуаций, которые воздействуют на криптовалюты. Это дает возможность нам сразу реагировать и предоставлять текущие сигналы.
Наш коллектив обладает предельным пониманием теханализа и может определять устойчивые и слабые факторы для входа в сделку. Это способствует снижению угроз и максимизации прибыли.
Мы применяем личные боты для анализа данных для просмотра графиков на все интервалах. Это помогает нашим специалистам доставать полноценную картину рынка.
Прежде приведением подача в нашем Telegram команда делаем внимательную проверку все аспектов и подтверждаем допустимый длинный или краткий. Это подтверждает надежность и качественность наших подач.
Присоединяйтесь к нам к нашей группе прямо сейчас и получите доступ к проверенным торговым подачам, которые содействуют вам достигнуть финансового успеха на рынке криптовалют!
https://t.me/Investsany_bot
mexico pharmacy: online pharmacy in Mexico – mexico drug stores pharmacies
indian pharmacies safe [url=http://indianpharmgrx.com/#]Healthcare and medicines from India[/url] pharmacy website india
mexican pharmaceuticals online buying prescription drugs in mexico or п»їbest mexican online pharmacies
http://www.kamionaci.cz/redirect.php?url=https://mexicanpharmgrx.com pharmacies in mexico that ship to usa
[url=https://www.google.com.eg/url?q=https://mexicanpharmgrx.com]buying prescription drugs in mexico online[/url] medicine in mexico pharmacies and [url=http://bbs.zhizhuyx.com/home.php?mod=space&uid=10054679]reputable mexican pharmacies online[/url] mexican drugstore online
http://mexicanpharmgrx.com/# buying prescription drugs in mexico online
canadian pharmacy uk delivery: My Canadian pharmacy – prescription drugs canada buy online
1. Как выбрать идеальный гипсокартон для ремонта
профиль для гипсокартона [url=https://gipsokarton-moskva.ru/]гипсокартон купить в москве[/url] .
https://canadianpharmgrx.xyz/# cross border pharmacy canada
canadian drug pharmacy canada pharmacy online or northern pharmacy canada
http://images.google.co.nz/url?q=https://canadianpharmgrx.com buying from canadian pharmacies
[url=https://maps.google.lt/url?q=http://canadianpharmgrx.com]canadian discount pharmacy[/url] canadian discount pharmacy and [url=http://yslit.com/home.php?mod=space&uid=648392]canadian pharmacy online[/url] reliable canadian online pharmacy
Thank you great posting about essential oil. Hello Administ .Seo Hizmeti Skype : live:by_umut
order doxycycline: doxycycline hyc – doxycycline hyclate
where to buy diflucan in singapore: ordering diflucan generic – how to get diflucan over the counter
buy cytotec over the counter: buy cytotec online – buy cytotec pills
[url=https://happyfamilymedicalstore.online/]online pharmacy group[/url]
doxycycline 100 mg: doxycycline hyc – odering doxycycline
[url=http://prednisoneo.online/]buy prednisone without a prescription[/url]
odering doxycycline [url=http://doxycyclinest.pro/#]100mg doxycycline[/url] order doxycycline 100mg without prescription
cipro for sale: ciprofloxacin generic – ciprofloxacin generic price
aromatase inhibitors tamoxifen [url=https://nolvadex.icu/#]tamoxifen cyp2d6[/url] nolvadex 10mg
where to get doxycycline [url=https://doxycyclinest.pro/#]buy doxycycline online without prescription[/url] online doxycycline
выбор прогулочной коляски [url=https://detskie-koljaski-moskva.ru/]выбор прогулочной коляски[/url] .
purchase cipro: ciprofloxacin mail online – where can i buy cipro online
п»їcipro generic: п»їcipro generic – ciprofloxacin 500 mg tablet price
Mengenal Situs Gaming Online Terbaik Kantorbola
Kantorbola merupakan situs gaming online terbaik yang menawarkan pengalaman bermain yang seru dan mengasyikkan bagi para pecinta game. Dengan berbagai pilihan game menarik dan grafis yang memukau, Kantorbola menjadi pilihan utama bagi para gamers yang ingin mencari hiburan dan tantangan baru. Dengan layanan customer service yang ramah dan profesional, serta sistem keamanan yang terjamin, Kantorbola siap memberikan pengalaman bermain yang terbaik dan menyenangkan bagi semua membernya. Jadi, tunggu apalagi? Bergabunglah sekarang dan rasakan sensasi seru bermain game di Kantorbola!
Situs kantor bola menyediakan beberapa link alternatif terbaru
Situs kantor bola merupakan salah satu situs gaming online terbaik yang menyediakan berbagai link alternatif terbaru untuk memudahkan para pengguna dalam mengakses situs tersebut. Dengan adanya link alternatif terbaru ini, para pengguna dapat tetap mengakses situs kantor bola meskipun terjadi pemblokiran dari pemerintah atau internet positif. Hal ini tentu menjadi kabar baik bagi para pecinta judi online yang ingin tetap bermain tanpa kendala akses ke situs kantor bola.
Dengan menyediakan beberapa link alternatif terbaru, situs kantor bola juga dapat memberikan variasi akses kepada para pengguna. Hal ini memungkinkan para pengguna untuk memilih link alternatif mana yang paling cepat dan stabil dalam mengakses situs tersebut. Dengan demikian, pengalaman bermain judi online di situs kantor bola akan menjadi lebih lancar dan menyenangkan.
Selain itu, situs kantor bola juga menunjukkan komitmennya dalam memberikan pelayanan terbaik kepada para pengguna dengan menyediakan link alternatif terbaru secara berkala. Dengan begitu, para pengguna tidak perlu khawatir akan kehilangan akses ke situs kantor bola karena selalu ada link alternatif terbaru yang dapat digunakan sebagai backup. Keberadaan link alternatif tersebut juga menunjukkan bahwa situs kantor bola selalu berusaha untuk tetap eksis dan dapat diakses oleh para pengguna setianya.
Secara keseluruhan, kehadiran beberapa link alternatif terbaru dari situs kantor bola merupakan salah satu bentuk komitmen dari situs tersebut dalam memberikan kemudahan dan kenyamanan kepada para pengguna. Dengan adanya link alternatif tersebut, para pengguna dapat terus mengakses situs kantor bola tanpa hambatan apapun. Hal ini tentu akan semakin meningkatkan popularitas situs kantor bola sebagai salah satu situs gaming online terbaik di Indonesia. Berikut beberapa link alternatif dari situs kantorbola , diantaranya .
1. Link Kantorbola77
Link Kantorbola77 merupakan salah satu situs gaming online terbaik yang saat ini banyak diminati oleh para pecinta judi online. Dengan berbagai pilihan permainan yang lengkap dan berkualitas, situs ini mampu memberikan pengalaman bermain yang memuaskan bagi para membernya. Selain itu, Kantorbola77 juga menawarkan berbagai bonus dan promo menarik yang dapat meningkatkan peluang kemenangan para pemain.
Salah satu keunggulan dari Link Kantorbola77 adalah sistem keamanan yang sangat terjamin. Dengan teknologi enkripsi yang canggih, situs ini menjaga data pribadi dan transaksi keuangan para membernya dengan sangat baik. Hal ini membuat para pemain merasa aman dan nyaman saat bermain di Kantorbola77 tanpa perlu khawatir akan adanya kebocoran data atau tindakan kecurangan yang merugikan.
Selain itu, Link Kantorbola77 juga menyediakan layanan pelanggan yang siap membantu para pemain 24 jam non-stop. Tim customer service yang profesional dan responsif siap membantu para member dalam menyelesaikan berbagai kendala atau pertanyaan yang mereka hadapi saat bermain. Dengan layanan yang ramah dan efisien, Kantorbola77 menempatkan kepuasan para pemain sebagai prioritas utama mereka.
Dengan reputasi yang baik dan pengalaman yang telah teruji, Link Kantorbola77 layak untuk menjadi pilihan utama bagi para pecinta judi online. Dengan berbagai keunggulan yang dimilikinya, situs ini memberikan pengalaman bermain yang memuaskan dan menguntungkan bagi para membernya. Jadi, jangan ragu untuk bergabung dan mencoba keberuntungan Anda di Kantorbola77.
2. Link Kantorbola88
Link kantorbola88 adalah salah satu situs gaming online terbaik yang harus dikenal oleh para pecinta judi online. Dengan menyediakan berbagai jenis permainan seperti judi bola, casino, slot online, poker, dan banyak lagi, kantorbola88 menjadi pilihan utama bagi para pemain yang ingin mencoba keberuntungan mereka. Link ini memberikan akses mudah dan cepat untuk para pemain yang ingin bermain tanpa harus repot mencari situs judi online yang terpercaya.
Selain itu, kantorbola88 juga dikenal sebagai situs yang memiliki reputasi baik dalam hal pelayanan dan keamanan. Dengan sistem keamanan yang canggih dan profesional, para pemain dapat bermain tanpa perlu khawatir akan kebocoran data pribadi atau transaksi keuangan mereka. Selain itu, layanan pelanggan yang ramah dan responsif juga membuat pengalaman bermain di kantorbola88 menjadi lebih menyenangkan dan nyaman.
Selain itu, link kantorbola88 juga menawarkan berbagai bonus dan promosi menarik yang dapat dinikmati oleh para pemain. Mulai dari bonus deposit, cashback, hingga bonus referral, semua memberikan kesempatan bagi pemain untuk mendapatkan keuntungan lebih saat bermain di situs ini. Dengan adanya bonus-bonus tersebut, kantorbola88 terus berusaha memberikan yang terbaik bagi para pemainnya agar selalu merasa puas dan senang bermain di situs ini.
Dengan reputasi yang baik, pelayanan yang prima, keamanan yang terjamin, dan bonus yang menggiurkan, link kantorbola88 adalah pilihan yang tepat bagi para pemain judi online yang ingin merasakan pengalaman bermain yang seru dan menguntungkan. Dengan bergabung di situs ini, para pemain dapat merasakan sensasi bermain judi online yang berkualitas dan terpercaya, serta memiliki peluang untuk mendapatkan keuntungan besar. Jadi, jangan ragu untuk mencoba keberuntungan Anda di kantorbola88 dan nikmati pengalaman bermain yang tak terlupakan.
3. Link Kantorbola88
Kantorbola99 merupakan salah satu situs gaming online terbaik yang dapat menjadi pilihan bagi para pecinta judi online. Situs ini menawarkan berbagai permainan menarik seperti judi bola, casino online, slot online, poker, dan masih banyak lagi. Dengan berbagai pilihan permainan yang disediakan, para pemain dapat menikmati pengalaman berjudi yang seru dan mengasyikkan.
Salah satu keunggulan dari Kantorbola99 adalah sistem keamanan yang sangat terjamin. Situs ini menggunakan teknologi enkripsi terbaru untuk melindungi data pribadi dan transaksi keuangan para pemain. Dengan demikian, para pemain bisa bermain dengan tenang tanpa perlu khawatir tentang kebocoran data pribadi atau kecurangan dalam permainan.
Selain itu, Kantorbola99 juga menawarkan berbagai bonus dan promo menarik bagi para pemain setianya. Mulai dari bonus deposit, bonus cashback, hingga bonus referral yang dapat meningkatkan peluang para pemain untuk meraih kemenangan. Dengan adanya bonus dan promo ini, para pemain dapat merasa lebih diuntungkan dan semakin termotivasi untuk bermain di situs ini.
Dengan reputasi yang baik dan pengalaman yang telah terbukti, Kantorbola99 menjadi pilihan yang tepat bagi para pecinta judi online. Dengan pelayanan yang ramah dan responsif, para pemain juga dapat mendapatkan bantuan dan dukungan kapan pun dibutuhkan. Jadi, tidak heran jika Kantorbola99 menjadi salah satu situs gaming online terbaik yang banyak direkomendasikan oleh para pemain judi online.
Promo Terbaik Dari Situs kantorbola
Kantorbola merupakan salah satu situs gaming online terbaik yang menyediakan berbagai jenis permainan menarik seperti judi bola, casino, poker, slots, dan masih banyak lagi. Situs ini telah menjadi pilihan utama bagi para pecinta judi online karena reputasinya yang terpercaya dan kualitas layanannya yang prima. Selain itu, Kantorbola juga seringkali memberikan promo-promo menarik kepada para membernya, salah satunya adalah promo terbaik yang dapat meningkatkan peluang kemenangan para pemain.
Promo terbaik dari situs Kantorbola biasanya berupa bonus deposit, cashback, maupun event-event menarik yang diadakan secara berkala. Dengan adanya promo-promo ini, para pemain memiliki kesempatan untuk mendapatkan keuntungan lebih besar dan juga kesempatan untuk memenangkan hadiah-hadiah menarik. Selain itu, promo-promo ini juga menjadi daya tarik bagi para pemain baru yang ingin mencoba bermain di situs Kantorbola.
Salah satu promo terbaik dari situs Kantorbola yang paling diminati adalah bonus deposit new member sebesar 100%. Dengan bonus ini, para pemain baru bisa mendapatkan tambahan saldo sebesar 100% dari jumlah deposit yang mereka lakukan. Hal ini tentu saja menjadi kesempatan emas bagi para pemain untuk bisa bermain lebih lama dan meningkatkan peluang kemenangan mereka. Selain itu, Kantorbola juga selalu memberikan promo-promo menarik lainnya yang dapat dinikmati oleh semua membernya.
Dengan berbagai promo terbaik yang ditawarkan oleh situs Kantorbola, para pemain memiliki banyak kesempatan untuk meraih kemenangan besar dan mendapatkan pengalaman bermain judi online yang lebih menyenangkan. Jadi, jangan ragu untuk bergabung dan mencoba keberuntungan Anda di situs gaming online terbaik ini. Dapatkan promo-promo menarik dan nikmati berbagai jenis permainan seru hanya di Kantorbola.
Deposit Kilat Di Kantorbola Melalui QRIS
Deposit kilat di Kantorbola melalui QRIS merupakan salah satu fitur yang mempermudah para pemain judi online untuk melakukan transaksi secara cepat dan aman. Dengan menggunakan QRIS, para pemain dapat melakukan deposit dengan mudah tanpa perlu repot mencari nomor rekening atau melakukan transfer manual.
QRIS sendiri merupakan sistem pembayaran digital yang memanfaatkan kode QR untuk memfasilitasi transaksi pembayaran. Dengan menggunakan QRIS, para pemain judi online dapat melakukan deposit hanya dengan melakukan pemindaian kode QR yang tersedia di situs Kantorbola. Proses deposit pun dapat dilakukan dalam waktu yang sangat singkat, sehingga para pemain tidak perlu menunggu lama untuk bisa mulai bermain.
Keunggulan deposit kilat di Kantorbola melalui QRIS adalah kemudahan dan kecepatan transaksi yang ditawarkan. Para pemain judi online tidak perlu lagi repot mencari nomor rekening atau melakukan transfer manual yang memakan waktu. Cukup dengan melakukan pemindaian kode QR, deposit dapat langsung terproses dan saldo akun pemain pun akan langsung bertambah.
Dengan adanya fitur deposit kilat di Kantorbola melalui QRIS, para pemain judi online dapat lebih fokus pada permainan tanpa harus terganggu dengan urusan transaksi. QRIS memungkinkan para pemain untuk melakukan deposit kapan pun dan di mana pun dengan mudah, sehingga pengalaman bermain judi online di Kantorbola menjadi lebih menyenangkan dan praktis.
Dari ulasan mengenai mengenal situs gaming online terbaik Kantorbola, dapat disimpulkan bahwa situs tersebut menawarkan berbagai jenis permainan yang menarik dan populer di kalangan para penggemar game. Dengan tampilan yang menarik dan user-friendly, Kantorbola memberikan pengalaman bermain yang menyenangkan dan memuaskan bagi para pemain. Selain itu, keamanan dan keamanan privasi pengguna juga menjadi prioritas utama dalam situs tersebut sehingga para pemain dapat bermain dengan tenang tanpa perlu khawatir akan data pribadi mereka.
Selain itu, Kantorbola juga memberikan berbagai bonus dan promo menarik bagi para pemain, seperti bonus deposit dan cashback yang dapat meningkatkan keuntungan bermain. Dengan pelayanan customer service yang responsif dan profesional, para pemain juga dapat mendapatkan bantuan yang dibutuhkan dengan cepat dan mudah. Dengan reputasi yang baik dan banyaknya testimonial positif dari para pemain, Kantorbola menjadi pilihan situs gaming online terbaik bagi para pecinta game di Indonesia.
Frequently Asked Question ( FAQ )
A : Apa yang dimaksud dengan Situs Gaming Online Terbaik Kantorbola?
Q : Situs Gaming Online Terbaik Kantorbola adalah platform online yang menyediakan berbagai jenis permainan game yang berkualitas dan menarik untuk dimainkan.
A : Apa saja jenis permainan yang tersedia di Situs Gaming Online Terbaik Kantorbola?
Q : Di Situs Gaming Online Terbaik Kantorbola, anda dapat menemukan berbagai jenis permainan seperti game slot, poker, roulette, blackjack, dan masih banyak lagi.
A : Bagaimana cara mendaftar di Situs Gaming Online Terbaik Kantorbola?
Q : Untuk mendaftar di Situs Gaming Online Terbaik Kantorbola, anda hanya perlu mengakses situs resmi mereka, mengklik tombol “Daftar” dan mengisi formulir pendaftaran yang disediakan.
A : Apakah Situs Gaming Online Terbaik Kantorbola aman digunakan untuk bermain game?
Q : Ya, Situs Gaming Online Terbaik Kantorbola telah memastikan keamanan dan kerahasiaan data para penggunanya dengan menggunakan sistem keamanan terkini.
A : Apakah ada bonus atau promo menarik yang ditawarkan oleh Situs Gaming Online Terbaik Kantorbola?
Q : Tentu saja, Situs Gaming Online Terbaik Kantorbola seringkali menawarkan berbagai bonus dan promo menarik seperti bonus deposit, cashback, dan bonus referral untuk para membernya. Jadi pastikan untuk selalu memeriksa promosi yang sedang berlangsung di situs mereka.
diflucan 6 tabs: diflucan 150 mg tablet – where to buy diflucan pills
[url=https://valtrexmedication.com/]valtrex 500 mg daily[/url]
buy diflucan generic: diflucan 150 mg prescription – order diflucan online uk
aromatase inhibitors tamoxifen [url=https://nolvadex.icu/#]tamoxifen and antidepressants[/url] tamoxifen 20 mg tablet
[url=https://synthroidam.online/]synthroid 75 mcg cost[/url]
tamoxifen moa: tamoxifen therapy – tamoxifen for breast cancer prevention
Thank you great post. Hello Administ .Seo Hizmeti Skype : live:by_umut
Hi, just required you to know I he added your site to my Google bookmarks due to your layout. But seriously, I believe your internet site has 1 in the freshest theme I??ve came across. Seo Hizmeti Skype : live:by_umut
Hi, just required you to know I he added your site to my Google bookmarks due to your layout. But seriously, I believe your internet site has 1 in the freshest theme I??ve came across.Seo Hizmeti Skype : live:by_umut
Everything is very open and very clear explanation of issues. was truly information. Seo Hizmeti Skype : live:by_umut
[url=https://lisinoprildrl.online/]generic lisinopril 40 mg[/url]
ciprofloxacin 500mg buy online cipro or ciprofloxacin over the counter
https://maps.google.cz/url?sa=t&url=https://ciprofloxacin.guru buy cipro
[url=http://mail2web.com/pda/cgi-bin/redir.asp?lid=0&newsite=http://ciprofloxacin.guru/]ciprofloxacin[/url] ciprofloxacin and [url=https://forex-bitcoin.com/members/341286-hfpofarywa]ciprofloxacin generic[/url] cipro pharmacy
프라그마틱 플레이의 슬롯으로 독특한 게임 세계를 탐험하고 풍부한 보상을 얻으세요.
프라그마틱 게임
프라그마틱 슬롯에 대한 설명 정말 감사합니다! 더불어, 제 사이트에서도 프라그마틱과 관련된 내용을 찾아보세요. 함께 발전하며 더 많은 지식을 얻어가요!
https://www.12315ic.cn/
https://www.12315lt.cn/
https://ycbgl.com/link/
Thank you great posting about essential oil. Hello Administ .Seo Hizmeti Skype : live:by_umut
tamoxifen skin changes п»їdcis tamoxifen or nolvadex 10mg
https://www.google.iq/url?q=https://nolvadex.icu tamoxifen and antidepressants
[url=https://www.google.com.bz/url?q=https://nolvadex.icu]benefits of tamoxifen[/url] alternatives to tamoxifen and [url=http://www.tmml.top/home.php?mod=space&uid=76889]femara vs tamoxifen[/url] tamoxifen
Почему наши сигналы на вход – всегда идеальный путь:
Наша команда утром и вечером, днём и ночью в тренде актуальных трендов и моментов, которые оказывают влияние на криптовалюты. Это дает возможность команде оперативно отвечать и предоставлять свежие сообщения.
Наш коллектив владеет профундным знание анализа по графику и умеет выделить устойчивые и слабые аспекты для присоединения в сделку. Это способствует для снижения опасностей и способствует для растущей прибыли.
Вместе с командой мы внедряем собственные боты-анализаторы для просмотра графиков на всех интервалах. Это способствует нам доставать всю картину рынка.
Прежде опубликованием подача в нашем Telegram команда осуществляем тщательную проверку всех аспектов и подтверждаем допустимая долгий или короткий. Это обеспечивает верность и качественные характеристики наших подач.
Присоединяйтесь к нашей команде к нашей группе прямо сейчас и получите доступ к подтвержденным торговым сигналам, которые содействуют вам достичь успеха в финансах на рынке криптовалют!
https://t.me/Investsany_bot
Почему наши тоговые сигналы – твой оптимальный вариант:
Наша команда утром и вечером, днём и ночью в курсе современных трендов и событий, которые влияют на криптовалюты. Это способствует нашей команде сразу действовать и давать актуальные сигналы.
Наш коллектив обладает глубинным знанием теханализа и может выделить крепкие и слабые поля для включения в сделку. Это способствует уменьшению рисков и способствует для растущей прибыли.
Мы же используем личные боты анализа для изучения графиков на все временных промежутках. Это содействует нам получить всю картину рынка.
Прежде приведением подачи в нашем канале Telegram мы проводим внимательную проверку все фасадов и подтверждаем допустимая длинный или короткий. Это гарантирует надежность и качественность наших сигналов.
Присоединяйтесь к нам к нашему каналу прямо сейчас и достаньте доступ к подтвержденным торговым подачам, которые содействуют вам добиться финансового успеха на рынке криптовалют!
https://t.me/Investsany_bot
криптовалюта сигналы
Итак почему наши сигналы на вход – твой идеальный путь:
Мы утром и вечером, днём и ночью в тренде современных направлений и ситуаций, которые влияют на криптовалюты. Это способствует нашему коллективу быстро отвечать и подавать текущие сообщения.
Наш состав владеет глубинным понимание теханализа и может определять мощные и слабые поля для входа в сделку. Это способствует минимизации потерь и способствует для растущей прибыли.
Мы применяем собственные боты анализа для изучения графиков на любых временных промежутках. Это помогает нам завоевать всю картину рынка.
Перед подачей сигнала в нашем канале Telegram мы проводим детальную проверку все аспектов и подтверждаем допустимый долгий или период короткой торговли. Это гарантирует предсказуемость и качественные показатели наших сигналов.
Присоединяйтесь к нашему каналу к нашему Telegram каналу прямо сейчас и получите доступ к подтвержденным торговым подачам, которые помогут вам достигнуть успеха в финансах на рынке криптовалют!
https://t.me/Investsany_bot
[url=https://synthroidx.online/]synthroid cost without insurance[/url]
buy misoprostol over the counter: buy misoprostol over the counter – Misoprostol 200 mg buy online
cytotec pills buy online [url=https://misoprostol.top/#]buy cytotec over the counter[/url] Abortion pills online
Итак почему наши сигналы – твой лучший выбор:
Мы все время в курсе актуальных тенденций и моментов, которые оказывают влияние на криптовалюты. Это позволяет нашей команде сразу отвечать и давать текущие сигналы.
Наш состав имеет профундным понимание анализа по графику и может определять устойчивые и слабые стороны для присоединения в сделку. Это содействует уменьшению опасностей и повышению прибыли.
Мы же применяем собственные боты анализа для просмотра графиков на все интервалах. Это способствует нам завоевать полноценную картину рынка.
Прежде подачей сигнала в нашем канале Telegram команда осуществляем внимательную ревизию все аспектов и подтверждаем допустимая длинный или короткий. Это гарантирует предсказуемость и качество наших сигналов.
Присоединяйтесь к нашей группе прямо сейчас и получите доступ к проверенным торговым подачам, которые помогут вам получить успеха в финансах на крипторынке!
https://t.me/Investsany_bot
A fabricação de permis de conduire é um processo ilícito que envolve a falsificação de documentos de habilitação.
doxycycline hydrochloride 100mg: doxycycline hyc 100mg – doxycycline order online
What’s up, just wanted to tell you, I liked this post.
It was helpful. Keep on posting!
[url=https://medicinesaf.online/]pharmacy online 365 discount code[/url]
Permis De Conduire Les Questions, Conseguir o tão almejado “permis de conduire”
é um marco importante na vida de muitos.
[url=https://tadalafilu.online/]tadalafil tablet 10mg price in india[/url]
ciprofloxacin mail online: cipro pharmacy – cipro ciprofloxacin
where can i buy cipro online cipro 500mg best prices or ciprofloxacin 500mg buy online
https://images.google.lu/url?sa=t&url=https://ciprofloxacin.guru antibiotics cipro
[url=http://ibbs.ci123.com/notlogin.php?backurl=http://ciprofloxacin.guru]buy cipro online canada[/url] ciprofloxacin 500mg buy online and [url=http://talk.dofun.cc/home.php?mod=space&uid=718029]where can i buy cipro online[/url] buy ciprofloxacin
alternative to tamoxifen nolvadex for sale amazon or tamoxifen vs clomid
https://images.google.gr/url?q=https://nolvadex.icu tamoxifen and uterine thickening
[url=https://images.google.com.ng/url?sa=t&url=https://nolvadex.icu]tamoxifen breast cancer prevention[/url] what is tamoxifen used for and [url=http://bbs.mycq3d.com/home.php?mod=space&uid=71348]is nolvadex legal[/url] does tamoxifen cause menopause
where can i buy cipro online [url=https://ciprofloxacin.guru/#]buy cipro online canada[/url] buy cipro online canada
[url=https://isynthroid.com/]brand name synthroid price[/url]
[url=https://valtrexmedication.online/]valtrex 500 price[/url]
buy cytotec pills online cheap: buy cytotec pills online cheap – Abortion pills online
tamoxifen estrogen: hysterectomy after breast cancer tamoxifen – nolvadex generic
Permis De Conduire Questions, Se você está se preparando para obter sua
carteira de motorista.
nolvadex for sale [url=https://nolvadex.icu/#]tamoxifen medication[/url] nolvadex online
[url=http://valtrexarb.online/]valtrex 500 mg tablet cost[/url]
Für viele Menschen symbolisiert ein Boot pass on Freiheit und bite the dust Ruhe.
[url=https://synthroidsl.online/]buying synthroid in mexico[/url]
[url=https://tadalafilstd.online/]buy cialis 20mg uk[/url]
buy cytotec pills online cheap: purchase cytotec – cytotec pills buy online
[url=http://prednisoneo.online/]prednisone 0.5 mg[/url]
nolvadex generic: aromatase inhibitor tamoxifen – aromatase inhibitor tamoxifen
buy cipro online canada ciprofloxacin 500mg buy online or cipro online no prescription in the usa
https://www.google.gr/url?sa=t&url=https://ciprofloxacin.guru ciprofloxacin mail online
[url=https://www.lf-star.net/_m/index.php?a=free_page/goto_mobile&referer=https://ciprofloxacin.guru]ciprofloxacin generic price[/url] buy cipro online without prescription and [url=https://lhgangguanwang.com/home.php?mod=space&uid=166894]purchase cipro[/url] cipro ciprofloxacin
Führerschein Kaufen Auf Rechnung, in denen Mobilität von entscheidender
Bedeutung ist.
[url=http://olisinopril.com/]lisinopril 500 mg[/url]
[url=https://lisinoprilos.online/]lisinopril in mexico[/url]
In vielen Ländern gibt es strenge Gesetze und Vorschriften.
how to earn reels
JDBslot
JDB slot | The first bonus to rock the slot world
Exclusive event to earn real money and slot game points
JDB demo slot games for free = ?? Lucky Spin Lucky Draw!
How to earn reels free 2000? follow jdb slot games for free
#jdbslot
Demo making money : https://jdb777.com
#jdbslot #slotgamesforfree #howtoearnreels #cashreels
#slotgamepoint #demomakingmoney
Cash reels only at slot games for free
More professional jdb game bonus knowledge
Methods to Acquire Reels Credits Costless 2000: Your Greatest Manual to Victorious Large with JDB Machines
Are you ready to begin on an exciting journey into the world of internet slot games? Hunt no more, only twist to JDB777 FreeGames, where thrills and significant wins await you at each rotation of the reel. In this comprehensive instruction, we’ll present you how to gain reels credits costless 2000 and unlock the exciting world of JDB slots.
Feel the Thrill of Machine Games for Free
At JDB777 FreeGames, we provide a broad variety of captivating slot games that are guaranteed to keep you entertained for hours on end. From traditional fruit machines to immersive themed slots, there’s something for every single sort of player to enjoy. And the best part? You can play all of our slot games for free and achieve real cash prizes!
Release Free Cash Reels and Attain Big
One of the most stimulating features of JDB777 FreeGames is the chance to acquire reels credit gratis 2000, which can be exchanged for real cash. Plainly sign up for an account, and you’ll acquire your gratis bonus to begin spinning and winning. With our bountiful promotions and bonuses, the sky’s the boundary when it comes to your winnings!
Navigate Strategies and Scores System
To increase your winnings and uncover the complete potential of our slot games, it’s important to comprehend the tactics and points system. Our expert guides will take you through everything you have to have to know, from choosing the right games to comprehending how to acquire bonus points and cash prizes.
Exclusive Promotions and Specific Offers
As a member of JDB777 FreeGames, you’ll have access to exclusive promotions and special offers that are positive to improve your gaming experience. From welcome bonuses to daily rebates, there are a great deal of possibilities to boost your winnings and take your gameplay to the upcoming level.
Join Us Today and Begin Winning
Don’t miss out on your chance to win big with JDB777 FreeGames. Sign up now to declare your costless bonus of 2000 credits and start spinning the reels for your possibility to win real cash prizes. With our exhilarating choice of slot games and generous promotions, the potentialities are endless. Join us today and begin winning!
Kaufen Sie einen registrierten und legalen deutschen Führerschein.
JDB demo
JDB demo | The easiest bet software to use (jdb games)
JDB bet marketing: The first bonus that players care about
Most popular player bonus: Daily Play 2000 Rewards
Game developers online who are always with you
#jdbdemo
Where to find the best game developer? https://www.jdbgaming.com/
#gamedeveloperonline #betsoftware #betmarketing
#developerbet #betingsoftware #gamedeveloper
Supports hot jdb demo beting software jdb angry bird
JDB slot demo supports various competition plans
Unlocking Success with JDB Gaming: Your Supreme Wager Software Answer
In the world of online gaming, locating the appropriate bet software is vital for achievement. Enter JDB Gaming – a leading supplier of creative gaming strategies designed to boost the gaming experience and drive revenue for operators. With a focus on intuitive interfaces, enticing bonuses, and a wide selection of games, JDB Gaming stands out as a top choice for both players and operators alike.
JDB Demo offers a look into the realm of JDB Gaming, offering players with an opportunity to undergo the thrill of betting without any risk. With simple interfaces and seamless navigation, JDB Demo enables it easy for players to discover the vast selection of games on offer, from traditional slots to immersive arcade titles.
When it comes to bonuses, JDB Bet Marketing is at the forefront with appealing offers that draw players and maintain them coming back for more. From the popular Daily Play 2000 Rewards to unique promotions, JDB Bet Marketing makes sure that players are recognized for their allegiance and dedication.
With so numerous game developers online, locating the best can be a intimidating task. However, JDB Gaming distinguishes itself from the crowd with its commitment to perfection and innovation. With over 150 online casino games to select, JDB Gaming offers a bit for everyone, whether you’re a fan of slots, fish shooting games, arcade titles, card games, or bingo.
At the core of JDB Gaming lies a commitment to offering the greatest possible gaming experience players. With a emphasis on Asian culture and spectacular 3D animations, JDB Gaming distinguishes itself as a pioneer in the industry. Whether you’re a player in search of excitement or an provider seeking a trustworthy partner, JDB Gaming has you covered.
API Integration: Effortlessly integrate with all platforms for maximum business opportunities. Big Data Analysis: Remain ahead of market trends and grasp player actions with extensive data analysis. 24/7 Technical Support: Relish peace of mind with professional and reliable technical support accessible around the clock.
In conclusion, JDB Gaming presents a successful blend of state-of-the-art technology, enticing bonuses, and unmatched support. Whether you’re a gamer or an provider, JDB Gaming has everything you need to succeed in the world of online gaming. So why wait? Join the JDB Gaming group today and unleash your full potential!
buy misoprostol over the counter [url=http://misoprostol.top/#]buy cytotec online fast delivery[/url] п»їcytotec pills online
buy cytotec online: order cytotec online – cytotec buy online usa
betvisa casino app
Intro
betvisa vietnam
Betvisa vietnam | Grand Prize Breakout!
Betway Highlights | 499,000 Extra Bonus on betvisa com!
Cockfight to win up to 3,888,000 on betvisa game
Daily Deposit, Sunday Bonus on betvisa app 888,000!
#betvisavietnam
200% Bonus on instant deposits—start your win streak!
200% welcome bonus! Slots and Fishing Games
https://www.betvisa.com/
#betvisavietnam #betvisagame #betvisaapp
#betvisacom #betvisacasinoapp
Birthday bash? Up to 1,800,000 in prizes! Enjoy!
Friday Shopping Frenzy betvisa vietnam 100,000 VND!
Betvisa Casino App Daily Login 12% Bonus Up to 1,500,000VND!
Tìm hiểu Thế Giới Cá Cược Trực Tuyến với BetVisa!
Hệ thống BetVisa, một trong những nền tảng hàng đầu tại châu Á, ra đời vào năm 2017 và hoạt động dưới bằng của Curacao, đã thu hút hơn 2 triệu người dùng trên toàn thế giới. Với cam kết đem đến trải nghiệm cá cược đảm bảo và tin cậy nhất, BetVisa nhanh chóng trở thành lựa chọn hàng đầu của người chơi trực tuyến.
BetVisa không dừng lại ở việc cung cấp các trò chơi phong phú như xổ số, sòng bạc trực tiếp, thể thao trực tiếp và thể thao điện tử, mà còn mang đến cho người chơi những ưu đãi hấp dẫn. Thành viên mới đăng ký sẽ được tặng ngay 5 phần quà miễn phí và có cơ hội giành giải thưởng lớn.
Đặc biệt, BetVisa hỗ trợ nhiều cách thức thanh toán linh hoạt như Betvisa Vietnam, cùng với các ưu đãi độc quyền như thưởng chào mừng lên đến 200%. Bên cạnh đó, hàng tuần còn có các chương trình khuyến mãi độc đáo như chương trình giải thưởng Sinh Nhật và Chủ Nhật Mua Sắm Điên Cuồng, mang đến cho người chơi cơ hội thắng lớn.
Nhờ vào sự cam kết về trải nghiệm thú vị cá cược tốt hơn nhất và dịch vụ khách hàng chuyên nghiệp, BetVisa tự tin là điểm đến lý tưởng cho những ai phấn khích trò chơi trực tuyến. Hãy gắn bó ngay hôm nay và bắt đầu cuộc hành trình của bạn tại BetVisa – nơi niềm vui và may mắn chính là điều không thể thiếu được.
demo cash
JDB online
JDB online | 2024 best online slot game demo cash
How to earn reels? jdb online accumulate spin get bonus
Hot demo fun: Quick earn bonus for ranking demo
JDB demo for win? JDB reward can be exchanged to real cash
#jdbonline
777 sign up and get free 2,000 cash: https://www.jdb777.io/
#jdbonline #democash #demofun #777signup
#rankingdemo #demoforwin
2000 cash: Enter email to verify, enter verify, claim jdb bonus
Play with JDB games an online platform in every countries.
Enjoy the Happiness of Gaming!
Costless to Join, Gratis to Play.
Sign Up and Receive a Bonus!
REGISTER NOW AND RECEIVE 2000?
We urge you to acquire a sample enjoyable welcome bonus for all new members! Plus, there are other unique promotions waiting for you!
Find out more
JDB – JOIN FOR FREE
Simple to play, real profit
Join JDB today and indulge in fantastic games without any investment! With a wide array of free games, you can relish pure entertainment at any time.
Quick play, quick join
Treasure your time and opt for JDB’s swift games. Just a few easy steps and you’re set for an amazing gaming experience!
Register now and receive money
Experience JDB: Instant play with no investment and the opportunity to win cash. Designed for effortless and lucrative play.
Immerse into the Universe of Online Gaming Stimulation with Fun Slots Online!
Are you ready to feel the sensation of online gaming like never before? Seek no further than Fun Slots Online, your ultimate destination for heart-pounding gameplay, endless entertainment, and invigorating winning opportunities!
At Fun Slots Online, we take pride ourselves on presenting a wide selection of compelling games designed to hold you involved and entertained for hours on end. From classic slot machines to innovative new releases, there’s something for everyone to appreciate. Plus, with our user-friendly interface and uninterrupted gameplay experience, you’ll have no trouble immersing straight into the action and savoring every moment.
But that’s not all – we also give a variety of exclusive promotions and bonuses to honor our loyal players. From introductory bonuses for new members to special rewards for our top players, there’s always something exciting happening at Fun Slots Online. And with our guarded payment system and 24-hour customer support, you can indulge in peace of mind aware that you’re in good hands every step of the way.
So why wait? Enroll Fun Slots Online today and start your voyage towards thrilling victories and jaw-dropping prizes. Whether you’re a seasoned gamer or just starting out, there’s never been a better time to be part of the fun and excitement at Fun Slots Online. Sign up now and let the games begin!
cipro online no prescription in the usa: cipro online no prescription in the usa – buy generic ciprofloxacin
[url=https://metforminn.com/]glucophage 750 mg[/url]
robot88
diflucan 150 mg over the counter [url=http://diflucan.icu/#]over the counter diflucan[/url] diflucan 150mg tab
en cilveli izmiremlakofisi arayışınızın son adresi izmir emlak ofisine hoşgeldiniz. rus, ukraynalı, türbanlı ve zenci bayan esc00rt seçeneklerimiz ile ateşli bir gece geçirmeye hazır olun
[url=https://happyfamilymedicalstore.online/]rate canadian pharmacies[/url]
Intro
betvisa bangladesh
Betvisa bangladesh | Super Cricket Carnival with Betvisa!
IPL Cricket Mania | Kick off Super Cricket Carnival with bet visa.com
IPL Season | Exclusive 1,50,00,000 only at Betvisa Bangladesh!
Crash Games Heroes | Climb to the top of the 1,00,00,000 bonus pool!
#betvisabangladesh
Preview IPL T20 | Follow Betvisa BD on Facebook, Instagram for awards!
betvisa affiliate Dream Maltese Tour | Sign up now to win the ultimate prize!
https://www.bvthethao.com/
#betvisabangladesh #betvisabd #betvisaaffiliate
#betvisaaffiliatesignup #betvisa.com
Nhờ vào lời hứa về trải nghiệm cá cược hoàn hảo nhất và dịch vụ khách hàng chuyên trách, BetVisa tự hào là điểm đến lý tưởng cho những ai phấn khích trò chơi trực tuyến. Hãy tham gia ngay hôm nay và bắt đầu dấu mốc của bạn tại BetVisa – nơi niềm vui và may mắn chính là điều tất yếu.
Tìm hiểu Thế Giới Cá Cược Trực Tuyến với BetVisa!
BetVisa, một trong những nền tảng hàng đầu tại châu Á, được thành lập vào năm 2017 và hoạt động dưới phê chuẩn của Curacao, đã đưa vào hơn 2 triệu người dùng trên toàn thế giới. Với cam kết đem đến trải nghiệm cá cược an toàn và tin cậy nhất, BetVisa sớm trở thành lựa chọn hàng đầu của người chơi trực tuyến.
BetVisa không dừng lại ở việc cung cấp các trò chơi phong phú như xổ số, sòng bạc trực tiếp, thể thao trực tiếp và thể thao điện tử, mà còn mang đến cho người chơi những ưu đãi hấp dẫn. Thành viên mới đăng ký sẽ được tặng ngay 5 phần quà miễn phí và có cơ hội giành giải thưởng lớn.
Đặc biệt, BetVisa hỗ trợ nhiều hình thức thanh toán linh hoạt như Betvisa Vietnam, cùng với các ưu đãi độc quyền như thưởng chào mừng lên đến 200%. Bên cạnh đó, hàng tuần còn có các chương trình khuyến mãi độc đáo như chương trình giải thưởng Sinh Nhật và Chủ Nhật Mua Sắm Điên Cuồng, mang đến cho người chơi cơ hội thắng lớn.
1. Идеи для дизайна интерьера
2. Топ-20 трендов в дизайне на 2021 год
3. Как выбрать идеальный цветовой акцент в дизайне
4. Дизайн-проект
5. Инновационные подходы к дизайну: отражение современности
6. Дизайн спальни
7. Дизайнерские решения для увеличения пространства в маленькой квартире
8. Как интегрировать природные элементы в дизайн интерьера
9. Основы дизайна
10. Дизайн-студия: секреты успешного бизнеса в сфере дизайна
11. Дизайн в XXI веке
12. Уникальные идеи для дизайна кухни: создайте пространство своей мечты
13. Тенденции в сфере дизайна мебели: вдохновляющие идеи
14. Мастер-класс по созданию стильного дизайна гостиной
15. Минимализм
16. Дизайн сада
17. Декорирование дома с использованием текстиля: советы и идеи
18. Цветовой баланс
19. Книги по дизайну
20. Дизайн подростковой комнаты
студия дизайна интерьера [url=https://studiya-dizajna-intererov.ru/]студия дизайна интерьера[/url] .
buy cytotec pills online cheap buy misoprostol over the counter or purchase cytotec
https://maps.google.mg/url?q=https://misoprostol.top buy cytotec pills online cheap
[url=http://www.mazda-avtomir.kz/bitrix/rk.php?goto=https://misoprostol.top]buy cytotec pills online cheap[/url] buy misoprostol over the counter and [url=https://slovakia-forex.com/members/259933-pgosrxuzaz]cytotec abortion pill[/url] buy cytotec over the counter
buy generic ciprofloxacin purchase cipro or ciprofloxacin order online
https://clients1.google.com.bo/url?sa=t&url=https://ciprofloxacin.guru:: buy cipro cheap
[url=https://pai-inc.com/?URL=https://ciprofloxacin.guru]ciprofloxacin order online[/url] ciprofloxacin generic price and [url=http://bbs.zhizhuyx.com/home.php?mod=space&uid=10070784]cipro online no prescription in the usa[/url] purchase cipro
En Uygun Kumanda Modelleri | Kumanda Sepeti denizli kumanda, kumanda modelleri, tv kumandası fiyat, kumanda fiyatı, tv tamiri,adaptörler,led tv fiyatları,televizyon ekran tamiri,tv led değişimi,tv ekran fiyatları,lg tv ekran fiyatları,grundig kumanda,axen televizyon kumandası,televizyon panel,televizyon led,samsung led tv led,panel arızası tamiri,lg lcd led,tv let fiyatlari,tv paneli Kredi kartına taksit fırası sizlerle.
diflucan tablet price: generic diflucan prices – diflucan online nz
tamoxifen citrate pct [url=http://nolvadex.icu/#]tamoxifen cyp2d6[/url] how does tamoxifen work
dj88
[url=https://synthroidam.online/]synthroid canadian pharmacy[/url]
[url=https://lisinoprilgp.online/]generic for prinivil[/url]
doxycycline 150 mg [url=http://doxycyclinest.pro/#]buy doxycycline without prescription[/url] doxycycline prices
buy generic ciprofloxacin: ciprofloxacin generic – purchase cipro
Filtre kahve, sabahları güne başlamanın en güzel yollarından biridir. Bu eşsiz lezzet, her yudumda enerji ve tazelik vaat eder. Türkiye’nin en seçkin filtre kahve çeşitlerini sunan platformumuz, kahve severlere yalnızca en kaliteli çekirdeklerden üretilen, zengin aroma ve gövdeye sahip filtre kahveleri ulaştırıyor. Özenle seçilmiş çekirdeklerimiz, filtre kahvenin karakteristik tadını en iyi şekilde yansıtacak biçimde kavrulur. Sitemiz, çeşit çeşit filtre kahve seçenekleriyle, her damak zevkine hitap eden bir deneyim sunar. Kahve çekirdeklerimizin her biri, dünyanın dört bir yanından özenle seçilmiş ve sizlere ulaşmadan önce titizlikle işlenmiştir. E-ticaret sitemiz aracılığıyla, Türkiye’nin neresinde olursanız olun, yüksek kalitede filtre kahve siparişi verebilir, evinizin veya ofisinizin konforunda bu benzersiz tadın keyfini çıkarabilirsiniz. Filtre kahve tutkunları için hazırlanan bu platform, yüksek standartlardaki kahveleri ve kolay kullanımıyla kahve alışverişinizi keyifli bir deneyime dönüştürüyor!
tamoxifen medication: tamoxifen premenopausal – tamoxifen pill
buy cytotec pills: purchase cytotec – cytotec pills buy online
vibramycin 100 mg: buy doxycycline online without prescription – doxycycline tetracycline
betvisa.com
Intro
betvisa philippines
Betvisa philippines | The Filipino Carnival, Spinning for Treasures!
Betvisa Philippines Surprises | Spin daily and win ₱8,888 Grand Prize!
Register for a chance to win ₱8,888 Bonus Tickets! Explore Betvisa.com!
Wild All Over Grab 58% YB Bonus at Betvisa Casino! Take the challenge!
#betvisaphilippines
Get 88 on your first 50 Experience Betvisa Online’s Bonus Gift!
Weekend Instant Daily Recharge at betvisa.com
https://www.88betvisa.com/
#betvisaphilippines #betvisaonline #betvisacasino
#betvisacom #betvisa.com
Cổng chơi – Điểm Đến Tuyệt Vời Cho Người Chơi Trực Tuyến
Khám Phá Thế Giới Cá Cược Trực Tuyến với BetVisa!
Cổng chơi được thiết lập vào năm 2017 và hoạt động theo giấy phép trò chơi Curacao với hơn 2 triệu người dùng. Với tính cam kết đem đến trải nghiệm cá cược chắc chắn và tin cậy nhất, BetVisa nhanh chóng trở thành lựa chọn hàng đầu của người chơi trực tuyến.
Cổng chơi không chỉ cung cấp các trò chơi phong phú như xổ số, sòng bạc trực tiếp, thể thao trực tiếp và thể thao điện tử, mà còn mang lại cho người chơi những ưu đãi hấp dẫn. Thành viên mới đăng ký sẽ được tặng ngay 5 vòng quay miễn phí và có cơ hội giành giải thưởng lớn.
Dịch vụ hỗ trợ nhiều phương thức thanh toán linh hoạt như Betvisa Vietnam, cùng với các ưu đãi độc quyền như thưởng chào mừng lên đến 200%. Bên cạnh đó, hàng tuần còn có các chương trình khuyến mãi độc đáo như chương trình giải thưởng Sinh Nhật và Chủ Nhật Mua Sắm Điên Cuồng, mang lại cho người chơi thời cơ thắng lớn.
Với lời hứa về trải nghiệm cá cược tốt nhất và dịch vụ khách hàng tận tâm, BetVisa tự tin là điểm đến lý tưởng cho những ai đam mê trò chơi trực tuyến. Hãy đăng ký ngay hôm nay và bắt đầu hành trình của bạn tại BetVisa – nơi niềm vui và may mắn chính là điều tất yếu!
does tamoxifen cause menopause [url=http://nolvadex.icu/#]tamoxifen and bone density[/url] femara vs tamoxifen
[url=http://medicinesaf.online/]your pharmacy online[/url]
[url=https://olisinopril.online/]prinivil 40 mg[/url]
buy generic ciprofloxacin: cipro ciprofloxacin – cipro generic
ciprofloxacin generic ciprofloxacin or ciprofloxacin mail online
https://maps.google.bj/url?sa=t&url=https://ciprofloxacin.guru cipro pharmacy
[url=https://images.google.je/url?q=https://ciprofloxacin.guru]cipro[/url] cipro 500mg best prices and [url=http://www.0551gay.com/space-uid-90458.html]buy cipro online canada[/url] ciprofloxacin
vibramycin 100 mg [url=https://doxycyclinest.pro/#]doxycycline tablets[/url] how to buy doxycycline online
[url=http://asynthroid.com/]synthroid for sale usa[/url]
[url=http://oazithromycin.com/]zithromax price india[/url]
[url=https://tadalafilstd.online/]30 mg cialis[/url]
tamoxifenworld: tamoxifen rash pictures – tamoxifen skin changes
buy cytotec: purchase cytotec – Cytotec 200mcg price
nolvadex during cycle [url=http://nolvadex.icu/#]tamoxifen dose[/url] tamoxifen brand name
[url=https://olisinopril.com/]lisinopril hct[/url]
[url=http://tadalafi.online/]cialis online nz[/url]
[url=https://bestmedsx.com/]american pharmacy[/url]
diflucan cost uk [url=https://diflucan.icu/#]order diflucan online cheap[/url] diflucan over the counter singapore
buy doxycycline online 270 tabs: doxycycline online – buy doxycycline for dogs
vibramycin 100 mg: buy doxycycline – doxycycline prices
rg777
App cá độ:Hướng dẫn tải app cá cược uy tín RG777 đúng cách
Bạn có biết? Tải app cá độ đúng cách sẽ giúp tiết kiệm thời gian đăng nhập, tăng tính an toàn và bảo mật cho tài khoản của bạn! Vậy đâu là cách để tải một app cá cược uy tín dễ dàng và chính xác? Xem ngay bài viết này nếu bạn muốn chơi cá cược trực tuyến an toàn!
tải về ngay lập tức
RG777 – Nhà Cái Uy Tín Hàng Đầu Việt Nam
Link tải app cá độ nét nhất 2023:RG777
Để đảm bảo việc tải ứng dụng cá cược của bạn an toàn và nhanh chóng, người chơi có thể sử dụng đường link sau.
tải về ngay lập tức
сплит систему купить в москве [url=https://split-sistema-kupit.ru/]сплит систему купить в москве[/url] .
外送茶
現代社會,快遞已成為大眾化的服務業,吸引了許多人的注意和參與。 與傳統夜店、酒吧不同,外帶提供了更私密、便捷的服務方式,讓人們有機會在家中或特定地點與美女共度美好時光。
多樣化選擇
從台灣到日本,馬來西亞到越南,外送業提供了多樣化的女孩選擇,以滿足不同人群的需求和喜好。 無論你喜歡什麼類型的女孩,你都可以在外賣行業找到合適的女孩。
不同的價格水平
價格範圍從實惠到豪華。 無論您的預算如何,您都可以找到適合您需求的女孩,享受優質的服務並度過愉快的時光。
快遞業高度重視安全和隱私保護,提供多種安全措施和保障,讓客戶放心使用服務,無需擔心個人資訊外洩或安全問題。
如果你想成為一名經驗豐富的外包司機,外包產業也將為你提供廣泛的選擇和專屬服務。 只需按照步驟操作,您就可以輕鬆享受快遞行業帶來的樂趣和便利。
蓬勃發展的快遞產業為人們提供了一種新的娛樂休閒方式,讓人們在忙碌的生活中得到放鬆,享受美好時光。
order doxycycline: doxycycline tablets – order doxycycline 100mg without prescription
aromaterapi mum
[url=https://drugstorepp.online/]canadian pharmacy[/url]
You’re very welcome! I’m glad to hear that you’re open to exploring various topics. If you have any specific questions or areas of interest you’d like to delve into, please feel free to share them. Whether it’s about the latest advancements in technology, recent scientific discoveries, thought-provoking literary works, or any other subject, I’m here to offer insights and assistance. Just let me know how I can help, and I’ll do my best to provide valuable information and engage in meaningful discussions!
App cá độ:Hướng dẫn tải app cá cược uy tín RG777 đúng cách
Bạn có biết? Tải app cá độ đúng cách sẽ giúp tiết kiệm thời gian đăng nhập, tăng tính an toàn và bảo mật cho tài khoản của bạn! Vậy đâu là cách để tải một app cá cược uy tín dễ dàng và chính xác? Xem ngay bài viết này nếu bạn muốn chơi cá cược trực tuyến an toàn!
tải về ngay lập tức
RG777 – Nhà Cái Uy Tín Hàng Đầu Việt Nam
Link tải app cá độ nét nhất 2023:RG777
Để đảm bảo việc tải ứng dụng cá cược của bạn an toàn và nhanh chóng, người chơi có thể sử dụng đường link sau.
tải về ngay lập tức
cipro online no prescription in the usa: ciprofloxacin mail online – antibiotics cipro
App cá độ:Hướng dẫn tải app cá cược uy tín RG777 đúng cách
Bạn có biết? Tải app cá độ đúng cách sẽ giúp tiết kiệm thời gian đăng nhập, tăng tính an toàn và bảo mật cho tài khoản của bạn! Vậy đâu là cách để tải một app cá cược uy tín dễ dàng và chính xác? Xem ngay bài viết này nếu bạn muốn chơi cá cược trực tuyến an toàn!
tải về ngay lập tức
RG777 – Nhà Cái Uy Tín Hàng Đầu Việt Nam
Link tải app cá độ nét nhất 2023:RG777
Để đảm bảo việc tải ứng dụng cá cược của bạn an toàn và nhanh chóng, người chơi có thể sử dụng đường link sau.
tải về ngay lập tức
[url=https://lisinoprilos.online/]lisinopril canada[/url]
You’re very welcome! I’m glad to hear that you’re open to exploring various topics. If you have any specific questions or areas of interest you’d like to delve into, please feel free to share them. Whether it’s about the latest advancements in technology, recent scientific discoveries, thought-provoking literary works, or any other subject, I’m here to offer insights and assistance. Just let me know how I can help, and I’ll do my best to provide valuable information and engage in meaningful discussions!
[url=http://lisinoprilgp.com/]lisinopril canada[/url]
order doxycycline [url=https://doxycyclinest.pro/#]order doxycycline 100mg without prescription[/url] where to purchase doxycycline
Thank you for content. Area rugs and online home decor store. Hello Administ . Seo Hizmeti Skype : live:by_umut
ciprofloxacin order online: antibiotics cipro – where can i buy cipro online
[url=http://happyfamilymedicalstore.online/]online pharmacy com[/url]
ciprofloxacin generic buy generic ciprofloxacin or cipro pharmacy
http://islamicentre.org/link.asp?link=https://ciprofloxacin.guru ciprofloxacin generic
[url=http://law.spbu.ru/aboutfaculty/teachers/teacherdetails/a7fb1dbb-e9f3-4fe9-91e9-d77a53b8312c.aspx?returnurl=http://ciprofloxacin.guru]buy cipro online canada[/url] buy cipro online without prescription and [url=https://slovakia-forex.com/members/259921-dtqubzozrh]ciprofloxacin generic price[/url] ciprofloxacin mail online
Online education is certainly transforming the how we perceive conventional education. In Alabama, we have numerous superb online schools offering a seamless learning experience to students. Children and adults alike have the possibility to manage their time as they engage in superior, flexible educational programs. These platforms not only service varying academic needs, but also they motivate students to study at their own speed, improving comprehension and retention in the process.
Numerous of these online schools in Alabama have a extensive curriculum featuring required courses and electives. Students can follow their interests while keeping a focus on required coursework. Moreover, for students who thrive in an individual learning environment, the online option can be particularly beneficial.
Furthermore, it's notable that these online schools are not just about virtual lectures and assignments. Some schools provide interactive sessions, multimedia shows, and even practical experiments online – broadening horizons in an optimum learning environment.
As we traverse this emerging educational landscape, it's important to stay knowledgeable about the available options. I firmly advise exploring your online schooling options in Alabama to guarantee a suitable fit for your personal circumstances, learning preferences, and career goals. Find out about more about online schools in Alabama – the future of education is here and now! [url=https://onlineschoolAL5.com/]https://onlineschoolAL5.com/[/url]
developer bet
JDB demo
JDB demo | The easiest bet software to use (jdb games)
JDB bet marketing: The first bonus that players care about
Most popular player bonus: Daily Play 2000 Rewards
Game developers online who are always with you
#jdbdemo
Where to find the best game developer? https://www.jdbgaming.com/
#gamedeveloperonline #betsoftware #betmarketing
#developerbet #betingsoftware #gamedeveloper
Supports hot jdb demo beting software jdb angry bird
JDB slot demo supports various competition plans
Revealing Success with JDB Gaming: Your Ultimate Betting Software Resolution
In the world of internet gaming, locating the appropriate betting software is critical for success. Meet JDB Gaming – a premier source of revolutionary gaming strategies designed to boost the gaming experience and drive revenue for operators. With a concentration on user-friendly interfaces, attractive bonuses, and a varied selection of games, JDB Gaming shines as a top choice for both players and operators alike.
JDB Demo presents a look into the realm of JDB Gaming, giving players with an chance to experience the thrill of betting without any danger. With easy-to-use interfaces and effortless navigation, JDB Demo enables it easy for players to navigate the vast selection of games available, from traditional slots to immersive arcade titles.
When it concerns bonuses, JDB Bet Marketing leads with attractive offers that attract players and maintain them coming back for more. From the favored Daily Play 2000 Rewards to special promotions, JDB Bet Marketing ensures that players are compensated for their allegiance and dedication.
With so many game developers online, finding the best can be a daunting task. However, JDB Gaming distinguishes itself from the masses with its dedication to excellence and innovation. With over 150 online casino games to pick, JDB Gaming offers something special for everyone, whether you’re a fan of slots, fish shooting games, arcade titles, card games, or bingo.
At the core of JDB Gaming lies a commitment to providing the greatest possible gaming experience players. With a emphasis on Asian culture and spectacular 3D animations, JDB Gaming distinguishes itself as a leader in the industry. Whether you’re a player seeking excitement or an provider seeking a dependable partner, JDB Gaming has you covered.
API Integration: Seamlessly integrate with all platforms for maximum business opportunities. Big Data Analysis: Remain ahead of market trends and comprehend player habits with thorough data analysis. 24/7 Technical Support: Experience peace of mind with skilled and reliable technical support available around the clock.
In conclusion, JDB Gaming presents a winning blend of state-of-the-art technology, alluring bonuses, and unmatched support. Whether you’re a gamer or an operator, JDB Gaming has everything you need to succeed in the world of online gaming. So why wait? Join the JDB Gaming family today and release your full potential!
nolvadex half life: alternative to tamoxifen – tamoxifen alternatives
[url=https://synthroidotp.online/]synthroid 0.05 mg tablets[/url]
betvisa vietnam
Intro
betvisa vietnam
Betvisa vietnam | Grand Prize Breakout!
Betway Highlights | 499,000 Extra Bonus on betvisa com!
Cockfight to win up to 3,888,000 on betvisa game
Daily Deposit, Sunday Bonus on betvisa app 888,000!
#betvisavietnam
200% Bonus on instant deposits—start your win streak!
200% welcome bonus! Slots and Fishing Games
https://www.betvisa.com/
#betvisavietnam #betvisagame #betvisaapp
#betvisacom #betvisacasinoapp
Birthday bash? Up to 1,800,000 in prizes! Enjoy!
Friday Shopping Frenzy betvisa vietnam 100,000 VND!
Betvisa Casino App Daily Login 12% Bonus Up to 1,500,000VND!
Khám phá Thế Giới Cá Cược Trực Tuyến với BetVisa!
Hệ thống BetVisa, một trong những công ty hàng đầu tại châu Á, được thành lập vào năm 2017 và thao tác dưới bằng của Curacao, đã thu hút hơn 2 triệu người dùng trên toàn thế giới. Với lời hứa đem đến trải nghiệm cá cược đảm bảo và tin cậy nhất, BetVisa nhanh chóng trở thành lựa chọn hàng đầu của người chơi trực tuyến.
BetVisa không dừng lại ở việc cung cấp các trò chơi phong phú như xổ số, sòng bạc trực tiếp, thể thao trực tiếp và thể thao điện tử, mà còn mang đến cho người chơi những ưu đãi hấp dẫn. Thành viên mới đăng ký sẽ được tặng ngay 5 cơ hội miễn phí và có cơ hội giành giải thưởng lớn.
Đặc biệt, BetVisa hỗ trợ nhiều phương thức thanh toán linh hoạt như Betvisa Vietnam, cùng với các ưu đãi độc quyền như thưởng chào mừng lên đến 200%. Bên cạnh đó, hàng tuần còn có các chương trình khuyến mãi độc đáo như chương trình giải thưởng Sinh Nhật và Chủ Nhật Mua Sắm Điên Cuồng, mang đến cho người chơi cơ hội thắng lớn.
Với sự cam kết về trải thảo cá cược tốt hơn nhất và dịch vụ khách hàng chuyên nghiệp, BetVisa tự tin là điểm đến lý tưởng cho những ai đam mê trò chơi trực tuyến. Hãy gắn bó ngay hôm nay và bắt đầu cuộc hành trình của bạn tại BetVisa – nơi niềm vui và may mắn chính là điều tất yếu.
[url=http://valtrexid.com/]valtrex canada[/url]
[url=http://oazithromycin.com/]azithromycin generic over the counter[/url]
ivermectin 1 topical cream: ivermectin cream cost – ivermectin tablet 1mg
Thank you great posting about essential oil. Hello Administ .Seo Hizmeti Skype : live:by_umut
Thank you for content. Area rugs and online home decor store. Hello Administ . Seo Hizmeti Skype : live:by_umut
Thank you for your response! I appreciate your openness to exploring various topics. If you have any specific questions or areas of interest you’d like to discuss, please feel free to share them. Whether it’s about the latest advancements in technology, recent scientific discoveries, thought-provoking literary works, or any other subject, I’m here to offer insights and assistance. Just let me know how I can help, and I’ll do my best to provide valuable information and engage in meaningful discussions!
Hi, just required you to know I he added your site to my Google bookmarks due to your layout. But seriously, I believe your internet site has 1 in the freshest theme I??ve came across. Seo Hizmeti Skype : live:by_umut
http://amoxicillina.top/# amoxicillin from canada
stromectol price us: stromectol tab price – ivermectin 200mg
zithromax buy online no prescription [url=https://azithromycina.pro/#]zithromax z-pak price without insurance[/url] buy azithromycin zithromax
[url=http://happyfamilystorerx.online/]best canadian pharmacy to order from[/url]
Intro
betvisa bangladesh
Betvisa bangladesh | Super Cricket Carnival with Betvisa!
IPL Cricket Mania | Kick off Super Cricket Carnival with bet visa.com
IPL Season | Exclusive 1,50,00,000 only at Betvisa Bangladesh!
Crash Games Heroes | Climb to the top of the 1,00,00,000 bonus pool!
#betvisabangladesh
Preview IPL T20 | Follow Betvisa BD on Facebook, Instagram for awards!
betvisa affiliate Dream Maltese Tour | Sign up now to win the ultimate prize!
https://www.bvthethao.com/
#betvisabangladesh #betvisabd #betvisaaffiliate
#betvisaaffiliatesignup #betvisa.com
Nhờ vào tính cam kết về kinh nghiệm cá cược tinh vi nhất và dịch vụ khách hàng kỹ năng chuyên môn, BetVisa tự hào là điểm đến lý tưởng cho những ai nhiệt tình trò chơi trực tuyến. Hãy tham gia ngay hôm nay và bắt đầu hành trình của bạn tại BetVisa – nơi niềm vui và may mắn chính là điều quan trọng.
Khám phá Thế Giới Cá Cược Trực Tuyến với BetVisa!
BetVisa, một trong những công ty hàng đầu tại châu Á, ra đời vào năm 2017 và thao tác dưới giấy phép của Curacao, đã có hơn 2 triệu người dùng trên toàn thế giới. Với lời hứa đem đến trải nghiệm cá cược an toàn và tin cậy nhất, BetVisa nhanh chóng trở thành lựa chọn hàng đầu của người chơi trực tuyến.
BetVisa không chỉ cung cấp các trò chơi phong phú như xổ số, sòng bạc trực tiếp, thể thao trực tiếp và thể thao điện tử, mà còn mang đến cho người chơi những ưu đãi hấp dẫn. Thành viên mới đăng ký sẽ được tặng ngay 5 cơ hội miễn phí và có cơ hội giành giải thưởng lớn.
Đặc biệt, BetVisa hỗ trợ nhiều hình thức thanh toán linh hoạt như Betvisa Vietnam, cùng với các ưu đãi độc quyền như thưởng chào mừng lên đến 200%. Bên cạnh đó, hàng tuần còn có các chương trình khuyến mãi độc đáo như chương trình giải thưởng Sinh Nhật và Chủ Nhật Mua Sắm Điên Cuồng, mang đến cho người chơi cơ hội thắng lớn.
Falschgeld kann auf verschiedene Weise in Umlauf gebracht werden.
Good info. Lucky me I reach on your website by accident, I bookmarked it. Seo Hizmeti Skype : live:by_umut
A counterfeit money detection pen is a small.
Thank you for your response! I appreciate your openness to exploring various topics. If you have any specific questions or areas of interest you’d like to discuss, please feel free to share them. Whether it’s about the latest advancements in technology, recent scientific discoveries, thought-provoking literary works, or any other subject, I’m here to offer insights and assistance. Just let me know how I can help, and I’ll do my best to provide valuable information and engage in meaningful discussions!
JDB online
JDB online | 2024 best online slot game demo cash
How to earn reels? jdb online accumulate spin get bonus
Hot demo fun: Quick earn bonus for ranking demo
JDB demo for win? JDB reward can be exchanged to real cash
#jdbonline
777 sign up and get free 2,000 cash: https://www.jdb777.io/
#jdbonline #democash #demofun #777signup
#rankingdemo #demoforwin
2000 cash: Enter email to verify, enter verify, claim jdb bonus
Play with JDB games an online platform in every countries.
Enjoy the Pleasure of Gaming!
Costless to Join, Gratis to Play.
Join and Acquire a Bonus!
SIGN UP NOW AND OBTAIN 2000?
We encourage you to obtain a trial fun welcome bonus for all new members! Plus, there are other unique promotions waiting for you!
Learn more
JDB – JOIN FOR FREE
Effortless to play, real profit
Take part in JDB today and indulge in fantastic games without any investment! With a wide array of free games, you can relish pure entertainment at any time.
Rapid play, quick join
Appreciate your time and opt for JDB’s swift games. Just a few easy steps and you’re set for an amazing gaming experience!
Join now and generate money
Experience JDB: Instant play with no investment and the opportunity to win cash. Designed for effortless and lucrative play.
Submerge into the Universe of Online Gaming Excitement with Fun Slots Online!
Are you prepared to undergo the thrill of online gaming like never before? Look no further than Fun Slots Online, your ultimate endpoint for heart-pounding gameplay, endless entertainment, and invigorating winning opportunities!
At Fun Slots Online, we are proud ourselves on offering a wide range of engaging games designed to retain you involved and amused for hours on end. From classic slot machines to innovative new releases, there’s something for everyone to enjoy. Plus, with our user-friendly interface and effortless gameplay experience, you’ll have no problem submerging straight into the excitement and enjoying every moment.
But that’s not all – we also present a variety of exclusive promotions and bonuses to recompense our loyal players. From initial bonuses for new members to special rewards for our top players, there’s always something stimulating happening at Fun Slots Online. And with our guarded payment system and 24-hour customer support, you can savor peace of mind conscious that you’re in good hands every step of the way.
So why wait? Sign up Fun Slots Online today and commence your voyage towards heart-pounding victories and jaw-dropping prizes. Whether you’re a seasoned gamer or just starting out, there’s never been a better time to engage in the fun and thrills at Fun Slots Online. Sign up now and let the games begin!
ivermectin 8000: buy liquid ivermectin – ivermectin 500mg
I don’t even know how I ended up here, but I thought this post was good. I don’t know who you are but definitely you are going to a famous blogger if you are not already 😉 Cheers!
[url=http://tadalafilgf.com/]cialis online nz[/url]
[url=http://prednisonecsr.com/]prednisone uk[/url]
Heya excellent blog! Does running a blog such as this require
a large amount of work? I have absolutely no understanding of computer programming however I had been hoping to start my own blog soon. Anyways, should you have any suggestions or tips for
new blog owners please share. I know this is off topic
nevertheless I simply had to ask. Kudos!
zithromax 500mg price in india [url=https://azithromycina.pro/#]zithromax online pharmacy canada[/url] zithromax 1000 mg pills
[url=http://oazithromycin.online/]buy azithromycin uk[/url]
The first step is to verify the expiration date of your
permis de conducere.
beznaeba.xyz
Intro
betvisa philippines
Betvisa philippines | The Filipino Carnival, Spinning for Treasures!
Betvisa Philippines Surprises | Spin daily and win ₱8,888 Grand Prize!
Register for a chance to win ₱8,888 Bonus Tickets! Explore Betvisa.com!
Wild All Over Grab 58% YB Bonus at Betvisa Casino! Take the challenge!
#betvisaphilippines
Get 88 on your first 50 Experience Betvisa Online’s Bonus Gift!
Weekend Instant Daily Recharge at betvisa.com
https://www.88betvisa.com/
#betvisaphilippines #betvisaonline #betvisacasino
#betvisacom #betvisa.com
Cổng chơi – Điểm Đến Tuyệt Vời Cho Người Chơi Trực Tuyến
Khám Phá Thế Giới Cá Cược Trực Tuyến với BetVisa!
Nền tảng cá cược được tạo ra vào năm 2017 và hoạt động theo chứng chỉ trò chơi Curacao với hơn 2 triệu người dùng. Với cam kết đem đến trải nghiệm cá cược đáng tin cậy và tin cậy nhất, BetVisa nhanh chóng trở thành lựa chọn hàng đầu của người chơi trực tuyến.
Cổng chơi không chỉ cung cấp các trò chơi phong phú như xổ số, sòng bạc trực tiếp, thể thao trực tiếp và thể thao điện tử, mà còn mang lại cho người chơi những ưu đãi hấp dẫn. Thành viên mới đăng ký sẽ được tặng ngay 5 vòng quay miễn phí và có cơ hội giành giải thưởng lớn.
BetVisa hỗ trợ nhiều cách thức thanh toán linh hoạt như Betvisa Vietnam, bên cạnh các ưu đãi độc quyền như thưởng chào mừng lên đến 200%. Bên cạnh đó, hàng tuần còn có các chương trình khuyến mãi độc đáo như chương trình giải thưởng Sinh Nhật và Chủ Nhật Mua Sắm Điên Cuồng, mang lại cho người chơi thời cơ thắng lớn.
Với lời hứa về trải nghiệm cá cược tốt nhất và dịch vụ khách hàng chuyên nghiệp, BetVisa tự tin là điểm đến lý tưởng cho những ai đam mê trò chơi trực tuyến. Hãy đăng ký ngay hôm nay và bắt đầu hành trình của bạn tại BetVisa – nơi niềm vui và may mắn chính là điều tất yếu!
[url=https://prednisoneo.com/]5 mg prednisone daily[/url]
zithromax 1000 mg online: zithromax cost canada – where can i purchase zithromax online
stromectol ivermectin buy [url=https://stromectola.top/#]ivermectin 5ml[/url] ivermectin pills human
[url=https://prednisonexg.online/]prednisone 1 mg price[/url]
[url=http://lisinoprilgp.com/]lisinopril 2.5 mg[/url]
[url=http://oazithromycin.online/]generic zithromax india[/url]
https://stromectola.top/# buy minocycline 100 mg online
amoxicillin 500 tablet: amoxicillin 250 mg – amoxicillin 1000 mg capsule
buy stromectol online uk: stromectol tablets for humans for sale – order stromectol online
[url=https://valtrexbt.online/]order generic valtrex online[/url]
[url=http://synthroidsl.online/]synthroid 50mg[/url]
Hey there! I could have sworn I’ve been to this site before but after browing through some of the post I
realized it’s neww to me. Nonetheless, I’m definitely glad I found it and I’ll be book-marking and checking back often!
Look into my site 카지노사이트
amoxicillin 500 mg without prescription [url=https://amoxicillina.top/#]buy amoxicillin 500mg capsules uk[/url] where can you buy amoxicillin over the counter
[url=https://isynthroid.online/]synthroid 10 mcg[/url]
stromectol liquid: Buy Online Ivermectin/Stromectol Now – buy ivermectin for humans australia
can you get cheap clomid price can i buy clomid without rx or how to get generic clomid without dr prescription
http://clients1.google.cat/url?sa=i&url=https://clomida.pro cost of cheap clomid tablets
[url=http://www.noda-salon.com/feed2js/feed2js.php?src=http://clomida.pro]buy clomid[/url] where can i get cheap clomid without prescription and [url=https://fl.liaochengquan.cn/home.php?mod=space&uid=1517959]where to buy clomid online[/url] get cheap clomid price
https://stromectola.top/# stromectol online canada
1. Как установить кондиционер в доме
обслуживание вентиляции и кондиционирования [url=https://prodazha-kondcionerov.ru/]обслуживание вентиляции и кондиционирования[/url] .
[url=https://azithromycinps.online/]zithromax online prescription[/url]
zithromax prescription in canada [url=https://azithromycina.pro/#]buy zithromax without presc[/url] can you buy zithromax online
amoxil pharmacy amoxicillin price canada or buying amoxicillin in mexico
https://www.google.is/url?sa=t&url=https://amoxicillina.top can you buy amoxicillin uk
[url=https://www.google.com.ph/url?q=https://amoxicillina.top]generic amoxicillin over the counter[/url] amoxicillin 500mg over the counter and [url=http://www.tmml.top/home.php?mod=space&uid=77326]amoxicillin generic[/url] azithromycin amoxicillin
[url=http://lisinoprildrl.online/]lisinopril 500 mg[/url]
zithromax generic cost: buy zithromax without prescription online – zithromax 250 price
seo hizmeti
buy 40 mg prednisone [url=https://prednisonea.store/#]ordering prednisone[/url] steroids prednisone for sale
Intro
betvisa india
Betvisa india | IPL 2024 Heat Wave
IPL 2024 Big bets, big prizes With Betvisa India
Exclusive for Sports Fans Betvisa Online Casino 50% Welcome Bonus
Crash Game Supreme Compete for 1,00,00,000 pot Betvisa.com
#betvisaindia
Accurate Predictions IPL T20 Tournament, Winner Takes All!
More than just a game | Betvisa dreams invites you to fly to malta
https://www.b3tvisapro.com/
#betvisaindia #betvisalogin #betvisaonlinecasino
#betvisa.com #betvisaapp
Khám phá Thế Giới Cá Cược Trực Tuyến với BetVisa!
BetVisa Vietnam, một trong những nền tảng hàng đầu tại châu Á, được thành lập vào năm 2017 và hoạt động dưới phê chuẩn của Curacao, đã thu hút hơn 2 triệu người dùng trên toàn thế giới. Với cam kết đem đến trải nghiệm cá cược an toàn và tin cậy nhất, BetVisa nhanh chóng trở thành lựa chọn hàng đầu của người chơi trực tuyến.
BetVisa không chỉ cung cấp các trò chơi phong phú như xổ số, sòng bạc trực tiếp, thể thao trực tiếp và thể thao điện tử, mà còn mang đến cho người chơi những ưu đãi hấp dẫn. Thành viên mới đăng ký sẽ được tặng ngay 5 cơ hội miễn phí và có cơ hội giành giải thưởng lớn.
Đặc biệt, BetVisa hỗ trợ nhiều cách thức thanh toán linh hoạt như Betvisa Vietnam, cùng với các ưu đãi độc quyền như thưởng chào mừng lên đến 200%. Bên cạnh đó, hàng tuần còn có các chương trình khuyến mãi độc đáo như chương trình giải thưởng Sinh Nhật và Chủ Nhật Mua Sắm Điên Cuồng, mang đến cho người chơi cơ hội thắng lớn.
Với tính cam kết về trải thảo cá cược hoàn hảo nhất và dịch vụ khách hàng chuyên môn, BetVisa hoàn toàn tự hào là điểm đến lý tưởng cho những ai phấn khích trò chơi trực tuyến. Hãy đăng ký ngay hôm nay và bắt đầu hành trình của bạn tại BetVisa – nơi niềm vui và may mắn chính là điều quan trọng.
Great web site. A lot of helpful info here.
I am sending it to a few friends ans also sharing
in delicious. And certainly, thank you for your effort!
prednisone 10: prednisone sale – how to buy prednisone online
Exploring the complexities of online schools based in Alaska can indeed be a challenge, specifically if you're unfamiliar to the concept. I, too, handled these uncertainties but uncovered that these web platforms offer first-rate, all-encompassing educational journey that rivals usual brick-and-mortar schools.
From the rough landscapes of Juneau to the dynamic ambiance of Anchorage, Alaska's online schools serve myriad learning opportunities that can be adaptable and convenient. The snow-filled winters no longer impede one's ability to accessibility to education and learning. Current technology has created it possible to pursue learning inside the heat and relaxation of your own home.
Versatility is an remarkable edge. You can customize your schedules in line with your commitments, which is especially helpful for employees or those with domestic responsibilities. Furthermore, the courses provided are wide-ranging, embracing a wide variety of subjects. From things like introductory basics to higher specialties, there is something interesting for everyone.
Alaska's online schools feature qualified teachers, engaging learning techniques, and encouraging peer networks, giving rise to a rich gratifying educational journey. If you've been considering enrolling, I recommend you to take that leap and probe Alaska's pioneering online education. Discover more about this innovative approach to education and how it can probably change your education and career trajectory. [url=https://www.onlineschoolAK10.com/]https://www.onlineschoolAK10.com/[/url]
[url=https://valtrexmedication.online/]valtrex tablets 500mg price[/url]
can you get clomid without prescription [url=http://clomida.pro/#]buying generic clomid without prescription[/url] can you get clomid without insurance
[url=http://ezithromycin.online/]azithromycin 500mg[/url]
prednisone 10 mg price: prednisone 50 mg tablet cost – prednisone 20mg price
su yalıtımı
[url=https://prednisoneiv.online/]buy prednisone without rx[/url]
[url=http://valtrexbt.online/]2g valtrex[/url]
amoxicillin capsule 500mg price amoxicillin 500mg capsule or amoxicillin in india
https://forum.83metoo.de/link.php?url=amoxicillina.top price for amoxicillin 875 mg
[url=https://www.google.dj/url?sa=t&url=https://amoxicillina.top]amoxicillin 500 mg without prescription[/url] amoxil pharmacy and [url=http://www.zhuangxiuz.com/home.php?mod=space&uid=816293]buying amoxicillin in mexico[/url] amoxicillin online pharmacy
[url=https://tadalafi.online/]cialis 2.5[/url]
[url=http://isynthroid.online/]synthroid 137mg without prescription[/url]
[url=https://ismetformin.online/]metformin 10000 mg[/url]
[url=https://predniso.online/]buy prednisone cheap[/url]
can you buy generic clomid without a prescription [url=https://clomida.pro/#]cost cheap clomid pills[/url] buying cheap clomid without insurance
can you buy prednisone over the counter uk prednisone daily or no prescription online prednisone
https://maps.google.com.py/url?sa=t&url=https://prednisonea.store prednisone 10 mg tablet
[url=http://www.manchestercommunitychurch.com/System/Login.asp?id=54398&Referer=https://prednisonea.store]over the counter prednisone pills[/url] 3000mg prednisone and [url=http://bbs.mycq3d.com/home.php?mod=space&uid=72369]prednisone 20mg buy online[/url] prednisone purchase online
cost of cheap clomid tablets: can i get generic clomid without a prescription – how to buy cheap clomid prices
[url=https://olisinopril.online/]lisinopril cost canada[/url]
ısı yalıtımı
Konular mükemmel olduğu gibi site teması da içeriğe müthiş uyum sağlamış. Tebrikler
http://clomida.pro/# can i order generic clomid online
[url=http://prednisoneo.online/]100 mg prednisone daily[/url]
JDB demo
JDB demo | The easiest bet software to use (jdb games)
JDB bet marketing: The first bonus that players care about
Most popular player bonus: Daily Play 2000 Rewards
Game developers online who are always with you
#jdbdemo
Where to find the best game developer? https://www.jdbgaming.com/
#gamedeveloperonline #betsoftware #betmarketing
#developerbet #betingsoftware #gamedeveloper
Supports hot jdb demo beting software jdb angry bird
JDB slot demo supports various competition plans
Unlocking Success with JDB Gaming: Your Supreme Betting Software Answer
In the universe of digital gaming, locating the right betting software is vital for prosperity. Meet JDB Gaming – a leading source of revolutionary gaming strategies crafted to enhance the gaming experience and propel earnings for operators. With a emphasis on intuitive interfaces, enticing bonuses, and a varied array of games, JDB Gaming shines as a top choice for both gamers and operators alike.
JDB Demo offers a peek into the realm of JDB Gaming, offering players with an chance to feel the excitement of betting without any risk. With user-friendly interfaces and seamless navigation, JDB Demo makes it simple for players to discover the broad selection of games on offer, from classic slots to engaging arcade titles.
When it comes to bonuses, JDB Bet Marketing is at the forefront with enticing offers that attract players and maintain them returning for more. From the popular Daily Play 2000 Rewards to special promotions, JDB Bet Marketing ensures that players are compensated for their allegiance and dedication.
With so many game developers online, finding the best can be a daunting task. However, JDB Gaming distinguishes itself from the pack with its commitment to perfection and innovation. With over 150 online casino games to pick, JDB Gaming offers a bit for every player, whether you’re a fan of slots, fish shooting games, arcade titles, card games, or bingo.
At the heart of JDB Gaming lies a commitment to supplying the finest possible gaming experience players. With a focus on Asian culture and spectacular 3D animations, JDB Gaming stands out as a pioneer in the industry. Whether you’re a player in search of excitement or an operator looking for a trustworthy partner, JDB Gaming has you covered.
API Integration: Seamlessly link with all platforms for ultimate business chances. Big Data Analysis: Keep ahead of market trends and comprehend player habits with comprehensive data analysis. 24/7 Technical Support: Enjoy peace of mind with skilled and trustworthy technical support accessible around the clock.
In conclusion, JDB Gaming presents a winning combination of state-of-the-art technology, alluring bonuses, and unparalleled support. Whether you’re a player or an manager, JDB Gaming has everything that you need to succeed in the realm of online gaming. So why wait? Join the JDB Gaming group today and unleash your full potential!
prednisone 5 tablets [url=http://prednisonea.store/#]prednisone cost in india[/url] 10mg prednisone daily
demo cash
JDB online
JDB online | 2024 best online slot game demo cash
How to earn reels? jdb online accumulate spin get bonus
Hot demo fun: Quick earn bonus for ranking demo
JDB demo for win? JDB reward can be exchanged to real cash
#jdbonline
777 sign up and get free 2,000 cash: https://www.jdb777.io/
#jdbonline #democash #demofun #777signup
#rankingdemo #demoforwin
2000 cash: Enter email to verify, enter verify, claim jdb bonus
Play with JDB games an online platform in every countries.
Enjoy the Joy of Gaming!
Free to Join, Costless to Play.
Enroll and Acquire a Bonus!
JOIN NOW AND RECEIVE 2000?
We encourage you to claim a sample enjoyable welcome bonus for all new members! Plus, there are other unique promotions waiting for you!
Get more information
JDB – NO COST TO JOIN
Straightforward to play, real profit
Participate in JDB today and indulge in fantastic games without any investment! With a wide array of free games, you can savor pure entertainment at any time.
Quick play, quick join
Esteem your time and opt for JDB’s swift games. Just a few easy steps and you’re set for an amazing gaming experience!
Register now and generate money
Experience JDB: Instant play with no investment and the opportunity to win cash. Designed for effortless and lucrative play.
Plunge into the Realm of Online Gaming Thrills with Fun Slots Online!
Are you set to experience the sensation of online gaming like never before? Scour no further than Fun Slots Online, your ultimate destination for thrilling gameplay, endless entertainment, and thrilling winning opportunities!
At Fun Slots Online, we pride ourselves on presenting a wide selection of enthralling games designed to keep you occupied and delighted for hours on end. From classic slot machines to innovative new releases, there’s something for everyone to savor. Plus, with our user-friendly interface and seamless gameplay experience, you’ll have no problem immersing straight into the excitement and savoring every moment.
But that’s not all – we also offer a range of unique promotions and bonuses to reward our loyal players. From welcome bonuses for new members to select rewards for our top players, there’s always something stimulating happening at Fun Slots Online. And with our protected payment system and 24-hour customer support, you can enjoy peace of mind knowing that you’re in good hands every step of the way.
So why wait? Enroll Fun Slots Online today and begin your journey towards breath-taking victories and jaw-dropping prizes. Whether you’re a seasoned gamer or just starting out, there’s never been a better time to engage in the fun and stimulation at Fun Slots Online. Sign up now and let the games begin!
[url=https://isynthroid.com/]synthroid 25 mcg[/url]
zithromax over the counter: zithromax for sale online – zithromax prescription online
[url=http://synthroidx.com/]synthroid generic prices[/url]
[url=http://metforminbi.online/]metformin canadian pharmacy[/url]
[url=https://motomagazinvfdvgd.vn.ua/uk/v-nakolenniki-i-nalokotniki/]motomagazinvfdvgd.vn.ua/uk/v-nakolenniki-i-nalokotniki/[/url]
В ТЕЧЕНИЕ нашем мотомагазине ваша милость выкроите запасные части для мотоциклов, скутеров, снегоходов и еще квадроциклов. ЯЗЫК нас вы хронически почтете масла для мотоциклов, фильтра, цепи.
motomagazinvfdvgd.vn.ua/uk/v-tsepi-privodnye/
мульти сплит системы кондиционирования [url=https://multisplit-sistemy-kondicionirovaniya.ru/]мульти сплит системы кондиционирования[/url] .
[url=http://synthroidam.online/]synthroid 12.5 mg[/url]
Intro
betvisa bangladesh
Betvisa bangladesh | Super Cricket Carnival with Betvisa!
IPL Cricket Mania | Kick off Super Cricket Carnival with bet visa.com
IPL Season | Exclusive 1,50,00,000 only at Betvisa Bangladesh!
Crash Games Heroes | Climb to the top of the 1,00,00,000 bonus pool!
#betvisabangladesh
Preview IPL T20 | Follow Betvisa BD on Facebook, Instagram for awards!
betvisa affiliate Dream Maltese Tour | Sign up now to win the ultimate prize!
https://www.bvthethao.com/
#betvisabangladesh #betvisabd #betvisaaffiliate
#betvisaaffiliatesignup #betvisa.com
Với tính lời hứa về trải nghiệm thú vị cá cược tốt hơn nhất và dịch vụ khách hàng chuyên trách, BetVisa hoàn toàn tự hào là điểm đến lý tưởng cho những ai phấn khích trò chơi trực tuyến. Hãy đăng ký ngay hôm nay và bắt đầu cuộc hành trình của bạn tại BetVisa – nơi niềm vui và may mắn chính là điều không thể thiếu.
Tìm hiểu Thế Giới Cá Cược Trực Tuyến với BetVisa!
Hệ thống BetVisa, một trong những công ty trò chơi hàng đầu tại châu Á, ra đời vào năm 2017 và hoạt động dưới giấy phép của Curacao, đã đưa vào hơn 2 triệu người dùng trên toàn thế giới. Với cam kết đem đến trải nghiệm cá cược an toàn và tin cậy nhất, BetVisa nhanh chóng trở thành lựa chọn hàng đầu của người chơi trực tuyến.
BetVisa không dừng lại ở việc cung cấp các trò chơi phong phú như xổ số, sòng bạc trực tiếp, thể thao trực tiếp và thể thao điện tử, mà còn mang đến cho người chơi những ưu đãi hấp dẫn. Thành viên mới đăng ký sẽ được tặng ngay 5 cơ hội miễn phí và có cơ hội giành giải thưởng lớn.
Đặc biệt, BetVisa hỗ trợ nhiều hình thức thanh toán linh hoạt như Betvisa Vietnam, cùng với các ưu đãi độc quyền như thưởng chào mừng lên đến 200%. Bên cạnh đó, hàng tuần còn có các chương trình khuyến mãi độc đáo như chương trình giải thưởng Sinh Nhật và Chủ Nhật Mua Sắm Điên Cuồng, mang đến cho người chơi cơ hội thắng lớn.
betvisa casino app
Intro
betvisa vietnam
Betvisa vietnam | Grand Prize Breakout!
Betway Highlights | 499,000 Extra Bonus on betvisa com!
Cockfight to win up to 3,888,000 on betvisa game
Daily Deposit, Sunday Bonus on betvisa app 888,000!
#betvisavietnam
200% Bonus on instant deposits—start your win streak!
200% welcome bonus! Slots and Fishing Games
https://www.betvisa.com/
#betvisavietnam #betvisagame #betvisaapp
#betvisacom #betvisacasinoapp
Birthday bash? Up to 1,800,000 in prizes! Enjoy!
Friday Shopping Frenzy betvisa vietnam 100,000 VND!
Betvisa Casino App Daily Login 12% Bonus Up to 1,500,000VND!
Tìm hiểu Thế Giới Cá Cược Trực Tuyến với BetVisa!
BetVisa, một trong những công ty hàng đầu tại châu Á, được thành lập vào năm 2017 và hoạt động dưới phê chuẩn của Curacao, đã có hơn 2 triệu người dùng trên toàn thế giới. Với lời hứa đem đến trải nghiệm cá cược an toàn và tin cậy nhất, BetVisa nhanh chóng trở thành lựa chọn hàng đầu của người chơi trực tuyến.
BetVisa không dừng lại ở việc cung cấp các trò chơi phong phú như xổ số, sòng bạc trực tiếp, thể thao trực tiếp và thể thao điện tử, mà còn mang đến cho người chơi những ưu đãi hấp dẫn. Thành viên mới đăng ký sẽ được tặng ngay 5 phần quà miễn phí và có cơ hội giành giải thưởng lớn.
Đặc biệt, BetVisa hỗ trợ nhiều hình thức thanh toán linh hoạt như Betvisa Vietnam, cùng với các ưu đãi độc quyền như thưởng chào mừng lên đến 200%. Bên cạnh đó, hàng tuần còn có các chương trình khuyến mãi độc đáo như chương trình giải thưởng Sinh Nhật và Chủ Nhật Mua Sắm Điên Cuồng, mang đến cho người chơi cơ hội thắng lớn.
Vì tính cam kết về trải nghiệm thú vị cá cược hoàn hảo nhất và dịch vụ khách hàng chuyên nghiệp, BetVisa tự tin là điểm đến lý tưởng cho những ai nhiệt tình trò chơi trực tuyến. Hãy đăng ký ngay hôm nay và bắt đầu dấu mốc của bạn tại BetVisa – nơi niềm vui và may mắn chính là điều tất yếu.
This post is so helpful. I learned a lot from it.
https://medicationnoprescription.pro/# no prescription medicine
[url=http://happyfamilymedicalstore.online/]canadian pharmacy discount coupon[/url]
I agree with you 100%. This is a really important issue.
ed doctor online [url=https://edpill.top/#]erectile dysfunction pills online[/url] cheapest ed online
https://onlinepharmacyworld.shop/# canadian pharmacy no prescription
http://edpill.top/# what is the cheapest ed medication
aydın çıkışlı turlar
http://medicationnoprescription.pro/# buying drugs without prescription
[url=https://tadalafilgf.com/]cialis generic[/url]
betvisa com
Intro
betvisa philippines
Betvisa philippines | The Filipino Carnival, Spinning for Treasures!
Betvisa Philippines Surprises | Spin daily and win ₱8,888 Grand Prize!
Register for a chance to win ₱8,888 Bonus Tickets! Explore Betvisa.com!
Wild All Over Grab 58% YB Bonus at Betvisa Casino! Take the challenge!
#betvisaphilippines
Get 88 on your first 50 Experience Betvisa Online’s Bonus Gift!
Weekend Instant Daily Recharge at betvisa.com
https://www.88betvisa.com/
#betvisaphilippines #betvisaonline #betvisacasino
#betvisacom #betvisa.com
Cổng chơi – Điểm Đến Tuyệt Vời Cho Người Chơi Trực Tuyến
Khám Phá Thế Giới Cá Cược Trực Tuyến với BetVisa!
Cổng chơi được tạo ra vào năm 2017 và hoạt động theo chứng chỉ trò chơi Curacao với hơn 2 triệu người dùng. Với tính cam kết đem đến trải nghiệm cá cược an toàn và tin cậy nhất, BetVisa nhanh chóng trở thành lựa chọn hàng đầu của người chơi trực tuyến.
Nền tảng cá cược không chỉ cung cấp các trò chơi phong phú như xổ số, sòng bạc trực tiếp, thể thao trực tiếp và thể thao điện tử, mà còn mang lại cho người chơi những chính sách ưu đãi hấp dẫn. Thành viên mới đăng ký sẽ nhận tặng ngay 5 vòng quay miễn phí và có cơ hội giành giải thưởng lớn.
Cổng chơi hỗ trợ nhiều cách thức thanh toán linh hoạt như Betvisa Vietnam, kết hợp với các ưu đãi độc quyền như thưởng chào mừng lên đến 200%. Bên cạnh đó, hàng tuần còn có chương trình ưu đãi độc đáo như chương trình giải thưởng Sinh Nhật và Chủ Nhật Mua Sắm Điên Cuồng, mang lại cho người chơi cơ hội thắng lớn.
Với sự cam kết về trải nghiệm cá cược tốt nhất và dịch vụ khách hàng chuyên nghiệp, BetVisa tự tin là điểm đến lý tưởng cho những ai đam mê trò chơi trực tuyến. Hãy đăng ký ngay hôm nay và bắt đầu hành trình của bạn tại BetVisa – nơi niềm vui và may mắn chính là điều tất yếu!
JDBslot
JDB slot | The first bonus to rock the slot world
Exclusive event to earn real money and slot game points
JDB demo slot games for free = ?? Lucky Spin Lucky Draw!
How to earn reels free 2000? follow jdb slot games for free
#jdbslot
Demo making money : https://jdb777.com
#jdbslot #slotgamesforfree #howtoearnreels #cashreels
#slotgamepoint #demomakingmoney
Cash reels only at slot games for free
More professional jdb game bonus knowledge
How to Secure Spins Points Free 2000: Your Supreme Manual to Triumphant Huge with JDB One-armed bandits
Are you you ready to start on an thrilling adventure into the planet of internet slot games? Look no additional, only spin to JDB777 FreeGames, where excitement and big wins expect you at each rotation of the reel. In this comprehensive guide, we’ll present you how to acquire reels credit complimentary 2000 and release the exhilarating world of JDB slots.
Live through the Thrill of Gaming Games for Free
At JDB777 FreeGames, we present a vast range of captivating slot games that are guaranteed to keep you entertained for hours on end. From vintage fruit machines to immersive themed slots, there’s something for every kind of player to enjoy. And the best part? You can play all of our slot games for free and achieve real cash prizes!
Open Free Cash Reels and Achieve Big
One of the most thrilling features of JDB777 FreeGames is the chance to earn reels points free 2000, which can be exchanged for real cash. Just sign up for an account, and you’ll obtain your costless bonus to begin spinning and winning. With our bountiful promotions and bonuses, the sky’s the ceiling when it comes to your winnings!
Steer Approaches and Points System
To enhance your winnings and unlock the complete potential of our slot games, it’s crucial to understand the approaches and points system. Our professional guides will take you through everything you need to know, from choosing the right games to comprehending how to acquire bonus points and cash prizes.
Distinctive Promotions and Specialized Offers
As a member of JDB777 FreeGames, you’ll have access to exclusive promotions and special offers that are guaranteed to improve your gaming experience. From welcome bonuses to daily rebates, there are lots of chances to improve your winnings and take your gameplay to the following level.
Join Us Today and Commence Winning
Don’t miss out on your possibility to win big with JDB777 FreeGames. Sign up now to claim your gratis bonus of 2000 credits and commence spinning the reels for your chance to win real cash prizes. With our exciting selection of slot games and generous promotions, the prospects are endless. Join us today and commence winning!
cheapest erectile dysfunction pills [url=https://edpill.top/#]ed meds by mail[/url] ed pills
[url=https://oprednisone.online/]prednisone 10mg[/url]
gerçekten çok yararlı bi konu teşekkürler
betvisa app
Intro
betvisa india
Betvisa india | IPL 2024 Heat Wave
IPL 2024 Big bets, big prizes With Betvisa India
Exclusive for Sports Fans Betvisa Online Casino 50% Welcome Bonus
Crash Game Supreme Compete for 1,00,00,000 pot Betvisa.com
#betvisaindia
Accurate Predictions IPL T20 Tournament, Winner Takes All!
More than just a game | Betvisa dreams invites you to fly to malta
https://www.b3tvisapro.com/
#betvisaindia #betvisalogin #betvisaonlinecasino
#betvisa.com #betvisaapp
Tìm hiểu Thế Giới Cá Cược Trực Tuyến với BetVisa!
BetVisa, một trong những công ty trò chơi hàng đầu tại châu Á, ra đời vào năm 2017 và thao tác dưới phê chuẩn của Curacao, đã thu hút hơn 2 triệu người dùng trên toàn thế giới. Với lời hứa đem đến trải nghiệm cá cược an toàn và tin cậy nhất, BetVisa nhanh chóng trở thành lựa chọn hàng đầu của người chơi trực tuyến.
BetVisa không dừng lại ở việc cung cấp các trò chơi phong phú như xổ số, sòng bạc trực tiếp, thể thao trực tiếp và thể thao điện tử, mà còn mang đến cho người chơi những ưu đãi hấp dẫn. Thành viên mới đăng ký sẽ được tặng ngay 5 phần quà miễn phí và có cơ hội giành giải thưởng lớn.
Đặc biệt, BetVisa hỗ trợ nhiều phương thức thanh toán linh hoạt như Betvisa Vietnam, cùng với các ưu đãi độc quyền như thưởng chào mừng lên đến 200%. Bên cạnh đó, hàng tuần còn có các chương trình khuyến mãi độc đáo như chương trình giải thưởng Sinh Nhật và Chủ Nhật Mua Sắm Điên Cuồng, mang đến cho người chơi cơ hội thắng lớn.
Nhờ vào tính lời hứa về trải thảo cá cược tốt hơn nhất và dịch vụ khách hàng chuyên môn, BetVisa tự hào là điểm đến lý tưởng cho những ai nhiệt huyết trò chơi trực tuyến. Hãy đăng ký ngay hôm nay và bắt đầu hành trình của bạn tại BetVisa – nơi niềm vui và may mắn chính là điều tất yếu.
betvisa india
Intro
betvisa india
Betvisa india | IPL 2024 Heat Wave
IPL 2024 Big bets, big prizes With Betvisa India
Exclusive for Sports Fans Betvisa Online Casino 50% Welcome Bonus
Crash Game Supreme Compete for 1,00,00,000 pot Betvisa.com
#betvisaindia
Accurate Predictions IPL T20 Tournament, Winner Takes All!
More than just a game | Betvisa dreams invites you to fly to malta
https://www.b3tvisapro.com/
#betvisaindia #betvisalogin #betvisaonlinecasino
#betvisa.com #betvisaapp
Khám phá Thế Giới Cá Cược Trực Tuyến với BetVisa!
Dịch vụ BetVisa, một trong những công ty trò chơi hàng đầu tại châu Á, được thành lập vào năm 2017 và hoạt động dưới bằng của Curacao, đã có hơn 2 triệu người dùng trên toàn thế giới. Với lời hứa đem đến trải nghiệm cá cược an toàn và tin cậy nhất, BetVisa nhanh chóng trở thành lựa chọn hàng đầu của người chơi trực tuyến.
BetVisa không dừng lại ở việc cung cấp các trò chơi phong phú như xổ số, sòng bạc trực tiếp, thể thao trực tiếp và thể thao điện tử, mà còn mang đến cho người chơi những ưu đãi hấp dẫn. Thành viên mới đăng ký sẽ được tặng ngay 5 vòng quay miễn phí và có cơ hội giành giải thưởng lớn.
Đặc biệt, BetVisa hỗ trợ nhiều cách thức thanh toán linh hoạt như Betvisa Vietnam, cùng với các ưu đãi độc quyền như thưởng chào mừng lên đến 200%. Bên cạnh đó, hàng tuần còn có các chương trình khuyến mãi độc đáo như chương trình giải thưởng Sinh Nhật và Chủ Nhật Mua Sắm Điên Cuồng, mang đến cho người chơi cơ hội thắng lớn.
Nhờ vào lời hứa về kinh nghiệm cá cược tốt nhất và dịch vụ khách hàng chuyên trách, BetVisa tự tin là điểm đến lý tưởng cho những ai đam mê trò chơi trực tuyến. Hãy gắn bó ngay hôm nay và bắt đầu hành trình của bạn tại BetVisa – nơi niềm vui và may mắn chính là điều quan trọng.
http://edpill.top/# erectile dysfunction meds online
п»їonline pharmacy no prescription needed [url=http://medicationnoprescription.pro/#]canadian and international prescription service[/url] best online pharmacy without prescription
Hi there! I just want to give you a huge thumbs up for your great info
you have got here on this post. I’ll be coming back to
your web site for more soon.
https://onlinepharmacyworld.shop/# legal online pharmacy coupon code
I’m often to blogging and i really appreciate your content. The article has actually peaks my interest. I’m going to bookmark your web site and maintain checking for brand spanking new information.
Wow, wonderful blog format! How lengthy have you been blogging for?
you make blogging glance easy. The total glance
of your site is wonderful, as well as the content material!
You can see similar here sklep internetowy
aydın çıkışlı turlar
[url=https://bmtadalafil.online/]tadalafil online rx[/url]
online medicine without prescription [url=http://medicationnoprescription.pro/#]online drugstore no prescription[/url] no prescription needed pharmacy
https://onlinepharmacyworld.shop/# cheapest pharmacy for prescriptions
http://edpill.top/# generic ed meds online
http://edpill.top/# where can i get ed pills
[url=https://tadalafilgf.com/]cialis tablets[/url]
online medication without prescription medications online without prescriptions or canada prescription
http://www.ahewar.org/links/dform.asp?url=http://medicationnoprescription.pro no prescription needed pharmacy
[url=https://www.google.ac/url?sa=t&url=https://medicationnoprescription.pro]canada mail order prescriptions[/url] online canadian pharmacy no prescription and [url=http://czn.com.cn/space-uid-31761.html]mexico prescription drugs online[/url] buy prescription drugs online without doctor
boner pills online buy erectile dysfunction pills or best ed pills online
https://entdeckertouren.com/redirect/Index.asp?url=http://edpill.top erectile dysfunction online prescription
[url=https://maps.google.la/url?q=https://edpill.top]erectile dysfunction medicine online[/url] buy ed medication online and [url=http://talk.dofun.cc/home.php?mod=space&uid=743123]how to get ed meds online[/url] buy ed medication
Kes – Mak Bahçe Aksesuarları ve Yedek Parça | Malatya kesmak, kes-mak malatya, malatya kes-mak, motorlu testere yedek parça, Malatya Stihl Bayi, benzinli testere yedek parça, testere zinciri, ağaç kesme pala, klavuz, elektronik bobin, hava filtresi, stihl malatya bayi, stihlmalatya,malatyastihl, stihl servisi, malatya stihl servis, malatya testere,malatyastihlbayi, stihl malatya, malatya stihl, stihl bayisi malatya, Hekimhan stihl bayi, malatya testere bayisi, malatya stihl servis, stihl malatya servis,
Bediroğlu Hırdavat Bahçe Aksesuarları ve Yedek Parça | Şanlıurfa Bediroğlu urfa stihl, Şanlıurfa stihl bayi, Şanlıurfa husqvarna bayi, güneydoğu felco bayi, Şanlıurfa taral bayisi, motorlu testere yedek parça,Şanlıurfa Stihl Bayi, benzinli testere yedek parça, testere zinciri, ağaç kesme pala, klavuz, elektronik bobin, hava filtresi, stihl Şanlıurfa bayi, stihl Şanlıurfa, Şanlıurfa stihl, stihl servisi, Şanlıurfa stihl servis, Şanlıurfa testere, Şanlıurfa stihlbayi, stihl Şanlıurfa, Şanlıurfa stihl, stihl bayisi Şanlıurfa, Şanlıurfa stihl baleri, Şanlıurfa testere bayisi, Şanlıurfa stihl servis, stihl Şanlıurfa servis,alpina Şanlıurfa bayi
[url=http://bestmedsx.online/]online pharmacy meds[/url]
us pharmacy no prescription [url=http://onlinepharmacyworld.shop/#]cheapest prescription pharmacy[/url] online pharmacy no prescription
denizli çıkışlı turlar
You’re welcome! I’m glad to hear that you’re open to exploring various topics. If you have any specific questions or areas of interest you’d like to delve into, please feel free to share them. Whether it’s about the latest advancements in technology, recent scientific discoveries, thought-provoking literary works, or any other subject, I’m here to offer insights and assistance. Just let me know how I can help, and I’ll do my best to provide valuable information and engage in meaningful discussions!
[url=https://lisinoprilgp.com/]lisinopril price in india[/url]
http://medicationnoprescription.pro/# canada prescription
[url=http://synthroidsl.online/]price for synthroid[/url]
http://edpill.top/# low cost ed pills
You’re welcome! I’m glad to hear that you’re open to exploring various topics. If you have any specific questions or areas of interest you’d like to delve into, please feel free to share them. Whether it’s about the latest advancements in technology, recent scientific discoveries, thought-provoking literary works, or any other subject, I’m here to offer insights and assistance. Just let me know how I can help, and I’ll do my best to provide valuable information and engage in meaningful discussions!
[url=http://tadalafilstd.com/]otc tadalafil[/url]
[url=http://happyfamilymedicalstore.online/]best online pet pharmacy[/url]
Wideo360 | 360 Video Booth – Selfie Booth video 360, 360 video booth, video booth, selfie booth, booth video360 video booth
buying drugs without prescription [url=http://medicationnoprescription.pro/#]canadian pharmacy no prescription required[/url] how to get prescription drugs from canada
[url=http://vatrex.online/]how to buy valtrex without a prescription[/url]
aydın çıkışlı turlar
Thank you for content. Area rugs and online home decor store. Hello Administ . 国产线播放免费人成视频播放
http://medicationnoprescription.pro/# canadian prescription prices
Master NURS FPX 4000 Assessments with Expert Online Tutoring
Ace your NURS FPX 4000 assessments with our expert tutors! Get personalized, online assessment help for NURS FPX 4000 Assessment 1 to 4 and complete your BSN and MSN in one billing cycle. High-quality tutoring designed for success.
Introduction to NURS FPX 4000 Series Assessments
Embarking on the NURS FPX 4000 series can be a pivotal step in your nursing career. These assessments are crucial for understanding complex healthcare concepts, developing critical thinking, and applying knowledge practically. Whether you’re tackling NURS FPX 4000 Assessment 1 or moving forward to NURS FPX 4000 Assessment 4, each step is an opportunity to excel and prove your competency in the nursing field.
Why Choose Our Services for Your Nursing Assessments?
Our online tutoring platform specializes in guiding nursing students through their BSN and MSN programs with ease and efficiency. If you aim to complete your nursing program within one billing cycle, our expert tutors are here to provide you with the support and resources you need. From NURS FPX 4000 Assessment 2 to the comprehensive
NURS FPX 4000 Assessment 3,
we cover all bases.
Personalized Tutoring Approach
We understand that each student has unique learning needs. That’s why our tutoring service is personalized, focusing on the specific requirements of assessments like NURS FPX 4000 Assessment 4. Our approach ensures that you not only meet but exceed the expectations set by these rigorous assessments.
Expert Tutors at Your Service
Our team consists of experienced tutors who are not just experts in their field but are also intimately familiar with the structure and demands of the NURS FPX series. Whether you’re looking for “Hire assessment help writer” or need someone to “Take my Assessment,” our professionals are equipped to assist you in navigating through NURS FPX 4000 Assessment 1 and beyond.
Achieve Your Goals in One Billing Cycle.
The journey to completing your BSN and MSN program is challenging but rewarding. With our focused tutoring for the NURS FPX 4000 series, including targeted help for NURS FPX 4000 Assessment 2. and NURS FPX 4000 Assessment 3, we make it possible to achieve your academic goals swiftly. Our strategy includes intensive review sessions, practical application exercises, and comprehensive support materials that prepare you for success.
Comprehensive Support for All Assessments
Understanding the depth of knowledge required for assessments like NURS FPX 4000 Assessment 4. is crucial. Our services offer detailed guidance for each assessment in the series, ensuring you’re well-prepared for every challenge. From “Online assessment help” to “Write my assessment,” we provide a range of services designed to support your academic journey.
Your Pathway to Success in Nursing
Choosing our tutoring services for your NURS FPX 4000 series assessments is more than just academic support; it’s an investment in your future. With our expert guidance, personalized tutoring, and comprehensive resources, completing your BSN. and MSN program in one billing cycle is within reach. Start your journey toward nursing excellence today and take the first step towards a successful career with confidence.
Don’t let the challenges of NURS FPX 4000 assessments hold you back. Hire an assessment help writer today and unlock your potential in the nursing field. Contact us to learn more about how we can help you achieve your goals.
https://edpill.top/# ed online prescription
Секрети вибору ідеальних тактичних кросівок
тактичні літні кросівки [url=https://vijskovikrosivkifvgh.kiev.ua/]https://vijskovikrosivkifvgh.kiev.ua/[/url] .
Achieve Excellence in NURS FPX 4040 Assessments with Expert Guidance
Unlock your full potential in the NURS FPX 4040 series with our personalized tutoring services. From Assessment 1 to 4, we ensure a tailored learning experience that sets you up for success in your nursing career.
Introduction to NURS FPX 4040 Series Assessments
Embarking on the NURS FPX 4040 series is a significant step towards deepening your understanding of nursing informatics and its application in improving patient care. This series, starting from NURS FPX 4040 Assessment 1 through NURS FPX 4040 Assessment 4, is designed to challenge your analytical skills and enhance your ability to integrate technology effectively in healthcare settings.
Personalized Tutoring for Unparalleled Success
Our tutoring service is dedicated to guiding you through the complexities of the NURS FPX 4040 assessments. Whether it’s navigating the intricacies of NURS FPX 4040 Assessment 2 or mastering the challenges of NURS FPX 4040 Assessment 3, our personalized approach ensures that you receive the support and insights needed to excel.
Customized Learning Paths for Every Student
Understanding that each student’s learning journey is unique, we offer customized tutoring plans tailored to your specific needs and goals. Our focus extends to ensuring you are fully prepared to tackle NURS FPX 4040 Assessment 4 with confidence, along with every other assessment in the series.
Expert Guidance from Nursing Informatics Specialists
Our team of tutors includes specialists in nursing informatics who bring a wealth of knowledge and real-world experience to their teaching. They are equipped to provide you with the tools and strategies necessary to excel in NURS FPX 4040 Assessment 1 and beyond, ensuring you have a strong foundation in nursing informatics.
Accelerate Your Nursing Career in One Billing Cycle
Our objective is to enable you to complete the NURS FPX 4040 series efficiently, allowing you to progress in your nursing career swiftly. With targeted support for NURS FPX 4040 Assessment 2 and NURS FPX 4040 Assessment 3, among others, we focus on accelerating your learning process without sacrificing depth or quality.
Comprehensive Support for Your Academic Journey
We offer a full suite of services to support your academic endeavors, from “Write my assessment” to “Online assessment help.” Our resources are meticulously designed to prepare you for NURS FPX 4040 Assessment 4 and equip you with the knowledge and skills necessary for a successful career in nursing and healthcare informatics.
Your Gateway to Nursing Informatics Excellence
Opting for our tutoring services for the NURS FPX 4040 series is a decisive step towards excellence in nursing informatics. With our customized support, expert guidance, and comprehensive tutoring approach, you’re poised to excel in your assessments and make a significant impact in the field of nursing.
Elevate your understanding of nursing informatics with our expert NURS FPX 4040 assessment tutoring. Contact us today to discover how we can help you achieve your goals and advance your nursing career.
[url=http://tadalafilu.online/]purchase tadalafil[/url]
jeetwin sign up
Jeetwin Affiliate
Jeetwin Affiliate
Join Jeetwin now! | Jeetwin sign up for a ?500 free bonus
Spin & fish with Jeetwin club! | 200% welcome bonus
Bet on horse racing, get a 50% bonus! | Deposit at Jeetwin live for rewards
#JeetwinAffiliate
Casino table fun at Jeetwin casino login | 50% deposit bonus on table games
Earn Jeetwin points and credits, enhance your play!
https://www.jeetwin-affiliate.com/hi
#JeetwinAffiliate #jeetwinclub #jeetwinsignup #jeetwinresult
#jeetwinlive #jeetwinbangladesh #jeetwincasinologin
Daily recharge bonuses at Jeetwin Bangladesh!
25% recharge bonus on casino games at jeetwin result
15% bonus on Crash Games with Jeetwin affiliate!
Spin to Win Authentic Funds and Voucher Codes with JeetWin’s Affiliate Scheme
Do you a devotee of online gaming? Do you like the thrill of turning the wheel and being victorious big-time? If so, consequently the JeetWin Affiliate Program is perfect for you! With JeetWin Gaming, you not just get to experience thrilling games but also have the chance to make authentic funds and gift certificates easily by promoting the platform to your friends, family, or virtual audience.
How Is it Work?
Registering for the JeetWin’s Affiliate Scheme is speedy and easy. Once you grow into an associate, you’ll receive a unique referral link that you can share with others. Every time someone joins or makes a deposit using your referral link, you’ll receive a commission for their activity.
Fantastic Bonuses Await!
As a JeetWin affiliate, you’ll have access to a selection of appealing bonuses:
500 Welcome Bonus: Receive a generous sign-up bonus of INR 500 just for joining the program.
Deposit Match Bonus: Get a whopping 200% bonus when you fund and play one-armed bandit and fish games on the platform.
Infinite Referral Bonus: Acquire unlimited INR 200 bonuses and cash rebates for every friend you invite to play on JeetWin.
Exciting Games to Play
JeetWin offers a diverse range of the most played and most popular games, including Baccarat, Dice, Liveshow, Slot, Fishing, and Sabong. Whether you’re a fan of classic casino games or prefer something more modern and interactive, JeetWin has something for everyone.
Join the Supreme Gaming Experience
With JeetWin Live, you can elevate your gaming experience to the next level. Engage in thrilling live games such as Lightning Roulette, Lightning Dice, Crazytime, and more. Sign up today and commence an unforgettable gaming adventure filled with excitement and limitless opportunities to win.
Easy Payment Methods
Depositing funds and withdrawing your winnings on JeetWin is fast and hassle-free. Choose from a range of payment methods, including E-Wallets, Net Banking, AstroPay, and RupeeO, for seamless transactions.
Don’t Lose on Special Promotions
As a JeetWin affiliate, you’ll acquire access to exclusive promotions and special offers designed to maximize your earnings. From cash rebates to lucrative bonuses, there’s always something exciting happening at JeetWin.
Get the Mobile App
Take the fun with you wherever you go by downloading the JeetWin Mobile Casino App. Available for both iOS and Android devices, the app features a wide range of entertaining games that you can enjoy anytime, anywhere.
Become a part of the JeetWin’s Affiliate Scheme Today!
Don’t wait any longer to start earning real cash and exciting rewards with the JeetWin Affiliate Program. Sign up now and be a member of the thriving online gaming community at JeetWin.
buy prescription online [url=https://medicationnoprescription.pro/#]online pharmacy without prescription[/url] canadian pharmacy without prescription
http://edpill.top/# cheap ed pills
[url=https://medicinesaf.online/]canada drugstore pharmacy rx[/url]
cheap ed drugs buy ed medication or low cost ed pills
https://maps.google.lk/url?sa=i&url=https://edpill.top erectile dysfunction drugs online
[url=http://images.google.co.ma/url?q=http://edpill.top]ed meds by mail[/url] ed medication online and [url=http://www.coin520.com/home.php?mod=space&uid=32113]online ed pharmacy[/url] erectile dysfunction meds online
ankara diş kliniği
prescription drugs online [url=http://onlinepharmacyworld.shop/#]cheap pharmacy no prescription[/url] online pharmacy no prescription
[url=https://bestprednisone.online/]prednisone 5 mg buy online[/url]
[url=https://medicinesaf.online/]what’s the best online pharmacy[/url]
[url=http://medicinesaf.online/]uk pharmacy no prescription[/url]
bursa avukat
[url=http://isynthroid.com/]synthroid 115 mcg[/url]
macbook servisi , İstanbul’un kalbinde bulunan Perpa Ticaret Merkezi’nde uzun yıllardır müşterilere kusursuz hizmet sunmaktadır.
canadian pharmacy no prescription needed canadian pharmacy coupon or online pharmacy no prescription needed
https://images.google.pt/url?sa=t&url=https://onlinepharmacyworld.shop non prescription medicine pharmacy
[url=https://www.baoviet.com.vn/redirect.aspx?url=http://onlinepharmacyworld.shop]canadian pharmacies not requiring prescription[/url] canadian pharmacy no prescription and [url=https://lhgangguanwang.com/home.php?mod=space&uid=176015]promo code for canadian pharmacy meds[/url] canadian pharmacy discount coupon
[url=https://oprednisone.com/]prednisone for sale 5mg[/url]
Hi, just required you to know I he added your site to my Google bookmarks due to your layout. But seriously, I believe your internet site has 1 in the freshest theme I??ve came across.儿童色情
https://medicationnoprescription.pro/# buy drugs online no prescription
pharmacy online 365 discount code [url=https://onlinepharmacyworld.shop/#]canadian pharmacy world coupon[/url] cheapest pharmacy prescription drugs
Thank you for great article. Hello Administ .国产线播放免费人成视频播放
Jeetwin Affiliate
Jeetwin Affiliate
Join Jeetwin now! | Jeetwin sign up for a ?500 free bonus
Spin & fish with Jeetwin club! | 200% welcome bonus
Bet on horse racing, get a 50% bonus! | Deposit at Jeetwin live for rewards
#JeetwinAffiliate
Casino table fun at Jeetwin casino login | 50% deposit bonus on table games
Earn Jeetwin points and credits, enhance your play!
https://www.jeetwin-affiliate.com/hi
#JeetwinAffiliate #jeetwinclub #jeetwinsignup #jeetwinresult
#jeetwinlive #jeetwinbangladesh #jeetwincasinologin
Daily recharge bonuses at Jeetwin Bangladesh!
25% recharge bonus on casino games at jeetwin result
15% bonus on Crash Games with Jeetwin affiliate!
Turn to Achieve Authentic Funds and Voucher Codes with JeetWin’s Referral Program
Are you a enthusiast of web-based gaming? Are you appreciate the excitement of turning the reel and succeeding huge? If so, therefore the JeetWin’s Partner Program is excellent for you! With JeetWin Casino, you not just get to indulge in exciting games but as well have the opportunity to generate authentic funds and gift certificates easily by promoting the platform to your friends, family, or online audience.
How Does Work?
Registering for the JeetWin Affiliate Program is rapid and straightforward. Once you grow into an affiliate, you’ll get a exclusive referral link that you can share with others. Every time someone signs up or makes a deposit using your referral link, you’ll get a commission for their activity.
Amazing Bonuses Await!
As a JeetWin affiliate, you’ll have access to a selection of enticing bonuses:
500 Welcome Bonus: Get a abundant sign-up bonus of INR 500 just for joining the program.
Deposit Match Bonus: Receive a whopping 200% bonus when you deposit and play slot and fishing games on the platform.
Unlimited Referral Bonus: Receive unlimited INR 200 bonuses and cash rebates for every friend you invite to play on JeetWin.
Exhilarating Games to Play
JeetWin offers a broad range of the most played and most popular games, including Baccarat, Dice, Liveshow, Slot, Fishing, and Sabong. Whether you’re a fan of classic casino games or prefer something more modern and interactive, JeetWin has something for everyone.
Engage in the Best Gaming Experience
With JeetWin Live, you can elevate your gaming experience to the next level. Engage in thrilling live games such as Lightning Roulette, Lightning Dice, Crazytime, and more. Sign up today and embark on an unforgettable gaming adventure filled with excitement and limitless opportunities to win.
Effortless Payment Methods
Depositing funds and withdrawing your winnings on JeetWin is rapid and hassle-free. Choose from a assortment of payment methods, including E-Wallets, Net Banking, AstroPay, and RupeeO, for seamless transactions.
Don’t Miss Out on Special Promotions
As a JeetWin affiliate, you’ll acquire access to exclusive promotions and special offers designed to maximize your earnings. From cash rebates to lucrative bonuses, there’s always something exciting happening at JeetWin.
Download the App
Take the fun with you wherever you go by downloading the JeetWin Mobile Casino App. Available for both iOS and Android devices, the app features a wide range of entertaining games that you can enjoy anytime, anywhere.
Enroll in the JeetWin’s Partner Program Today!
Don’t wait any longer to start earning real cash and exciting rewards with the JeetWin Affiliate Program. Sign up now and become a part of the thriving online gaming community at JeetWin.
ankara tercüme bürosu
http://onlinepharmacyworld.shop/# foreign pharmacy no prescription
ed rx online cheap ed treatment or erectile dysfunction medications online
https://www.google.dm/url?sa=t&url=https://edpill.top ed online prescription
[url=http://www.aozhuanyun.com/index.php/goods/Index/golink?url=https://edpill.top]erectile dysfunction drugs online[/url] ed medications online and [url=http://www.zhuangxiuz.com/home.php?mod=space&uid=817661]erectile dysfunction medication online[/url] cheapest ed online
where to buy ed pills [url=https://edpill.top/#]ed medications cost[/url] ed online prescription
[url=http://prednisoneo.com/]prednisone 10 mg over the counter[/url]
[url=http://ezithromycin.online/]z pack azithromycin[/url]
http://casinvietnam.com/# casino tr?c tuy?n uy tin
[url=http://happyfamilymedicalstore.online/]canadian pharmacy store[/url]
xslot
[url=https://tadalafilgf.com/]tadalafil tablets 10 mg[/url]
[url=http://bestmedsx.com/]reputable online pharmacy uk[/url]
choi casino tr?c tuy?n tren di?n tho?i [url=https://casinvietnam.shop/#]casino tr?c tuy?n[/url] casino tr?c tuy?n vi?t nam
[url=https://metformindi.com/]metformin for sale in usa[/url]
[url=http://azithromycinmds.online/]buy azithromycin tablets in us[/url]
[url=https://bestmetformin.online/]buy metformin 500[/url]
[url=https://valtrexv.com/]valtrex online prescription[/url]
PBN sites
We’ll establish a system of PBN sites!
Benefits of our self-owned blog network:
We carry out everything so google doesn’t realize that this is A privately-owned blog network!!!
1- We obtain web domains from different registrars
2- The main site is hosted on a VPS server (Virtual Private Server is high-speed hosting)
3- The rest of the sites are on various hostings
4- We attribute a separate Google ID to each site with verification in Search Console.
5- We develop websites on WP, we don’t utilise plugins with aided by which Trojans penetrate and through which pages on your websites are generated.
6- We do not duplicate templates and employ only distinct text and pictures
We don’t work with website design; the client, if wished, can then edit the websites to suit his wishes
casino online uy tín: casino tr?c tuy?n vi?t nam – dánh bài tr?c tuy?n
https://casinvietnam.shop/# game c? b?c online uy tin
http://casinvietnam.com/# choi casino tr?c tuy?n tren di?n tho?i
casino tr?c tuy?n vi?t nam [url=http://casinvietnam.shop/#]game c? b?c online uy tin[/url] choi casino tr?c tuy?n tren di?n tho?i
[url=https://synthroidsl.online/]where can you buy synthroid[/url]
Nice post. I learn something totally new and challenging on websites
http://casinvietnam.com/# casino tr?c tuy?n vi?t nam
[url=https://pharmgf.online/]online pharmacy denmark[/url]
[url=http://prednisoneo.online/]10mg prednisone[/url]
[url=http://tadalafilgf.com/]canada cialis otc[/url]
[url=https://tadalafi.online/]cialis 100mg uk[/url]
[url=https://azithromycinps.online/]where can i get azithromycin 500 mg[/url]
game c? b?c online uy tin [url=http://casinvietnam.com/#]casino tr?c tuy?n[/url] casino tr?c tuy?n vi?t nam
[url=http://synthroidx.com/]buy synthroid over the counter[/url]
[url=https://synthroidx.com/]synthroid 0.88 mcg[/url]
[url=http://oprednisone.com/]medication prednisone 10mg[/url]
[url=http://prednisonexg.online/]prednisone pill cost[/url]
casino tr?c tuy?n uy tin choi casino tr?c tuy?n tren di?n tho?i or casino tr?c tuy?n
https://maps.google.co.ck/url?q=https://casinvietnam.shop casino tr?c tuy?n
[url=https://clients1.google.com.mt/url?q=https://casinvietnam.shop::]game c? b?c online uy tin[/url] web c? b?c online uy tin and [url=https://98e.fun/space-uid-7465298.html]choi casino tr?c tuy?n tren di?n tho?i[/url] casino online uy tin
[url=http://tadalafilstd.online/]generic cialis online fast shipping[/url]
[url=https://oazithromycin.online/]azithromycin 500 mg tablets cost[/url]
[url=http://oprednisone.online/]prednisone price uk[/url]
[url=https://isynthroid.online/]synthroid cost comparison[/url]
[url=http://tadalafilstd.com/]tadalafil soft tabs[/url]
[url=https://happyfamilymedicalstore.online/]online pet pharmacy[/url]
[url=http://synthroidotp.online/]can i buy synthroid from canada[/url]
casino tr?c tuy?n vi?t nam web c? b?c online uy tin or casino tr?c tuy?n vi?t nam
https://maps.google.dk/url?sa=t&url=https://casinvietnam.shop casino tr?c tuy?n vi?t nam
[url=https://www.google.com.pg/url?q=https://casinvietnam.shop]choi casino tr?c tuy?n tren di?n tho?i[/url] game c? b?c online uy tin and [url=http://bbs.cheaa.com/home.php?mod=space&uid=3109439]web c? b?c online uy tin[/url] casino tr?c tuy?n vi?t nam
[url=http://azithromycinmds.com/]buy azithromycin cheap online[/url]
casino online uy tin casino tr?c tuy?n uy tin or casino tr?c tuy?n vi?t nam
http://www.ballpark-sanjo.com/feed2js/feed2js.php?src=http://casinvietnam.com casino tr?c tuy?n vi?t nam
[url=https://cse.google.com.do/url?q=http://casinvietnam.com]web c? b?c online uy tin[/url] casino tr?c tuy?n vi?t nam and [url=https://forex-bitcoin.com/members/342724-clyqsxobwc]casino tr?c tuy?n[/url] casino tr?c tuy?n uy tin
Everything is very open and very clear explanation of issues. was truly information.活婴儿色情片
Hi, just required you to know I he added your site to my Google bookmarks due to your layout. But seriously, I believe your internet site has 1 in the freshest theme I??ve came across.国产线播放免费人成视频播放
Perpa Bilgisayar Servisi, laptop klavye degisimi İstanbul’da bulunan Perpa Ticaret Merkezi’nde uzun yıllardır müşterilere kusursuz hizmet sunmaktadır.
[url=https://lisinoprilgp.online/]ordering lisinopril without a prescription[/url]
danh bai tr?c tuy?n casino tr?c tuy?n uy tin or casino tr?c tuy?n vi?t nam
https://www.google.co.vi/url?q=http://casinvietnam.com casino tr?c tuy?n vi?t nam
[url=https://maps.google.mv/url?q=https://casinvietnam.com]danh bai tr?c tuy?n[/url] web c? b?c online uy tin and [url=https://forexzloty.pl/members/377155-ofkmeepwhx]casino tr?c tuy?n uy tin[/url] choi casino tr?c tuy?n tren di?n tho?i
casino tr?c tuy?n vi?t nam web c? b?c online uy tin or game c? b?c online uy tin
https://www.google.gl/url?q=https://casinvietnam.shop casino tr?c tuy?n vi?t nam
[url=http://lipperhey.com/en/casinvietnam.shop/]casino tr?c tuy?n uy tin[/url] choi casino tr?c tuy?n tren di?n tho?i and [url=http://www.tmml.top/home.php?mod=space&uid=78018]casino tr?c tuy?n vi?t nam[/url] choi casino tr?c tuy?n tren di?n tho?i
[url=http://pharmgf.online/]canada discount pharmacy[/url]
[url=https://tadalafilgf.com/]cialis 20mg cost[/url]
[url=http://pharmgf.online/]canadian pharmacies not requiring prescription[/url]
[url=https://bestprednisone.online/]steroid prednisone[/url]
jeetwin sign up
Jeetwin Affiliate
Jeetwin Affiliate
Join Jeetwin now! | Jeetwin sign up for a ?500 free bonus
Spin & fish with Jeetwin club! | 200% welcome bonus
Bet on horse racing, get a 50% bonus! | Deposit at Jeetwin live for rewards
#JeetwinAffiliate
Casino table fun at Jeetwin casino login | 50% deposit bonus on table games
Earn Jeetwin points and credits, enhance your play!
https://www.jeetwin-affiliate.com/hi
#JeetwinAffiliate #jeetwinclub #jeetwinsignup #jeetwinresult
#jeetwinlive #jeetwinbangladesh #jeetwincasinologin
Daily recharge bonuses at Jeetwin Bangladesh!
25% recharge bonus on casino games at jeetwin result
15% bonus on Crash Games with Jeetwin affiliate!
Spin to Win Genuine Currency and Gift Certificates with JeetWin’s Referral Program
Do you a devotee of web-based gaming? Do you like the adrenaline rush of rotating the wheel and triumphing large? If so, then the JeetWin’s Referral Program is excellent for you! With JeetWin Casino, you not simply get to experience enthralling games but additionally have the chance to earn genuine currency and gift certificates just by publicizing the platform to your friends, family, or virtual audience.
How Is it Function?
Joining for the JeetWin’s Affiliate Scheme is fast and effortless. Once you become an partner, you’ll acquire a special referral link that you can share with others. Every time someone signs up or makes a deposit using your referral link, you’ll obtain a commission for their activity.
Fantastic Bonuses Await!
As a JeetWin affiliate, you’ll have access to a assortment of enticing bonuses:
500 Sign-Up Bonus: Receive a generous sign-up bonus of INR 500 just for joining the program.
Welcome Deposit Bonus: Receive a huge 200% bonus when you deposit and play fruit machine and fish games on the platform.
Infinite Referral Bonus: Get unlimited INR 200 bonuses and rebates for every friend you invite to play on JeetWin.
Exciting Games to Play
JeetWin offers a broad range of the most played and most popular games, including Baccarat, Dice, Liveshow, Slot, Fishing, and Sabong. Whether you’re a fan of classic casino games or prefer something more modern and interactive, JeetWin has something for everyone.
Take part in the Best Gaming Experience
With JeetWin Live, you can enhance your gaming experience to the next level. Take part in thrilling live games such as Lightning Roulette, Lightning Dice, Crazytime, and more. Sign up today and start an unforgettable gaming adventure filled with excitement and limitless opportunities to win.
Easy Payment Methods
Depositing funds and withdrawing your winnings on JeetWin is fast and hassle-free. Choose from a variety of payment methods, including E-Wallets, Net Banking, AstroPay, and RupeeO, for seamless transactions.
Don’t Pass Up on Exclusive Promotions
As a JeetWin affiliate, you’ll gain access to exclusive promotions and special offers designed to maximize your earnings. From cash rebates to lucrative bonuses, there’s always something exciting happening at JeetWin.
Download the Mobile Application
Take the fun with you wherever you go by downloading the JeetWin Mobile Casino App. Available for both iOS and Android devices, the app features a wide range of entertaining games that you can enjoy anytime, anywhere.
Sign up for the JeetWin’s Referral Program Today!
Don’t wait any longer to start earning real cash and exciting rewards with the JeetWin Affiliate Program. Sign up now and join the thriving online gaming community at JeetWin.
[url=https://prednisoneiv.online/]prednisone capsules[/url]
[url=https://synthroidx.com/]synthroid 0.125[/url]
choi casino tr?c tuy?n tren di?n tho?i casino tr?c tuy?n vi?t nam or danh bai tr?c tuy?n
https://images.google.gm/url?sa=t&url=https://casinvietnam.shop web c? b?c online uy tin
[url=https://www.google.is/url?q=https://casinvietnam.shop]danh bai tr?c tuy?n[/url] casino tr?c tuy?n vi?t nam and [url=http://bocauvietnam.com/member.php?1454486-tcruyqggtq]casino tr?c tuy?n vi?t nam[/url] casino tr?c tuy?n vi?t nam
[url=https://happyfamilystorerx.online/]all med pharmacy[/url]
[url=https://synthroidam.online/]over the counter synthroid[/url]
[url=http://isynthroid.com/]synthroid 1.25 mcg[/url]
[url=https://metforminn.com/]where to buy metformin in south africa[/url]
[url=http://medicinesaf.online/]online pharmacy without insurance[/url]
[url=https://lisinoprilgp.com/]lisinopril 5 mg buy online[/url]
[url=http://valtrexbt.online/]price of valtrex in canada[/url]
casino tr?c tuy?n uy tin danh bai tr?c tuy?n or casino tr?c tuy?n vi?t nam
http://traditionsalive.wsiefusion.net/redirect.aspx?destination=http://casinvietnam.shop web c? b?c online uy tin
[url=https://images.google.dm/url?q=https://casinvietnam.shop]game c? b?c online uy tin[/url] web c? b?c online uy tin and [url=http://www.coin520.com/home.php?mod=space&uid=32591]casino tr?c tuy?n vi?t nam[/url] game c? b?c online uy tin
casino online uy tin casino online uy tin or game c? b?c online uy tin
https://marketplace.tryondailybulletin.com/AdHunter/Tryon/Home/EmailFriend?url=https://casinvietnam.com casino online uy tin
[url=http://bangkok-hotels.fr/redirecturl.php?url=https://casinvietnam.com]danh bai tr?c tuy?n[/url] choi casino tr?c tuy?n tren di?n tho?i and [url=https://www.xiaoditech.com/bbs/home.php?mod=space&uid=1695023]casino tr?c tuy?n vi?t nam[/url] casino tr?c tuy?n uy tin
[url=http://lisinoprilos.online/]generic prinivil[/url]
[url=http://valtrexid.com/]generic valtrex price comparison[/url]
[url=https://drugstorepp.online/]online pharmacy delivery[/url]
Thank you for great content. Hello Administ. 国产线播放免费人成视频播放
[url=http://valtrexv.com/]buy valtrex online prescription[/url]
[url=http://lisinoprilgp.online/]lisinopril 2.5 pill[/url]
casino tr?c tuy?n [url=https://casinvietnam.com/#]choi casino tr?c tuy?n tren di?n tho?i[/url] casino tr?c tuy?n uy tin
[url=https://valtrexid.com/]generic valtrex sale[/url]
Thank you great post. Hello Administ .国产线播放免费人成视频播放
thx admin
casino tr?c tuy?n vi?t nam [url=http://casinvietnam.com/#]casino tr?c tuy?n vi?t nam[/url] casino tr?c tuy?n vi?t nam
[url=http://metformindi.com/]metformin without a prescription drug[/url]
[url=http://olisinopril.com/]lisinopril 20 mg over the counter[/url]
casino tr?c tuy?n vi?t nam casino tr?c tuy?n or casino tr?c tuy?n
https://maps.google.com.co/url?sa=t&url=https://casinvietnam.shop web c? b?c online uy tin
[url=https://www.google.ae/url?q=https://casinvietnam.shop]choi casino tr?c tuy?n tren di?n tho?i[/url] choi casino tr?c tuy?n tren di?n tho?i and [url=http://www.tmml.top/home.php?mod=space&uid=78128]game c? b?c online uy tin[/url] casino online uy tin
[url=https://medicinesaf.online/]best online pharmacy reddit[/url]
[url=http://drugstorepp.online/]canadian pharmacy 24h com[/url]
choi casino tr?c tuy?n tren di?n tho?i [url=http://casinvietnam.com/#]casino tr?c tuy?n uy tin[/url] casino online uy tin
[url=http://metformindi.online/]metformin er 500[/url]
Good info. Lucky me I reach on your website by accident, I bookmarked it. 現場兒童色情片
web c? b?c online uy tin [url=https://casinvietnam.shop/#]casino tr?c tuy?n vi?t nam[/url] game c? b?c online uy tin
[url=https://azithromycinmds.online/]canadian azithromycin[/url]
casino tr?c tuy?n danh bai tr?c tuy?n or choi casino tr?c tuy?n tren di?n tho?i
https://images.google.fm/url?sa=t&url=https://casinvietnam.com danh bai tr?c tuy?n
[url=http://casinvietnam.com.isdownorblocked.com/]casino tr?c tuy?n vi?t nam[/url] casino tr?c tuy?n uy tin and [url=https://bbs.tlcq666.com/home.php?mod=space&uid=30183]web c? b?c online uy tin[/url] casino tr?c tuy?n vi?t nam
[url=https://valtrexmedication.com/]where to buy valtrex generic[/url]
After all, what a great site and informative posts, I will upload inbound link – bookmark this web site? Regards, Reader.儿童色情片
danh bai tr?c tuy?n [url=https://casinvietnam.com/#]game c? b?c online uy tin[/url] web c? b?c online uy tin
animehangover.com
“이건…” 홍지황제는 신하들을 나쁘게 대했다고 느꼈다.
[url=https://oazithromycin.com/]azithromycin 500 buy online[/url]
web c? b?c online uy tin choi casino tr?c tuy?n tren di?n tho?i or casino tr?c tuy?n uy tin
https://cse.google.co.th/url?q=https://casinvietnam.shop choi casino tr?c tuy?n tren di?n tho?i
[url=http://www.youwriteon.com/buy-completed-book.aspx?url=http://casinvietnam.shop]casino online uy tin[/url] casino tr?c tuy?n and [url=http://www.coin520.com/home.php?mod=space&uid=32408]casino online uy tin[/url] casino tr?c tuy?n vi?t nam
https://casinvietnam.shop/# casino tr?c tuy?n vi?t nam
[url=http://synthroidx.com/]where can i buy synthroid online[/url]
Рюкзак тактичний як акцент образу
Функціональність
тактичний військовий рюкзак [url=https://ryukzakivijskovibpjgl.kiev.ua/]https://ryukzakivijskovibpjgl.kiev.ua/[/url] .